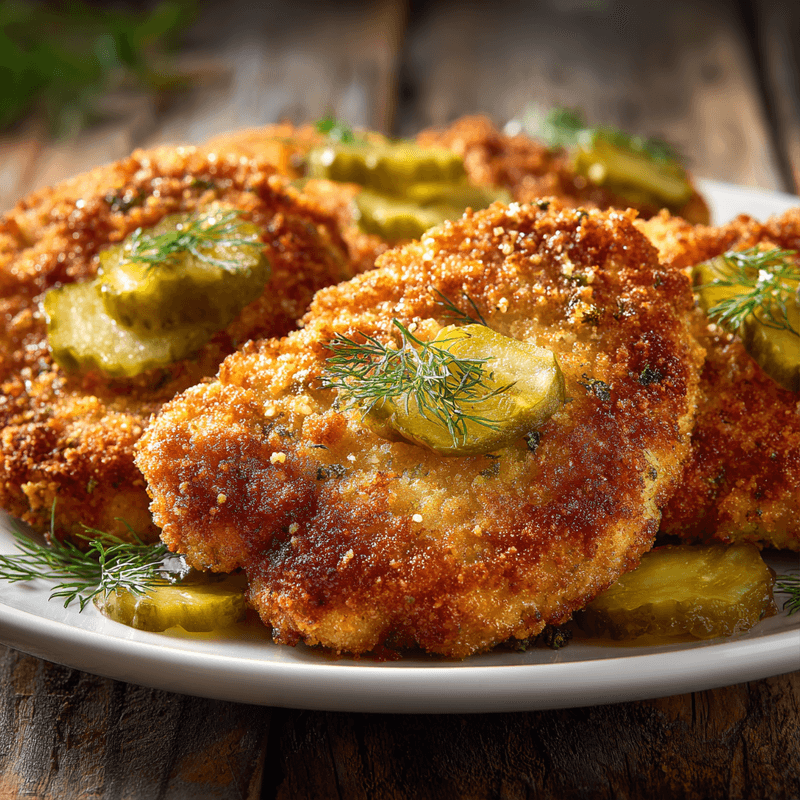
Best Crispy Dill Pickle Parmesan Chicken (Easy Recipe!)
Learn how to make the best crispy dill pickle Parmesan chicken with a crunchy coating and juicy interior. This easy recipe delivers restaurant-quality results at home.
cookwithlucia.com/recipes/the-best-crispy-dill-pickle-parmesan-chicken-easy-recipe
There's something utterly captivating about the marriage of tangy dill pickles and savory Parmesan cheese when they come together as a crispy coating for tender chicken. This dish represents the best of modern comfort food innovation, taking familiar flavors from beloved appetizers and reimagining them as a satisfying main course that delights everyone at the table. When I first encountered an exceptionally well-executed version of crispy dill pickle Parmesan chicken at a local eatery, I was immediately struck by how the briny punch of pickles cut through the richness of cheese and created something entirely new and crave-worthy.
I won't pretend this is a throw-together weeknight miracle. This crispy dill pickle Parmesan chicken requires three separate coating stations, attention to oil temperature, and a bit of patience. But here's what I can promise: every single minute you invest pays dividends in flavor and texture. The crunch of that golden crust, the bright pickle tang that makes your taste buds sing, and the way the Parmesan adds nutty depth while keeping everything supremely crispy makes this recipe absolutely worth mastering.
This guide will walk you through not just the steps, but the why behind each technique. You'll learn how to achieve that restaurant-quality crunch at home, how to keep your chicken juicy while the coating crisps to perfection, and how to troubleshoot when things don't go exactly as planned. Whether you're cooking for a weekend dinner or a family gathering, this crispy dill pickle Parmesan chicken will become one of those recipes you return to again and again, each time with more confidence and better results.
The Origins and History
The crispy dill pickle Parmesan chicken is a thoroughly modern American creation, born from the current trend of transforming popular appetizers and snacks into full meals. While fried chicken has roots stretching back centuries across multiple continents, this particular preparation emerged in the last decade as creative home cooks and restaurant chefs began experimenting with pickle-brined chicken and pickle-flavored coatings. The inspiration likely came from the wildly popular fried pickle appetizer that swept through American restaurants in the early 2000s, combined with the long-standing tradition of using Parmesan cheese in breadcrumb coatings.
Regional variations have already begun to emerge despite the dish's relative youth. Southern cooks tend to use buttermilk and pickle juice double-soaking methods, creating an extra-thick crust that echoes traditional Southern fried chicken. Midwest preparations often incorporate ranch seasoning into the breadcrumb mixture, adding another layer of herby flavor. Coastal variations sometimes use panko breadcrumbs exclusively for maximum crunch, while heartland versions stick with traditional fine breadcrumbs mixed with crushed crackers.
What makes this dish particularly fascinating is how quickly it's evolved in home kitchens. Initially seen as an indulgent restaurant specialty, the crispy dill pickle Parmesan chicken has been adapted for oven-baking, air-frying, and even meal prep situations. The core concept remains the same: taking the addictive combination of pickles and Parmesan and using it to transform ordinary chicken into something extraordinary. It represents the best of American food innovation, where comfort meets creativity and traditional techniques meet bold new flavors.
Understanding the Flavor Profile
The beauty of crispy dill pickle Parmesan chicken lies in its masterful balance of contrasting yet complementary flavors. The dill pickles contribute a sharp, vinegary tang that immediately awakens your palate, cutting through richness and providing that addictive brightness that makes you reach for another bite. The Parmesan brings nutty, salty, umami depth that anchors the flavor profile and prevents the pickle from overwhelming everything else. Together, they create a savory-tangy partnership that's further enhanced by the subtle sweetness of properly cooked chicken.
As you cook this dish, the flavors intensify and concentrate. The pickle juice in the coating caramelizes slightly during frying or baking, mellowing its sharpness while maintaining that characteristic dill flavor. The Parmesan actually gets nuttier and more complex when toasted in the hot oil or oven, developing new flavor compounds that didn't exist in its raw state. Garlic and herbs in the coating bloom and release their aromatic oils, weaving through the pickle and cheese to add layers of complexity.
Texture plays an equally important role in this dish's appeal. The exterior should shatter with a satisfying crunch when you bite through it, giving way to juicy, tender chicken that's been kept moist by the pickle brine marinade. That textural contrast between crispy coating and succulent meat is what elevates this from merely tasty to truly memorable. The coating should never be soggy or soft; it should maintain its crispness even as steam from the chicken tries to soften it from within, which is why the Parmesan and proper coating technique matter so much.
Essential Ingredients Explained
The chicken itself forms the foundation of this dish, and choosing the right cut matters tremendously. Boneless, skinless chicken breasts are traditional, but they require careful attention to avoid drying out. I strongly recommend pounding them to even thickness, which ensures uniform cooking and prevents thick sections from staying raw while thin parts overcook. Chicken thighs offer more forgiveness due to their higher fat content and stay juicier even if slightly overcooked, though their irregular shape requires extra attention during coating.
Dill pickle juice serves double duty in the best versions of this crispy dill pickle Parmesan chicken. First, it acts as a brine that seasons the chicken from within while keeping it moist during cooking. The acidity also tenderizes the meat slightly, though you don't want to brine longer than four hours or the texture becomes mushy. Look for pickle juice with simple, clean ingredients: cucumbers, water, vinegar, salt, and dill. Avoid varieties with artificial colors or excessive additives that can impart off-flavors.
Finely chopped dill pickles go directly into the coating mixture, providing bursts of intense pickle flavor and adding texture. Drain them thoroughly and pat them dry with paper towels; excess moisture is the enemy of crispiness. The pickle pieces should be minced small enough that they adhere to the coating but large enough to provide distinct flavor pops. I prefer using whole dill pickles that I chop myself rather than relish, which tends to be too wet and sweet for this application.
Parmesan cheese must be freshly grated from a block for optimal results. Pre-grated Parmesan contains anti-caking agents that prevent proper adhesion and crisping. Real Parmigiano-Reggiano offers the best flavor, but any aged hard cheese labeled Parmesan will work. The cheese should be grated on the small holes of a box grater to create fine shreds that distribute evenly through the breadcrumb mixture and melt into a cohesive crust.
Breadcrumbs form the structural foundation of your coating. Plain dried breadcrumbs offer neutral flavor and reliable texture, while panko creates extra crunch due to its larger, airier flake structure. Many cooks use a combination: two parts panko for crunch and one part regular breadcrumbs for better adhesion. Season your breadcrumbs generously; they should taste slightly over-seasoned on their own because they'll be coating bland chicken.
Flour in the initial dredging station creates a dry surface that helps the egg wash adhere. All-purpose flour works perfectly, though some cooks add cornstarch for extra crispiness. Season this flour with salt, pepper, and garlic powder so that every layer of your coating contributes flavor. The flour coating should be thin and even, with no clumps or bare spots.
Eggs beaten with a splash of pickle juice create the crucial middle layer that glues breadcrumbs to flour. The egg proteins coagulate when heated, essentially creating an edible adhesive that locks everything together. Adding pickle juice to the egg wash reinforces the pickle flavor while slightly thinning the eggs for easier, more even coating.
Garlic powder, onion powder, dried dill, and black pepper season the breadcrumb mixture and bring complexity to the crust. Fresh garlic would burn during cooking, so dried is essential here. Use true garlic powder rather than garlic salt to control sodium levels independently. Dried dill reinforces the pickle flavor and adds herbal notes that complement the fresh dill in the pickles.
Mastering the Technique
The journey to perfect crispy dill pickle Parmesan chicken begins with proper preparation of your chicken pieces. If using breasts, place them between sheets of plastic wrap and pound them with a meat mallet until they're uniformly about three-quarters of an inch thick. This even thickness ensures that the exterior coating doesn't burn while waiting for thick sections to cook through. Submerge the prepared chicken in pickle juice and refrigerate for at least two hours but no more than four, which gives the brine time to work its magic without turning the meat mushy.
Setting up your breading station correctly makes the coating process dramatically easier and cleaner. Arrange three shallow dishes in a row: flour mixture in the first, beaten eggs with pickle juice in the second, and the breadcrumb-Parmesan-pickle mixture in the third. Use one hand as your dry hand (for flour and breadcrumbs) and the other as your wet hand (for egg wash) to prevent your fingers from becoming hopelessly coated. Remove chicken from the pickle juice and pat it completely dry with paper towels; surface moisture prevents proper adhesion and creates a soggy coating.
The actual coating process requires attention to detail. Dredge each chicken piece in seasoned flour, shaking off all excess so only a thin, even layer remains. Dip into egg wash, allowing excess to drip back into the bowl for several seconds. Finally, press firmly into the breadcrumb mixture, using your dry hand to pack the coating onto both sides and all edges. The coating should look thick and even, with no bare spots where chicken shows through. Let coated pieces rest on a wire rack for ten to fifteen minutes before cooking, which helps the coating adhere better.
Cooking method significantly impacts your final results. Pan-frying in about half an inch of oil heated to 350°F delivers the crispiest, most golden crust with the best texture. The oil should bubble steadily around the chicken but not violently; too hot and the coating burns before the chicken cooks, too cool and it absorbs excess oil and turns greasy. Cook without moving the chicken for four to five minutes per side, until deep golden brown and the internal temperature reaches 165°F. Transfer to a wire rack rather than paper towels to prevent steam from softening the bottom crust.
Oven-baking offers a lighter alternative that still delivers impressive crispiness. Preheat your oven to 425°F and place coated chicken on a wire rack set over a baking sheet. Spray the tops generously with cooking oil, which provides the fat necessary for browning and crisping. Bake for twenty-five to thirty minutes, flipping halfway through and spraying the second side. The oven method produces a slightly lighter, less oily crust that still maintains satisfying crunch, though it won't quite match the deep golden color of fried versions.
Common Pitfalls and How to Fix Them
The most frequent disaster with crispy dill pickle Parmesan chicken is a coating that falls off during cooking, leaving you with naked chicken and a pan full of loose breading. This happens when you skip the resting period after coating or when the chicken is too wet when you start breading. Always pat your brined chicken completely dry and let coated pieces rest for at least ten minutes before cooking. If coating has already started falling off mid-cook, resist the urge to flip repeatedly; additional handling only makes it worse. Cook each side completely before turning, using a thin metal spatula to release the crust gently from the pan.
Soggy coating plagues many attempts at this dish, particularly when people pile cooked chicken pieces on a plate. Steam from the hot chicken softens crispy coatings remarkably quickly. Always transfer finished chicken to a wire rack where air can circulate underneath, carrying away moisture instead of trapping it against the crust. If your coating seems soggy despite proper resting techniques, your oil temperature likely ran too low or you overcrowded the pan. Cook in batches with plenty of space between pieces and verify your oil temperature with a thermometer rather than guessing.
Dry, overcooked chicken inside a beautiful golden crust represents a heartbreaking failure of timing and temperature. A meat thermometer is your best insurance against this outcome; pull chicken from heat when it reaches exactly 165°F in the thickest part. Remember that carryover cooking will add another five degrees even after removal from heat. If you've already overcooked chicken, you can't undo the damage, but you can serve it with a creamy sauce or flavored mayonnaise that adds moisture to each bite.
Burned coating with raw chicken inside signals oil that's too hot or pieces that are too thick. If this happens mid-cooking, immediately transfer the chicken to a baking sheet and finish it in a 350°F oven, which provides gentler, more even heat. For future attempts, verify your oil temperature regularly and adjust your heat to maintain steady 350°F, and remember to pound chicken to even thickness before brining.
Pickle flavor that's too subtle or completely absent usually means you skipped the brine or didn't use enough pickles in the coating. The pickle juice soak is not optional; it's where most of the interior pickle flavor develops. Similarly, don't be shy with the chopped pickles in your breadcrumb mixture. You should be able to see distinct green flecks throughout the coating, and the mixture should smell noticeably of dill and vinegar even before cooking.
Regional Twists Worth Trying
Southern-style crispy dill pickle Parmesan chicken incorporates buttermilk into the brine alongside pickle juice, creating an even tangier marinade that produces exceptionally tender chicken. The breadcrumb mixture often includes crushed saltine crackers for a distinctively Southern texture and subtle buttery flavor. Some cooks add a pinch of cayenne pepper to the coating for a gentle heat that complements the pickle tang beautifully. This version tends to have a thicker, craggier crust that maximizes textural contrast.
A Buffalo-inspired variation adds hot sauce to the egg wash and includes ranch seasoning in the breadcrumb mixture, creating a spicy-tangy flavor profile that pickle lovers find irresistible. After cooking, these versions are sometimes tossed lightly in a mixture of melted butter and more hot sauce, though this obviously softens the coating somewhat. The combination of pickle brine, hot sauce, and Parmesan creates a complex flavor that's simultaneously tangy, spicy, rich, and savory.
Italian-leaning versions increase the Parmesan dramatically and add dried Italian herbs like oregano and basil to the coating mixture, while reducing the pickle presence slightly. These preparations sometimes include a small amount of finely grated lemon zest in the breadcrumbs, which provides brightness similar to pickles but with a more refined, Mediterranean character. The result is less pickle-forward but more sophisticated, appealing to those who want subtlety rather than bold pickle punch.
Healthier air-fryer adaptations have become increasingly popular, using cooking spray to encourage browning while eliminating most of the oil. The technique remains largely the same, but air-fried versions need slightly lower temperatures (380°F) and more frequent spraying of oil to achieve even browning. The texture differs from traditional fried versions, being more uniformly crispy rather than having those delightfully irregular craggy bits, but it's still satisfying.
The Perfect Spread
Crispy dill pickle Parmesan chicken pairs beautifully with sides that provide contrasting textures and flavors to keep the meal interesting. Creamy coleslaw offers cool crunch and a vinegar-based tang that echoes the pickles without competing with them. The cabbage's freshness cuts through the richness of fried chicken while the creamy dressing adds moisture to balance the crispy coating. For a lighter option, a simple mixed green salad with a bright vinaigrette and plenty of fresh herbs refreshes the palate between bites.
Starchy sides ground the meal and provide comforting substance alongside the crispy chicken. Creamy mashed potatoes are classic for good reason, their smooth richness providing perfect contrast to crunchy coating. Roasted potato wedges seasoned with herbs offer a lighter alternative with textural variety. For something different, try buttery egg noodles tossed with fresh dill and a squeeze of lemon, which picks up on the chicken's pickle notes while adding their own comforting appeal.
Vegetable sides should be simple and fresh to avoid overwhelming the star of the meal. Roasted green beans with garlic stay in the background while adding nutritional value and a slight char that complements the golden-brown chicken. Grilled or roasted corn on the cob brings summery sweetness that balances the tangy, salty chicken coating. Sautéed zucchini and yellow squash with a sprinkle of Parmesan creates a light, colorful side that ties into the chicken's cheese component.
Don't forget about sauce options that can enhance the crispy dill pickle Parmesan chicken experience. A simple garlic mayonnaise or aioli adds richness and makes each bite even more indulgent. Ranch dressing is a natural partner for anything pickle-related and provides cooling creaminess. For those who love extra pickle flavor, try serving a small bowl of finely chopped pickles mixed with sour cream and fresh dill as a chunky dipping sauce.
Keeping and Reheating
Proper storage keeps your crispy dill pickle Parmesan chicken delicious for several days after cooking. Allow chicken to cool completely to room temperature before storing, which prevents condensation from forming inside the container and making the coating soggy. Place pieces in a single layer in an airtight container lined with paper towels, which absorb any moisture that does develop. Stored this way in the refrigerator, the chicken remains safe to eat for three to four days, though the coating will inevitably soften somewhat during storage.
This particular dish doesn't improve overnight the way braised dishes or stews do. The coating will lose most of its crispiness after refrigeration, though the flavor remains excellent. The chicken itself stays moist thanks to the pickle brine, which is a blessing when reheating. For this reason, some cooks prefer to prep components ahead but only coat and cook the chicken right before serving, keeping the brine-soaked chicken refrigerated for up to two days before the final cooking step.
Reheating crispy dill pickle Parmesan chicken in the oven produces far better results than the microwave, which turns the coating unpleasantly rubbery. Preheat your oven to 375°F and place chicken pieces on a wire rack set over a baking sheet. Heat for twelve to fifteen minutes until warmed through and the coating has re-crisped somewhat. The texture won't match freshly cooked chicken, but it will be dramatically better than microwave reheating, with at least some of that desirable crunch restored.
For best results when making this dish ahead for gatherings, consider coating the chicken completely and refrigerating it on the wire rack for up to four hours before cooking. This extended rest actually improves coating adhesion and allows you to prep during a less hectic time. Cook the chicken within thirty minutes of when you plan to serve it, keeping finished pieces warm in a 200°F oven on a wire rack while you complete the remaining batches. This approach gives you the convenience of advance preparation with the quality of freshly cooked chicken.
Your Questions Answered
Can I make crispy dill pickle Parmesan chicken with frozen chicken breasts?
You can, but you must fully thaw them first and then drain away all the liquid that's released during thawing. Frozen chicken releases significant moisture as it thaws, which dilutes your pickle brine and creates excess surface moisture that prevents proper coating adhesion. Thaw chicken completely in the refrigerator, pat it absolutely dry with paper towels, then proceed with the pickle juice brine as directed. Never attempt to bread partially frozen chicken; the temperature difference causes uneven cooking and prevents the coating from adhering properly.
What's the best oil for frying this chicken?
Vegetable oil, canola oil, or peanut oil all work excellently for frying crispy dill pickle Parmesan chicken due to their high smoke points and neutral flavors. Avoid olive oil, which smokes at temperatures too low for proper frying and imparts a flavor that clashes with pickles and Parmesan. You need an oil that can maintain 350°F without breaking down or smoking, and you need enough depth (about half an inch) to properly crisp the bottom of the chicken while you cook the first side. Monitor and adjust your heat throughout cooking to maintain steady temperature.
Can I prep the coating mixture in advance?
Absolutely, and doing so actually saves significant time on cooking day. Mix your seasoned breadcrumbs with Parmesan and dried herbs up to three days ahead, storing the mixture in an airtight container at room temperature. Wait to add the chopped pickles until just before coating your chicken, as their moisture will soften the breadcrumbs if added too far in advance. Your flour mixture can be combined and stored similarly, making the breading process quick and simple when you're ready to cook.
How do I scale this recipe up for a family gathering?
When cooking for a crowd, coat all your chicken pieces first and arrange them in a single layer on wire racks before you start cooking any of them. Cook in batches without crowding your pan, transferring finished pieces to a wire rack in a 200°F oven to keep warm while you cook the remaining batches. This approach ensures every piece gets proper attention and adequate oil contact for even browning. Don't try to speed the process by increasing heat or crowding the pan; you'll end up with unevenly cooked chicken and a coating that doesn't crisp properly.
Can I use chicken tenders or drumsticks instead of breasts?
Chicken tenders work beautifully for crispy dill pickle Parmesan chicken and actually cook more quickly due to their smaller size. Reduce cooking time to about three to four minutes per side when using tenders, and watch the temperature carefully to avoid overcooking these lean strips. Drumsticks require a different approach; the bone conducts heat differently and they need lower temperature and longer cooking time. Fry drumsticks at 325°F for about fifteen to eighteen minutes, turning several times, or bake at 400°F for thirty-five to forty minutes to ensure the meat near the bone cooks completely.
Is there a gluten-free version of this recipe?
You can absolutely make gluten-free crispy dill pickle Parmesan chicken by substituting gluten-free all-purpose flour in the dredging station and using gluten-free breadcrumbs or crushed gluten-free crackers in the coating mixture. The texture will differ slightly depending on which gluten-free breadcrumb you choose, but the flavor remains excellent. Rice-based breadcrumbs tend to create a lighter, more delicate crust, while those made from corn provide sturdier texture closer to traditional breadcrumbs. Ensure your pickle juice and all seasonings are certified gluten-free, as some products contain hidden gluten as thickeners or anti-caking agents.
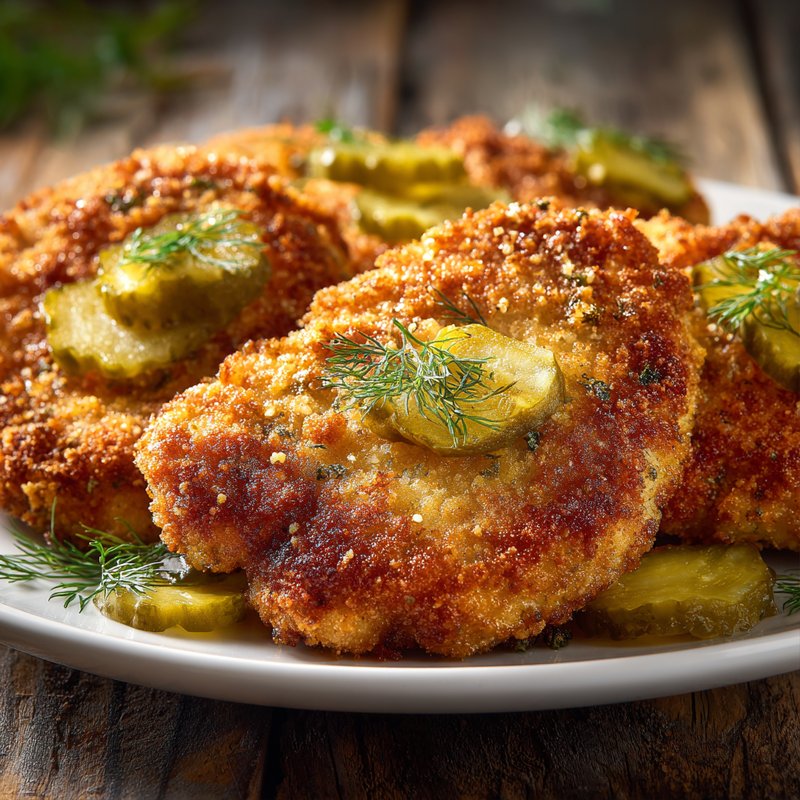
The Best Crispy Dill Pickle Parmesan Chicken
Juicy chicken coated in a crunchy Parmesan and dill pickle crust that delivers bold tangy flavor with every bite. This easy recipe creates restaurant-quality results at home.
Prep Time
30 min
Cook Time
25 min
Total Time
55 min
Servings
4 servings
Ingredients
For 4 servings
- 4 boneless, skinless chicken breasts (about 6-8 oz each), pounded to even thickness
- 2 cups dill pickle juice
- 1 cup all-purpose flour
- 2 teaspoons garlic powder, divided
- 2 teaspoons onion powder, divided
- 2 teaspoons salt, divided
- 1 teaspoon black pepper, divided
- 3 large eggs
- 3 tablespoons dill pickle juice (for egg wash)
- 2 cups panko breadcrumbs
- 1 cup plain dried breadcrumbs
- 1 1/2 cups freshly grated Parmesan cheese
- 3/4 cup finely chopped dill pickles, drained and patted dry
- 2 tablespoons dried dill
- Vegetable oil or canola oil for frying (about 2 cups)
Instructions
- 1
Brine the chicken
Place pounded chicken breasts in a large resealable bag or shallow dish and cover completely with 2 cups of dill pickle juice. Seal or cover and refrigerate for 2 to 4 hours, turning occasionally to ensure even brining. This step tenderizes the chicken and infuses it with pickle flavor from the inside out.
- 2
Prepare coating stations
Set up three shallow dishes in a row. In the first dish, combine flour with 1 teaspoon garlic powder, 1 teaspoon onion powder, 1 teaspoon salt, and 1/2 teaspoon black pepper. In the second dish, beat eggs with 3 tablespoons pickle juice until well combined. In the third dish, mix panko breadcrumbs, plain breadcrumbs, Parmesan cheese, chopped pickles, dried dill, and remaining garlic powder, onion powder, salt, and pepper.
- 3
Dry and coat chicken
Remove chicken from pickle juice and pat completely dry with paper towels; surface moisture prevents coating adhesion. Dredge each piece in the flour mixture, shaking off excess. Dip into egg wash, letting excess drip off for several seconds. Finally, press firmly into breadcrumb mixture, coating both sides completely and packing the coating on with your hands.
- 4
Rest coated chicken
Place coated chicken pieces on a wire rack and let rest for 10 to 15 minutes at room temperature. This crucial step allows the coating to adhere properly and reduces the chance of it falling off during cooking. The coating will look dry and set when ready.
- 5
Heat the oil
Pour about 1/2 inch of oil into a large, heavy skillet and heat over medium-high heat until it reaches 350°F on a thermometer. Test the temperature by dropping a pinch of breadcrumbs into the oil; they should sizzle immediately and turn golden within 30 seconds. Adjust heat as needed to maintain steady temperature.
- 6
Fry the chicken
Carefully place chicken pieces in the hot oil without crowding (work in batches if necessary). Cook without moving for 4 to 5 minutes until deep golden brown on the bottom. Flip gently using a thin spatula and cook the second side for another 4 to 5 minutes until golden brown and the internal temperature reaches 165°F.
- 7
Drain and rest
Transfer cooked chicken to a wire rack set over a baking sheet rather than paper towels, which allows air circulation and prevents the bottom from becoming soggy. Let rest for 5 minutes before serving, which allows juices to redistribute throughout the meat. The coating should be deeply golden and audibly crispy.
- 8
Serve immediately
Slice chicken if desired and serve while still hot for the best textural contrast between crispy coating and juicy interior. Pair with your choice of sides and dipping sauces, and enjoy the perfect combination of tangy pickle flavor, savory Parmesan, and satisfying crunch.
Nutrition Facts
Per serving (estimated)
485 calories
Calories
38g
Carbs
48g
Protein
16g
Fat
2g
Fiber
1240mg
Sodium
3g
Sugar


