Sweet Cotton Candy Sushi Recipe – Easy Fun Dessert
Learn how to make adorable sweet cotton candy sushi! This easy dessert sushi recipe is perfect for kids parties with colorful fruit and candy toppings.
cookwithlucia.com/recipes/sweet-cotton-candy-sushi-recipe-easy-fun-dessert-for-kids-parties
There's something magical about transforming familiar flavors into unexpected shapes, and this sweet cotton candy sushi recipe does exactly that. Instead of traditional rice and seaweed, we're working with fluffy cotton candy rolled around fruit leather, studded with colorful candies, and sliced into perfect rounds that look just like sushi. The technique is surprisingly simple, but the wow factor is through the roof.
What makes this sweet cotton candy sushi recipe so brilliant is how it flips expectations. Kids recognize the sushi shape immediately, then delight in discovering it's entirely made of their favorite treats. The cotton candy provides that sticky, moldable texture similar to sushi rice, while fruit leather stands in beautifully for nori wraps. You'll arrange gummy candies, sprinkles, and fruit pieces just like a sushi chef selecting toppings.
I know working with cotton candy might sound tricky at first. It dissolves at the slightest hint of moisture, and it sticks to everything, right? But once you understand how to handle it and the short window you have to work, this sweet cotton candy sushi recipe becomes an absolute breeze. The secret is confidence and speed, treating the cotton candy with the same respect a sushi chef shows their rice.
The best part about mastering this technique is how endlessly customizable it becomes. Once you nail the basic rolling and slicing method, you can create dozens of variations using different candy combinations, changing colors to match themes, or incorporating seasonal fruits. Let me walk you through exactly how to create these whimsical treats that'll have everyone reaching for seconds.
The Science Behind the Method
Cotton candy is pure spun sugar with thousands of tiny air pockets, which is why it's so light and dissolves instantly on your tongue. When you compress it gently with your hands, those sugar strands stick to each other, creating a denser, more moldable texture similar to sticky rice. This compression is what makes the sweet cotton candy sushi recipe work so beautifully.
The fruit leather serves as both a wrapper and a moisture barrier. Since cotton candy dissolves when it touches anything wet, the fruit leather protects it while adding a chewy texture contrast. The slight tackiness of fruit leather also helps everything hold together once rolled, acting like the nori in traditional sushi that keeps the rice contained.
Understanding the humidity factor is crucial here. Sugar is hygroscopic, meaning it pulls moisture from the air. On humid days, your cotton candy will start breaking down faster, giving you less working time. On dry days, it stays fluffy and manageable much longer. This is why professional candy makers prefer climate-controlled environments.
The slicing technique mimics real sushi preparation because it requires a sharp knife and a clean cut through varied textures. Each slice compresses the cotton candy slightly, helping everything hold together while revealing the colorful cross-section. When you grasp why each component behaves the way it does, you'll instinctively know how to adjust your technique for perfect results every time.
Tools and Ingredients You'll Need
You won't need any specialized equipment for this sweet cotton candy sushi recipe, which is part of its charm. A sharp knife is essential, preferably a chef's knife or serrated bread knife that can cut cleanly through the compressed cotton candy without sawing. Wipe the blade between cuts to prevent sticky buildup. If you don't have a sharp knife, kitchen shears work surprisingly well for cutting these dessert rolls.
A clean, dry cutting board is your workspace. I emphasize dry because any moisture will start dissolving your cotton candy immediately. Wood or plastic both work fine, but make sure it's completely free of water droplets. Keep a dry kitchen towel nearby to wipe your hands frequently since the sugar will make them sticky.
For ingredients, you'll need fresh cotton candy in whatever colors match your theme. Store-bought tubs from party supply stores work perfectly and stay fresh longer than carnival-style bags. Look for cotton candy that's fluffy and dry, not clumped or sticky. Fruit leather or fruit roll-ups serve as your wrapper, and any brand works as long as it's pliable. The rectangular sheet style is easiest to work with.
Your fillings are where creativity shines in this sweet cotton candy sushi recipe. Gummy candies in various shapes, mini marshmallows, colorful sprinkles, small fruit pieces like strawberry slices or blueberries, and candy pearls all work beautifully. Choose items that won't leak moisture. Avoid fresh citrus or very juicy fruits, as they'll dissolve the cotton candy too quickly.
A small plate of water and a clean towel are helpful for keeping your hands manageable, though you'll want to dry thoroughly before touching the cotton candy again. Some people like wearing disposable gloves to keep their hands cleaner, though I find bare hands give you better control when shaping.
The Method, Step by Step
Start by preparing your workspace and ingredients like a professional mise en place. Lay out all your candies, fruit pieces, and toppings in small bowls so you can work quickly once you start assembling. Unwrap your fruit leather sheets and lay them flat on your cutting board. Have your knife ready and wiped clean. This preparation is crucial because once you start working with cotton candy, speed matters.
Take a generous handful of cotton candy, about the size of a baseball. Gently compress it between your palms, working it into a loose log shape. You're not squishing it flat, just encouraging the sugar strands to stick together. The cotton candy should feel like it's holding together but still remain somewhat fluffy. This compressed cotton candy forms the "rice" in your sweet cotton candy sushi recipe.
Lay your compressed cotton candy log along one edge of the fruit leather sheet, leaving about an inch of space at each end. The cotton candy should extend almost the full length of the fruit leather. If your log is too thick to roll comfortably, remove some of the cotton candy and set it aside for another roll. You want the cotton candy layer to be about one to one and a half inches thick.
Now quickly press your chosen toppings into the cotton candy before you roll. Add a row of gummy candies down the center, sprinkle with colorful decorations, or arrange small fruit pieces. Work fast but deliberately. The toppings should press into the cotton candy slightly so they'll stay put when you slice. This is the fun part where your sweet cotton candy sushi recipe comes to life with color and creativity.
Beginning at the edge with the cotton candy, carefully roll the fruit leather over the filling, keeping steady pressure to create a tight cylinder. The fruit leather might crack slightly if it's cold, so you can warm it briefly in your hands first. Roll all the way to the opposite edge, then give the completed roll a gentle squeeze along its length to help everything adhere. The roll should feel firm but not rock-hard.
Let your completed roll rest seam-side down for about thirty seconds. This brief rest lets the fruit leather's natural stickiness help seal everything together. During this time, wipe your knife blade completely clean and dry. Any moisture or residue will make clean slicing impossible.
Using a sharp knife and a swift, confident motion, slice your roll into rounds about one inch thick. Don't saw back and forth; instead, use a single downward press and pull motion. Wipe the blade between each cut. Each slice should reveal a beautiful cross-section showing the colorful filling surrounded by cotton candy "rice" and the fruit leather "nori." Arrange your sweet cotton candy sushi pieces on a serving plate immediately, as they look best when freshly cut.
Troubleshooting Guide
If your cotton candy is dissolving or becoming sticky before you can roll it, you're likely dealing with too much humidity in your kitchen or moisture on your hands. Try working in an air-conditioned room, and make absolutely sure your hands are bone-dry before touching the cotton candy. You can also try making this sweet cotton candy sushi recipe earlier in the day when humidity tends to be lower, or use a dehumidifier in your workspace.
When the fruit leather cracks or tears during rolling, it's usually too cold or too old. Fresh fruit leather is pliable and rolls easily, while older sheets become brittle. You can revive slightly stiff fruit leather by warming it between your palms for fifteen to twenty seconds. If it tears mid-roll, don't panic. Simply press another piece of fruit leather over the tear and continue rolling. The overlap won't show once you slice the roll.
If your slices fall apart when cutting, you're either using a dull knife that crushes rather than cuts, or you didn't compress the cotton candy enough initially. The solution is to reshape your roll with firmer pressure, let it rest a full minute, then use your sharpest knife with confident, swift cuts. Hesitant sawing motions will always create messy slices in this sweet cotton candy sushi recipe.
Soggy or dissolved cotton candy within minutes of assembly means your fillings were too moist. Fresh fruits often contain enough juice to start breaking down the sugar immediately. Stick with dried fruits, gummy candies, and other low-moisture toppings. If you must use fresh fruit, pat it thoroughly dry with paper towels and use tiny pieces rather than large chunks.
When everything sticks to your knife and creates ragged edges, your blade needs cleaning between every single cut. Keep a damp cloth nearby, wipe the blade after each slice, then dry it immediately before the next cut. This seems tedious, but it's the difference between beautiful, professional-looking pieces and a sticky mess. The extra ten seconds per cut is worth it for that pristine presentation that makes this sweet cotton candy sushi recipe so impressive.
Taking It to the Next Level
Once you've mastered the basic sweet cotton candy sushi recipe, try creating multiple rolls with different color combinations and arranging them on a platter like a real sushi chef. Use pink cotton candy with strawberry fruit leather for a berry theme, blue cotton candy with grape fruit leather for an ocean vibe, or mix colors within a single roll for a rainbow effect. The visual presentation becomes art.
For an elevated touch, serve your dessert sushi on traditional rectangular sushi plates with small dishes of "dipping sauces" made from fruit purees, melted chocolate, or caramel sauce. Provide chopsticks for eating, which adds to the authentic presentation and makes the experience more interactive and fun. Kids especially love the challenge of picking up these sweet treats with chopsticks.
Create themed variations by matching your colors and decorations to specific occasions. Use pastel colors for spring gatherings, bold primary colors for summer events, or metallic edible glitter for elegant evening celebrations. You can even make miniature versions using less cotton candy for bite-sized pieces that work beautifully as party favors.
Professional-level presentation involves garnishing the serving platter with edible flowers, mint leaves, or a dusting of powdered sugar that resembles sesame seeds. Some creative cooks use a small kitchen torch to lightly caramelize the edges of their sweet cotton candy sushi recipe creations, adding a subtle toasted sugar flavor and a glossy finish that catches the light beautifully.
Storing Your Results
Honesty first: this sweet cotton candy sushi recipe is best enjoyed within an hour or two of making it. Cotton candy's nature means it will gradually absorb moisture from the air and begin to break down, losing that fluffy texture that makes these treats so special. However, with proper storage, you can buy yourself a few extra hours.
Store your completed sushi pieces in an airtight container with a layer of parchment paper between any stacked layers. Add a small food-safe silica gel packet or a few grains of raw rice wrapped in cheesecloth to the container to absorb excess moisture. Keep the container in a cool, dry place, never in the refrigerator, as the humidity inside will destroy the cotton candy almost immediately.
If you need to make these ahead for an event, I recommend preparing all your components separately and assembling just before serving. Keep the cotton candy in its original sealed container, pre-cut your fruit leather into sheets, and have all your toppings ready in bowls. With everything prepped, you can roll and slice your sweet cotton candy sushi recipe in about fifteen minutes.
For transport to a party or gathering, use a rigid container that prevents the pieces from shifting and getting crushed. Line the container with parchment paper, arrange the pieces in a single layer without touching if possible, and transport in an air-conditioned vehicle. The container should stay sealed until just before serving time.
Common Questions
Can I make this sweet cotton candy sushi recipe without fruit leather?
Absolutely! While fruit leather provides the best structure and visual similarity to nori, you can use thin crepes, flavored tortillas cut into strips, or even strips of store-bought pastry dough rolled very thin and par-baked until pliable. Each alternative creates a different texture experience, but they all work to contain the cotton candy and provide that essential moisture barrier.
How do I prevent the cotton candy from sticking to everything?
The key is working with completely dry hands and tools in a low-humidity environment. Some people find that lightly dusting their hands with cornstarch or powdered sugar helps, though use it sparingly so it doesn't affect the cotton candy's texture. Work quickly and confidently, and don't overhandle the cotton candy. The less you touch it, the less it will stick and compress.
Can I scale up this recipe for a large party?
Definitely, but I recommend an assembly line approach rather than making everything yourself. Set up stations with cotton candy, fruit leather, various toppings, and cutting boards. Have multiple people making rolls simultaneously, then one person dedicated to slicing. This sweet cotton candy sushi recipe works beautifully as an interactive party activity where guests make their own creations.
What's the shelf life, and can these be frozen?
These treats have a very short shelf life of just a few hours at best due to the cotton candy's moisture sensitivity. Freezing is not recommended as the condensation that forms when thawing will completely dissolve the cotton candy. Always plan to make this sweet cotton candy sushi recipe close to serving time for the best results and that fresh, fluffy texture everyone loves.
Why does my cotton candy deflate so much when I compress it?
That's actually normal and expected! Cotton candy is mostly air, so when you compress it, you're removing that air and letting the sugar strands stick together. The key is finding the right balance where it's compressed enough to hold shape and accept toppings, but not so much that it becomes a dense, hard mass. Gentle pressure with your palms gives you that perfect moldable texture this sweet cotton candy sushi recipe needs.
Can I use homemade cotton candy, or does it need to be store-bought?
Both work beautifully! Homemade cotton candy from a cotton candy machine is actually ideal because it's super fresh and fluffy. Just make sure to use it within an hour of spinning for the best texture. Store-bought cotton candy from sealed tubs works great too and has the advantage of staying fresh longer in storage. Avoid the pre-formed cotton candy cones from carnivals, as they're often already too compressed and stale for this sweet cotton candy sushi recipe to work properly.
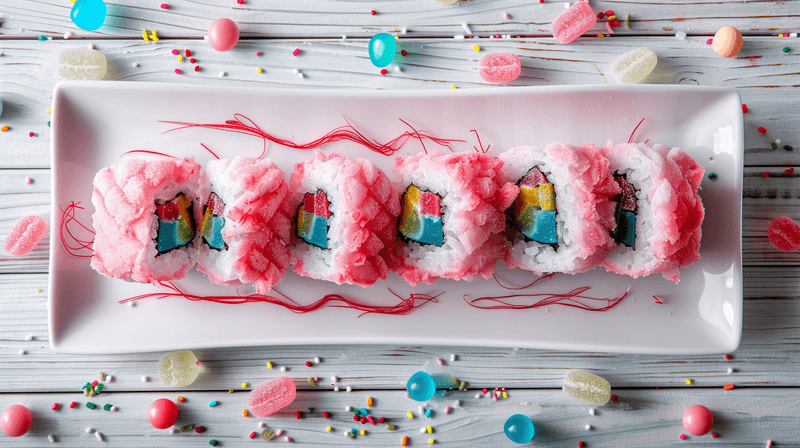
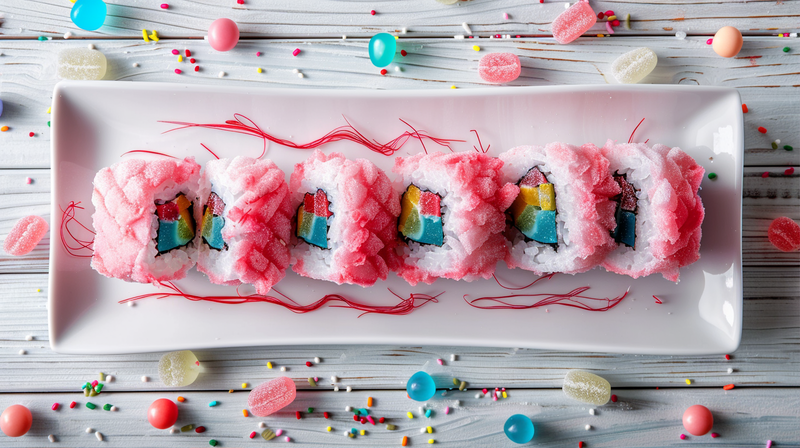
Sweet Cotton Candy Sushi Recipe
A whimsical dessert that looks like sushi but is made entirely of sweet treats! Cotton candy forms the 'rice,' fruit leather wraps it like nori, and colorful candies create beautiful toppings.
Prep Time
15 min
Cook Time
0 min
Total Time
15 min
Servings
12 pieces
Ingredients
For 12 pieces
- 4 cups cotton candy, any color (about 4 ounces)
- 4 sheets fruit leather or fruit roll-ups
- 1/2 cup assorted gummy candies, small pieces
- 1/4 cup mini marshmallows
- 2 tablespoons colorful sprinkles
- 1/4 cup small candy pearls or nonpareils
- 1/4 cup fresh strawberries, sliced thin and patted dry
- 2 tablespoons small jelly beans or candy-coated chocolates
Instructions
- 1
Prepare your workspace
Set up a clean, completely dry cutting board as your workspace. Arrange all candies, toppings, and fruit pieces in small bowls for easy access. Unwrap fruit leather sheets and lay them flat. Have a sharp knife ready and wiped clean with a dry towel. Ensure your hands are completely dry before beginning.
- 2
Compress the cotton candy
Take a generous handful of cotton candy, about the size of a baseball. Gently compress it between your palms, working it into a loose log shape about 6 inches long and 1.5 inches thick. The cotton candy should hold together but remain somewhat fluffy. This forms your sushi 'rice' base.
- 3
Position on fruit leather
Lay your compressed cotton candy log along one edge of a fruit leather sheet, leaving about 1 inch of space at each end. The cotton candy should extend almost the full length of the fruit leather. If your log is too thick, remove some cotton candy and save it for another roll.
- 4
Add toppings quickly
Working swiftly, press your chosen toppings into the cotton candy before rolling. Add a row of gummy candies down the center, sprinkle with colorful decorations, and arrange fruit pieces if using. Press toppings slightly into the cotton candy so they'll stay in place when sliced.
- 5
Roll the sushi
Beginning at the edge with the cotton candy, carefully roll the fruit leather over the filling while maintaining steady pressure to create a tight cylinder. Roll all the way to the opposite edge, then gently squeeze the completed roll along its length to help everything adhere together. The roll should feel firm but not compressed flat.
- 6
Let the roll rest
Place your completed roll seam-side down on the cutting board and let it rest for 30 seconds. This allows the fruit leather's natural stickiness to help seal everything together. During this time, wipe your knife blade completely clean and dry to prepare for slicing.
- 7
Slice into pieces
Using a sharp knife and a swift, confident downward motion, slice the roll into rounds about 1 inch thick. Don't saw back and forth; use a single press and pull. Wipe the blade clean and dry between each cut for the cleanest edges.
- 8
Arrange and serve
Immediately arrange your sweet cotton candy sushi pieces on a serving platter with the colorful cross-sections facing up. Serve within 1-2 hours for the best texture and appearance. These treats are best enjoyed fresh, as cotton candy will absorb moisture from the air over time.
Nutrition Facts
Per serving (estimated)
95 calories
Calories
24g
Carbs
0g
Protein
0.5g
Fat
0g
Fiber
15mg
Sodium
22g
Sugar


