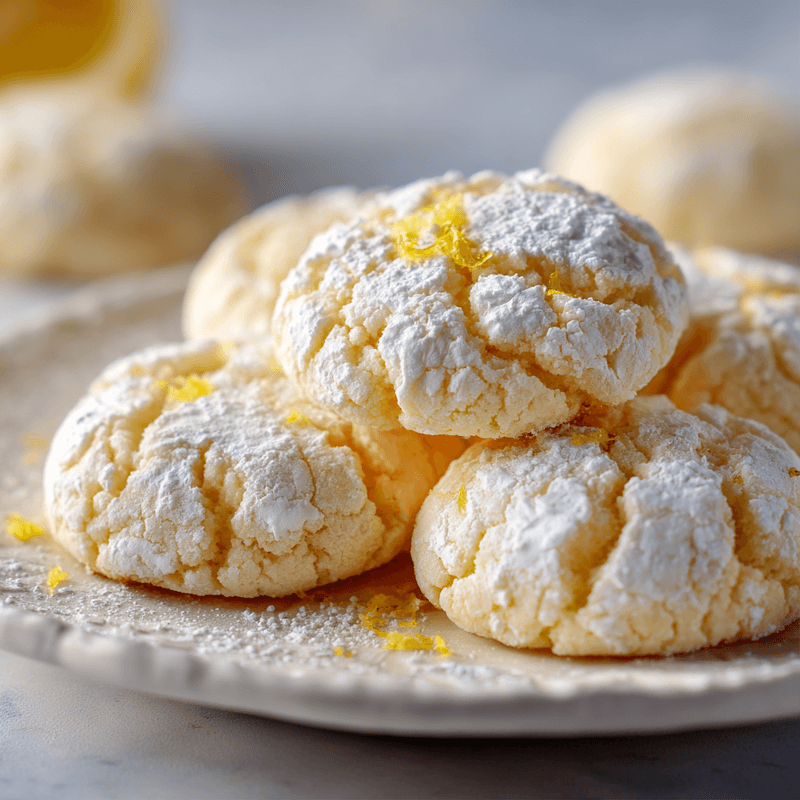
Springtime Crinkle Cookies That Melt in Your Mouth
Light, buttery crinkle cookies with bright citrus notes and powdered sugar. Perfect for spring gatherings with a melt-in-your-mouth texture everyone loves.
cookwithlucia.com/recipes/springtime-crinkle-cookies-that-melt-in-your-mouth
Nobody loves doing dishes, and that truth becomes especially clear when you're baking cookies and find yourself elbow-deep in mixing bowls, measuring cups, and flour-dusted countertops. But what if I told you that some of the most delicate, impressive cookies require surprisingly little fuss? These springtime crinkle cookies that melt in your mouth are proof that simplicity and elegance can coexist beautifully in your kitchen. With their characteristic crackled exterior dusted in snowy powdered sugar and a tender, almost cloud-like interior, these cookies look like they emerged from a French patisserie window. The gentle citrus notes dance on your tongue while the buttery crumb dissolves almost instantly, leaving you reaching for just one more. The beauty of this recipe lies not just in the final product, but in how straightforward the process truly is—one bowl, a handful of pantry staples, and about thirty minutes from start to finish.
I promise you this: minimal prep, maximum impact, and cookies that will have everyone asking for your secret recipe. The crinkled, sugar-dusted surface isn't just for show—it's the natural result of a perfectly balanced dough that puffs and cracks as it bakes, creating those gorgeous fissures that catch the light and make each cookie look like a tiny work of art.
The Magic Behind Crinkle Cookies
Crinkle cookies occupy a special place in the cookie pantheon because they're all about textural contrast and visual drama. The signature crackled appearance happens when a soft, slightly cake-like dough meets high heat and gets coated in powdered sugar before baking. As the cookies spread and rise in the oven, the outer sugar coating stays put while the dough beneath expands, creating those beautiful fissures and valleys.
What makes springtime crinkle cookies that melt in your mouth particularly special is the delicate balance between structure and tenderness. Unlike their chocolate-based cousins, these lighter versions rely on the interplay of butter, a touch of oil, and carefully measured leavening to achieve that signature melt-away texture. The addition of bright citrus zest brings a freshness that feels perfectly suited to warmer weather and outdoor gatherings.
The science is fascinating: when you roll the dough in powdered sugar, you're creating a moisture barrier that dries out slightly in the oven's heat. This dry outer layer can't expand as much as the moist interior, forcing the cookie to crack open in those gorgeous patterns. It's controlled chaos at its finest, and it happens naturally every single time without any special techniques required.
What Makes These Melt in Your Mouth
The melt-in-your-mouth quality of these springtime crinkle cookies comes down to a carefully orchestrated combination of ingredients and ratios. First, there's the butter—always use high-quality unsalted butter at room temperature. Butter creates tender cookies because its fat coats the flour proteins, preventing them from forming too much gluten. The result is a cookie that's structurally sound enough to hold its shape but tender enough to dissolve on your tongue.
I also incorporate a small amount of neutral oil alongside the butter. This might seem unusual, but oil stays liquid at room temperature, which means cookies made with some oil maintain a softer texture even after they've cooled completely. It's the secret to cookies that feel just as tender the next day as they did fresh from the oven.
The flour-to-fat ratio is crucial here. Too much flour and you'll have dry, crumbly cookies. Too little and they'll spread into flat puddles. These springtime crinkle cookies use just enough flour to give structure while keeping everything impossibly light. Cornstarch plays a supporting role too, adding tenderness and that characteristic melt-away quality you find in the finest shortbread.
Citrus zest is non-negotiable for the springtime version. Whether you choose lemon, orange, or even lime, the essential oils in the zest brighten the entire cookie and cut through the richness of the butter. When you zest citrus directly into your sugar and rub it together with your fingertips, you release those aromatic oils throughout the dough, ensuring every bite carries that fresh, sunny flavor.
Finally, the leavening must be precise. Baking powder gives these cookies their lift and contributes to the cracking pattern, but too much will make them taste metallic and cause them to spread too thin. The gentle rise from properly measured leavening creates that perfect dome that then cracks beautifully.
Mixing and Shaping Your Dough
The mixing method for springtime crinkle cookies that melt in your mouth is refreshingly straightforward, but a few key techniques will elevate your results from good to extraordinary. Start by creaming your room-temperature butter with sugar until the mixture is genuinely fluffy and pale—this usually takes about three to four minutes with an electric mixer. This step incorporates air into the dough, which contributes to the light texture.
When you add your eggs, make sure they're also at room temperature. Cold eggs can cause the butter to seize up and create a curdled-looking mixture, which won't cream together as smoothly. Room-temperature eggs blend seamlessly into the butter mixture, creating an emulsion that holds everything together beautifully. Add your vanilla extract and citrus zest at this stage, mixing just until combined.
The dry ingredients should be whisked together separately before adding them to the wet mixture. This ensures even distribution of the baking powder, salt, and cornstarch throughout the flour. When you add the dry ingredients to the wet, mix on low speed and stop as soon as you no longer see streaks of flour. Overmixing at this stage develops gluten, which will make your cookies tough instead of tender.
Once your dough comes together, you'll notice it's quite soft—almost too soft to handle immediately. This is exactly right. Cover the bowl and refrigerate the dough for at least one hour, or up to overnight. Chilling serves multiple purposes: it firms up the fats so the cookies hold their shape better, it allows the flour to fully hydrate for better texture, and it makes the dough much easier to portion and roll.
When you're ready to shape the cookies, portion the dough into balls about one and a half tablespoons each. I find a cookie scoop invaluable here for uniform sizing, which ensures even baking. Roll each portion between your palms to create a smooth ball—any cracks or seams on the surface will show through the powdered sugar coating.
The rolling process is where the magic happens visually. First, roll each ball in granulated sugar, which helps the powdered sugar adhere and adds a slight textural contrast. Then, roll generously in powdered sugar until completely coated. Don't be shy with the powdered sugar—a thick coating is what creates those dramatic white cracks against the golden cookie beneath.
The Baking Process
Baking springtime crinkle cookies that melt in your mouth requires attention to temperature and timing, but once you understand the principles, it becomes second nature. Preheat your oven to 350°F and position your rack in the center of the oven. The center provides the most even heat, which is crucial for cookies that need to puff and crack uniformly.
Line your baking sheets with parchment paper rather than greasing them. Parchment provides a non-stick surface without adding extra fat, which could cause the cookies to spread too much. It also makes cleanup effortless—a bonus that never gets old.
Space your sugar-coated dough balls about two inches apart on the prepared sheets. These cookies do spread somewhat as they bake, and you need to give them room to expand without running into each other. Crowding the pan creates uneven heat circulation and can lead to cookies that bake unevenly or merge together.
Bake for ten to twelve minutes, watching for the telltale signs of doneness. The cookies should puff up first, then begin to crack across the surface. The edges will set and turn the palest golden color, while the centers might still look slightly underdone. This is exactly when you want to remove them from the oven. They'll continue cooking on the hot pan for another two to three minutes thanks to residual heat.
Resist the urge to bake these cookies until they're fully golden all over. That melt-in-your-mouth texture depends on removing them while they're still quite soft in the center. They'll firm up as they cool but maintain that tender, dissolving quality that makes them so addictive. If you bake them until they look completely done in the oven, they'll be dry and crumbly once cooled.
Let the cookies rest on the baking sheet for about five minutes before transferring them to a cooling rack. This brief rest period allows them to set just enough to move without breaking, but they'll still be quite delicate. Use a thin spatula and support the entire cookie when transferring to avoid any cracks or breaks.
Secrets for Perfect Crinkles Every Time
The visual appeal of springtime crinkle cookies that melt in your mouth depends entirely on achieving those dramatic cracks and fissures across the surface. The first secret is making sure your dough is properly chilled before shaping. If the dough is too warm, the cookies will spread too quickly in the oven and you won't get those high domes that crack beautifully. When in doubt, chill longer rather than shorter.
Your powdered sugar coating technique matters more than you might think. Use a bowl deep enough to roll the dough balls around completely, and don't just dust them—really coat them generously. A thick layer of powdered sugar creates more dramatic contrast when the cracks form. Some bakers even do a double coating, rolling in powdered sugar, letting the balls sit for a minute to absorb some moisture, then rolling again for extra coverage.
Oven temperature consistency is crucial. If your oven runs hot or cold, your cookies will behave differently than expected. I strongly recommend using an oven thermometer to verify your actual temperature. An oven that's too hot will cause the cookies to spread and brown too quickly before they have a chance to puff and crack. An oven that's too cool will dry them out before the cracking can occur.
Don't open the oven door during the first eight minutes of baking. The temperature drop from opening the door can interrupt the rising process and affect how the cookies crack. Let them do their thing undisturbed, and only check them after the eight-minute mark when they should be starting to show those characteristic fissures.
The size of your dough balls affects the final texture significantly. Smaller cookies will bake through more completely and be slightly crispier, while larger cookies maintain a softer, more tender center. For that true melt-in-your-mouth quality, aim for dough balls that are about one and a half tablespoons in volume—this creates a cookie that's about three inches across after baking.
Finally, humidity in your environment can affect how much the powdered sugar coating adheres and how dramatically it cracks. On very humid days, you might want to increase your powdered sugar coating slightly or ensure your dough is extra cold before baking. The contrast between cold dough and hot oven helps create more dramatic temperature shock, which enhances the cracking pattern.
Flavor Variations to Try
While the classic springtime crinkle cookies that melt in your mouth are perfectly lovely with just citrus zest, this versatile base welcomes creative variations beautifully. For a more floral note that screams spring, add a teaspoon of rose water or orange blossom water to your wet ingredients. These delicate floral flavors complement the citrus beautifully and add an elegant, unexpected dimension.
Herb-infused versions work wonderfully too. Finely minced fresh lavender, rosemary, or thyme can be mixed into the dough for an sophisticated twist. Use these herbs sparingly—about one teaspoon of finely minced fresh herbs or half a teaspoon of dried is plenty. Too much and the cookies taste more like potpourri than pastry.
For a richer variation, replace the citrus zest with vanilla bean paste or the scraped seeds from one whole vanilla bean. This creates a more subtle, creamy flavor profile that lets the pure buttery taste shine through. The tiny black specks of vanilla bean seeds scattered throughout the dough also add visual interest.
Almond extract is another beautiful addition—use just half a teaspoon alongside your vanilla extract for a delicate almond undertone. If you go this route, consider rolling the cookies in a mixture of granulated sugar and finely chopped pistachios before the final powdered sugar coating. The nuts add a lovely textural element and a beautiful pale green color that's perfect for spring.
Coconut lovers can replace a quarter cup of the all-purpose flour with finely ground coconut flour for a subtle tropical note. Just be aware that coconut flour absorbs more moisture, so you may need to add a tablespoon of milk or cream to keep the dough at the right consistency.
Serving and Presenting These Beauties
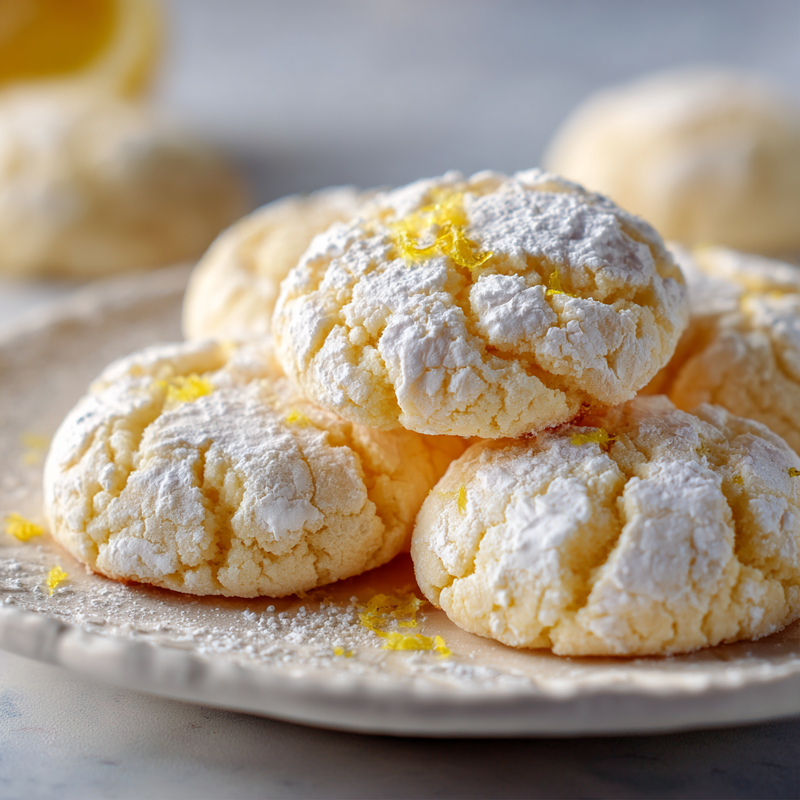
Springtime crinkle cookies that melt in your mouth deserve a presentation that shows off their delicate beauty. Arrange them on a simple white platter or cake stand where the crackled powdered sugar coating can be the star. Their natural elegance needs no embellishment, though a few fresh edible flowers scattered around the platter makes for a stunning springtime display.
These cookies pair beautifully with tea or coffee for afternoon gatherings. The light, citrusy flavor won't overwhelm more delicate teas like white tea, green tea, or herbal infusions. They're also lovely alongside fresh fruit—a bowl of strawberries or sliced melon complements their buttery sweetness perfectly.
For a more substantial dessert presentation, serve the cookies alongside lemon curd or a light citrus mousse. The cookies can be used almost like elegant spoons to scoop up the creamy accompaniment. This turns simple cookies into a plated dessert that feels much more special.
If you're packing these cookies for gifting or transport, handle them gently. They're quite tender and the powdered sugar coating can smudge if the cookies touch each other too much. Layer them in a tin or container with parchment paper between layers, and add a gentle shake of additional powdered sugar just before serving to refresh their snowy appearance.
Storage and Keeping Them Fresh
These springtime crinkle cookies that melt in your mouth maintain their tender texture remarkably well when stored properly. Once completely cooled, transfer them to an airtight container, layering parchment paper between each layer to prevent sticking. At room temperature, they'll stay fresh and tender for about five days, though they rarely last that long in my kitchen.
The powdered sugar coating will absorb some moisture from the air over time, especially in humid climates. If your cookies lose their visual impact after a day or two, simply dust them with a fresh layer of powdered sugar through a fine-mesh sieve just before serving. This takes thirty seconds and makes them look freshly baked.
You can freeze the baked cookies for up to three months if you want to make them ahead for a gathering. Arrange them in a single layer on a baking sheet and freeze until solid, then transfer to a freezer bag or container. This flash-freezing method prevents them from sticking together. Thaw at room temperature for about thirty minutes before serving.
Alternatively, you can freeze the shaped, sugar-coated dough balls on a baking sheet, then transfer the frozen balls to a freezer bag. When you want fresh cookies, bake them straight from frozen, adding an extra minute or two to the baking time. This is my favorite approach because you get that fresh-from-the-oven experience whenever the craving strikes.
The dough itself also freezes beautifully before shaping. Wrap the disk of dough tightly in plastic wrap, then place in a freezer bag. It will keep for up to three months. Thaw overnight in the refrigerator before shaping and baking.
Answers to Your Questions
Why did my cookies spread too much instead of staying puffy?
The most common culprit is dough that wasn't chilled long enough before baking. The butter needs to be firm so the cookies hold their shape in the initial heat of the oven. Make sure you're chilling the dough for at least one hour, and if your kitchen is very warm, chill the shaped and coated balls for another fifteen minutes before baking. Also check that you're measuring flour correctly—too little flour will cause excessive spreading.
Can I make these springtime crinkle cookies that melt in your mouth without citrus zest?
Absolutely, though the citrus does provide that characteristic bright spring flavor. You can replace it with vanilla bean paste, almond extract, or even a teaspoon of finely ground cardamom for a different but equally delicious flavor profile. The texture will remain exactly the same since the zest is primarily for flavor rather than structure.
My cookies didn't crack as dramatically as yours—what went wrong?
Dramatic cracks require a thick powdered sugar coating and a good temperature contrast between cold dough and hot oven. Make sure you're coating the dough balls very generously—the powdered sugar layer should be quite thick. Also, don't let the coated balls sit at room temperature for too long before baking. Get them into that hot oven while they're still cold, and make sure your oven has fully preheated to the correct temperature.
How do I prevent the cookies from sticking to the pan?
Parchment paper is your best friend here. It provides a non-stick surface without any grease that might cause the cookies to spread too much. If you don't have parchment, a silicone baking mat works well too. Avoid greasing the pan directly, as the additional fat changes how the cookies bake. If cookies do stick slightly, use a thin metal spatula and slide it gently under the cookie while they're still warm but after the five-minute rest period.
Can I double the recipe and bake multiple sheets at once?
You can absolutely double or even triple the recipe—the dough keeps well in the refrigerator for several days. However, I recommend baking only one sheet at a time in the center of the oven for the most even results. If you must bake two sheets simultaneously, position racks in the upper and lower thirds of the oven, rotate the pans halfway through baking, and expect slightly less uniform results. The cookies on the lower rack may brown more on the bottom.
What's the best way to get that melt-in-your-mouth texture?
The key is removing the cookies from the oven when they still look slightly underdone in the centers. They should be set around the edges with visible cracks across the surface, but the centers might look a bit soft still. They continue cooking on the hot pan after you remove them from the oven, and this residual cooking brings them to perfect doneness without overbaking. Overbaked cookies lose that tender, dissolving quality and become dry and crumbly instead.
Why These Cookies Are Perfect for Spring Gatherings
There's something about springtime crinkle cookies that melt in your mouth that feels inherently celebratory and fresh. Perhaps it's the light, buttery flavor that doesn't feel heavy after a meal. Or maybe it's the way their snowy powdered sugar coating evokes the last vestiges of winter giving way to warmer days. Whatever the reason, these cookies have become my go-to for spring gatherings, outdoor meals, and casual get-togethers.
They're sophisticated enough for more formal occasions but approachable enough that everyone feels comfortable reaching for one. The citrus notes feel bright and awakening after months of heavier winter flavors. And practically speaking, they're easy to eat outdoors without creating a huge mess—no frosting to melt, no chocolate to smudge, just tender cookies that disappear in a few delightful bites.
The visual appeal cannot be overstated either. Those crackled surfaces catch the light beautifully, and when you pile them on a platter, they look like a snowdrift of sweetness. They photograph beautifully too, which never hurts when you're sharing food with friends and family who might want to remember the occasion.
These cookies also scale beautifully for larger gatherings. The dough comes together quickly, and you can shape and coat dozens of cookies in less than thirty minutes. They bake relatively quickly too, so even if you're making multiple batches, you're not spending all day in the kitchen.
Finally, they're a wonderful cookie for bakers of all skill levels. There's no rolling and cutting, no piping, no complicated techniques. Just mixing, scooping, rolling, and baking. Yet the results look incredibly impressive and taste like they required far more effort than they actually did. That's the kind of recipe that earns a permanent spot in any baker's rotation.
Whether you're gathering with loved ones for a casual weekend meal, hosting a spring afternoon tea, or simply want to fill your cookie jar with something delightful, these springtime crinkle cookies that melt in your mouth deliver every time. They're proof that simple ingredients, handled with care and baked with attention, can create something truly special that brings joy to everyone who tries them.
Springtime Crinkle Cookies That Melt in Your Mouth
Light, tender crinkle cookies with bright citrus notes and a signature powdered sugar coating. These delicate cookies feature a melt-in-your-mouth texture and dramatic crackled appearance perfect for spring gatherings.
Prep Time
20 min
Cook Time
12 min
Total Time
92 min
Servings
24 cookies
Ingredients
For 24 cookies
- 1/2 cup (113g) unsalted butter, softened to room temperature
- 2 tablespoons neutral oil (vegetable or canola)
- 1 cup (200g) granulated sugar, plus 1/4 cup for rolling
- 1 large egg, at room temperature
- 1 large egg yolk, at room temperature
- 2 teaspoons vanilla extract
- 1 tablespoon lemon zest (from about 2 lemons)
- 1 3/4 cups (220g) all-purpose flour
- 2 tablespoons cornstarch
- 2 teaspoons baking powder
- 1/4 teaspoon salt
- 1 cup (120g) powdered sugar, for coating
Instructions
- 1
Cream butter and sugar
In a large mixing bowl, beat the softened butter, oil, and 1 cup granulated sugar together with an electric mixer on medium-high speed for 3-4 minutes until light and fluffy. The mixture should be pale in color and noticeably increased in volume, which incorporates air for a tender texture.
- 2
Add wet ingredients
Add the egg, egg yolk, vanilla extract, and lemon zest to the butter mixture. Beat on medium speed for about 1 minute until everything is well combined and the mixture looks smooth and creamy. Scrape down the sides of the bowl to ensure even mixing.
- 3
Combine dry ingredients
In a separate medium bowl, whisk together the flour, cornstarch, baking powder, and salt until evenly distributed. Whisking ensures the leavening is dispersed throughout the flour, which helps the cookies rise and crack uniformly.
- 4
Mix dough
Add the dry ingredients to the wet ingredients and mix on low speed just until no streaks of flour remain, about 30-45 seconds. Do not overmix, as this develops gluten and makes the cookies tough rather than tender. The dough will be quite soft at this stage.
- 5
Chill the dough
Cover the bowl with plastic wrap and refrigerate for at least 1 hour or up to overnight. Chilling firms up the fats so the cookies hold their shape better, allows the flour to fully hydrate, and makes the dough much easier to portion and roll into balls.
- 6
Prepare for baking
When ready to bake, preheat your oven to 350°F (175°C). Line two baking sheets with parchment paper. Place the remaining 1/4 cup granulated sugar in one small bowl and the powdered sugar in another small, deep bowl for easy rolling.
- 7
Shape and coat cookies
Using a cookie scoop or tablespoon, portion the chilled dough into balls about 1.5 tablespoons each. Roll each portion between your palms to create a smooth ball. First, roll each ball in the granulated sugar to coat lightly, then roll generously in the powdered sugar until completely covered with a thick white coating.
- 8
Arrange on baking sheets
Place the coated dough balls on the prepared baking sheets, spacing them about 2 inches apart to allow for spreading. You should fit about 12 cookies per standard baking sheet. The spacing is important for even heat circulation and prevents cookies from merging together.
- 9
Bake the cookies
Bake one sheet at a time in the center of the preheated oven for 10-12 minutes. The cookies are done when they've puffed up, developed characteristic cracks across the surface, and the edges are set and barely golden. The centers will still look slightly soft, which is correct—they continue cooking on the hot pan after removal.
- 10
Cool and serve
Let the cookies rest on the baking sheet for 5 minutes to set slightly, then carefully transfer them to a wire cooling rack using a thin spatula. Allow them to cool completely before storing. The cookies will firm up as they cool while maintaining their tender, melt-in-your-mouth texture throughout.
Nutrition Facts
Per serving (estimated)
120 calories
Calories
17g
Carbs
1g
Protein
6g
Fat
0g
Fiber
65mg
Sodium
11g
Sugar


