Spring Orzo Salad Recipe: Fresh, Light & Full of Flavor
This vibrant spring orzo salad combines tender pasta with crisp vegetables, herbs, and a zesty lemon dressing. Perfect for gatherings and meal prep!
cookwithlucia.com/recipes/spring-orzo-salad
There's something magical about the first warm days of the season when fresh vegetables start appearing at markets and you crave meals that feel light yet satisfying. That's exactly when a spring orzo salad becomes your best friend in the kitchen. This isn't just another pasta salad — it's a celebration of technique, texture, and timing that transforms tiny rice-shaped pasta into a dish that's equally at home at a family gathering or as your weekly meal prep hero.
What makes a truly exceptional spring orzo salad is understanding how to cook the pasta to that perfect tender-but-firm texture, how to build layers of flavor through proper seasoning at each stage, and how to balance the dish so every bite delivers crunch, creaminess, and brightness. Many cooks struggle with pasta salads that turn gummy or bland, but once you grasp the fundamental principles — proper pasta cooking, strategic cooling, and thoughtful dressing application — you'll find yourself making variations of this dish all season long.
The beauty of mastering this spring orzo salad lies in its versatility. Learn the core technique once, and you can adapt it endlessly based on what's fresh, what you're craving, or who you're feeding. The method I'm sharing today focuses on the science of pasta salad success, the precise timing that keeps vegetables crisp, and the flavor-building steps that make each component shine. Whether you're new to cooking or looking to refine your approach, this guide will give you the confidence to create a spring orzo salad that disappears from the bowl every single time.

The Science Behind the Method
Understanding what happens when you cook orzo transforms this from following a recipe to truly cooking with confidence. Orzo is a pasta shape that behaves differently from longer noodles because of its small size and high surface area. When you boil it in well-salted water, the starches on the exterior begin to gelatinize while the interior cooks through. The key to perfect spring orzo salad texture is stopping the cooking at precisely the right moment — when there's still a slight resistance at the center — because the pasta will continue softening slightly as it cools.
The cooling process itself is crucial science. When you rinse cooked orzo under cold water, you're not just lowering the temperature — you're washing away excess surface starch that would otherwise cause clumping as the pasta sits. This is one of the few times rinsing pasta is actually recommended, because unlike a hot pasta dish where that starch helps sauce cling, a cold salad needs each grain of orzo to remain distinct and separate.
The emulsification of your dressing is another scientific principle at work. When you whisk together oil and an acidic component like lemon juice with a bit of mustard or honey, you're creating a temporary suspension where tiny oil droplets are dispersed throughout the liquid. This coating distributes flavor evenly across every piece of orzo and vegetable. Finally, understanding salt's role in drawing out moisture from vegetables helps you decide when to add them — cucumbers and tomatoes added too early will weep and make your spring orzo salad watery, while heartier vegetables can marinate longer for deeper flavor.
Tools and Ingredients You'll Need
The right equipment makes preparing a spring orzo salad significantly easier and more enjoyable. You'll need a large pot with at least a 4-quart capacity for cooking the orzo — the pasta needs plenty of room to move freely in boiling water to cook evenly. A fine-mesh strainer is essential because orzo's small size means it can slip through the holes of a standard colander. If you don't have one, you can line a regular colander with cheesecloth or a clean kitchen towel.
For mixing, a large bowl with plenty of room to toss without spilling is crucial. I recommend a bowl that seems almost too big — you want space to fold ingredients gently without crushing delicate vegetables or herbs. A good whisk or a jar with a tight-fitting lid works perfectly for emulsifying your dressing. Some cooks prefer a jar because you can shake vigorously and then store any leftover dressing right in the same container.
For ingredients, start with quality orzo pasta — look for brands made from durum wheat semolina, which holds its shape better than softer wheat varieties. Your vegetables should be the freshest you can find: crisp asparagus or snap peas, firm cucumbers, ripe but not mushy cherry tomatoes, and vibrant herbs with no wilting or dark spots. The olive oil you choose matters significantly in a spring orzo salad since it's a prominent flavor — select something fruity and peppery rather than a mild refined oil.
Fresh lemons are non-negotiable for the brightness that defines this dish. Bottled lemon juice simply doesn't provide the same aromatic oils and complex acidity. For cheese, if you're including it, look for high-quality aged varieties that add a sharp, salty punch without overwhelming the fresh vegetable flavors. Keep in mind that a little goes a long way when the cheese is properly aged and flavorful.
The Method, Step by Step
Begin by bringing a large pot of water to a rolling boil — you want about 4 quarts of water for every pound of orzo. This generous water-to-pasta ratio prevents the orzo from becoming sticky and ensures even cooking. Once the water reaches a vigorous boil, add salt generously — the water should taste like the sea, about 2 tablespoons for a large pot. This is your only opportunity to season the pasta itself from the inside, so don't be timid.
Add the orzo to the boiling water and stir immediately to prevent it from settling to the bottom and clumping. Set a timer for 2 minutes less than the package directions suggest, because you want to catch the pasta at the perfect al dente stage. Stir occasionally during cooking, especially in the first few minutes when the starches are most likely to cause sticking. Watch for the orzo to become tender but with a slight firmness in the center — this typically takes 7-9 minutes depending on the brand.
When the timer goes off, taste a few pieces of orzo from different parts of the pot to ensure even cooking. The texture should offer gentle resistance without being chalky or hard in the center. Immediately drain the orzo in your fine-mesh strainer and rinse thoroughly under cold running water, using your hands to gently toss the pasta so the water reaches every piece. This stops the cooking instantly and removes the surface starch. Continue rinsing until the orzo feels cool to the touch and the water runs clear.
While the orzo drains completely — give it a good shake and let it sit for a few minutes — prepare your vegetables. For asparagus or snap peas, blanch them briefly in boiling water for 60-90 seconds, then plunge into ice water to preserve their vibrant color and crisp texture. Dice cucumbers, halve cherry tomatoes, and chop your fresh herbs just before assembling so they don't oxidize or wilt. The timing here matters: vegetables cut too far in advance lose their fresh flavor and crisp texture.
In a small bowl or jar, whisk together your dressing components: fresh lemon juice, olive oil, minced garlic, a touch of honey or sugar to balance the acidity, salt, and pepper. Whisk vigorously for 30-45 seconds until the mixture looks creamy and emulsified rather than separated into distinct layers. Taste and adjust — the dressing should be slightly more assertive than seems right on its own because it will mellow when coating all the other ingredients in your spring orzo salad.
Transfer the cooled, drained orzo to your large mixing bowl and drizzle about half the dressing over it, tossing gently but thoroughly. This initial dressing allows the pasta to absorb flavors while you finish prep. Add your prepared vegetables, starting with heartier items like blanched asparagus and moving to more delicate ingredients like herbs and tomatoes. Pour the remaining dressing over everything and fold gently with a large spoon or your hands, lifting from the bottom to ensure even distribution without crushing anything.
Taste your spring orzo salad at this point and adjust seasoning. Cold foods need more salt and acid than hot dishes, so be bold with both lemon juice and salt. Let the salad rest for at least 15 minutes before serving — this resting period allows flavors to marry and the orzo to absorb some of the dressing. Right before serving, give it one final gentle toss and add any delicate garnishes like fresh herbs or a sprinkle of cheese if you're using it.
Troubleshooting Guide
If your spring orzo salad turns gummy or clumpy, the culprit is usually inadequate rinsing after cooking or not enough dressing. The starch on the pasta's surface becomes sticky as it cools, so you need that cold water rinse to wash it away. If you notice clumping after mixing, drizzle in a bit more olive oil and a splash of cold water, then toss thoroughly. The water helps loosen the pasta while the oil provides slip to keep pieces separate.
When your salad tastes bland despite following measurements, remember that cold dishes require more aggressive seasoning than hot ones. Our taste buds perceive salt and acid less intensely at cooler temperatures, so your spring orzo salad needs what might seem like too much lemon juice and salt when you're mixing it. Always taste after the salad has chilled and adjust again before serving. Don't be afraid to add another squeeze of lemon or pinch of salt at the last moment.
If vegetables release too much water and make the salad soupy, you've likely added watery vegetables too early or didn't seed tomatoes and cucumbers properly. For future batches, remove the seeds from cucumbers and tomatoes before dicing, and add these moisture-rich vegetables closer to serving time. If your salad is already watery, you can drain off excess liquid and refresh with a bit more dressing and a handful of fresh herbs to brighten it back up.
Overcooked, mushy orzo is unfortunately difficult to fix after the fact, but it teaches an important lesson for next time. Set your timer for less time than the package suggests, and remember that tiny pasta shapes like orzo continue cooking from residual heat even after draining. If you've overcooked your current batch, the best approach is to use it in a different application — blend it into a soup or bake it into a casserole where the softer texture won't be as noticeable.
If your spring orzo salad loses its vibrancy after a day in the refrigerator, with colors dulling and flavors fading, this is normal but preventable. Store your most delicate ingredients separately — keep fresh herbs, cheese, and any crunchy toppings in small containers and add them just before serving. The dressed pasta and heartier vegetables can stay together, but give everything a refresh with fresh lemon juice, a drizzle of olive oil, and those fresh toppings before bringing it to the table.
Taking It to the Next Level
Once you've mastered the basic spring orzo salad technique, there are numerous ways to elevate the dish for more sophisticated palates or special occasions. Consider toasting your orzo before boiling it — heat the dry pasta in a skillet with a bit of oil until golden and nutty-smelling, then cook as usual. This adds a deeper, more complex flavor dimension that makes people wonder what your secret ingredient is.
Infuse your dressing oil for an aromatic upgrade. Gently warm olive oil with smashed garlic cloves, lemon zest, or fresh herb sprigs, then let it cool completely before making your dressing. The subtle infusion adds layers of flavor without overwhelming the fresh vegetable tastes. You can also experiment with compound finishing touches like a drizzle of aged balsamic reduction or a sprinkle of toasted pine nuts or sliced almonds for textural contrast.
For a restaurant-quality presentation, compose your spring orzo salad rather than just mixing it. Use a ring mold to create a neat cylinder of the orzo mixture on individual plates, then arrange your most beautiful vegetable pieces and herb leaves artfully on top and around the base. A final flourish of microgreens, edible flowers, or a delicate drizzle of herb oil makes it photo-worthy. The technique remains the same, but the thoughtful presentation elevates the perceived effort and sophistication of the dish.
Storing Your Results
Proper storage ensures your spring orzo salad stays fresh and delicious for several days, making it an excellent meal-prep option. Transfer the salad to an airtight container, pressing a piece of plastic wrap directly against the surface before sealing the lid. This prevents air exposure which can dry out the pasta and oxidize fresh herbs. Stored this way in the refrigerator, your spring orzo salad will maintain good quality for 3-4 days.
Keep in mind that the texture and flavor will evolve as it sits. The orzo will continue to absorb dressing, so what seems perfectly dressed on day one might taste drier by day three. I recommend reserving about a quarter of your dressing in a separate small jar and adding a spoonful or two each time you serve the salad throughout the week. This keeps it tasting fresh and vibrant rather than tired and dried out.
If you're making your spring orzo salad ahead for a gathering, prepare the components separately up to a day in advance. Keep the cooked and cooled orzo in one container with just a light coating of oil to prevent sticking, store cut vegetables separately, and make the dressing in a jar. Combine everything 2-4 hours before serving for the best texture and flavor. This approach gives you all the convenience of advance preparation without sacrificing quality.
Freezing is not recommended for spring orzo salad as the vegetables will become watery and limp upon thawing, and the pasta texture will deteriorate. This is truly a fresh preparation that shines when served within a few days of making. If you find yourself with more salad than you can eat, consider transforming leftovers by heating them gently and adding broth to create a quick soup, which handles the textural changes better than trying to serve it cold.
Common Questions
Can I make spring orzo salad without blanching the vegetables?
Absolutely, though blanching offers specific benefits for certain vegetables. Blanching asparagus, snap peas, or green beans sets their vibrant color, making them visually stunning in your spring orzo salad while keeping them crisp-tender rather than raw and tough. However, if you prefer the crunch of raw vegetables or want to save time, simply slice firmer vegetables very thin so they're easier to eat. Cucumbers, bell peppers, and cherry tomatoes are always fine to add raw.
What if I don't have fresh lemons for the dressing?
Fresh lemon juice truly makes a significant difference in a spring orzo salad because of the aromatic oils in the zest and the bright, complex acidity of fresh juice. If you're in a pinch, you can substitute with a combination of white vinegar or apple cider vinegar plus a small amount of orange juice to mimic the fruity sweetness of lemon. Use about two-thirds the amount of vinegar since it's more intensely acidic, and add the orange juice to taste. The result won't be identical but will still be delicious.
How do I scale this recipe for a large crowd?
Scaling a spring orzo salad is straightforward, but remember that very large batches require some technique adjustments. Cook the orzo in multiple smaller batches rather than one enormous pot — this ensures even cooking and makes rinsing manageable. For the dressing, mix it in a blender or food processor when making large quantities to achieve proper emulsification. Dress the salad in batches too, as mixing 5 pounds of salad in a single bowl often means uneven distribution. A large roasting pan can work as a mixing vessel when bowls aren't big enough.
Can I make spring orzo salad warm instead of cold?
You certainly can, though it becomes a different dish with different strengths. Skip the rinsing step and toss the hot drained orzo immediately with your dressing, allowing the pasta to absorb more flavor. Warm orzo pairs beautifully with wilted greens, roasted vegetables, and more robust flavors. However, it won't have the refreshing quality that makes a cold spring orzo salad perfect for warm weather. Consider it a cool-season variation of the same technique, ideal for cozy evenings when you want something comforting but still vegetable-forward.
Why does my orzo salad dry out in the refrigerator?
Orzo continues absorbing liquid as it sits, which is why your spring orzo salad seems perfectly dressed when first mixed but dry the next day. This is normal starch behavior. Combat it by slightly overdressing the salad initially if you know it'll be stored, or by reserving extra dressing to refresh it before serving. Another trick is to add a splash of cold water along with extra dressing when reviving leftovers — the water helps redistribute the dressing throughout the pasta without making it greasy.
What herbs work best in spring orzo salad?
The most successful herbs are those with bright, fresh flavors that complement rather than overpower delicate spring vegetables. Basil, parsley, dill, and mint are all excellent choices for your spring orzo salad, each bringing a different character. Basil adds sweetness, parsley offers clean freshness, dill provides a subtle anise note, and mint brings coolness. You can use a single herb or combine two or three for complexity. Add tender herbs like basil and mint just before serving, while sturdier parsley and dill can go in earlier without wilting.
Mastering a spring orzo salad means understanding the interplay between properly cooked pasta, strategic seasoning, and fresh ingredient selection. The technique is accessible to cooks at any level, yet offers enough depth to keep you discovering new variations and refinements for years to come. When you nail that perfect balance of tender pasta, crisp vegetables, and bright citrusy dressing, you'll understand why this dish appears at gatherings all season long and becomes a weekly staple in so many kitchens. The beauty lies not just in the flavors but in the confidence you'll gain from understanding exactly why each step matters and how to adapt the method to whatever fresh ingredients inspire you at the market.
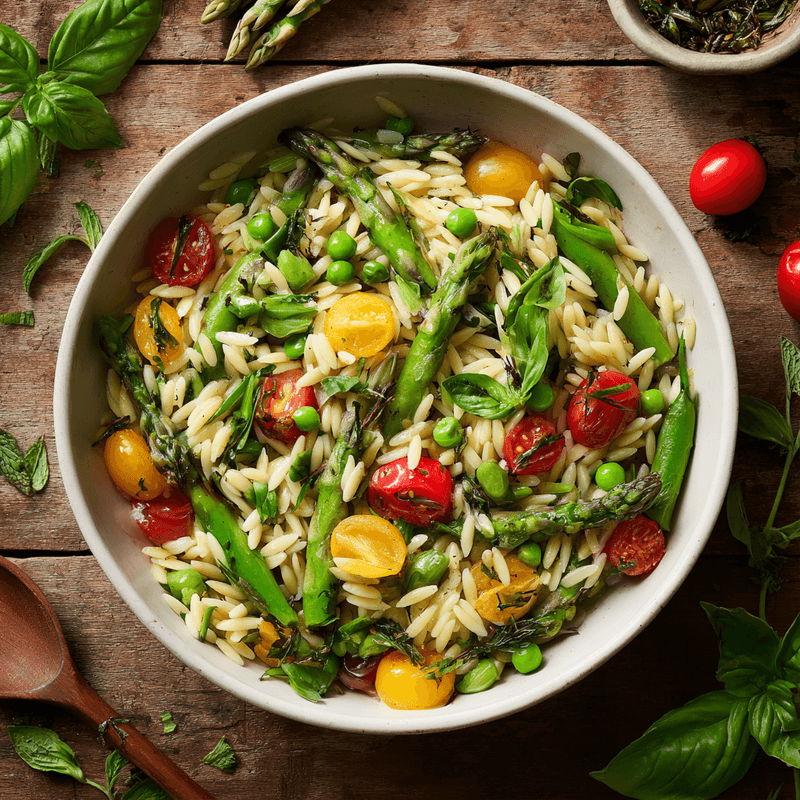
Spring Orzo Salad
A vibrant pasta salad featuring tender orzo, crisp spring vegetables, fresh herbs, and a bright lemon dressing. Perfect for gatherings and meal prep.
Prep Time
20 min
Cook Time
10 min
Total Time
30 min
Servings
6 servings
Ingredients
For 6 servings
- 1 pound orzo pasta
- 2 tablespoons salt for pasta water
- 1 bunch asparagus (about 1 pound), trimmed and cut into 1-inch pieces
- 1 cup snap peas, trimmed and halved
- 1 pint cherry tomatoes, halved
- 1 English cucumber, seeded and diced
- 1/2 cup fresh basil leaves, chopped
- 1/4 cup fresh mint leaves, chopped
- 1/4 cup fresh parsley, chopped
- 1/3 cup extra virgin olive oil
- 1/4 cup fresh lemon juice (about 2 lemons)
- 2 cloves garlic, minced
- 1 teaspoon honey
- 1 teaspoon salt, plus more to taste
- 1/2 teaspoon black pepper
- 1/2 cup crumbled cheese (optional)
- 1/4 cup toasted pine nuts or sliced almonds (optional)
Instructions
- 1
Boil pasta water
Bring a large pot with 4 quarts of water to a rolling boil over high heat. Add 2 tablespoons of salt to the water — it should taste like the sea. This is your only opportunity to season the pasta from within, so be generous with the salt.
- 2
Cook the orzo
Add the orzo to the boiling salted water and stir immediately to prevent clumping. Cook for 7-9 minutes, stirring occasionally, until the pasta is al dente with a slight firmness in the center. Set a timer for 2 minutes less than package directions and taste test to ensure you don't overcook.
- 3
Rinse and cool pasta
Drain the orzo in a fine-mesh strainer and immediately rinse under cold running water, tossing with your hands to ensure every piece gets rinsed. Continue rinsing until the orzo is completely cool and the water runs clear, removing excess starch. Let drain thoroughly for several minutes.
- 4
Blanch spring vegetables
In the same pot of boiling water, blanch the asparagus pieces and snap peas for 60-90 seconds until bright green and crisp-tender. Immediately transfer to a bowl of ice water to stop the cooking and preserve their vibrant color. Drain and pat completely dry.
- 5
Make the dressing
In a small bowl or jar with a tight lid, combine the olive oil, fresh lemon juice, minced garlic, honey, salt, and pepper. Whisk vigorously for 30-45 seconds or shake in the jar until the dressing is emulsified and creamy rather than separated. Taste and adjust seasoning — it should be slightly more assertive than you think necessary.
- 6
Dress the orzo
Transfer the cooled, drained orzo to a large mixing bowl. Pour about half of the dressing over the pasta and toss gently but thoroughly to coat every piece. This initial dressing allows the pasta to absorb flavor while you finish preparing the other ingredients.
- 7
Add vegetables and herbs
Add the blanched asparagus and snap peas, halved cherry tomatoes, diced cucumber, and all the fresh chopped herbs to the dressed orzo. Pour the remaining dressing over everything and fold gently from the bottom, lifting to distribute evenly without crushing the vegetables.
- 8
Season and rest
Taste the salad and adjust seasoning with additional salt, pepper, or lemon juice as needed — remember that cold foods need more seasoning than hot dishes. Let the salad rest for at least 15 minutes at room temperature to allow flavors to marry.
- 9
Final touches and serve
Just before serving, give the salad one final gentle toss and taste again, adjusting seasoning if needed. If using cheese, sprinkle it over the top along with toasted nuts if desired. Garnish with extra fresh herbs for a beautiful presentation. Serve immediately or refrigerate until ready to serve.
Nutrition Facts
Per serving (estimated)
385 calories
Calories
52g
Carbs
11g
Protein
15g
Fat
4g
Fiber
520mg
Sodium
5g
Sugar


