
Soft and Chewy Spring Cookies Recipe
Learn how to make perfectly soft and chewy spring cookies with pastel icing. Easy recipe with foolproof tips for bakery-style cookies every time.
cookwithlucia.com/recipes/soft-and-chewy-easter-cookies
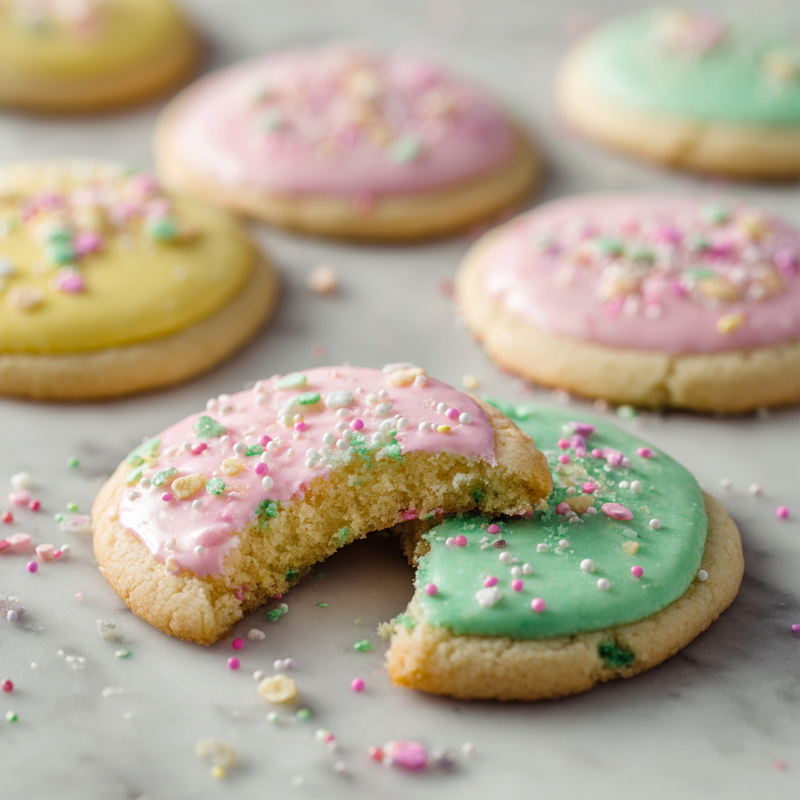
There's something magical about the moment a cookie breaks apart in your hands, revealing that perfect soft, chewy center while the slightest crisp edge gives way under your fingers. The aroma of vanilla and butter filling your kitchen, the sight of pastel colors brightening your counter, the anticipation of that first warm bite—these are the simple joys that make baking worthwhile.
I've spent years perfecting my approach to soft and chewy spring cookies, tweaking ratios and testing techniques until I found the formula that delivers bakery-quality results every single time. What makes these cookies truly special is their texture: they stay incredibly soft for days, with edges that have just enough structure to hold a generous layer of sweet icing, while the centers remain pillowy and tender. The delicate vanilla flavor provides the perfect canvas for vibrant pastel glazes that make these cookies as beautiful as they are delicious.
In this comprehensive guide, you'll learn exactly how to achieve that coveted soft and chewy texture, discover the science behind each ingredient choice, and master the simple techniques that transform ordinary cookies into something extraordinary. Whether you're baking for a family gathering, a weekend brunch, or simply because you deserve something sweet, these soft and chewy spring cookies will become your go-to recipe for any occasion that calls for a touch of sweetness and color.
The Story Behind This Dish
Soft sugar cookies decorated with colorful icing have been a beloved tradition in American home baking for generations, with roots tracing back to European butter cookies that traveled across the Atlantic with immigrant families. These tender, cake-like cookies became particularly popular in the mid-20th century when home bakers discovered that a slightly different ratio of ingredients could create a softer, more substantial cookie that held up beautifully under layers of icing.
What started as simple sugar cookies evolved into the decorated treats we cherish today, with home bakers adapting recipes to include ingredients like sour cream or cream cheese to achieve that signature soft texture. The beauty of homemade soft and chewy spring cookies lies in their versatility—you control the sweetness level, the quality of ingredients, and the intensity of flavor in ways that store-bought versions simply can't match.
Unlike the often-dry packaged cookies found in supermarkets, homemade versions stay fresh and tender for days when stored properly. The process of making these cookies from scratch also allows you to customize everything from the thickness to the icing flavors, creating a truly personal treat that reflects your own taste preferences.
What Makes This Recipe Special
Guaranteed Soft Texture: The secret combination of butter, vegetable oil, and sour cream creates cookies that stay soft and tender for up to a week, never turning dry or crumbly the way traditional sugar cookies often do.
No Chilling Required: Unlike many cookie recipes that demand hours of dough refrigeration, these soft and chewy spring cookies can go from mixing bowl to oven in minutes, making them perfect for spontaneous baking sessions or when you need a quick dessert solution.
Foolproof for Beginners: The dough is incredibly forgiving and easy to work with, requiring no special equipment beyond basic mixing tools and a cookie scoop. Even first-time bakers achieve professional-looking results.
Budget-Friendly Ingredients: Every component is a pantry staple, with no specialty items or expensive additions required. A single batch makes two to three dozen cookies depending on size, making these an economical choice for feeding crowds.
Perfect Icing Canvas: The smooth, flat surface and sturdy texture of these cookies makes them ideal for decorating with pastel glazes, sprinkles, or simple dustings of colored sugar. The cookies won't crack or crumble under the weight of generous icing layers.
Customizable Flavors: While vanilla provides a classic base, the recipe adapts beautifully to almond extract, lemon zest, or even cardamom for those who want to experiment with different flavor profiles.
Breaking Down the Ingredients
All-purpose flour forms the foundation of these soft and chewy spring cookies, providing just enough structure to hold their shape while remaining tender. I measure flour by spooning it into the measuring cup rather than scooping directly from the bag, which can compact the flour and lead to dense, tough cookies. The protein content in all-purpose flour strikes the perfect balance between cake flour's delicacy and bread flour's chewiness.
Granulated sugar does double duty here, sweetening the dough while also contributing to the cookies' texture through its interaction with the butter and eggs. As sugar dissolves during mixing, it creates tiny air pockets that help the cookies spread slightly and develop their characteristic soft crumb. I've tested these cookies with less sugar, but reducing it by more than a quarter cup affects both sweetness and texture.
Unsalted butter brings rich flavor and helps create tender cookies through its fat content, while vegetable oil adds moisture that keeps the cookies soft long after baking. This combination of solid and liquid fats is the real secret to achieving that bakery-style texture. Butter alone would make the cookies too crisp once cooled, while oil alone would make them greasy and flat.
Sour cream is the ingredient that truly sets these soft and chewy spring cookies apart from standard sugar cookies. Its acidity tenderizes the gluten in the flour while adding moisture and a subtle tang that balances the sweetness. Full-fat sour cream works best—low-fat versions contain more water and less fat, which can make the cookies spread too much.
Eggs bind everything together and contribute to the cake-like texture, while vanilla extract provides that classic cookie flavor we all crave. I use pure vanilla extract rather than imitation because the flavor is noticeably cleaner and more aromatic. Baking powder gives the cookies a gentle lift without making them puffy or cake-like, creating that perfect tender crumb.
Salt might seem like a minor player, but it's essential for enhancing all the other flavors and preventing the cookies from tasting flat or one-dimensional. Even a quarter teaspoon makes a significant difference in the final result.
The Cooking Process Explained
The journey to perfect soft and chewy spring cookies begins with properly creaming the butter and sugar together until the mixture becomes light and fluffy, which typically takes three to four minutes with an electric mixer. This process incorporates air into the dough and ensures the sugar dissolves properly, creating a better texture in the finished cookies. You'll know you've creamed long enough when the mixture lightens in color from yellow to pale cream and increases slightly in volume.
Once you add the egg, sour cream, oil, and vanilla, the mixture will look somewhat loose and almost curdled—this is completely normal and nothing to worry about. Mix just until everything combines into a smooth batter, scraping down the bowl sides to ensure even incorporation. At this stage, the mixture should smell wonderfully buttery and sweet with prominent vanilla notes.
When you add the dry ingredients, mix on low speed and stop as soon as you no longer see streaks of flour. Overmixing at this point develops too much gluten, which would make your soft and chewy spring cookies tough instead of tender. The finished dough will be thick, soft, and slightly sticky to the touch—much softer than traditional sugar cookie dough.
Using a cookie scoop ensures uniform size, which means all your cookies will bake evenly in the same amount of time. I use a medium scoop that holds about two tablespoons of dough, creating cookies that are substantial but not oversized. Space the dough balls at least two inches apart on your baking sheet because they will spread moderately during baking.
The cookies are done when the edges are set and very lightly golden, but the centers still look slightly underdone and soft. This usually takes nine to eleven minutes in a preheated oven, but start checking at the eight-minute mark because every oven is different. The cookies will continue cooking on the hot pan after you remove them from the oven, so pulling them out when they look barely done ensures they stay soft and chewy rather than becoming crisp.
Mistakes to Avoid
Don't skip measuring your flour properly—scooping directly from the bag compacts the flour and you'll end up with too much, resulting in dry, tough cookies instead of soft and chewy spring cookies. Always spoon flour into your measuring cup and level it off with a knife for accurate measurements.
Avoid overbaking these cookies even by a minute or two. The difference between perfectly soft and disappointingly dry is often just sixty seconds in the oven. Remember that the cookies continue to cook on the hot baking sheet after removal, so they should look barely set when you pull them out. The centers might even appear slightly glossy or wet—this is exactly what you want.
Don't try to frost or ice the cookies while they're still warm. The heat will melt the icing, causing it to become transparent and slide right off the cookies into a puddle. Let the cookies cool completely on a wire rack, which takes about thirty minutes, before decorating. Patient bakers are rewarded with beautifully decorated treats.
Resist the urge to flatten the dough balls before baking. These soft and chewy spring cookies are designed to spread naturally into the perfect shape as they bake. Pressing them down will cause them to spread too thin and become crispy rather than maintaining that desirable soft texture.
Don't store the cookies until the icing has fully set, which takes at least two hours and sometimes up to four hours depending on humidity levels. Stacking cookies with wet icing will create a sticky mess and ruin your beautiful decorating work. Test one cookie by gently touching the icing—if it doesn't leave a fingerprint, they're ready to stack and store.
How to Serve This
These soft and chewy spring cookies pair beautifully with a glass of cold milk, which provides a refreshing contrast to the sweet icing and helps cleanse your palate between bites. For weekend gatherings, arrange them on a tiered serving stand with fresh fruit and mild cheese for an elegant dessert spread that offers variety without overwhelming richness.
Serve them alongside mint tea or chamomile for an afternoon treat that feels special without being heavy. The delicate vanilla flavor of the cookies complements herbal teas particularly well, while the pastel colors create an appealing visual presentation on any table.
For family gatherings, create a cookie decorating station where everyone can add their own icing designs and sprinkles to plain, baked cookies. Set out small bowls of different colored icings, various sprinkles, and simple tools like small spoons or butter knives. This interactive dessert option keeps both children and adults entertained while creating personalized treats.
Plate individual soft and chewy spring cookies on small dessert dishes with a dollop of whipped cream and fresh berries for a more refined presentation. The contrast between the soft cookie, airy cream, and bright fruit creates a dessert that feels restaurant-worthy despite its simple components.
Pack them in clear cellophane bags tied with ribbons for gift-giving occasions, stacking three or four cookies per bag. The beautiful pastel colors show through the wrapping, and the soft texture means they'll still taste fresh and delicious when your recipients enjoy them a day or two later.
Make-Ahead and Storage Guide
Store completely cooled and fully decorated soft and chewy spring cookies in an airtight container at room temperature for up to seven days. Layer them between sheets of parchment paper to prevent sticking, and make sure the container seals tightly to maintain that soft, fresh texture. Adding a slice of bread to the container is an old baker's trick that helps keep cookies soft by providing a bit of moisture.
For longer storage, freeze unfrosted cookies in a single layer on a baking sheet until solid, then transfer them to freezer bags with as much air pressed out as possible. Frozen cookies maintain their quality for up to three months and can be thawed at room temperature in about thirty minutes. Ice them after thawing for the freshest appearance and best texture.
You can also freeze the cookie dough itself for ultimate convenience. Scoop the dough into balls, freeze them on a baking sheet until solid, then transfer to freezer bags. When you're ready to bake, place frozen dough balls on a baking sheet and add two to three extra minutes to the baking time—no thawing required. This method gives you fresh-baked soft and chewy spring cookies whenever the craving strikes.
If you've already decorated the cookies, they can be frozen, but the icing may develop slight condensation as they thaw, which can make colors bleed slightly. For best results with decorated cookies, freeze them in a single layer in rigid containers rather than bags to prevent the icing from getting damaged.
Refrigeration isn't ideal for these cookies because it can actually dry them out and make them firm. Room temperature storage in a proper airtight container keeps them at their best texture and flavor.
Reader Questions Answered
Can I make these cookies without sour cream?
You can substitute plain Greek yogurt in the same amount, which provides similar moisture and acidity. Avoid using regular yogurt as it's too thin and will make the dough too loose. The texture will be very close to the original, though the flavor might have a slightly different tang. Some bakers also use softened cream cheese, but this makes the dough more delicate and harder to work with.
How do I get perfectly smooth icing on my soft and chewy spring cookies?
The key is getting your icing consistency exactly right—it should be thick enough to stay on the cookie but thin enough to self-level. Add liquid one teaspoon at a time until the icing slowly drips from a spoon in a ribbon that disappears back into itself within ten seconds. Use a small offset spatula or the back of a spoon to spread it, working from the center outward. Let gravity do the work rather than overworking the icing.
Can I double this recipe for a large gathering?
Absolutely, this recipe doubles beautifully without any adjustments to ingredients or technique. Just make sure you have enough baking sheets and oven space, because you'll be baking multiple batches. The dough can sit at room temperature while you work through the batches without any issues. Most standard mixers can handle a double batch, though you may need to mix slightly longer to ensure everything incorporates properly.
What makes these cookies stay soft instead of getting crispy?
The combination of sour cream and vegetable oil creates moisture that doesn't evaporate during baking the way butter alone would. Additionally, pulling the cookies from the oven while they still look slightly underdone ensures they don't overbake. Proper storage in an airtight container prevents moisture loss over time. The ratio of ingredients in these soft and chewy spring cookies is specifically designed to create and maintain that tender texture.
Can I use this recipe to make cutout shapes instead of drop cookies?
While this dough is too soft for traditional cutout cookies, you can chill it for at least four hours or overnight to make it firm enough to roll. However, the texture will be slightly different from classic sugar cookies—softer and more cake-like. For true cutout cookies with crisp edges, a different recipe designed specifically for rolling would give better results. This recipe really shines as drop cookies.
How can I make these cookies less sweet for adults who don't like very sweet desserts?
Reduce the sugar in the cookie dough by up to one-quarter cup without significantly affecting texture, though they may spread slightly less. The bigger adjustment should be in the icing—use less of it, apply a thinner layer, or skip it entirely and simply dust the cooled soft and chewy spring cookies with a light sprinkle of powdered sugar. You could also use a cream cheese frosting instead of royal icing, which has a tangy flavor that balances sweetness.
Tips for Perfect Results Every Time
Room temperature ingredients mix together more easily and create a smoother, more uniform dough. Take your butter, eggs, and sour cream out of the refrigerator thirty minutes before you plan to start baking. Cold ingredients don't incorporate as well and can result in a streaky dough that bakes unevenly.
Invest in an oven thermometer if you don't already have one, because many home ovens run hotter or cooler than their dials indicate. A difference of even twenty-five degrees can mean the difference between perfectly soft and chewy spring cookies and ones that are either underbaked or too crisp. Check your oven temperature and adjust accordingly.
Use parchment paper or silicone baking mats on your baking sheets for the most even baking and easiest cleanup. These cookies can stick to ungreased pans, and greasing the pans can cause them to spread too much. Parchment provides the perfect nonstick surface while still allowing proper heat distribution.
Rotate your baking sheet halfway through the baking time to ensure even browning, especially if your oven has hot spots. Most ovens don't heat completely uniformly, and this simple step prevents one side of the cookies from becoming more golden than the other.
When making icing for your soft and chewy spring cookies, use gel food coloring rather than liquid food coloring. Gel colors are much more concentrated, so you need less to achieve vibrant pastels, and they don't thin out your icing the way liquid colors can. Start with just a tiny amount—you can always add more, but you can't take it away.
Troubleshooting Common Issues
If your cookies spread too much and turn out flat and thin, your dough was likely too warm or your oven temperature was too low. Make sure your butter is softened but not melted, and verify your oven temperature with a thermometer. You can also try chilling the dough for fifteen to twenty minutes before scooping if your kitchen is particularly warm.
Cookies that turn out dry and crumbly instead of soft usually indicate overbaking or too much flour. Remember that these soft and chewy spring cookies should look barely done when you remove them from the oven. Also double-check your flour measuring technique—spooning and leveling rather than scooping ensures you don't accidentally add too much.
If the centers of your cookies sink or crater as they cool, you may have undermixed the dough or used old baking powder that has lost its potency. Make sure your baking powder is fresh—it should fizz when mixed with hot water. Mix the dough thoroughly in the creaming stage to incorporate enough air.
Icing that's too thick and won't spread smoothly needs more liquid added one teaspoon at a time. Icing that's too thin and runs off the cookies needs more powdered sugar added in small amounts. Getting the consistency right is crucial for beautifully decorated soft and chewy spring cookies, so adjust patiently until it's perfect.
If your cookies taste bland or one-dimensional, you may have forgotten the salt or used imitation vanilla extract. These small ingredients make a huge difference in the overall flavor profile. Always use pure vanilla extract and don't skip the salt, even though it seems like a tiny amount.
Variations to Try
Add a quarter teaspoon of almond extract along with the vanilla for a subtle nutty undertone that pairs beautifully with the sweet icing. This small addition transforms the flavor profile without overwhelming the delicate vanilla base of these soft and chewy spring cookies.
Stir in the zest of one lemon or orange into the dough for a bright, citrusy variation that feels especially refreshing. The oils in the zest add incredible aroma and flavor without adding extra liquid that would affect the texture. Citrus versions pair wonderfully with fruit-flavored icings.
Fold in a half cup of sprinkles or mini chocolate chips into the finished dough for a confetti cookie variation that's festive and fun. Make sure to use jimmies-style sprinkles rather than nonpareils, which can bleed color into the dough. This creates a colorful cookie that doesn't require icing to look festive.
Create a brown sugar version by replacing half the granulated sugar with light brown sugar for deeper, more caramel-like flavor notes. These taste almost like soft snickerdoodles without the cinnamon coating. The molasses in brown sugar also helps keep the soft and chewy spring cookies even more tender.
Make sandwich cookies by spreading a thin layer of your favorite filling between two cookies—try cream cheese frosting, lemon curd, or even a simple buttercream. This creates an elegant presentation and adds another dimension of flavor and texture to the finished treat.
The Science of Soft Cookies
Understanding what makes cookies soft versus crispy helps you become a better baker overall. The ratio of fat to flour determines how much cookies spread and how tender they become. These soft and chewy spring cookies have a higher fat content from the combination of butter, oil, and sour cream, which creates that melt-in-your-mouth texture.
Moisture content is equally important—ingredients like sour cream add liquid that keeps the finished cookies soft even as they cool. Cookies with less moisture dry out quickly and become crisp or even hard within a day or two. The oil in this recipe also helps retain moisture because it doesn't solidify when cooled the way butter does.
Sugar plays a fascinating role beyond just sweetness. It's hygroscopic, meaning it attracts and holds moisture from the air, which helps keep baked goods soft over time. This is why properly stored cookies in an airtight container stay fresh for days—the sugar is continuously working to maintain moisture balance.
Baking time and temperature create the final texture distinction. Lower temperatures for longer times dry out cookies and make them crisp, while higher temperatures for shorter times create a set exterior with a soft interior. These soft and chewy spring cookies bake at a moderate temperature just long enough to set without drying out.
The type of flour also matters significantly. All-purpose flour has moderate protein content that creates some structure without making cookies tough. Bread flour would create chewier, denser cookies, while cake flour would make them too delicate and crumbly for icing.
Final Thoughts on Baking Success
Mastering soft and chewy spring cookies opens the door to countless baking variations and decorating possibilities. Once you understand the techniques and principles behind this recipe, you can adapt it to different flavors, shapes, and occasions throughout the year. The beauty of a truly good cookie recipe is its versatility and reliability.
Baking should bring joy, not stress, and this recipe delivers on that promise. The ingredients are simple and affordable, the method is straightforward enough for beginners, and the results are consistently excellent. Whether you're an experienced baker or just starting your baking journey, these cookies will reward your efforts with delicious results.
The most important ingredient in any recipe isn't listed in the instructions—it's the care and attention you bring to the process. Take your time measuring ingredients accurately, watch your cookies carefully as they bake, and don't rush the cooling or decorating stages. These small acts of patience make the difference between good cookies and truly exceptional ones.
Remember that baking is as much about the process as the final product. The time spent in your kitchen, the wonderful aromas filling your home, the satisfaction of creating something beautiful and delicious with your own hands—these experiences are just as valuable as the soft and chewy spring cookies themselves. Enjoy every moment of the journey, from measuring the first ingredient to savoring the last cookie.
I hope this recipe becomes a staple in your baking repertoire, bringing smiles to faces at family gatherings, weekend brunches, and cozy evenings at home. There's something deeply satisfying about sharing homemade treats with the people you care about, and these cookies are guaranteed to become a requested favorite. Happy baking, and may your kitchen always smell of vanilla and butter.
Soft and Chewy Spring Cookies
Pillowy soft sugar cookies with a tender, cake-like texture that stay fresh for days. Perfect for decorating with pastel icing for any springtime occasion.
Prep Time
15 min
Cook Time
11 min
Total Time
26 min
Servings
28 cookies
Ingredients
For 28 cookies
- 2 3/4 cups all-purpose flour, spooned and leveled
- 1 teaspoon baking powder
- 1/2 teaspoon salt
- 3/4 cup unsalted butter, softened to room temperature
- 1 1/4 cups granulated sugar
- 1 large egg, room temperature
- 1/3 cup sour cream, full-fat
- 1/4 cup vegetable oil
- 2 teaspoons pure vanilla extract
- 3 cups powdered sugar, for icing
- 3-4 tablespoons milk, for icing
- Gel food coloring in pastel colors, optional
Instructions
- 1
Preheat and prepare
Preheat your oven to 350°F (175°C). Line two large baking sheets with parchment paper or silicone baking mats. This ensures even baking and prevents the cookies from sticking.
- 2
Combine dry ingredients
In a medium bowl, whisk together the flour, baking powder, and salt until well combined. Set this mixture aside. Whisking ensures the leavening is evenly distributed throughout the flour.
- 3
Cream butter and sugar
In a large mixing bowl, beat the softened butter and granulated sugar together with an electric mixer on medium-high speed for 3-4 minutes. The mixture should become light, fluffy, and pale in color, which incorporates air for a better texture.
- 4
Add wet ingredients
Add the egg, sour cream, vegetable oil, and vanilla extract to the butter mixture. Beat on medium speed until everything is well combined and smooth, about 1-2 minutes. Scrape down the sides of the bowl as needed to ensure even mixing.
- 5
Mix in dry ingredients
With the mixer on low speed, gradually add the flour mixture to the wet ingredients. Mix just until no streaks of flour remain and the dough comes together. Avoid overmixing, which can make the cookies tough instead of tender.
- 6
Scoop cookie dough
Using a medium cookie scoop (about 2 tablespoons), scoop rounded balls of dough onto the prepared baking sheets. Space them about 2 inches apart to allow for spreading. The dough will be soft and slightly sticky.
- 7
Bake the cookies
Bake for 9-11 minutes, rotating the pan halfway through for even baking. The cookies are done when the edges are set and very lightly golden, but the centers still look soft and slightly underdone. They will continue to cook on the hot pan.
- 8
Cool completely
Allow the cookies to cool on the baking sheet for 5 minutes, then transfer them to a wire cooling rack to cool completely, about 30 minutes. The cookies must be completely cool before icing or they will melt the frosting.
- 9
Make the icing
In a medium bowl, whisk together the powdered sugar and 3 tablespoons of milk until smooth. Add more milk, one teaspoon at a time, until the icing reaches a spreadable consistency that slowly drips from a spoon. Divide into bowls and tint with gel food coloring if desired.
- 10
Decorate and set
Spread or pipe the icing onto the completely cooled cookies using a small offset spatula, knife, or piping bag. Add sprinkles if desired while the icing is still wet. Allow the icing to set completely for 2-4 hours before stacking or storing the cookies.
Nutrition Facts
Per serving (estimated)
165 calories
Calories
25g
Carbs
2g
Protein
7g
Fat
0.3g
Fiber
65mg
Sodium
16g
Sugar


