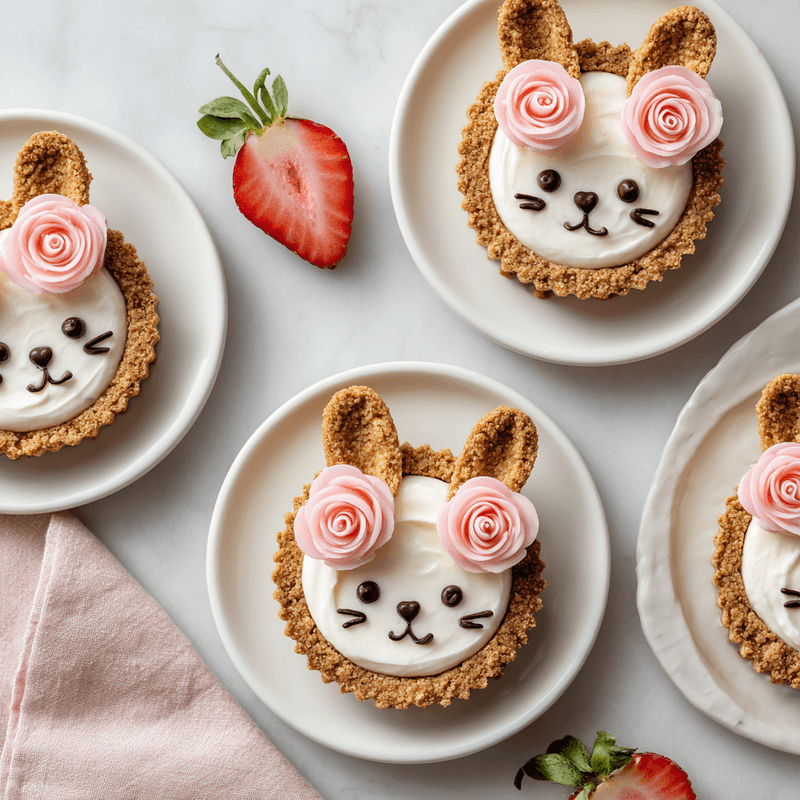
Miffy Strawberry Cheesecake Tartlets 🍓
Adorable Miffy Strawberry Cheesecake Tartlets with creamy filling and fresh berries. Easy no-bake dessert perfect for any gathering!
cookwithlucia.com/recipes/miffy-strawberry-cheesecake-tartlets
Let me be honest with you: nobody loves doing dishes. We all dream of elaborate desserts that wow our guests, but the thought of scrubbing multiple mixing bowls, pastry bags, and baking sheets makes us reach for store-bought treats instead. That's why these Miffy Strawberry Cheesecake Tartlets have become my go-to dessert when I want something absolutely adorable without the kitchen chaos.
These little bunny-shaped beauties combine everything I love about dessert: a buttery cookie crust that requires no rolling or baking, a silky no-bake cheesecake filling that comes together in minutes, and the bright pop of fresh strawberries that makes each bite feel like spring. The Miffy shape transforms simple cheesecake tartlets into something truly special, turning an ordinary dessert into an occasion. When you pull these from the refrigerator, with their sweet bunny faces peeking up from delicate tartlet shells, crowned with jewel-like strawberries, you'll get gasps of delight before anyone even takes a bite.
Here's my promise: you'll spend more time assembling these adorable Miffy Strawberry Cheesecake Tartlets than you will cleaning up afterward. One bowl for the crust, one for the filling, a handful of tools, and you're done. No oven preheating, no careful temperature monitoring, no anxiety about overbaking. Just simple mixing, patient chilling, and the pure joy of creating something that looks professionally crafted but feels completely achievable.

The Magic of No-Bake Cheesecake
There's something wonderfully freeing about no-bake desserts. Traditional baked cheesecakes demand precision: exact oven temperatures, water baths to prevent cracking, slow cooling periods to avoid collapse. They're beautiful, yes, but they're also nerve-wracking. No-bake cheesecake removes all that stress while delivering the same luxurious, creamy texture we crave.
The secret lies in the cream cheese itself. When you beat it until it's perfectly smooth and airy, then fold in whipped cream, you create a mousse-like filling that sets firm in the refrigerator without ever seeing the inside of an oven. The gelatin or cornstarch stabilizes everything, giving you clean slices that hold their shape beautifully. This method actually gives you more control over texture than baking does.
For these Miffy Strawberry Cheesecake Tartlets, the no-bake approach is essential. Individual tartlets would dry out in the oven, and getting that perfect creamy consistency in such small portions would be nearly impossible with heat. Cold setting gives you that silky, spoonable texture that melts on your tongue, creating the perfect contrast with the crisp cookie crust and fresh strawberry topping.
What Goes In
The beauty of Miffy Strawberry Cheesecake Tartlets lies in their simplicity. For the crust, you'll need digestive biscuits or graham crackers, melted butter, and just a touch of sugar. I crush mine in a food processor for the finest, most compact crumb, but a rolling pin and some frustration also work perfectly. The butter binds everything together, creating a crust that's sturdy enough to handle but tender enough to cut with just a fork.
The filling is where the magic happens. Full-fat cream cheese is non-negotiable here. Low-fat versions have too much moisture and not enough richness, resulting in a filling that weeps and never quite sets properly. You'll also need heavy cream for whipping, powdered sugar for sweetness without graininess, vanilla extract for depth, and a small amount of gelatin to ensure everything holds its shape when unmolded. Some recipes skip the gelatin, but for tartlets that need to stand tall and proud, it's your insurance policy.
Fresh strawberries are the crown jewels of these tartlets. Choose berries that are firm, bright red, and fragrant. Small to medium berries work better than giant ones, as they're easier to slice and arrange decoratively. You'll use them two ways: finely diced and folded into the filling for bursts of flavor throughout, and sliced or halved for the gorgeous topping that makes people reach for their phones before their forks.
For the Miffy decorations, you have options. White chocolate can be melted and piped to create the bunny face, or you can use mini chocolate chips for eyes and nose. A tiny piece of pink fondant or a sliver of strawberry creates that signature bunny mouth. The ears can be formed from sliced almonds, white chocolate pieces, or even additional strawberry slices for an all-fruit approach.
Assembly and Cooking
Start with your tartlet pans. I use individual 3-inch tart pans with removable bottoms, but you can also make these in a muffin tin lined with cupcake papers for an even easier cleanup. Lightly grease each pan, which makes unmolding effortless later. Mix your crushed cookies with melted butter until the mixture looks like wet sand and holds together when squeezed. Press about two tablespoons into each tartlet pan, using the back of a spoon or a small glass to create an even layer on the bottom and up the sides.
Pop those crusts into the refrigerator while you make the filling. This fifteen-minute chill firms up the butter, making the crusts sturdy enough to hold the creamy filling without getting soggy. Meanwhile, beat your cream cheese until it's absolutely silky. This takes longer than you think, usually three to four minutes on medium-high speed. Scrape down the bowl frequently. Any lumps now will be lumps in your finished tartlets.
Bloom your gelatin in cold water, then gently heat it until dissolved. Let it cool slightly so it doesn't scramble when mixed with the cream cheese. In a separate bowl, whip your heavy cream to stiff peaks. Fold the powdered sugar and vanilla into the cream cheese, then gently stream in the gelatin while mixing on low speed. Finally, fold in the whipped cream in three additions, being gentle to preserve all that airiness you just created.
Spoon or pipe the filling into your chilled crusts, filling each about three-quarters full. If you're adding diced strawberries to the filling, fold them in just before filling the tartlets. Smooth the tops with an offset spatula, then return everything to the refrigerator for at least four hours, or overnight. This patience is rewarded with tartlets that slice cleanly and taste incredibly luxurious.
Secrets for No-Bake Success
Temperature is everything in no-bake desserts. Every ingredient should be at room temperature before you begin, except the heavy cream, which whips best when cold. Room temperature cream cheese beats smooth without lumps, and room temperature gelatin incorporates without forming strings or clumps. Plan ahead and pull your cream cheese from the refrigerator an hour before you start.
When pressing the crust into your pans, aim for even thickness everywhere. Thin spots will crack when you unmold, and thick spots will be hard to cut through. I use the bottom of a shot glass to press the center, then my fingers to work the crumb up the sides. The crust should be firm but not compressed so hard it becomes rock-solid.
Don't skip the gelatin, even though many no-bake recipes claim it's optional. For these Miffy Strawberry Cheesecake Tartlets that need to be unmolded and hold their shape, gelatin is essential. Use unflavored gelatin and bloom it properly: sprinkle it over cold water and let it sit for five minutes until it looks wrinkled and absorbed. If you heat it too much, it loses its setting power, so just warm it until the granules dissolve.
Folding technique matters when you add the whipped cream. Use a large rubber spatula and cut down through the center of the mixture, scrape along the bottom, and bring the spatula up along the side, turning the bowl as you go. This preserves the air you worked to incorporate. Stirring or beating will deflate everything, giving you dense cheesecake instead of that ethereal, mousse-like texture.
When it's time to decorate, work quickly if you're using chocolate. White chocolate seizes easily, so melt it gently and use it immediately. For the strawberry arrangement, pat your berries completely dry. Any moisture will make your decorations slide around. Slice them uniformly and arrange them in overlapping circles for a rose effect, or create a simple Miffy face with strategic placement.
Rounding Out the Meal
These Miffy Strawberry Cheesecake Tartlets are rich and satisfying, so they pair beautifully with lighter beverages. Serve them alongside freshly brewed mint tea, which cuts through the richness and refreshes the palate between bites. For gatherings, set up a tea station with several herbal options and let guests choose their perfect pairing.
If you're serving these at a larger gathering, consider adding a fruit platter with additional strawberries, sliced kiwi, and fresh berries. The bright, clean flavors complement the creamy tartlets without competing for attention. A small bowl of extra strawberry sauce on the side lets guests add more fruit if they want it, and doubles as a beautiful accent on the serving plate.
For a complete dessert spread, add some simple butter cookies or shortbread alongside the tartlets. They provide textural variety and give guests options without requiring much additional work from you. The key is keeping everything light and fresh, letting these adorable Miffy Strawberry Cheesecake Tartlets remain the star of the show.
Leftovers and Next-Day Ideas
Store leftover tartlets in an airtight container in the refrigerator for up to three days. Place a piece of parchment paper between layers if you need to stack them, though they're so pretty you'll want to keep them visible on a single layer if possible. The crust will gradually soften in the refrigerator, but they'll still taste delicious.
These actually taste even better the next day, as all the flavors have time to meld together. The strawberries release a bit of their juice into the cream cheese filling, creating little pockets of concentrated berry flavor. If your decorations have slid or wilted, simply add fresh strawberry slices just before serving. Keep the components separate if you're making them more than a day ahead, assembling and decorating just before you need them.
If you have filling left over but no more crusts, spoon it into small glasses and top with crushed cookies and fresh berries for an instant parfait. Or spread it between layers of graham crackers and freeze for homemade ice cream sandwiches. The no-bake filling is incredibly versatile and forgiving, adapting to whatever serving vessel you have available.
Creating the Perfect Miffy Design
The Miffy character is beautifully simple, which makes these tartlets approachable even for decorating beginners. Start with a smooth, level surface on your cheesecake filling. This is your canvas. For the classic Miffy face, you need just a few elements: two dot eyes, an X-shaped mouth, and those iconic upright ears.
For the ears, you have several options depending on your skill level and available ingredients. White chocolate can be melted and piped onto parchment paper in ear shapes, then chilled and inserted into the top of each tartlet. Sliced almonds, positioned vertically, create instant bunny ears with no additional work. Or use two thin strawberry slices, which keeps everything fruit-forward and adds a lovely pink accent.
The face comes together with simple precision. Use mini chocolate chips for the eyes, positioning them evenly spaced in the upper half of the tartlet. For the X-shaped mouth, pipe melted dark chocolate in two crossing lines, or use tiny pieces of chocolate arranged in an X formation. Some decorators use black gel icing, which is easier to control for beginners and doesn't require melting or tempering.
Arrange your strawberry slices around the face to create a beautiful frame. Thin slices can be overlapped in a circular pattern, creating a rose-like effect that makes each Miffy Strawberry Cheesecake Tartlet look like a work of art. If you're short on time, simply place one perfect strawberry half on top and call it elegant minimalism. The Miffy face peeking out from beneath a strawberry crown is absolutely charming.
Scaling for a Crowd
These tartlets scale beautifully, making them perfect for gatherings large and small. The recipe can easily be doubled or tripled, and because they're individual portions, you don't have to worry about cutting and serving a large cheesecake while guests wait. Everyone gets their own perfect little dessert, complete with its own Miffy face smiling up at them.
For larger batches, work in stages. Make all your crusts first, chill them together, then prepare your filling in one large batch. An electric mixer makes quick work of even triple recipes. You can fill and chill all the tartlets at once if you have refrigerator space, or work in batches, filling one tray while another chills.
Consider setting up a decorating station if you're making these with family members or friends. Lay out all the components: the chilled tartlets, melted chocolate in piping bags, mini chocolate chips, sliced strawberries, and any other decorations you're using. Let everyone create their own Miffy face. Kids especially love this activity, and the slight variations in each bunny face add charm rather than looking like mistakes.
For truly large events, you can make these up to two days ahead. Prepare the tartlets completely but add the fresh strawberry topping just a few hours before serving to keep everything looking fresh and vibrant. Cover them loosely with plastic wrap, being careful not to touch the surface of the cheesecake, and refrigerate until needed.
The Joy of Themed Desserts
There's something special about themed desserts that goes beyond just taste. These Miffy Strawberry Cheesecake Tartlets transform a simple gathering into something memorable. The whimsy of the bunny faces makes people smile before they even taste the creamy filling and fresh strawberries. It's that emotional connection that makes food truly special.
Themed desserts also photograph beautifully, which matters in our visual world. These tartlets are inherently photogenic: the contrast between the golden crust, white filling, and red strawberries creates a color palette that pops. The Miffy faces add personality and charm. When you serve these at any gathering, expect phones to come out before forks do.
The Miffy character specifically brings a sense of gentleness and sweetness that perfectly matches the dessert itself. Unlike complex character designs that require advanced piping skills or specialized tools, Miffy's simple features are achievable for everyone. You don't need to be a professional decorator to make these look amazing. That accessibility is part of their appeal.
You can adapt the Miffy theme seasonally too. Add a tiny chocolate carrot next to each bunny for spring gatherings. Use different berries in summer, like a mix of strawberries, blueberries, and raspberries arranged around the face. The basic template of these cheesecake tartlets stays the same, but the decorations can shift with the seasons and your creativity.
Troubleshooting Common Issues
If your crust is crumbling when you try to unmold the tartlets, it needed more butter or wasn't pressed firmly enough. The mixture should hold together when squeezed before you press it into the pans. If it's too dry, add melted butter one teaspoon at a time until it reaches wet sand consistency. Press firmly and evenly, paying special attention to the corners where the bottom meets the sides.
A filling that won't set properly usually means the gelatin wasn't activated correctly or you didn't use enough. Make sure you bloom the gelatin in cold water for the full five minutes, then heat it gently until completely dissolved. If you live in a very warm climate, you might need to increase the gelatin slightly. Conversely, too much gelatin creates a rubbery texture, so measure carefully.
Cracks in the filling surface typically come from temperature shock. Don't put warm filling into cold crusts, and don't move the tartlets from refrigerator to warm room too quickly. Let them sit at room temperature for about ten minutes before serving, which also makes the flavors more pronounced. The filling should be perfectly smooth and crack-free if you've treated it gently.
If your Miffy decorations keep sliding off, the surface might be too warm or the filling too soft. Make sure your tartlets are completely chilled and set before decorating. Pat strawberries dry thoroughly. If using melted chocolate, let it cool slightly so it's not warm enough to melt the filling surface. Work quickly and return decorated tartlets to the refrigerator immediately to set everything in place.
Answers to Your Questions
Can I make these without gelatin?
You can make no-bake cheesecake without gelatin, but for tartlets that need to hold their shape when unmolded, I strongly recommend it. Without gelatin, the filling will be softer and more mousse-like, which works fine if you're serving them directly from their pans. For traditional Miffy Strawberry Cheesecake Tartlets that stand tall and proud, the gelatin provides essential structure. Vegetarian gelatin substitutes like agar-agar work well too, though they set firmer and require different proportions.
What size tartlet pans work best?
I use 3-inch tartlet pans with removable bottoms, which yield perfect individual portions. You can also use 4-inch pans for larger servings, or make these in a standard muffin tin if you don't have tartlet pans. For muffin tins, line them with cupcake papers for easy removal, though you lose the clean sides that make tartlet pans so elegant. Mini tartlet pans at 2 inches work for bite-sized versions, perfect for larger gatherings where you want more servings from the same amount of filling.
How do I prevent the crust from getting soggy?
The key is chilling your crust thoroughly before adding the filling, which sets the butter and creates a moisture barrier. Don't add any wet ingredients directly to the crust. If you're folding fruit into your filling, make sure it's patted completely dry first. You can also brush a thin layer of melted white chocolate onto the crust before filling, creating an impermeable layer that keeps everything crisp. These Miffy Strawberry Cheesecake Tartlets hold their texture beautifully when stored properly in the refrigerator.
Can I use frozen strawberries?
Fresh strawberries are really essential for both the filling and decoration, as frozen berries release too much moisture and become mushy when thawed. They'll make your filling watery and your decorations will slide right off. If fresh strawberries aren't available, consider using a different berry that is, or make a strawberry-free version and call them simply Miffy Cheesecake Tartlets. The dessert is delicious even without the strawberries, though they do add beautiful color and fresh flavor.
How far ahead can I make these?
You can make these Miffy Strawberry Cheesecake Tartlets up to two days ahead for the best texture and flavor. Prepare the crusts and filling, chill completely, but wait to add fresh strawberry decorations until the day you're serving. The strawberries stay brighter and firmer when added fresh. Store the finished tartlets covered in the refrigerator. You can freeze the unfilled crusts for up to a month, then thaw and fill them when needed, which makes last-minute desserts even easier.
What other fruits work well in this recipe?
While strawberries are classic for Miffy Strawberry Cheesecake Tartlets, you can adapt this recipe to any berry or soft fruit. Raspberries, blueberries, and blackberries all work beautifully folded into the filling and arranged on top. Sliced peaches or mango create a tropical version perfect for warm weather. Kiwi slices add gorgeous green color. You can even do mixed berries for a more complex flavor profile, though single fruits create the cleanest, most striking presentation that lets the Miffy design shine through.
Miffy Strawberry Cheesecake Tartlets
Adorable bunny-themed no-bake cheesecake tartlets with buttery cookie crust, silky cream cheese filling, and fresh strawberries. Perfect individual desserts for any gathering.
Prep Time
30 min
Cook Time
0 min
Total Time
4h 30m
Servings
12 tartlets
Ingredients
For 12 tartlets
- 2 cups digestive biscuits or graham crackers, finely crushed
- 6 tablespoons unsalted butter, melted
- 2 tablespoons granulated sugar
- 16 oz cream cheese, room temperature
- 1 cup heavy whipping cream, cold
- 3/4 cup powdered sugar
- 2 teaspoons vanilla extract
- 1 tablespoon unflavored gelatin powder
- 3 tablespoons cold water
- 1 1/2 cups fresh strawberries, divided (1 cup diced, 1/2 cup sliced for topping)
- 2 oz white chocolate, melted (for decorating)
- 24 mini chocolate chips (for eyes)
- 12 sliced almonds (for ears, optional)
Instructions
- 1
Prepare tartlet pans
Lightly grease twelve 3-inch tartlet pans with removable bottoms. Set them on a baking sheet for easy handling and refrigeration.
- 2
Make the crust
In a medium bowl, combine crushed biscuits, melted butter, and granulated sugar. Mix until the mixture resembles wet sand and holds together when squeezed. Press about 2 tablespoons into each tartlet pan, creating an even layer on the bottom and up the sides using the back of a spoon.
- 3
Chill the crusts
Place the baking sheet with all the tartlet pans in the refrigerator and chill for 15-20 minutes until the crusts are firm to the touch. This prevents sogginess when you add the filling.
- 4
Bloom the gelatin
Sprinkle gelatin powder over cold water in a small bowl and let it sit for 5 minutes until it looks wrinkled and absorbed. Microwave for 10-15 seconds or heat gently in a small saucepan until completely dissolved. Let cool slightly.
- 5
Beat the cream cheese
In a large bowl using an electric mixer, beat the room temperature cream cheese on medium-high speed for 3-4 minutes until completely smooth and fluffy. Scrape down the sides of the bowl frequently to ensure no lumps remain.
- 6
Add sugar and gelatin
Beat in the powdered sugar and vanilla extract until well combined. With the mixer on low speed, slowly stream in the dissolved gelatin, mixing just until incorporated throughout the cream cheese mixture.
- 7
Whip and fold cream
In a separate bowl, whip the cold heavy cream to stiff peaks. Gently fold the whipped cream into the cream cheese mixture in three additions, using a rubber spatula and cutting through the center, then scooping up the sides. Fold in the diced strawberries just until evenly distributed.
- 8
Fill the tartlets
Spoon or pipe the cheesecake filling into the chilled crusts, filling each about three-quarters full. Smooth the tops with an offset spatula or the back of a spoon to create an even surface for decorating.
- 9
Chill until set
Return the filled tartlets to the refrigerator and chill for at least 4 hours or overnight until completely set and firm. The filling should not jiggle when gently shaken.
- 10
Unmold the tartlets
Carefully remove the tartlets from their pans by pushing up from the bottom. If they stick, run a thin knife around the edges first. Place on your serving platter.
- 11
Create Miffy faces
Using melted white chocolate in a piping bag or toothpick, draw simple X-shaped mouths on each tartlet. Press two mini chocolate chips into each for eyes. Insert sliced almonds or white chocolate pieces at the top for ears.
- 12
Add strawberry topping
Arrange sliced strawberries around the Miffy face in a circular pattern or create a decorative crown on top. Pat strawberries dry before placing them to prevent sliding. Refrigerate until ready to serve, up to 4 hours after decorating.
Nutrition Facts
Per serving (estimated)
285 calories
Calories
28g
Carbs
4g
Protein
18g
Fat
1g
Fiber
165mg
Sodium
18g
Sugar


