Melt in Your Mouth Chicken Breast Recipe (So Tender!)
This melt in your mouth chicken breast is incredibly tender, juicy, and bursting with flavor. My foolproof method guarantees perfect results every time!
cookwithlucia.com/recipes/melt-in-your-mouth-chicken-breast
There's something absolutely magical about cutting into a perfectly cooked chicken breast and watching it release tender, juicy rivulets of flavor with every slice. That's exactly what you'll experience with this melt in your mouth chicken breast recipe. I'll never forget the first time I nailed this technique — it was during a hectic weeknight when I was determined to transform plain chicken into something extraordinary without spending hours in the kitchen. The result was so spectacularly tender that my family thought I'd been cooking all day. The secret lies in a simple combination of the right seasoning blend, a quick sear, and a gentle finishing technique that locks in every bit of moisture. This isn't your average dry, bland chicken breast that you have to drown in sauce just to make it palatable. Instead, this melt in your mouth chicken breast is so succulent and flavorful that it stands beautifully on its own, though it also serves as the perfect canvas for your favorite sauces and sides. Whether you're a beginner cook looking to master chicken or a seasoned home chef seeking a reliable weeknight winner, this recipe will become your go-to method. In this post, I'll walk you through every step of creating the most tender chicken you've ever made, share my best tips for avoiding common mistakes, and show you how to customize this dish to suit any occasion. Let me show you how easy it is to achieve restaurant-quality results right in your own kitchen.
What is Melt in Your Mouth Chicken Breast?
Ever wonder why restaurant chicken always seems more tender than what we make at home? The answer isn't some fancy culinary secret — it's all about technique and understanding how chicken behaves when cooked properly. Melt in your mouth chicken breast is exactly what it sounds like: chicken so tender and juicy that it practically dissolves on your tongue with minimal chewing. This cooking method originated from the need to transform one of the leanest, most affordable proteins into something luxuriously tender without adding excessive fats or complicated processes. The key lies in treating the chicken breast with respect — not overcooking it, ensuring proper seasoning penetration, and using a cooking method that keeps moisture locked inside. The flavor profile is beautifully balanced, with a golden, slightly caramelized exterior that gives way to incredibly moist, seasoned meat inside. What makes this particular approach stand out is the combination of a simple herb and spice coating that creates a flavorful crust while the gentle cooking method ensures the interior stays perfectly juicy. Whether you serve it sliced over salads, alongside roasted vegetables, or as the star of a complete dinner plate, this melt in your mouth chicken breast delivers every single time. Ready to discover how simple it really is?
Why You'll Love This Melt in Your Mouth Chicken Breast
Foolproof and beginner-friendly — This recipe eliminates all the guesswork from cooking chicken breast. The straightforward method ensures you'll never end up with dry, rubbery chicken again. Even if you've struggled with chicken in the past, this technique is so forgiving that you'll feel like a professional chef from your very first attempt. The visual cues I provide make it easy to know exactly when your chicken is perfectly done.
Incredibly budget-friendly — Chicken breast is one of the most economical proteins available, and this recipe transforms it into something that tastes like a premium restaurant dish. You're getting maximum flavor and tenderness from an ingredient that won't break the bank, making it perfect for feeding families or meal prepping for the week ahead without compromising on quality or taste.
Packed with bold, savory flavor — The seasoning blend creates a beautiful harmony of herbs and spices that penetrate deep into the meat. Unlike plain grilled chicken that needs heavy sauces, this melt in your mouth chicken breast is so well-seasoned and flavorful that it's absolutely delicious on its own. The golden exterior provides a slightly crispy texture contrast to the tender interior.
Remarkably versatile — This chicken works beautifully in countless dishes. Slice it for salads, dice it for pasta, serve it whole alongside your favorite sides, or use it in sandwiches and wraps. The neutral yet flavorful profile means it pairs well with virtually any cuisine style, from Mediterranean to Asian-inspired dishes.
Quick enough for weeknights — From start to finish, you'll have dinner on the table in under 30 minutes. This makes it perfect for those busy evenings when you want something homemade and delicious but don't have hours to spend in the kitchen. The active cooking time is minimal, giving you moments to prepare sides or simply relax.
Meal prep superstar — This melt in your mouth chicken breast stores exceptionally well and maintains its tender texture even after refrigeration. Make a batch on the weekend and you'll have protein ready for quick lunches and dinners throughout the week. It reheats beautifully without drying out, which is rare for chicken breast. Unlike those dry takeout chicken meals, this homemade version stays moist and flavorful day after day. Trust me, once you taste how tender and juicy this chicken is, you'll want to make it every single week!
Key Ingredients and What They Bring
The foundation of this melt in your mouth chicken breast starts with quality boneless, skinless chicken breasts themselves. I recommend choosing breasts that are similar in size and thickness for even cooking, ideally around six to eight ounces each. If your breasts are particularly thick, you'll want to pound them to an even thickness, which ensures they cook uniformly and stay tender throughout. The chicken provides a lean, protein-rich canvas that readily absorbs the flavors we'll be adding.
Olive oil plays a dual role in this recipe, acting as both a moisture barrier and a flavor conductor. It helps the seasonings adhere to the chicken while creating that beautiful golden crust during searing. The oil also prevents the exterior from drying out during cooking, contributing to the overall juicy texture. You can substitute with avocado oil if you prefer a higher smoke point, but olive oil provides a subtle fruity note that complements the herbs beautifully.
Garlic powder delivers a concentrated, mellow garlic flavor that distributes evenly across the chicken surface. Fresh garlic can burn during the searing process, but garlic powder provides that essential savory depth without the risk of bitterness. It's a key component in building layers of flavor that make this chicken so irresistible.
Paprika contributes a gentle sweetness and that gorgeous golden-red color to the chicken's exterior. I use sweet paprika rather than smoked for this recipe because it provides color and mild flavor without overpowering the other seasonings. The paprika also helps create a beautiful caramelization during cooking that adds visual appeal and a subtle complexity to each bite.
Dried Italian herbs — typically a blend of oregano, basil, thyme, and rosemary — bring an aromatic, slightly earthy quality that makes the chicken taste incredibly well-rounded. These herbs are classic for a reason: they complement poultry perfectly and create that comforting, homestyle flavor that makes this dish so appealing. The dried form is preferable here because it concentrates the flavors and won't burn as easily as fresh herbs would.
Salt and black pepper are non-negotiable for proper seasoning. Salt doesn't just add saltiness; it actually enhances the chicken's natural flavors and helps retain moisture during cooking. Black pepper provides a gentle heat and aromatic quality that rounds out the seasoning blend. Together, they ensure every bite of your melt in your mouth chicken breast is perfectly seasoned from edge to center.
Butter, added at the final stage, is the secret weapon for achieving that luxurious, melt-in-your-mouth quality. As it melts over the hot chicken, it creates a glossy finish and adds richness that takes the dish from good to absolutely spectacular. The butter also carries flavors beautifully and adds that restaurant-quality finish that makes this chicken truly special.
How to Make Melt in Your Mouth Chicken Breast — Quick Overview
The journey to perfect chicken begins with proper preparation. You'll start by patting your chicken breasts completely dry with paper towels, which is crucial for achieving a good sear and helping the seasonings stick properly. If your chicken breasts are uneven in thickness, gently pound them to about three-quarters of an inch thickness throughout. Then comes the fun part — creating your seasoning blend by mixing together the garlic powder, paprika, Italian herbs, salt, and pepper. Rub this mixture generously over both sides of each chicken breast, making sure to coat every surface. Let the seasoned chicken rest for a few minutes while you heat your skillet, allowing the seasonings to begin penetrating the meat.
The cooking process itself is beautifully straightforward. Heat olive oil in a heavy skillet over medium-high heat until it shimmers but doesn't smoke. Carefully place your chicken breasts in the pan, listening for that satisfying sizzle that tells you the heat is just right. Sear the chicken without moving it for about five to six minutes, allowing a golden crust to form. Flip the chicken just once, then reduce the heat to medium-low. This is where the magic happens — the gentle heat allows the chicken to finish cooking through without drying out the exterior. Add a pat of butter to the pan, letting it melt and baste over the chicken, infusing it with richness.
After about six to eight more minutes, your chicken will reach an internal temperature of 165°F and be perfectly cooked through. Remove the chicken from the heat and let it rest for five minutes before slicing. This resting period is absolutely essential — it allows the juices to redistribute throughout the meat rather than running out onto your cutting board. The entire process takes less than thirty minutes from start to finish, yet delivers results that will have everyone asking for your secret to such tender, flavorful chicken.
Top Tips for Perfecting Melt in Your Mouth Chicken Breast
Start with chicken that's been brought to room temperature for about fifteen to twenty minutes before cooking. Cold chicken straight from the refrigerator will cook unevenly, with the exterior overcooking before the center reaches a safe temperature. Room temperature chicken cooks more uniformly, resulting in that perfectly tender texture throughout. Simply remove your chicken from the fridge while you prepare your other ingredients and let it sit on the counter.
Invest in an instant-read meat thermometer if you don't already have one. This inexpensive tool is the difference between guessing and knowing with certainty that your melt in your mouth chicken breast is perfectly cooked. Insert it into the thickest part of the breast — when it reads 165°F, your chicken is done. This eliminates the risk of undercooking or, more commonly, overcooking your chicken into dryness.
Don't overcrowd your pan. If you're cooking multiple chicken breasts, make sure there's at least an inch of space between each piece. Overcrowding causes the temperature to drop and creates steam rather than a proper sear, which means you'll miss out on that golden crust and the chicken will essentially boil rather than sear. Cook in batches if necessary — it's worth the extra few minutes.
Resist the urge to flip your chicken multiple times or press down on it with your spatula. Moving the chicken constantly prevents proper browning and pressing it squeezes out precious juices. Place your chicken in the pan and leave it alone until it's time to flip. You'll know it's ready to flip when it releases easily from the pan — if it's sticking, it needs another minute or two.
Season generously and don't be shy with your spice mixture. Chicken breast is mild and lean, so it needs adequate seasoning to taste flavorful. The seasonings should coat the surface visibly — if you can see bare chicken, add more. Remember, some of the exterior seasoning will remain in the pan, so what looks like a lot initially will be perfect once cooked.
Choose the right pan for the job. A heavy-bottomed skillet, whether cast iron or stainless steel, distributes heat evenly and maintains temperature when you add the chicken. Thin pans create hot spots that lead to uneven cooking. If you only have one good pan, this is the recipe to use it for — it makes a noticeable difference in achieving that perfect golden crust.
Always let your chicken rest after cooking. I know it's tempting to cut right into that beautiful golden chicken, but patience pays off dramatically here. Those five minutes of resting allow the proteins to relax and the juices to redistribute, ensuring every slice of your melt in your mouth chicken breast is moist and tender rather than dry. Cover it loosely with foil during resting to keep it warm.
If your chicken breasts are particularly large or thick, consider butterflying them or slicing them horizontally to create thinner cutlets. Thinner pieces cook faster and more evenly, reducing the risk of a dried-out exterior before the center cooks through. This technique is especially helpful if you're working with those extra-large breasts that are increasingly common in stores.
Variations and Flavor Twists
For a Mediterranean-inspired version, swap the Italian herbs for a blend of oregano, thyme, and a touch of cumin, then add a squeeze of fresh lemon juice over the finished chicken. The bright citrus notes complement the herbs beautifully and add a refreshing quality that pairs wonderfully with grain salads or roasted vegetables. You can also add some crumbled feta cheese over the top after cooking for extra richness.
Create a spicy variation by adding cayenne pepper and chili powder to your seasoning blend, and finish the cooked chicken with a drizzle of hot sauce mixed with melted butter. This gives you a buffalo-style melt in your mouth chicken breast that's perfect for serving over salads or alongside cooling cucumber salad. Adjust the heat level to your preference — start with a quarter teaspoon of cayenne and increase from there.
Try a creamy mushroom version by removing the cooked chicken from the pan and using the remaining drippings to sauté sliced mushrooms with fresh thyme. Add a splash of chicken broth and a dollop of cream, then return the chicken to the pan to coat in the sauce. This transforms your simple chicken into an elegant dish worthy of special gatherings.
For an Asian-inspired twist, season your chicken with ground ginger, garlic powder, and a touch of five-spice powder instead of Italian herbs. After cooking, drizzle with a mixture of honey and soy sauce, and garnish with sliced green onions and sesame seeds. This version is incredible served over rice or alongside stir-fried vegetables.
Make it herb-crusted by pressing fresh chopped herbs like parsley, thyme, and rosemary into the seasoned chicken before cooking. The fresh herbs create a more pronounced, aromatic crust that's absolutely stunning. This variation is perfect when you want to impress guests but still keep the preparation simple and quick.
What to Serve with Melt in Your Mouth Chicken Breast
Creamy mashed potatoes are a classic pairing that never disappoints. The fluffy, buttery potatoes provide a comforting base that soaks up any juices from the chicken, and the textures complement each other perfectly. For a lighter option, try mashed cauliflower instead, which offers a similar creamy consistency with fewer carbohydrates and a subtle sweetness that doesn't compete with the chicken's flavors.
A crisp, fresh salad with mixed greens, cherry tomatoes, cucumber, and a light vinaigrette provides a refreshing contrast to the rich, savory chicken. The acidity in the dressing helps cut through the butter and oil in the chicken, creating a beautifully balanced meal. Slice your melt in your mouth chicken breast and arrange it over the salad for a complete lunch or light dinner.
Roasted vegetables are an excellent choice because they can cook in the oven while you prepare the chicken on the stovetop. Try roasted broccoli, carrots, Brussels sprouts, or asparagus tossed with olive oil, salt, and pepper. The caramelized edges of roasted vegetables echo the golden crust on the chicken, and their natural sweetness complements the savory seasoning perfectly.
Fluffy rice or seasoned couscous serves as a wonderful neutral base that absorbs the chicken's juices and helps make the meal more filling. You can keep it simple with plain rice or jazz it up with herbs, lemon zest, or toasted nuts. The mild flavor of rice allows the chicken to remain the star while adding substance to your plate.
Steamed or roasted green beans with almonds offer a light, crunchy side that adds color and nutrition to your plate. The beans provide a fresh, slightly sweet element, while the almonds add texture and a subtle nutty flavor that pairs wonderfully with the herbs in the chicken seasoning.
Warm, crusty bread is perfect for soaking up any pan juices or butter sauce remaining on your plate. There's something deeply satisfying about using good bread to capture every last bit of flavor. Choose a rustic loaf, dinner rolls, or even garlic bread to round out your meal and ensure nothing goes to waste.
Storing and Reheating Tips
Proper storage is key to maintaining the tender quality of your melt in your mouth chicken breast for future meals. Allow the cooked chicken to cool to room temperature, but don't leave it out for more than two hours to ensure food safety. Once cooled, transfer the chicken to an airtight container or wrap it tightly in plastic wrap or aluminum foil. Stored this way in the refrigerator, your chicken will stay fresh and delicious for up to four days. I like to keep mine whole if I'm planning to reheat and serve it as a main course, or slice it before storing if I'll be using it in salads or sandwiches.
For longer storage, freezing is an excellent option. Wrap each chicken breast individually in plastic wrap, then place them together in a freezer-safe bag or container. This individual wrapping prevents the pieces from sticking together and allows you to thaw only what you need. Properly frozen melt in your mouth chicken breast maintains its quality for up to three months. Label your container with the date so you can keep track of freshness. When you're ready to use frozen chicken, thaw it overnight in the refrigerator rather than at room temperature for food safety.
Reheating requires a gentle approach to preserve that tender texture. For the best results, reheat in the oven at 325°F. Place the chicken in a baking dish, add a tablespoon or two of chicken broth or water to create steam, and cover tightly with foil. Heat for about fifteen to twenty minutes until warmed through. This method keeps the chicken moist and prevents the edges from drying out. The low temperature and added moisture ensure your reheated chicken tastes nearly as good as when it was freshly cooked.
If you're short on time, the microwave works in a pinch, though it requires careful attention. Place the chicken on a microwave-safe plate, sprinkle a little water or broth over it, and cover with a damp paper towel. Heat on fifty percent power in thirty-second intervals, checking frequently. The reduced power and added moisture help prevent the rubbery texture that microwaves often create with chicken. For sliced chicken that you're adding to salads or wraps, you can actually use it cold straight from the refrigerator — the tender texture means it's still delicious without reheating.
Frequently Asked Questions
Can I make this melt in your mouth chicken breast ahead of time?
Absolutely! This recipe is fantastic for meal prep. You can season the raw chicken breasts and store them covered in the refrigerator for up to twenty-four hours before cooking. This actually allows the seasonings to penetrate deeper into the meat, resulting in even more flavor. Alternatively, cook the chicken completely, let it cool, and store it in the refrigerator for up to four days. The chicken maintains its tender texture remarkably well when stored properly and makes quick lunches and dinners effortless.
Can I use chicken thighs instead of chicken breasts?
Yes, this method works beautifully with boneless, skinless chicken thighs as well. Thighs are naturally more forgiving due to their higher fat content, so they're even harder to overcook. Keep in mind that thighs may take a minute or two longer to reach the safe internal temperature of 165°F. The seasoning blend works perfectly with thighs, and many people actually prefer the slightly richer flavor that dark meat provides.
How do I know when the chicken is done without a thermometer?
While an instant-read thermometer is the most reliable method, you can check doneness by making a small cut in the thickest part of the breast. The meat should be completely opaque with no pink remaining, and the juices should run clear rather than pink. The texture should feel firm but still springy when pressed gently. However, I strongly recommend investing in a thermometer because it removes all guesswork and helps you avoid both undercooking and overcooking your melt in your mouth chicken breast.
Can I double this recipe for a crowd?
Definitely! The seasoning blend scales up perfectly. The key is to avoid overcrowding your pan, so you'll need to cook the chicken in batches or use multiple skillets simultaneously. Keep the first batch warm in a 200°F oven on a baking sheet while you cook the remaining chicken. Each batch should take the same amount of time, and the quality remains consistent whether you're cooking two breasts or ten.
What if my chicken breasts are different sizes?
This is a common challenge since chicken breasts vary significantly in size. For the most even cooking, try to purchase breasts that are similar in size, or trim and pound them to similar thickness before cooking. If you're working with a mix of sizes, you can remove smaller pieces earlier once they reach 165°F while allowing larger pieces to continue cooking. Alternatively, butterfly your largest breasts by slicing them horizontally to create thinner cutlets that match the thickness of your smaller pieces.
Can I cook this melt in your mouth chicken breast in the oven instead?
Yes, you can adapt this recipe for oven cooking. Sear the seasoned chicken in an oven-safe skillet on the stovetop for two to three minutes per side to develop that golden crust, then transfer the entire skillet to a preheated 375°F oven. Bake for fifteen to twenty minutes until the internal temperature reaches 165°F. This method is great when you're cooking a large batch or want a more hands-off approach. The stovetop method I've provided gives you a bit more control and creates an especially beautiful crust, but the oven method produces tender, delicious chicken as well.
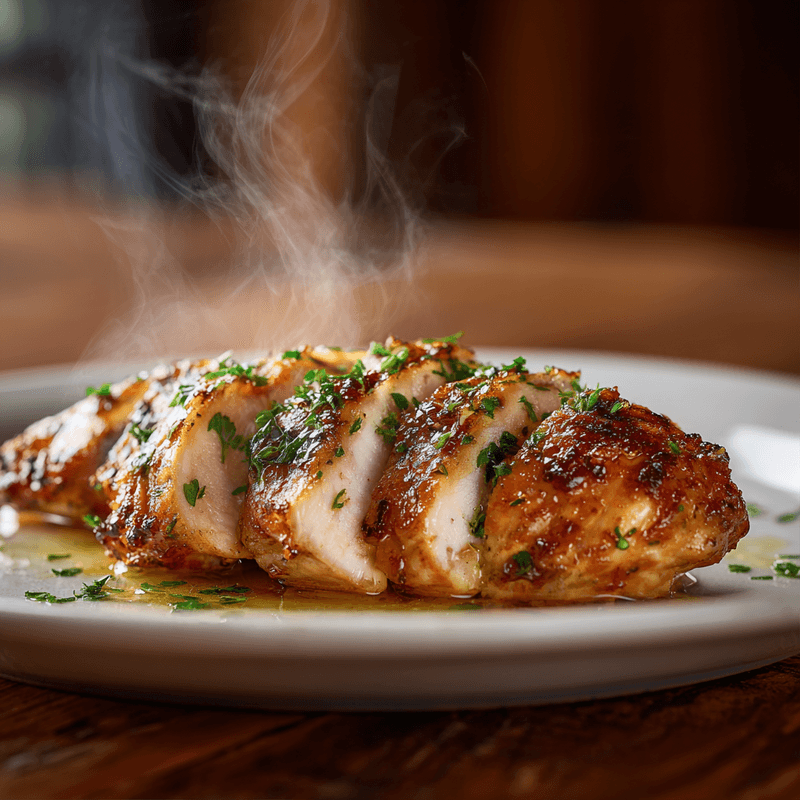
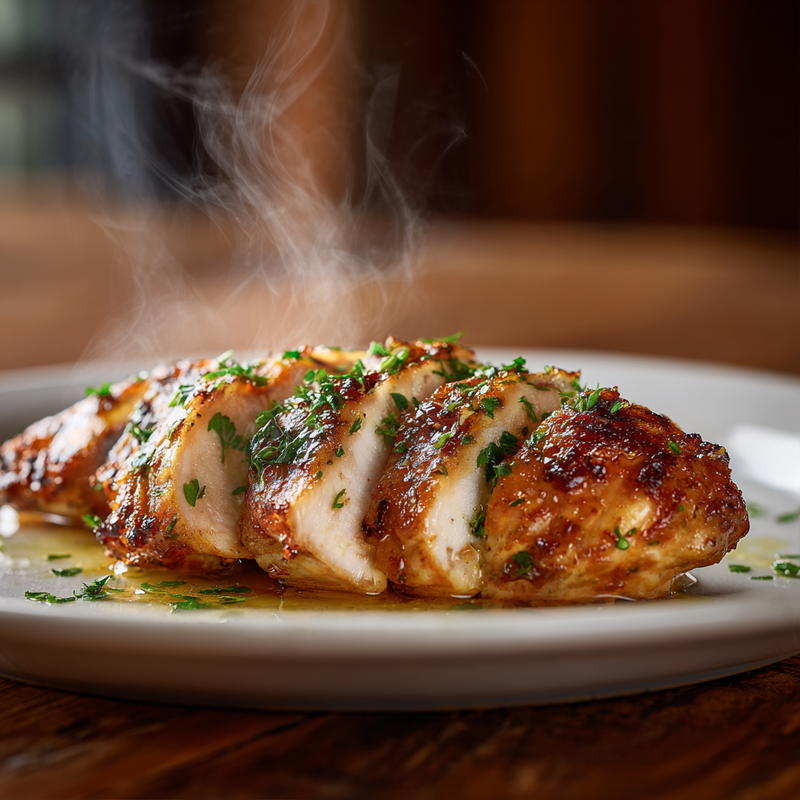
Melt in Your Mouth Chicken Breast
Incredibly tender and juicy chicken breast with a golden, flavorful crust. This foolproof method guarantees perfectly cooked chicken every single time.
Prep Time
10 min
Cook Time
18 min
Total Time
28 min
Servings
4 servings
Ingredients
For 4 servings
- 4 boneless, skinless chicken breasts (6-8 oz each)
- 2 tablespoons olive oil
- 1 teaspoon garlic powder
- 1 teaspoon paprika
- 1 teaspoon dried Italian herb blend (oregano, basil, thyme)
- 1 teaspoon salt
- 1/2 teaspoon black pepper
- 2 tablespoons unsalted butter
Instructions
- 1
Prepare the chicken
Pat the chicken breasts completely dry with paper towels. If the breasts are uneven in thickness, place them between two pieces of plastic wrap and gently pound with a meat mallet to an even 3/4-inch thickness throughout. This ensures even cooking and tender results.
- 2
Make seasoning blend
In a small bowl, combine the garlic powder, paprika, Italian herb blend, salt, and black pepper. Mix well to ensure the seasonings are evenly distributed. This blend will create a flavorful crust on your chicken.
- 3
Season the chicken
Rub the seasoning mixture generously over both sides of each chicken breast, making sure to coat the entire surface. Press the seasonings gently into the meat to help them adhere. Let the seasoned chicken rest at room temperature for 5-10 minutes while you heat your skillet.
- 4
Heat the skillet
Heat the olive oil in a large heavy-bottomed skillet (cast iron or stainless steel works best) over medium-high heat. The oil is ready when it shimmers but doesn't smoke. This temperature is crucial for achieving a golden crust without burning.
- 5
Sear the chicken
Carefully place the chicken breasts in the hot skillet, making sure not to overcrowd the pan. Let them sear undisturbed for 5-6 minutes until a golden-brown crust forms on the bottom. You should hear a steady sizzle—if the chicken is sticking, give it another minute before trying to flip.
- 6
Flip and reduce heat
Flip the chicken breasts once using tongs or a spatula. Immediately reduce the heat to medium-low. This lower temperature allows the chicken to cook through gently without drying out the exterior or creating a tough texture.
- 7
Add butter and finish cooking
Add the butter to the pan, letting it melt around the chicken breasts. Tilt the pan slightly and use a spoon to baste the melted butter over the chicken. Continue cooking for 6-8 minutes more, basting occasionally, until the internal temperature reaches 165°F when checked with an instant-read thermometer in the thickest part.
- 8
Rest the chicken
Remove the chicken from the heat and transfer to a clean plate. Tent loosely with aluminum foil and let rest for 5 minutes before slicing. This crucial resting period allows the juices to redistribute throughout the meat, ensuring every bite is moist and tender.
- 9
Slice and serve
After resting, slice the chicken against the grain into strips or serve whole. Drizzle any remaining pan butter over the top for extra richness. Serve immediately with your favorite sides and enjoy the most tender, flavorful chicken you've ever made!
Nutrition Facts
Per serving (estimated)
285 calories
Calories
2g
Carbs
42g
Protein
12g
Fat
0g
Fiber
680mg
Sodium
0g
Sugar


