Showstopping Layered Trifle Dessert Recipe
Learn how to make an elegant layered trifle with cake, custard, and fresh fruit. Perfect for family gatherings and special occasions!
cookwithlucia.com/recipes/make-this-showstopping-easter-trifle-dessert-recipe
We all know that feeling when you want to serve something truly impressive for a special gathering, but the thought of complicated dessert techniques makes you want to order something instead. You're juggling multiple dishes, coordinating timing, and trying to present something that looks like it came from a professional kitchen.
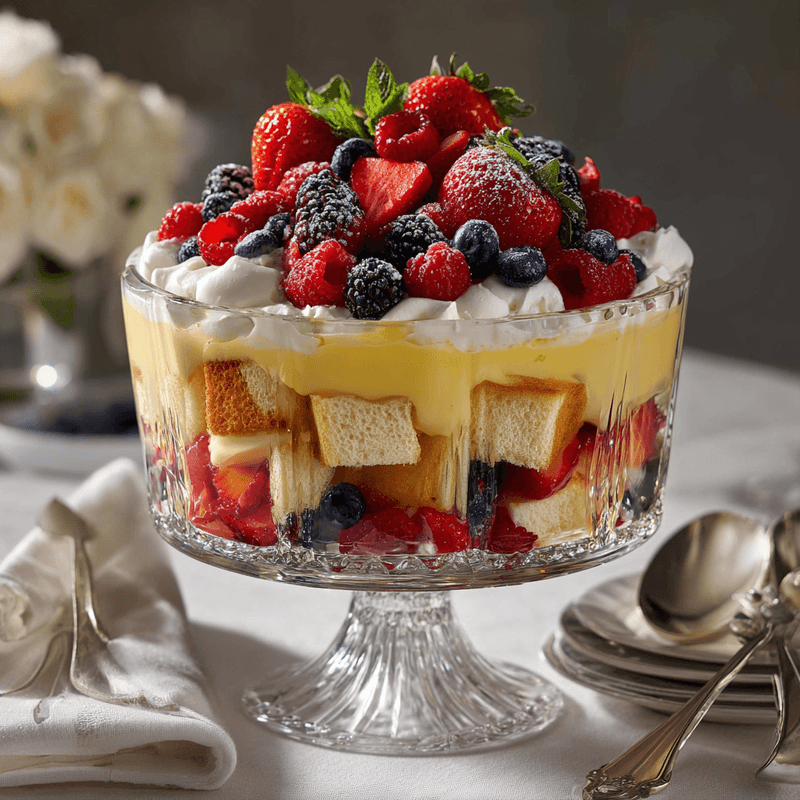
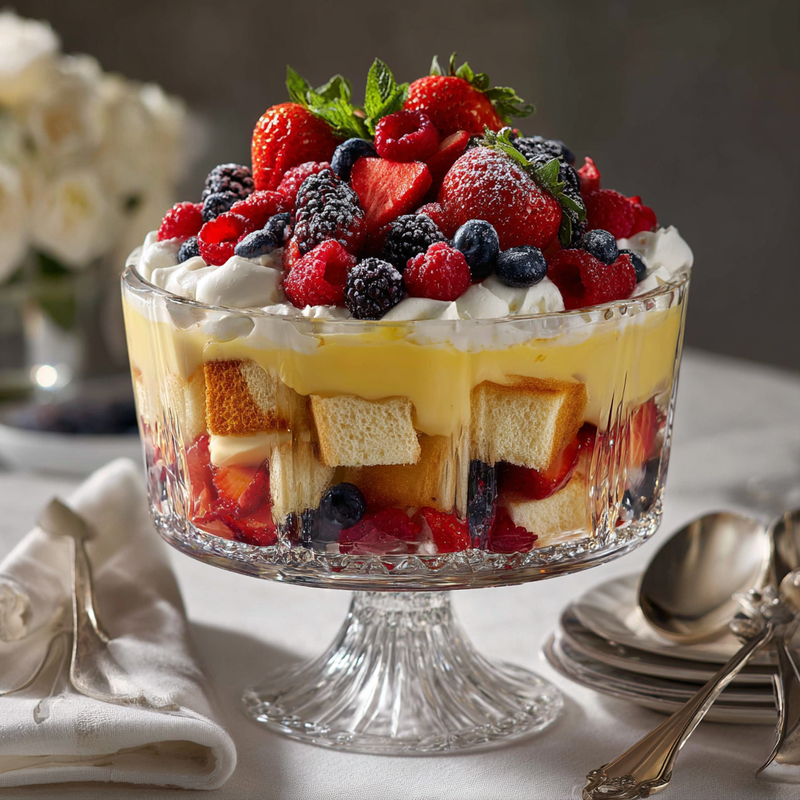
That's exactly where this stunning layered trifle dessert comes to your rescue. It's one of those magical recipes that looks incredibly sophisticated but is actually built from simple, manageable components that you assemble rather than bake from scratch. Picture tall glass layers of tender vanilla cake cubes, silky vanilla custard, billowing whipped cream, and jewel-toned fresh berries that cascade down the sides of a crystal-clear trifle bowl.
The best part? You can make this showstopping trifle dessert almost entirely ahead of time, leaving you free to actually enjoy your gathering instead of sweating in the kitchen. From start to finish, you'll have an elegant centerpiece dessert ready in about an hour of active work, with most of that time simply being gentle assembly. No piping bags, no temperamental meringues, no worry about whether your oven temperature is exactly right.
Why This Is Your New Celebration Go-To
It's completely make-ahead friendly. The beauty of a layered trifle dessert is that it actually benefits from a few hours in the refrigerator, allowing all those gorgeous layers to settle together and the cake to soak up some of that luscious custard. You can assemble this beauty in the morning and unveil it after dinner with zero stress.
The visual impact is incredible. When you bring a tall trifle bowl to the table, with those distinct layers visible through the glass and berries tumbling artfully throughout, guests genuinely gasp. It's the kind of dessert that photographs beautifully and makes everyone feel like they're at something special, even if it's just a weekend family gathering.
No special baking skills required. Unlike layer cakes that need perfect leveling or pastries that demand precise technique, this showstopping trifle dessert is all about assembly. If you can stir custard and whip cream, you can absolutely master this. The rustic, generous nature of trifle means there's no "perfect" way to layer it—each one is unique.
It feeds a crowd beautifully. A standard trifle bowl serves 10-12 people generously, making it ideal for larger gatherings without having to multiply recipes or manage multiple desserts. One stunning bowl handles everyone, and serving is as simple as scooping down through all those layers.
Customize it to your heart's content. The basic structure of cake, custard, cream, and fruit is incredibly flexible. You can swap in different berries depending on the season, add a layer of jam for extra flavor, or incorporate crushed cookies for texture contrast. This showstopping trifle dessert becomes your canvas.
Leftovers are a gift, not a burden. Unlike frosted cakes that dry out or delicate pastries that go soggy, trifle actually holds up remarkably well for a day or two in the refrigerator. Those morning-after spoonfuls straight from the bowl might just be the best part of making this dessert.
Simple Ingredients, Big Flavor
The foundation starts with pound cake or vanilla sponge cake, which you can absolutely buy pre-made from your local bakery or supermarket. I'm talking about a good-quality butter cake or a light sponge—nothing too dense or too airy. You'll cube it into generous bite-sized pieces that will soak up custard while maintaining some structure. If you have time and love baking, homemade sponge is wonderful, but this is not where you need to be a hero.
Vanilla custard forms the silky, luxurious layer that makes people close their eyes when they taste it. You can make this from scratch with egg yolks, milk, sugar, and cornstarch (I'll walk you through it), or use a quality instant custard powder if time is tight. The key is getting it thick enough to hold its shape in layers but still spoonable and creamy. A generous splash of vanilla extract makes all the difference here.
Heavy whipping cream gets whipped with a touch of sugar and vanilla until it forms soft, billowy peaks. This isn't stiff meringue-like whipped cream—you want it just firm enough to spread in clouds but still soft and luxurious on the tongue. Cold cream whips better, so keep it refrigerated until the moment you need it.
Fresh berries bring color, freshness, and a slight tartness that cuts through all that richness. I love using a mix of strawberries, raspberries, blueberries, and blackberries for maximum visual impact. The variety of reds, blues, and purples creates that jewel-box effect. Make sure they're rinsed and thoroughly dried—excess water will make your layers weepy.
Granulated sugar sweetens both the custard and the whipped cream, while vanilla extract appears in multiple layers, tying everything together with that warm, aromatic baseline. Don't skip the vanilla in the whipped cream—it transforms it from plain to special.
For the custard, you'll need whole milk for richness and body, egg yolks for that classic custard texture and golden color, and cornstarch as the thickener that gives you a foolproof, lump-free result. Some recipes use all eggs, but I find the cornstarch method more reliable for home cooks.
Finally, a little fruit preserves or jam—raspberry or strawberry work beautifully—adds an optional but highly recommended layer of concentrated fruit flavor. Warm it slightly so it's spreadable, and you can brush it over the cake cubes or swirl it into the custard for gorgeous marbled effects.
Step-by-Step in Plain English
Stage one is preparing your custard, which sounds fancy but is truly just patient stirring. Whisk together egg yolks, sugar, cornstarch, and a splash of milk until smooth, then heat the remaining milk until steaming. Slowly pour that hot milk into your egg mixture while whisking constantly—this tempers the eggs so they don't scramble. Return everything to the pot and cook over medium heat, stirring continuously, until it thickens enough to coat the back of a spoon. This takes about 5-7 minutes. Stir in vanilla, then press plastic wrap directly onto the surface and refrigerate until completely cold, at least an hour.
Stage two is all about prep and assembly setup. Cube your cake into roughly one-inch pieces—they don't need to be perfect, just relatively uniform. Wash and dry all your berries thoroughly, slicing strawberries if they're large. Whip your cream with sugar and vanilla until soft peaks form. This is the stage where you line up all your components like a cooking show, because once you start layering, you want everything at your fingertips. Make sure your custard is cold and your whipped cream is freshly made and chilled.
Stage three is the first layer, which sets the foundation for everything else. Start with about a third of your cake cubes across the bottom of your trifle bowl. Press them down gently to create an even layer. Spoon or pipe about a third of your custard over the cake, spreading it to the edges so it's visible through the glass. Scatter a generous handful of mixed berries over the custard, pressing some against the glass sides for that beautiful cross-section view. Dollop about a third of your whipped cream over the berries and spread gently.
Stage four is simply repeating that layering process two more times. Cake, custard, berries, cream. Cake, custard, berries, cream. With each layer, press some of those gorgeous berries against the glass so every angle shows off the colors. The final layer should be a generous crown of whipped cream, which you can swirl dramatically with the back of a spoon. Save your most beautiful berries for the top—arrange them like jewels across that cream.
Stage five is the patient part—covering your showstopping trifle dessert loosely with plastic wrap and refrigerating it for at least 2-4 hours, though overnight is even better. This resting time allows the cake to absorb some custard, the flavors to meld, and everything to set up properly. The layers will compress slightly and become cohesive rather than separate elements.
The final stage is serving, which is pure joy. Bring your trifle to the table and let everyone admire it before you dig in. Use a large spoon to scoop straight down through all the layers, making sure each serving gets some of everything. Watch as those distinct stripes collapse into a beautiful mess on each plate—that's the magic of this showstopping trifle dessert.
Pro Shortcuts and Time-Savers
Buy the cake component completely prepared. There is absolutely zero shame in using store-bought pound cake, angel food cake, or even ladyfinger cookies. Some bakeries will sell you undecorated cake layers specifically for recipes like this. I've made incredible trifles with grocery store pound cake, and nobody knew or cared because the overall result was so delicious.
Use instant vanilla pudding as your custard shortcut. If you're truly pressed for time, a good-quality instant vanilla pudding made with whole milk instead of the package directions (use slightly less milk for thicker consistency) works perfectly. Add extra vanilla extract and a pinch of salt to boost the flavor, and you've saved yourself 30 minutes and the egg-tempering anxiety.
Prep your custard a full day ahead. Custard actually improves with a night in the refrigerator—the flavors develop and the texture becomes even silkier. Make it the day before your gathering, and you've already conquered the most time-intensive component of this showstopping trifle dessert.
Use frozen berries strategically. While I prefer fresh berries for their structure and appearance, you can absolutely use frozen berries that have been thawed and thoroughly drained. They'll be softer and release more juice, so use them in inner layers rather than pressed against the glass, and reserve fresh berries just for the visible parts and top garnish.
Assemble in individual glasses for even easier serving. Instead of one large trifle bowl, layer everything into 8-10 individual glasses or mason jars. This eliminates serving time entirely—just hand them out—and looks incredibly elegant. Plus, you can make exactly as many as you need without worrying about leftovers.
Ways to Switch It Up
Try a chocolate lover's version by using chocolate cake cubes and adding chocolate shavings between layers. You can even make chocolate custard by whisking cocoa powder into your custard base. The combination of chocolate cake, vanilla custard, and berries is absolutely heavenly, and it creates dramatic dark-and-light layers.
Go tropical by swapping the berries for fresh mango, pineapple, and kiwi, and using coconut cream in place of some of the whipped cream. Add a layer of toasted coconut flakes for texture, and suddenly you have a completely different flavor profile that's perfect for warm-weather gatherings. Consider using a light citrus curd instead of vanilla custard.
Make it nutty and textured by adding layers of toasted sliced almonds, chopped pistachios, or crushed shortbread cookies between the traditional layers. This adds wonderful crunch that contrasts beautifully with all that softness. Fold some almond extract into your whipped cream for a subtle nutty flavor throughout this showstopping trifle dessert.
Create a stone fruit version during summer by using sliced peaches, nectarines, and apricots instead of berries. Brush the cake with a little fruit nectar, and consider adding a layer of mascarpone cheese mixed into your whipped cream for extra richness. The golden colors are absolutely stunning in the glass.
Go berry-preserve intense by spreading a thin layer of high-quality jam between each element—jam on the cake before custard, a swirl in the custard itself, and a drizzle over the berries. This amplifies the fruit flavor and adds glossy, jewel-like pockets of concentrated sweetness throughout.
Storing Leftovers the Right Way
Your assembled layered trifle dessert will keep beautifully in the refrigerator for up to three days when properly covered. Use plastic wrap pressed directly against any exposed whipped cream to prevent it from forming a skin, or use a fitted lid if your trifle bowl came with one. The texture actually improves slightly over the first 24 hours as everything melds together, though the cake will become increasingly custard-soaked over time.
The individual components store differently if you want to prep ahead but not assemble. Custard keeps for up to four days in the refrigerator in an airtight container with plastic wrap pressed to its surface. Cake cubes can be stored at room temperature for a day or frozen for up to a month. Fresh berries should be washed and dried right before assembly, not stored wet. Whipped cream is best made fresh, but you can make stabilized whipped cream with a little gelatin that holds for two days.
Freezing a fully assembled trifle isn't ideal because the custard may separate and the berries will become mushy when thawed. However, you can freeze the custard alone in an airtight container for up to two months—thaw it overnight in the refrigerator and whisk it smooth before using. This is a great way to get ahead if you're planning this showstopping trifle dessert for a specific date.
Reheating isn't applicable here since trifle is meant to be served cold, but if it's been in the refrigerator for a while and seems too firm, let it sit at room temperature for about 10-15 minutes before serving. This takes the chill off slightly and allows the flavors to blossom. The custard will be softer and more luxurious, and the whipped cream will have a better mouthfeel.
If you have leftover components before assembly, get creative. Custard makes an excellent filling for cream puffs or a topping for fresh fruit. Extra whipped cream can top hot chocolate or coffee drinks. Cake cubes can be toasted with butter and cinnamon for a quick snack, and fresh berries obviously have endless uses from smoothies to breakfast toppings.
Quick Answers to Common Questions
Can I make this showstopping trifle dessert a full day ahead?
Absolutely, and I actually recommend it. Assemble your trifle the evening before or morning of your gathering, then refrigerate it covered for at least four hours or up to 24 hours. The resting time allows the flavors to develop and the cake to absorb some of the custard, creating that signature trifle texture. Just save the final berry garnish for right before serving so they look fresh and vibrant.
What if I don't have a traditional trifle bowl?
Any clear glass bowl or dish works beautifully—the key is transparency so you can see those gorgeous layers. A large glass mixing bowl, a straight-sided glass salad bowl, or even a deep glass baking dish all work perfectly. You can also use individual serving glasses, wine glasses, or even mason jars for single portions. The recipe adapts to whatever vessel you have.
How do I keep my layers from getting too soggy?
The key is using cake that has some structure (pound cake or sponge rather than very light angel food) and making sure your custard is fully cooled and thick before assembly. If you're worried about sogginess, you can lightly toast your cake cubes in a 300°F oven for 10 minutes to dry them out slightly. Don't oversoak the cake with extra liquid, and make sure berries are completely dry before adding them to your showstopping trifle dessert.
Can I make this without raw eggs in the custard?
Yes, your custard is actually cooked on the stovetop, so the eggs are fully cooked and completely safe. If you're still concerned, use the instant pudding shortcut instead, which contains no eggs at all. You can also make a cornstarch-only custard using milk, sugar, cornstarch, butter, and vanilla—it won't have quite the same richness, but it's still delicious and completely egg-free.
What's the best way to transport this to a gathering?
If your trifle bowl has a fitted lid, you're all set—just cover and carry carefully. Otherwise, stretch plastic wrap tightly over the top, making sure it doesn't touch the whipped cream surface. Place the bowl in a sturdy box with towels packed around it to prevent sliding. Keep it upright and refrigerated until serving time. Alternatively, assemble it in individual jars with lids for the easiest transport possible.
Can I use dairy-free alternatives for this recipe?
Yes, with some adjustments. Use coconut cream (the thick part from a chilled can) in place of heavy cream, and make your custard with full-fat coconut milk or other plant-based milk thickened with cornstarch. There are also excellent dairy-free whipped toppings available that work well. The texture will be slightly different, but you can absolutely create a beautiful dairy-free version of this showstopping trifle dessert that's just as stunning and delicious.
Showstopping Layered Trifle Dessert
An elegant layered trifle with vanilla cake, silky custard, fresh whipped cream, and mixed berries. Perfect for special gatherings and completely make-ahead friendly.
Prep Time
30 min
Cook Time
15 min
Total Time
4h 45m
Servings
12 servings
Ingredients
For 12 servings
- 1 pound cake or vanilla sponge cake, cut into 1-inch cubes
- 3 cups whole milk
- 6 large egg yolks
- 3/4 cup granulated sugar, divided
- 1/3 cup cornstarch
- 2 tablespoons vanilla extract, divided
- 2 cups heavy whipping cream, cold
- 3 tablespoons powdered sugar
- 4 cups mixed fresh berries (strawberries, raspberries, blueberries, blackberries), washed and dried
- 1/4 cup fruit preserves (raspberry or strawberry), optional
Instructions
- 1
Prepare the custard base
In a medium bowl, whisk together egg yolks, 1/2 cup granulated sugar, cornstarch, and 1/2 cup of the milk until smooth and no lumps remain. Set this mixture aside while you heat the remaining milk.
- 2
Heat the milk
Pour the remaining 2 1/2 cups milk into a medium saucepan and heat over medium heat until steaming and small bubbles form around the edges, about 4-5 minutes. Do not let it boil.
- 3
Temper the eggs
Slowly pour about 1 cup of the hot milk into the egg mixture while whisking constantly to temper the eggs. Then pour the egg mixture back into the saucepan with the remaining hot milk, whisking continuously to combine.
- 4
Cook the custard
Cook the custard over medium heat, stirring constantly with a wooden spoon or whisk, until it thickens enough to coat the back of a spoon, about 5-7 minutes. Remove from heat and stir in 1 tablespoon vanilla extract.
- 5
Chill the custard
Transfer custard to a clean bowl and press plastic wrap directly onto the surface to prevent a skin from forming. Refrigerate until completely cold, at least 1-2 hours or overnight.
- 6
Prepare cake and berries
Cut the cake into 1-inch cubes and set aside. Wash and thoroughly dry all berries, slicing strawberries if they're large. If using preserves, warm them slightly in the microwave until spreadable, about 15 seconds.
- 7
Make whipped cream
In a large chilled bowl, beat the heavy cream with powdered sugar and remaining 1 tablespoon vanilla extract using an electric mixer on medium-high speed until soft peaks form, about 3-4 minutes. Be careful not to overbeat.
- 8
Start first layer
Arrange about one-third of the cake cubes in the bottom of a trifle bowl or large glass bowl. Press them down gently to create an even layer. If using preserves, dot or brush some over the cake.
- 9
Add custard and berries
Spoon about one-third of the chilled custard over the cake layer, spreading it to the edges. Scatter a generous handful of mixed berries over the custard, pressing some against the glass sides for visual appeal.
- 10
Add whipped cream layer
Dollop about one-third of the whipped cream over the berries and spread gently with a spatula to create an even layer. The cream should reach the edges of the bowl for clean layer definition.
- 11
Repeat layers twice
Repeat the layering process two more times: cake, custard, berries, cream, then cake, custard, berries, cream. Press berries against the glass with each layer for maximum visual impact through the sides.
- 12
Create final garnish
Top the final whipped cream layer with your most beautiful berries, arranging them decoratively. You can create swirls in the cream with the back of a spoon for an elegant finish.
- 13
Chill and serve
Cover the trifle loosely with plastic wrap and refrigerate for at least 2-4 hours or overnight to allow flavors to meld and layers to set. Serve cold, scooping straight down through all layers with a large spoon.
Nutrition Facts
Per serving (estimated)
425 calories
Calories
52g
Carbs
8g
Protein
21g
Fat
3g
Fiber
180mg
Sodium
38g
Sugar


