Magical 3-Step Easter Cake Roll That Steals the Show
Master this stunning rolled sponge cake with a simple 3-step method. Light, airy, and impressive — perfect for celebrations and family gatherings.
cookwithlucia.com/recipes/magical-3-step-easter-cake-roll-that-steals-the-show
There's something utterly mesmerizing about slicing into a perfectly spiraled cake roll. The tender sponge, the silky filling, those beautiful swirls that reveal themselves with each cut — it's the kind of dessert that makes people pause and reach for their cameras before their forks. But here's what most home bakers don't realize: creating this showstopper isn't about advanced pastry skills or professional equipment. It's about understanding three essential steps that transform simple ingredients into an elegant rolled cake that looks like it came from a high-end bakery.
I know what you're thinking. Rolling a cake sounds terrifying. Visions of cracked surfaces and filling oozing everywhere might be dancing through your head right now. But once you understand the fundamental technique behind this magical 3-step Easter cake roll that steals the show, you'll see how straightforward it actually is. The secret lies in timing, temperature, and treating your sponge with the gentle confidence it deserves.
This isn't just about making one specific cake. When you master the technique of creating a rolled sponge, you unlock an entire category of impressive desserts. Change the filling, adjust the flavors, and suddenly you have endless variations for family gatherings, weekend celebrations, or any time you want to create something that genuinely wows your guests. Let's dive into exactly how this works, why it works, and how you'll nail it on your very first attempt.

The Science Behind the Method
The magic of a successful cake roll lives in the structure of the sponge itself. Unlike traditional layer cakes that rely heavily on chemical leaveners, a proper rolled cake gets its lift primarily from whipped eggs. When you beat eggs and sugar together, you're incorporating thousands of tiny air bubbles that expand in the oven's heat, creating that characteristically light, springy texture that can bend without breaking.
This is where the Maillard reaction becomes your best friend. That gentle browning on the surface isn't just visual appeal — it's creating a slightly firmer outer layer that provides structure while the interior remains pillowy and flexible. The key is achieving just enough set without over-baking, which would create a dry, brittle sponge that cracks the moment you try to roll it.
The rolling technique itself relies on understanding how proteins behave when warm versus cold. While your cake is still warm from the oven, the gluten and egg proteins remain pliable and willing to take on a new shape. Roll it too soon and it's structurally weak; wait too long and it becomes rigid and prone to cracking. There's a perfect window — usually around five to seven minutes after removing from the oven — when the cake is cool enough to handle but warm enough to be malleable.
Grasping these principles transforms you from someone following instructions blindly to a baker who understands what's happening at each stage. You'll know instinctively when your eggs are whipped enough, when your cake has baked just right, and exactly when to execute that crucial first roll. This knowledge transfers to countless other recipes, making you more confident and intuitive in the kitchen overall.
Tools and Ingredients You'll Need
Let's talk about your baking sheet first, because it's absolutely critical to success with this magical 3-step Easter cake roll that steals the show. You need a standard 10x15-inch jelly roll pan with a one-inch rim. If you only have a regular baking sheet, you can create walls using aluminum foil, though a proper jelly roll pan makes everything easier. The shallow sides ensure even heat distribution and make releasing your cake much simpler.
Parchment paper is non-negotiable here. Not wax paper, not aluminum foil, but genuine parchment paper that can withstand oven temperatures and release cleanly from your delicate sponge. I line both the bottom and slightly up the sides, creating a little sling that helps me lift the entire cake out in one piece. Some bakers grease the parchment, but I find that a light dusting of flour works beautifully without adding extra fat that might affect texture.
For mixing, a stand mixer makes the job effortless, but a hand mixer works perfectly well if that's what you have. You'll be whipping eggs for several minutes, so if you're going the hand mixer route, make sure it's charged or plugged in securely. A large balloon whisk can work in a pinch if you've got strong arms and patience, though I won't pretend it's not a workout.
Ingredient quality matters more than you might expect. Fresh eggs at room temperature whip to greater volume than cold ones, creating more air pockets and a lighter final texture. Your flour should be cake flour if possible — the lower protein content creates a more tender crumb that rolls without resistance. All-purpose flour works in a pinch, but consider removing two tablespoons per cup and replacing with cornstarch to approximate cake flour's delicate structure.
For the filling, you'll want heavy cream that's been thoroughly chilled, along with whatever flavorings speak to you. A fine-mesh sieve for dusting and a clean kitchen towel for rolling complete your toolkit. The towel should be lint-free and slightly damp — this prevents sticking and helps create the initial shape your cake will hold as it cools.
The Method, Step by Step
Step one is all about creating that perfect sponge base. Begin by preheating your oven to 375°F — this slightly higher temperature is intentional, creating quick lift and that desirable golden surface. While it heats, separate your eggs with meticulous care. Even a tiny bit of yolk in your whites can prevent them from reaching full volume. Whip the eggs and sugar together until the mixture is pale yellow, thick, and falls from the beaters in ribbons that hold their shape for several seconds. This typically takes five to seven minutes with a stand mixer on medium-high speed. You're looking for the mixture to triple in volume and feel substantial when you lift the beaters.
Once your eggs reach that ribbon stage, it's time to gently fold in your dry ingredients. Sift your flour, and any other dry ingredients together, then add them in three additions. Use a large rubber spatula and fold with deliberate, gentle strokes — cutting down through the center, sweeping along the bottom, and bringing the spatula up along the side. Rotate the bowl a quarter turn with each fold. You want to see no flour streaks, but you also want to preserve as many of those precious air bubbles as possible. Over-mixing deflates the batter and creates a dense, tough cake that won't roll properly. The batter should flow thickly when you pour it into your prepared pan, spreading it evenly to all corners with an offset spatula.
Bake for exactly 12 to 14 minutes, depending on your oven. You're watching for a golden surface that springs back when gently pressed and edges that just barely begin to pull away from the pan sides. The cake should smell fragrant and sweet, with no raw batter scent remaining. This is where many bakers go wrong — they either under-bake, creating a gummy texture, or over-bake, resulting in dryness and cracks. Set a timer, but also trust your senses.
Now comes step two, the crucial rolling technique that gives this magical 3-step Easter cake roll that steals the show its signature spiral. The moment your cake comes out of the oven, run a thin knife around the edges to loosen it from the pan. Dust a clean kitchen towel generously with powdered sugar — this prevents sticking and adds a subtle sweetness. In one confident motion, invert the cake onto the prepared towel. Carefully peel away the parchment paper, working slowly if it wants to stick. Starting from one short end, roll the cake up in the towel while it's still warm. This creates the muscle memory in your sponge, teaching it the shape it will eventually hold with filling inside. The towel stays rolled up inside, maintaining the spiral as the cake cools to room temperature on a wire rack.
Step three is where your patience pays off with spectacular results. Once your cake has cooled completely — and I mean completely, about one hour — gently unroll it. It will want to maintain its spiral shape slightly, which is perfect. This is when you spread your filling of choice, whether that's whipped cream, buttercream, or a cream cheese mixture. Work quickly but thoroughly, spreading the filling to within half an inch of the edges. Too much filling and it squeezes out when you roll; too little and you don't get those beautiful defined swirls when sliced.
Roll the cake back up, this time without the towel, using the same starting edge as before. Your cake remembers its shape and will cooperate beautifully. Wrap the finished roll in plastic wrap and refrigerate for at least one hour before slicing. This firms up the filling and allows the flavors to meld. When you're ready to serve, use a sharp serrated knife and wipe it clean between each slice for those picture-perfect spirals that make this dessert truly steal the show.
Troubleshooting Guide
If your cake cracks when rolling, the most common culprit is over-baking. A cake that's spent even two minutes too long in the oven loses the moisture and flexibility it needs to bend gracefully. Next time, pull it from the oven when it barely springs back to touch, even if it seems slightly under-done in the center. The residual heat continues cooking it slightly as it cools. You can also try rolling it a bit sooner while it's warmer and more pliable, though be careful it's not so hot that it tears.
When your cake turns out dense rather than light and airy, you likely didn't whip the eggs long enough or you over-mixed when folding in the flour. Remember, those eggs need to reach ribbon stage — thick, pale, and voluminous. If you rush this step, you don't incorporate enough air. Similarly, aggressive stirring when adding flour deflates all that hard-won volume. Fold gently and stop as soon as you see no more dry streaks.
Filling that oozes out the sides means either too much filling or not leaving enough border when spreading. Aim for about one cup of filling for a standard cake roll, and always leave that half-inch margin around all edges. The pressure of rolling pushes filling outward, so it needs somewhere to go without escaping entirely. If your filling is too soft or warm, it's also more likely to squeeze out, so make sure whipped cream is stiff and cold.
A cake that sticks to the towel during unrolling usually wasn't dusted with enough powdered sugar initially. Be generous with that sugar coating, covering every bit of towel that will touch your cake. If sticking happens anyway, try refrigerating the rolled cake for just 10 minutes before unrolling — sometimes a brief chill makes separation easier.
Soggy or gummy texture points to under-baking. Your cake needs those full 12 to 14 minutes to set the structure properly. An under-baked sponge might seem easier to roll because it's so moist, but it won't have the pleasant tender-yet-springy texture you're after. It should feel soft but not wet, delicate but not fragile.
Taking It to the Next Level
Once you've mastered the basic technique of this magical 3-step Easter cake roll that steals the show, you can elevate it with professional touches. Try adding a tablespoon of cornstarch to your dry ingredients — this creates an even more tender crumb with improved flexibility. Pastry chefs often use this trick for their most delicate sponge cakes.
For deeper flavor, consider adding extracts or citrus zest to your batter. A teaspoon of vanilla, almond, or orange extract gets distributed evenly when added during the egg-whipping stage. Finely grated lemon or orange zest folded in with the flour provides subtle brightness that makes people wonder what makes your version so special.
Create a truly stunning presentation by finishing the outside of your roll with additional whipped cream, then using an offset spatula to create decorative swoops and peaks. A light dusting of cocoa powder, a drizzle of melted chocolate, or strategically placed fresh berries and mint leaves transform your cake roll from homemade to magazine-worthy.
Temperature control separates good from great. Professional kitchens keep their ingredients, tools, and even work surfaces at specific temperatures. Try chilling your mixing bowl and beaters for 15 minutes before whipping cream for filling. The colder everything stays, the more stable your whipped cream becomes, holding its shape beautifully when sliced.
Experiment with flavor combinations that surprise and delight. A cardamom-scented sponge with rosewater whipped cream offers Middle Eastern elegance. Cocoa powder in the cake with a vanilla bean cream filling creates a classic combination. Matcha powder mixed into both cake and filling delivers a sophisticated, subtly sweet result that's visually striking.
Storing Your Results
A finished cake roll stays fresh for up to three days when properly stored in the refrigerator. The key is wrapping it securely in plastic wrap to prevent it from drying out or absorbing other refrigerator odors. I wrap mine twice — once around the cake itself, then again in a slightly larger sheet that covers the ends completely. Some bakers prefer storing in an airtight container, which works beautifully if your container is large enough to accommodate the roll without squashing it.
For the best texture and flavor, remove your magical 3-step Easter cake roll that steals the show from the refrigerator about 15 minutes before serving. This slight warming brings the sponge back to its optimal tender state and allows the filling flavors to bloom. Cold cake is perfectly safe to eat, but room-temperature cake offers superior taste and mouthfeel.
If you need to prepare ahead, you can bake the sponge, roll it with the towel, and freeze it for up to one month. Wrap the cooled, towel-rolled cake tightly in plastic wrap, then in aluminum foil. When you're ready to fill it, thaw in the refrigerator overnight, then bring to room temperature, unroll, fill, and re-roll as usual. The texture remains remarkably close to fresh-baked.
Filled cake rolls freeze reasonably well for up to two weeks, though cream-based fillings can sometimes weep slightly upon thawing. If you plan to freeze a filled roll, wrap it exceptionally well and thaw it slowly in the refrigerator rather than at room temperature. Slice while still slightly frozen for the cleanest cuts, then let the individual slices come to room temperature on serving plates.
Common Questions
Can I make this without a stand mixer or electric beaters?
Yes, though it requires significant arm strength and patience. You'll need to whisk vigorously for at least 10 to 12 minutes to achieve the proper ribbon stage with the eggs and sugar. A large balloon whisk and a deep bowl help, and you might want to switch arms periodically. The result can be just as good, but the physical effort is considerable.
What if I live at high altitude — do I need to adjust anything?
High altitude baking requires a few modifications for this magical 3-step Easter cake roll that steals the show. Reduce your sugar by about two tablespoons to prevent over-tenderizing, increase your oven temperature by 15°F to set the structure before too much expansion occurs, and decrease baking time by two to three minutes. You might also add an extra tablespoon of flour to provide additional structure in the lower air pressure.
Can I double the recipe to make two rolls at once?
Absolutely, and it's a smart strategy if you're serving a crowd or want one for the freezer. Mix the batter in two separate batches rather than doubling in one bowl — egg foam is delicate and doesn't scale up well in a single mixing. Prepare two pans and bake them on separate oven racks, rotating their positions halfway through for even baking. Just make sure your oven can maintain consistent temperature with both pans inside.
Why did my cake turn out rubbery instead of tender?
A rubbery texture usually indicates over-mixing after adding the flour, which develops too much gluten. Remember to fold gently and stop immediately when you no longer see dry flour streaks. It can also result from using bread flour or high-protein all-purpose flour instead of cake flour or lower-protein alternatives. The protein content directly affects tenderness in delicate sponge cakes.
How far in advance can I assemble the filled cake before serving?
You can fill and roll your cake up to 24 hours before serving for optimal results. Beyond that, moisture from the filling gradually softens the sponge, which isn't necessarily bad but does change the texture slightly. For gatherings, I find assembling it the evening before or the morning of your event gives you the best balance between convenience and perfect texture.
What's the best way to transport this cake to a gathering?
Transport your cake roll on a flat serving platter or cutting board, wrapped loosely in plastic wrap to protect it without squashing the shape. Place it in a large, shallow container or box to prevent sliding during transit. Keep it refrigerated until the last possible moment, then transport in a cooler with ice packs if you'll be traveling more than 15 minutes. Once you arrive, let it sit at room temperature for those crucial 15 minutes before slicing and serving for the best flavor and texture that truly steals the show.
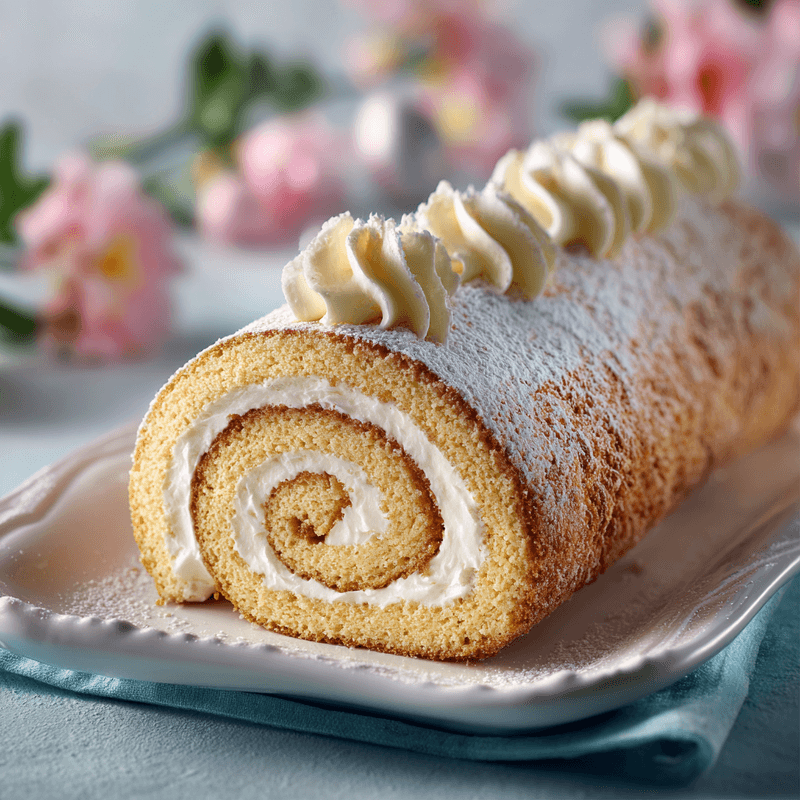
Magical 3-Step Easter Cake Roll That Steals the Show
A light, airy rolled sponge cake with silky whipped cream filling, featuring beautiful spirals that impress at any celebration or family gathering.
Prep Time
20 min
Cook Time
14 min
Total Time
2h 34m
Servings
10 servings
Ingredients
For 10 servings
- 4 large eggs, at room temperature
- 3/4 cup granulated sugar
- 1 teaspoon vanilla extract
- 3/4 cup cake flour, sifted
- 1 teaspoon baking powder
- 1/4 teaspoon salt
- 1/4 cup powdered sugar, for dusting
- 1 1/2 cups heavy whipping cream, cold
- 1/3 cup powdered sugar, for filling
- 1 teaspoon vanilla extract, for filling
- Additional powdered sugar for finishing
Instructions
- 1
Prepare pan and preheat
Preheat your oven to 375°F. Line a 10x15-inch jelly roll pan with parchment paper, allowing it to extend slightly up the sides. Lightly dust the parchment with a tablespoon of flour and tap out any excess.
- 2
Whip eggs to ribbon stage
In a large mixing bowl or stand mixer, combine the eggs and granulated sugar. Beat on medium-high speed for 5 to 7 minutes until the mixture is pale yellow, tripled in volume, and falls in thick ribbons that hold their shape for several seconds when you lift the beaters. Add vanilla extract in the final minute of mixing.
- 3
Fold in dry ingredients
Sift together the cake flour, baking powder, and salt. Gently fold the dry ingredients into the egg mixture in three additions, using a large rubber spatula and broad, sweeping strokes. Fold just until no flour streaks remain, being careful not to deflate the batter.
- 4
Bake the sponge
Pour the batter into the prepared pan and spread evenly to all corners with an offset spatula. Bake for 12 to 14 minutes until the top is golden brown and springs back when gently pressed, and the edges just begin to pull away from the pan sides.
- 5
Roll cake in towel
Immediately run a thin knife around the edges of the hot cake. Generously dust a clean kitchen towel with the 1/4 cup powdered sugar. Invert the cake onto the towel and carefully peel away the parchment paper. Starting from one short end, roll the cake up with the towel inside. Place seam-side down on a wire rack and cool completely, about 1 hour.
- 6
Prepare whipped cream filling
In a chilled mixing bowl, combine the cold heavy cream, 1/3 cup powdered sugar, and vanilla extract. Beat on medium-high speed until stiff peaks form, about 3 to 4 minutes. Be careful not to over-whip or the cream will become grainy.
- 7
Unroll and fill
Gently unroll the cooled cake, removing the towel. The cake will naturally want to maintain a slight curl, which is perfect. Spread the whipped cream filling evenly over the cake, leaving a 1/2-inch border around all edges.
- 8
Re-roll and chill
Starting from the same short end as before, carefully roll the cake back up without the towel, using the filling to help seal it. Place seam-side down on a serving platter. Wrap in plastic wrap and refrigerate for at least 1 hour before serving.
- 9
Finish and serve
Just before serving, remove the plastic wrap and dust the top with additional powdered sugar. Slice with a sharp serrated knife, wiping the blade clean between cuts for beautiful spiral presentation. Remove from refrigerator 15 minutes before serving for best flavor and texture.
Nutrition Facts
Per serving (estimated)
245 calories
Calories
28g
Carbs
4g
Protein
13g
Fat
0g
Fiber
95mg
Sodium
20g
Sugar


