Master the Art of Colorful Layered Poke Cake
Learn to create stunning layered poke cakes with vibrant colors and moist texture. Professional techniques, troubleshooting tips, and creative variations.
cookwithlucia.com/recipes/maak-een-magische-easter-poke-cake-voor-een-onvergetelijk-dessert
There's something truly magical about slicing into a cake and revealing unexpected swirls of color throughout every layer. The poke cake technique transforms an ordinary dessert into a stunning centerpiece that delights both the eyes and the palate. This method involves baking a simple cake, then piercing it with holes and pouring flavored liquid through those channels to create pockets of moisture and color that penetrate deep into the crumb.
The beauty of mastering this technique lies in its incredible versatility. Once you understand how to create these flavor-infused channels, you can adapt the method to countless variations—from fruit-flavored gelatin desserts to chocolate-infused creations, or even sophisticated options with flavored syrups and cream fillings. The result is always impressive: a cake that stays incredibly moist for days, with bursts of complementary flavors in every bite.
Many home bakers feel intimidated by fancy layered desserts, assuming they require professional skills or special equipment. The truth is quite the opposite. The poke cake method is forgiving, accessible, and nearly foolproof. You don't need piping bags, fondant skills, or hours of decorating experience. Your most important tool is simply a wooden spoon handle or similar implement to create those all-important holes.
What makes this technique truly special is that understanding the science behind it—how liquid absorbs into cake structure, how gelatin sets within those pockets, and how moisture distribution affects texture—suddenly makes you confident to experiment. You'll no longer follow recipes blindly; you'll understand why each step matters and how to adjust for different flavor combinations or occasions.
The Science Behind the Method
The poke cake technique relies on the principle of capillary action and the porous structure of baked goods. When you bake a cake, air bubbles and steam create thousands of tiny channels throughout the crumb. These channels give cake its characteristic soft, tender texture. By intentionally creating larger holes and introducing liquid while the cake is still warm, you're essentially creating highways for flavor to travel deep into the structure.
The timing of when you poke and pour is crucial. A warm cake has a more open crumb structure—the starches are still somewhat pliable, and the proteins haven't fully set into their final formation. This means the cake can absorb liquid more readily without becoming soggy or falling apart. If you wait until the cake is completely cool, the crumb tightens up and resists absorption, leading to pools of liquid on top rather than beautiful marbled channels throughout.
When you use gelatin-based mixtures, there's an additional layer of science at work. The gelatin remains liquid when warm but begins to set as it cools, creating firm pockets of flavor within the cake. This setting process takes several hours in the refrigerator, during which the gelatin slowly firms while the cake crumb around it absorbs some of the moisture. The result is a perfect balance: the cake becomes more moist without being wet, and the flavored pockets become concentrated bursts of taste.
Understanding this process transforms how you approach baking. You'll recognize that the poke cake method can rescue an overbaked or dry cake by introducing moisture. You'll know that different liquids—thin syrups versus thick gelatin mixtures—will behave differently in those channels. And you'll feel confident adjusting recipes based on your cake's density, knowing that a tighter crumb needs more holes and longer absorption time than a light, airy cake.
Tools and Ingredients You'll Need
The beauty of creating a spectacular layered poke cake lies in how minimal your equipment needs truly are. Your primary poking tool can be the rounded handle of a wooden spoon, a thick chopstick, or even the handle of a large serving spoon. The key is choosing something with a diameter of about half an inch—large enough to create substantial channels but not so large that you compromise the cake's structural integrity. I prefer wooden spoon handles because they're smooth and won't tear the cake as you create holes.
For the cake itself, you'll need a 9x13-inch baking pan. This size is ideal because it provides enough surface area to create an impressive pattern of colored channels without making the cake too thin. Metal pans conduct heat more evenly than glass, giving you a more consistent bake, though glass works perfectly well if that's what you have. You'll also want a wire cooling rack, mixing bowls for your gelatin or syrup mixtures, and a whisk for ensuring everything dissolves smoothly.
Regarding ingredients, start with a reliable cake base. Whether you're making a cake from scratch or using a quality cake mix as your foundation, ensure you're using fresh leavening agents. Baking powder and baking soda lose potency over time, and a cake that doesn't rise properly will have a dense crumb that resists liquid absorption. For the colorful liquid component, unflavored gelatin powder or flavored gelatin mixes work beautifully, as do fruit juice concentrates mixed with simple syrup.
The quality of your gelatin matters more than you might think. Higher-quality gelatin sets more reliably and has a cleaner flavor that won't compete with your other ingredients. If you're using flavored varieties, read labels carefully to ensure all ingredients meet your dietary requirements. For natural coloring options, consider fruit juices like pomegranate, orange, or berry blends—they provide gorgeous hues without artificial additives. Finally, you'll need a light, fluffy topping. Whipped cream or a stabilized whipped topping provides the perfect neutral canvas that lets your colorful cake interior shine through.
The Method, Step by Step
Begin by preparing your cake base according to your chosen recipe, whether from scratch or using a dependable mix. The key at this stage is achieving an even bake—use an oven thermometer to verify your actual temperature matches the dial setting, as many home ovens run hot or cold. Pour your batter into a greased and floured 9x13-inch pan, smoothing the top with a spatula to ensure uniform thickness. Bake until a toothpick inserted in the center comes out with just a few moist crumbs attached—this usually takes 25-35 minutes depending on your recipe. You want the cake fully baked but not overdone, as a dry cake will absorb liquid too quickly and may become mushy.
The moment your cake comes out of the oven, let it rest for exactly fifteen minutes. This brief cooling period allows the structure to stabilize just enough that it won't collapse when you poke it, but keeps it warm enough for optimal liquid absorption. While the cake rests, prepare your colored liquids. If using gelatin, dissolve the powder in boiling water, stirring constantly for two full minutes to ensure no granules remain—undissolved gelatin creates an unpleasant grainy texture. Then add cold water or juice according to package directions. For multiple colors, prepare each in a separate bowl or large measuring cup with a pouring spout.
Now comes the transformative moment: creating your pattern of holes. Using your wooden spoon handle or chosen tool, poke holes throughout the entire cake at roughly one-inch intervals. Push down until you're about three-quarters through the cake's depth—you want deep channels but not to puncture completely through to the pan bottom. Work systematically across the surface, creating an even grid pattern. Don't worry if the holes seem large; they'll close up slightly as the cake absorbs liquid. For a standard 9x13 cake, you'll typically create 50-70 holes. The more holes you make, the more evenly distributed the color will be.
Immediately begin pouring your prepared liquids over the warm cake. Work slowly and deliberately, moving your pouring vessel in a steady pattern across the surface. If you're creating a multi-colored effect, alternate your colors as you pour, allowing each liquid to seek out different holes. The cake will make soft gurgling sounds as the liquid travels down through the channels—this is exactly what you want to hear. Some liquid will pool on the surface initially; this is normal and will gradually absorb as the cake continues cooling. Pour until you've used about two-thirds of your prepared liquid; the cake can only absorb so much, and excess will simply sit on top.
Once all the liquid is poured, gently tap the pan on your counter a few times to help distribute the liquid and eliminate any air pockets. You'll notice the surface looks quite wet and the holes are clearly visible—don't panic. Cover the cake loosely with plastic wrap, ensuring the wrap doesn't touch the surface, and transfer immediately to your refrigerator. The chilling process is where the magic happens. Over the next three to four hours, the gelatin will set, the cake will absorb remaining surface moisture, and the flavors will meld together beautifully.
After the initial chill period, check your cake. The surface should now appear slightly drier, with the holes still visible but the pooled liquid absorbed. At this point, you can apply your topping layer. Spread whipped cream or your chosen topping evenly across the entire surface, using an offset spatula to create smooth, sweeping strokes. The topping serves both an aesthetic and practical purpose: it seals in moisture and provides a beautiful neutral background. Return the covered cake to the refrigerator for at least another two hours, or preferably overnight. This extended chilling time allows the flavors to fully develop and ensures clean slices when you cut into your masterpiece.
When you're ready to serve, run a thin knife under hot water, wipe it dry, and cut through the cake with one smooth motion. The first slice will reveal your handiwork—those gorgeous swirls of color running throughout the interior. Each subsequent slice will show a slightly different pattern, making every serving unique. The texture should be remarkably moist but not wet, with distinct pockets of flavor-infused gelatin providing bursts of complementary taste against the tender cake crumb.
Troubleshooting Guide
If your cake turns out soggy rather than moist, you likely poured the liquid too quickly or used more than the cake could absorb. The solution for next time is to pour more gradually and stop when you notice liquid pooling on the surface isn't being absorbed within a minute or two. You can also make your holes slightly further apart, which leaves more intact cake structure between channels. For the current soggy cake, increase the chilling time—extended refrigeration will help the gelatin firm up, which improves the texture considerably. You can also serve smaller portions topped with extra whipped cream to balance the moisture.
When the colored liquid doesn't penetrate deeply and instead creates a pool on top, the most common culprit is waiting too long after baking to poke and pour. The cake needs to be warm for optimal absorption. If you notice this happening as you pour, try using a skewer or toothpick to gently probe deeper into some of the existing holes, creating additional pathways for the liquid. You can also try gently pressing on the cake surface around the holes to encourage liquid movement. In future attempts, work more quickly after the fifteen-minute rest period.
If your cake develops a rubbery layer where the gelatin concentrated, you used gelatin that was too thick or cool when you poured it. Gelatin begins setting up as it cools, so if your mixture was already starting to thicken, it couldn't flow properly through the cake channels. Always pour gelatin while it's still completely liquid and slightly warm. If this happens, the cake is still perfectly edible—just let guests know to expect a different texture. For your next attempt, work quickly after mixing the gelatin, or keep the bowl in a warm water bath to maintain the liquid state longer.
When slices fall apart or look messy rather than showing clean color swirls, the issue is usually inadequate chilling time. The gelatin needs several hours to fully set within the cake structure, providing stability. Additionally, make sure you're using a sharp knife cleaned between each cut. A dull blade or one with cake residue will drag and tear rather than slicing cleanly. Let the cake chill for a full six hours or overnight, and always use a hot, clean knife for each slice.
If the colors bleed together into a muddy appearance rather than staying distinct, you either poured different colors too close together or moved the cake before the gelatin set. When creating multiple color channels, alternate your pouring pattern so the same colors aren't adjacent. Think of it like a checkerboard rather than stripes. Also, move the cake to the refrigerator immediately after pouring and resist the temptation to peek or move it during the first two hours. Any jostling while the gelatin is still liquid will cause the colors to run together.
Taking It to the Next Level
Once you've mastered the basic technique of creating a beautiful layered poke cake, you can elevate your results with professional touches. Consider using natural fruit purees and juices instead of artificial flavoring—blend fresh strawberries, steep hibiscus tea for a deep magenta color, or use concentrated pomegranate juice for rich red channels. These natural options provide more complex, sophisticated flavors that appeal to adult palates while maintaining visual drama. You can also experiment with layering different textures by using some channels filled with fruit preserves or lemon curd instead of liquid gelatin.
For stunning presentations, try creating an ombre effect by using varying concentrations of the same colored gelatin—starting with deeply saturated liquid at one end of the pan and progressively lighter shades toward the other end. This creates a gorgeous gradient when you cut perpendicular to the color flow. Another professional technique involves using a flavor injector to place small amounts of different colored liquids in specific patterns, giving you more control than the random pouring method. This allows you to create deliberate designs like concentric circles or geometric patterns.
Consider pairing your colorful cake interior with complementary garnishes that hint at the flavors within. If you've used citrus-flavored channels, top your whipped cream with candied citrus peel or fresh zest. For berry-flavored versions, arrange fresh berries on top in a decorative pattern. Edible flowers add an elegant touch that makes the dessert suitable for special gatherings. Finally, think about texture contrasts—adding a thin layer of crumbled cookies, toasted nuts, or coconut between the cake and the whipped topping provides a delightful textural surprise.
Storing Your Results
A properly made layered poke cake is remarkably forgiving when it comes to storage, actually improving in flavor and texture over the first day or two. The gelatin-infused moisture continues to distribute throughout the cake, and the flavors meld together beautifully. Store your finished cake covered in the refrigerator—if you've used plastic wrap directly on the whipped topping, be aware it may stick and mar the surface when removed. A better option is placing toothpicks in the topping around the edges and center, then draping plastic wrap over these supports to create a tent that doesn't touch the surface.
For optimal freshness, consume your cake within four to five days of preparation. Beyond this window, the cake remains safe to eat but may begin to develop a slightly watery layer at the bottom as the gelatin gradually releases moisture. The whipped topping may also begin to deflate or develop a slightly grainy texture. If you've used stabilized whipped cream rather than regular whipped cream, you'll get an extra day or two of peak quality.
This dessert doesn't freeze particularly well due to the gelatin component and whipped topping, both of which undergo undesirable textural changes when frozen and thawed. If you must freeze it, do so before adding the whipped topping, wrap individual slices tightly in plastic wrap followed by aluminum foil, and freeze for up to one month. Thaw overnight in the refrigerator, then add fresh whipped topping just before serving. The texture won't be quite as perfect as a fresh cake, but the flavor remains good.
When transporting your layered poke cake to gatherings, keep it chilled until the last possible moment. If you're traveling more than thirty minutes, place the covered pan in a cooler with ice packs, ensuring the ice packs don't directly contact the pan. The gelatin can begin to soften in warm temperatures, which may cause colors to bleed. Once at your destination, refrigerate immediately and keep chilled until serving time.
Common Questions
Can I make this technique work with other cake flavors beyond vanilla?
Absolutely, and I encourage experimentation with different base cakes. Chocolate cake works beautifully with cherry or raspberry-flavored gelatin channels, creating a sophisticated flavor combination. Lemon or citrus cake pairs wonderfully with blueberry or lime-flavored liquid. The key consideration is ensuring your base cake isn't too dense—pound cakes and very heavy butter cakes don't absorb liquid as readily as lighter, more tender varieties. Stick with standard cake recipes or mixes that have a soft, open crumb structure for best results.
What can I use if I want to avoid gelatin entirely?
You have several excellent alternatives that create similar effects. Simple syrup infused with fruit juices provides moisture and flavor without the setting action of gelatin—the result will be slightly less distinct color channels but equally delicious moisture throughout. Fruit preserves thinned with a bit of water or juice can be poured into the holes for concentrated flavor pockets. For a thicker option that mimics gelatin's texture, try using agar-agar, a plant-based setting agent derived from seaweed. Use it according to package directions, keeping in mind it sets more firmly than gelatin, so you may want to use slightly less than you would gelatin.
How do I scale this technique for a smaller or larger crowd?
The method adapts beautifully to different pan sizes. For an 8x8-inch square pan serving 6-9 people, reduce all ingredients by about one-third and space your holes slightly closer together—about three-quarters of an inch apart. For a larger crowd, you can bake two 9x13 pans and create different color combinations in each, or use a half-sheet pan for a thinner cake that serves 20-24. The key adjustment is maintaining the proper ratio of holes to cake volume. Thicker cakes need holes that go deeper but can be spaced further apart; thinner cakes need shallower, more closely spaced holes.
Why did my cake develop a tough, dense texture after adding the liquid?
This usually indicates the cake was significantly overbaked before you added the liquid. When cake bakes too long, the protein structure becomes very tight and the starches fully crystallize. Adding liquid to an overbaked cake can actually make it tougher rather than more tender, as the liquid causes the starches to retrograde—essentially, they become gummy rather than soft. To prevent this, remove your cake from the oven when a toothpick comes out with a few moist crumbs, not completely clean. The residual heat will finish cooking the cake during those fifteen minutes of rest time.
Can I prepare this dessert a day in advance?
Not only can you prepare a layered poke cake ahead, but it actually benefits from advance preparation. Making the cake a full day before serving allows the flavors to develop completely and the texture to reach optimal moistness throughout. In fact, many people find the cake tastes best on the second day. The only component I recommend adding closer to serving time is any garnish like fresh fruit or additional whipped cream decorations, which maintain better appearance when freshly applied. The base cake with its initial whipped topping layer holds beautifully for 24-48 hours.
What's the best way to create distinct color patterns rather than random swirls?
For more controlled color placement, use a turkey baster or large syringe to inject colored liquid directly into specific holes. Create your hole pattern first, then decide which holes will receive which colors, working systematically across the pan. Another approach is to poke holes in distinct sections—one-third of the pan in a grid, skip a section, then another grid, and so forth. Pour one color over the first section of holes, then create holes in the skipped sections and pour a different color. This creates more defined color zones. Remember that some bleeding between colors creates beautiful marbled effects, so don't stress about absolute precision.
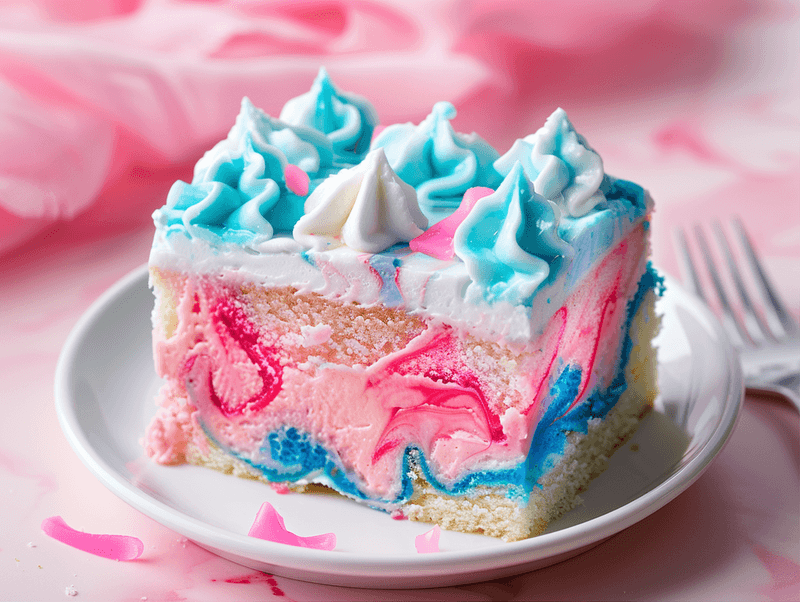
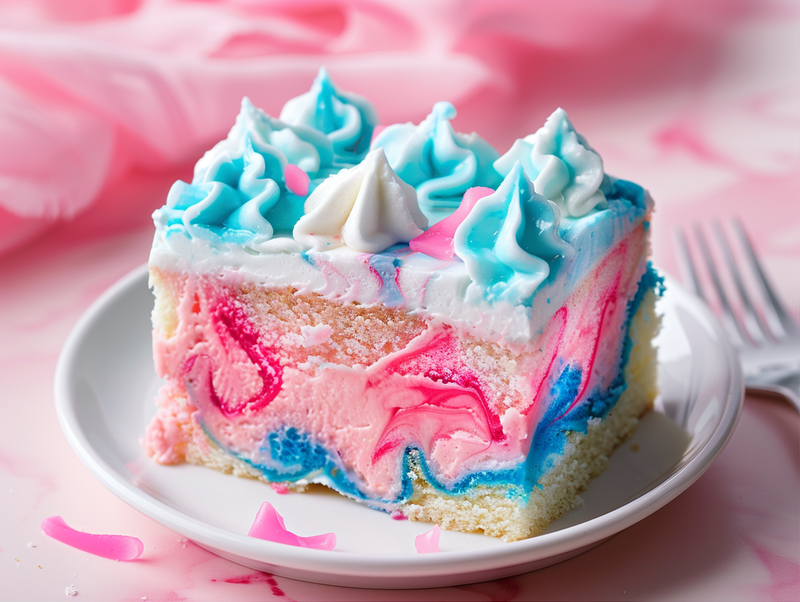
Colorful Layered Poke Cake
A stunning dessert featuring a moist vanilla cake with vibrant colored gelatin channels running throughout, topped with fluffy whipped cream. Perfect for family gatherings and special occasions.
Prep Time
25 min
Cook Time
30 min
Total Time
5h
Servings
12 servings
Ingredients
For 12 servings
- 1 box (15.25 oz) vanilla cake mix
- 3 large eggs
- 1/2 cup vegetable oil
- 1 cup water
- 2 packages (3 oz each) flavored gelatin in different colors
- 2 cups boiling water, divided
- 2 cups cold water, divided
- 16 oz frozen whipped topping, thawed
- Fresh fruit for garnish (optional)
Instructions
- 1
Prepare the cake
Preheat your oven to 350°F (175°C). Grease and flour a 9x13-inch baking pan thoroughly. In a large mixing bowl, combine the cake mix, eggs, vegetable oil, and water. Beat with an electric mixer on low speed for 30 seconds, then increase to medium speed and beat for 2 minutes until smooth and well combined. Pour the batter into the prepared pan and spread evenly.
- 2
Bake the cake
Place the pan in the preheated oven and bake for 28-32 minutes, or until a toothpick inserted in the center comes out with just a few moist crumbs attached. The top should be golden and spring back lightly when touched. Remove from oven and place on a wire cooling rack. Let the cake rest for exactly 15 minutes—this timing is crucial for proper liquid absorption.
- 3
Prepare colored gelatin
While the cake bakes and rests, prepare your colored gelatin mixtures. In separate large measuring cups or bowls, combine each gelatin package with 1 cup of boiling water. Stir continuously for 2 full minutes until the gelatin is completely dissolved with no granules visible. Add 1 cup of cold water to each mixture and stir well. Keep the gelatin at room temperature—it should remain completely liquid when you pour it.
- 4
Create the holes
After the cake has rested for 15 minutes, use the round handle of a wooden spoon, a thick chopstick, or similar tool to poke holes throughout the entire surface. Space the holes about 1 inch apart, creating an even grid pattern. Push down until you're about three-quarters through the cake's depth. For a standard 9x13 cake, you should create 50-70 holes total. The holes will appear quite large, but they'll close up slightly as the cake absorbs liquid.
- 5
Pour the gelatin
Working slowly and deliberately, pour the prepared gelatin mixtures over the warm cake, alternating colors as you move across the surface. Allow the liquid to flow into the holes naturally, moving your pouring container in a steady pattern. You should hear soft gurgling sounds as the liquid travels through the channels. Use about two-thirds of your prepared gelatin—stop pouring if you see liquid pooling on the surface that isn't being absorbed. Some surface liquid is normal and will absorb gradually.
- 6
Initial chilling
Gently tap the pan on your counter 3-4 times to help distribute the liquid and eliminate air pockets. Cover the cake loosely with plastic wrap, ensuring the wrap doesn't touch the wet surface. Transfer immediately to the refrigerator and chill for 3-4 hours. During this time, the gelatin will set within the cake channels, the surface moisture will absorb, and the flavors will begin to meld together.
- 7
Add the topping
After the initial chill period, remove the cake from the refrigerator. The surface should appear less wet, though the holes will still be visible. Spread the thawed whipped topping evenly across the entire surface using an offset spatula, creating smooth, even coverage. The topping layer seals in moisture and provides a beautiful neutral background that makes the colored interior pop when you cut the cake.
- 8
Final chilling and serving
Cover the cake again and return it to the refrigerator for at least 2 more hours, or preferably overnight. This extended chilling allows the flavors to fully develop and ensures clean, beautiful slices. When ready to serve, run a thin knife under hot water, wipe it dry, and cut through the cake with one smooth motion. Clean the knife between cuts for the neatest presentation. Each slice will reveal gorgeous swirls of color throughout the interior.
Nutrition Facts
Per serving (estimated)
385 calories
Calories
58g
Carbs
4g
Protein
16g
Fat
1g
Fiber
345mg
Sodium
42g
Sugar


