Japanese Dango Recipe 🍡 | Sweet Mochi Balls
Master the art of Japanese dango with this authentic recipe! Learn to make adorable pink, white, and green mochi balls perfect for gatherings.
cookwithlucia.com/recipes/japanese-dango-recipe-cute-pink-white-green-mochi-balls
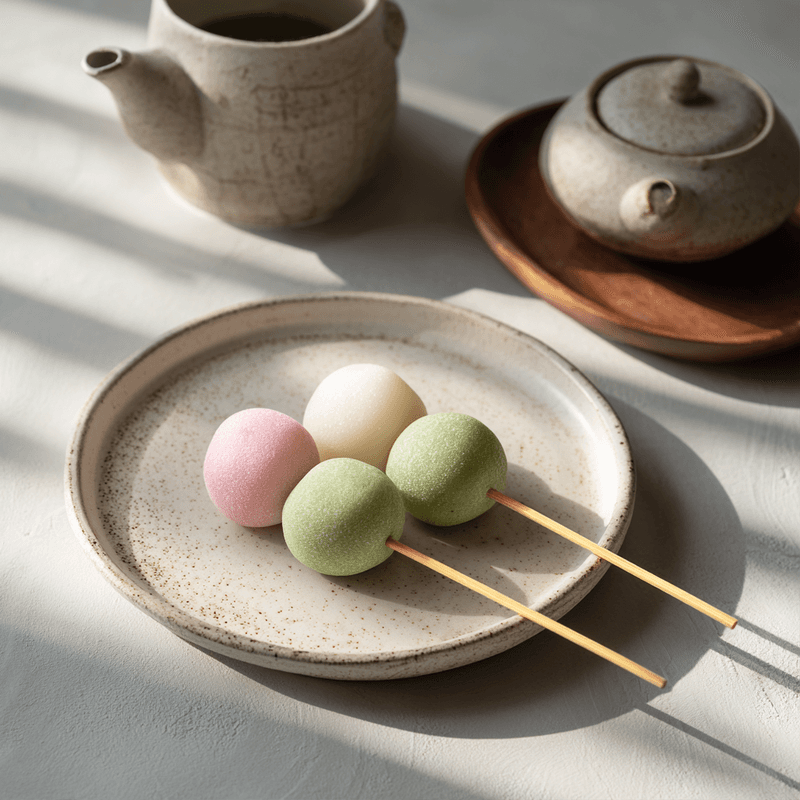
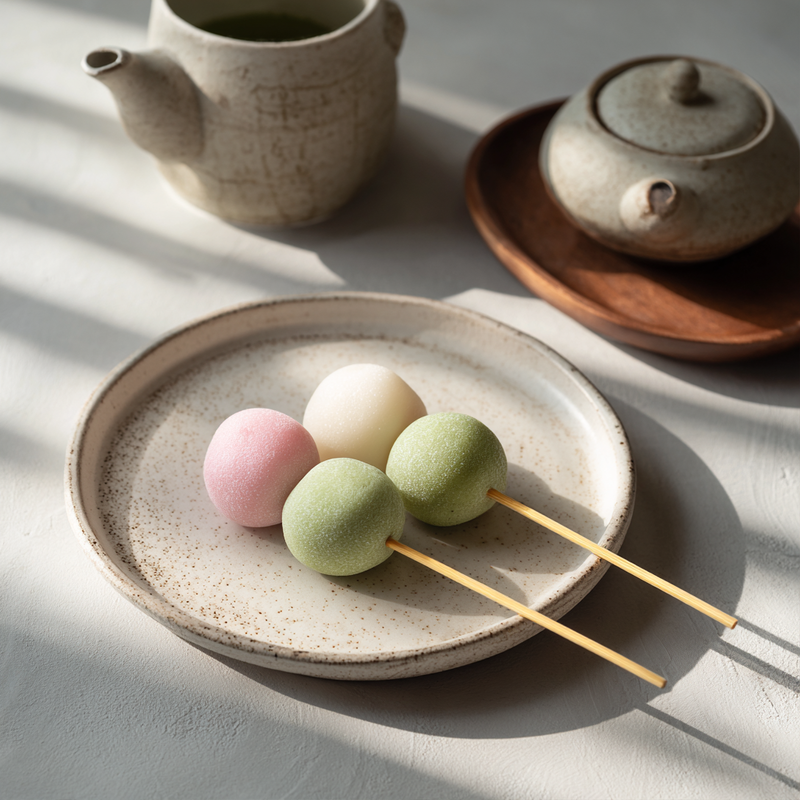
Few confections capture the charm of traditional Japanese sweets quite like dango. These delightful rice flour dumplings, skewered in trios and often enjoyed during hanami flower viewing season, represent centuries of confectionery artistry. The first time I encountered truly exceptional dango was at a small traditional sweet shop where the texture was impossibly smooth yet pleasantly chewy, each bite releasing a subtle sweetness that didn't overwhelm. The tri-color presentation of pink, white, and green wasn't merely decorative—it symbolized the beauty of changing seasons, a concept deeply embedded in Japanese culinary philosophy.
I won't mislead you: crafting perfect dango requires attention to detail and a bit of patience. The dough must achieve that precise consistency where it's pliable enough to shape yet firm enough to hold together during boiling. The coloring must be gentle and natural, the cooking time exact, and the cooling process properly managed. But here's what makes this Japanese dango recipe absolutely worth every minute of effort—you'll create an authentic sweet that tastes remarkably close to what you'd find in specialty shops across Japan. These mochi balls offer a unique textural experience that's neither cake nor candy, and once you master the technique, you'll find yourself making batch after batch for family gatherings and quiet afternoons with tea. This guide will walk you through not just the steps, but the why behind each technique, transforming you from a curious cook into someone who truly understands the art of dango making.
The Origins and History
Dango traces its roots back over a thousand years in Japanese culinary history, emerging during a period when rice cultivation became central to the culture. Originally made from rice flour or mochiko (glutinous rice flour), these dumplings were offerings at shrines and temples, their round shape symbolizing completeness and harmony. Unlike mochi, which requires the labor-intensive process of pounding steamed rice, dango offered a simpler preparation method that made sweet rice treats accessible to common households throughout Japan.
The tri-color presentation you see in this Japanese dango recipe—known as hanami dango or sanshoku dango—became particularly popular during the Edo period. The pink represents cherry blossoms, white symbolizes the lingering snow of winter, and green evokes the fresh leaves of spring. Regional variations abound across Japan's islands: mitarashi dango gets glazed with a sweet soy sauce, anko dango features sweet red bean paste, and tsukimi dango appears in pure white for moon viewing celebrations. Each style reflects local tastes and seasonal celebrations unique to different prefectures.
In modern home kitchens, dango has evolved from a seasonal specialty to an accessible sweet that creative cooks prepare year-round. Contemporary versions experiment with flavors like matcha, strawberry, and even sesame, though the fundamental technique remains remarkably consistent with historical methods. The beauty of making dango today is that we can achieve traditional results with modern conveniences while honoring the centuries of refinement that perfected these charming rice flour dumplings.
Understanding the Flavor Profile
The flavor of traditional dango embodies subtle sweetness rather than the aggressive sugar intensity found in many Western confections. When you bite into a properly prepared dango ball, you experience a gentle sweetness that allows the natural flavor of rice to shine through—earthy, slightly nutty, and comforting. The sugar content is deliberately restrained, creating a canvas that pairs beautifully with tea and allows any added flavors like matcha or fruit to express themselves without competition.
What makes this Japanese dango recipe particularly interesting from a flavor perspective is how the tri-color presentation affects perception. The pink balls, typically flavored with a touch of strawberry or food coloring, might carry the faintest fruity note. The green spheres, when properly prepared with matcha powder, introduce a pleasant bitterness that balances the sweetness. The white dango serves as a neutral palate cleanser between the two, creating a complete tasting experience as you work your way along the skewer.
Texture plays an equally important role in the overall flavor profile. The characteristic mochi-like chewiness—smooth yet resistant, soft yet structured—creates a satisfying mouthfeel that prolongs each bite. When perfectly executed, dango should never feel gummy or sticky in your mouth, but rather offer a pleasant resistance that yields gently as you chew, releasing its delicate sweetness gradually rather than all at once.
Essential Ingredients Explained
Joshinko, or non-glutinous rice flour, forms the foundation of authentic dango and creates that signature smooth texture. Unlike regular wheat flour, joshinko produces a translucent quality when cooked and provides structure without heaviness. Look for finely milled rice flour at Asian markets—the powder should feel silky between your fingers, not gritty. If joshinko proves difficult to source, you can substitute mochiko (sweet rice flour), though the texture will be slightly chewier and more elastic.
Shiratamako, a type of glutinous rice flour made from mochi rice, adds the essential chewiness that defines properly made dango. This ingredient is what transforms simple rice dough into those beautifully bouncy spheres. When shopping, examine packages carefully—shiratamako should be pure white and feel extremely fine, almost like cornstarch. Some recipes use only one type of flour, but combining joshinko and shiratamako in this Japanese dango recipe creates superior texture with the perfect balance of smoothness and chew.
Granulated sugar provides the gentle sweetness, but its role extends beyond flavor—it also affects texture by retaining moisture and creating tenderness in the finished dumplings. The amount should be carefully measured; too much creates overly soft dango that fall apart, while too little produces dense, heavy spheres. Water temperature matters tremendously when mixing your dough. Hot water activates the starches differently than cold, so this recipe specifies warm water to achieve optimal gluten development and pliability.
Matcha powder for the green dango must be culinary grade or higher—the vibrant green color and clean, slightly bitter flavor distinguish quality matcha from oxidized, yellowish varieties. Store matcha in an airtight container away from light to preserve its color and flavor. For the pink coloring, natural strawberry powder offers both color and subtle flavor, though food-safe pink coloring works perfectly well if you prefer a more neutral taste. Always choose ingredients without any questionable additives, ensuring everything remains halal-compliant.
Potato starch or cornstarch for dusting prevents sticking during shaping and after cooking. This seems like a minor detail, but inadequate dusting leads to dango that stick together or to your work surface, ruining their perfect round shapes. Finally, bamboo skewers complete the traditional presentation—soak them briefly in water before threading to prevent splintering.
Mastering the Technique
The journey to perfect dango begins with proper dough hydration, the single most critical factor in achieving that coveted texture. Start by combining your dry ingredients—the rice flours and sugar—in a spacious bowl, whisking thoroughly to eliminate any lumps that could create textural inconsistencies. Gradually add warm water while stirring continuously with chopsticks or a wooden spoon, observing how the mixture transforms from powder to crumbles to a cohesive mass. The dough should come together into a ball that's soft and pliable but not sticky—think of the consistency of an earlobe when you press it.
Kneading develops the structure that gives dango its characteristic bounce, so don't rush this stage. Transfer the dough to a clean work surface dusted with potato starch and knead firmly for five to seven minutes. You'll notice the texture becoming smoother and more elastic as you work. If the dough feels too dry and cracks appear, wet your hands slightly and continue kneading to incorporate that moisture. If it's too wet and clings to your palms, dust with additional starch gradually until it reaches the proper consistency.
Dividing and shaping requires precision for uniform cooking and visual appeal. Divide your main dough into three equal portions, then color one with matcha powder and another with pink coloring, kneading each until the color distributes evenly throughout. Roll each colored portion into a log, then cut into equal pieces—I recommend weighing them at about 10-12 grams each for consistent results. Roll each piece between your palms in a circular motion, applying gentle pressure to create perfectly smooth spheres without any cracks or creases.
The boiling stage demands your full attention because timing determines whether your dango achieves that perfect texture or turns mushy. Bring a large pot of water to a rolling boil, then gently lower your dango balls in batches—don't overcrowd or they'll stick together. Initially, they'll sink to the bottom, which is perfectly normal. After two to three minutes, you'll notice them floating to the surface, which signals they're nearly done. Continue boiling for exactly one more minute after floating—this ensures the centers cook through completely.
Shocking in ice water immediately after boiling halts the cooking process and sets the texture while creating that glossy, translucent appearance characteristic of excellent dango. Prepare your ice bath before you begin boiling so it's ready the moment you need it. Use a slotted spoon to transfer the cooked dango directly from boiling water to ice water, letting them cool completely for about two minutes. This temperature shock also firms up the exterior, making the dango easier to handle during skewering and serving.
Common Pitfalls and How to Fix Them
The most frequent mistake when attempting this Japanese dango recipe involves dough that's either too wet or too dry, both of which produce disappointing results. If your dough is too wet, the dango will spread and flatten during boiling, losing their round shape and emerging with a gummy, unpleasant texture. The remedy is to add rice flour one tablespoon at a time, kneading thoroughly between additions until the dough holds its shape when rolled into a ball. Conversely, overly dry dough cracks during shaping and produces dense, hard dango. Fix this by wetting your hands and kneading that moisture into the dough gradually—never add water directly or you'll create wet pockets that won't incorporate evenly.
Another common issue occurs when dango stick together during boiling, creating misshapen clusters instead of individual spheres. This happens when the pot is overcrowded or the water isn't at a full rolling boil when you add the dumplings. Always work in batches, boiling no more than 8-10 pieces at once in a large pot, and ensure the water returns to a boil quickly after adding the dango. Stirring very gently once during the first minute of cooking also prevents sticking without damaging the delicate spheres.
Uneven coloring frustrates many first-time dango makers, resulting in streaky green or pink balls instead of uniform pastels. The solution lies in thorough kneading after adding your coloring agents—knead for at least two full minutes until absolutely no streaks remain. For matcha, sift the powder before adding it to prevent clumps that create dark green spots. With liquid food coloring, add just a drop or two at a time, kneading completely between additions to build up to your desired shade gradually.
Dango that turn hard and rubbery shortly after making signal either overcooking or improper storage. If you've boiled them too long—more than one minute after they float—the starches overdevelop and create that unpleasant rubbery texture. There's no fixing overcooked dango, but you can prevent it by setting a timer religiously. If your perfectly cooked dango harden during storage, it's because they've dried out. Always keep finished dango covered with a damp cloth if serving within a few hours, or store them in an airtight container with a piece of dampened paper towel to maintain moisture.
Some cooks struggle with dango that fall apart during boiling, dissolving into cloudy water instead of holding their shape. This typically indicates insufficient kneading during the dough stage—the structure simply hasn't developed enough to withstand the boiling process. The starches need adequate working to create that network that holds everything together. If you notice your first batch disintegrating, remove any remaining uncooked dango, return the dough to your work surface, and knead vigorously for another three to four minutes before reshaping and trying again.
Regional Twists Worth Trying
Mitarashi dango represents one of Japan's most beloved variations, transforming the basic dango foundation with a glossy, sweet-savory glaze. Instead of the tri-color presentation, mitarashi uses plain white dango skewered and grilled briefly until light char marks appear, then generously coated with a sauce made from soy sauce, sugar, and cornstarch cooked until thick and shiny. The contrast between the subtle rice flavor and the umami-rich glaze creates an addictive sweet-savory combination that's particularly popular at festivals. To adapt this Japanese dango recipe for mitarashi style, simply skip the coloring step and prepare all white dango, then grill and glaze.
Anko dango showcases the classic pairing of mochi-like textures with sweet red bean paste, a combination fundamental to Japanese confectionery. This variation wraps the dango dough around a small ball of smooth anko (red bean paste) before boiling, creating a sweet surprise inside each dumpling. The technique requires slightly flattening each dough portion, placing a half-teaspoon of anko in the center, then carefully sealing and rolling to encase the filling completely. The result offers a more substantial sweet with layers of flavor and texture that make it perfect for serving alongside green tea.
Kusadango brings the vibrant color and distinctive flavor of yomogi (Japanese mugwort) to the dango experience, creating brilliant green spheres with an herbal, slightly bitter note. Traditional preparation involves blanching fresh mugwort leaves, grinding them into a paste, and kneading this directly into the dough. For home cooks without access to fresh yomogi, high-quality matcha powder in slightly higher quantities than this recipe uses can approximate the color and introduce similar beneficial bitterness. Kusadango is particularly associated with early spring and pairs beautifully with sweet accompaniments that balance its subtle bitterness.
Tsukimi dango takes a minimalist approach, featuring pure white spheres traditionally arranged in a pyramid to honor the autumn moon viewing tradition. These dango contain slightly less sugar than the standard recipe, emphasizing the natural rice flavor, and are typically presented without skewers on a special stand. The appeal lies in their purity and simplicity—no colors, no glazes, just perfectly formed white dumplings that celebrate the ingredient itself. Making tsukimi style dango requires extra attention to shaping since any imperfections show clearly without colorful distractions.
The Perfect Spread
Serving dango as part of a thoughtful spread elevates these simple sweets into a memorable experience. Traditional Japanese tea service provides the classic context—prepare a pot of high-quality green tea, either sencha for its grassy freshness or hojicha for its roasted warmth, and serve it alongside your freshly made dango. The tea's slight bitterness and astringency cut through the sweetness perfectly, cleansing your palate between bites and highlighting the subtle rice flavor that makes this Japanese dango recipe special.
For a more substantial offering suitable for afternoon gatherings, consider adding dorayaki (red bean pancakes), mochi, or taiyaki to create a full Japanese sweets tasting experience. Include small dishes of kinako (roasted soybean powder) mixed with sugar as an optional coating—guests can roll their dango for added nutty flavor and textural contrast. Fresh fruit like sliced strawberries, mandarin oranges, or persimmons provides refreshing counterpoints to the chewy dumplings and adds vibrant color to your presentation.
Modern fusion approaches might pair dango with matcha lattes, fruit teas, or even coconut milk-based drinks that complement the rice flavors while offering something familiar to guests less experienced with Japanese sweets. Consider serving alongside fresh whipped cream lightly sweetened, allowing guests to dip their dango for a contemporary twist that bridges traditional and modern dessert sensibilities. The key is balancing textures and temperatures—if serving something cold like ice cream, the room-temperature or slightly warm dango provides pleasant contrast.
Presentation matters significantly in Japanese food culture, so take time to arrange your tri-color dango skewers attractively. A simple rectangular plate allows the colors to stand out, or use a traditional lacquered tray for authentic appeal. Add a few seasonal leaves or flowers as garnish—nothing edible is necessary, just a visual nod to the natural world that inspired the tri-color combination. Whatever accompaniments you choose, keep portions modest; dango is rich despite its small size, and a little goes a long way.
Keeping and Reheating
Freshly made dango tastes best within the first few hours when the texture remains perfectly soft and pleasantly chewy. If you need to hold them before serving, arrange the cooked and cooled dango on a plate, cover loosely with a damp kitchen towel, and keep at room temperature for up to four hours. The moisture from the towel prevents the surface from drying and developing that unpleasant hardened exterior that ruins the eating experience. Never refrigerate dango you plan to serve the same day—cold temperatures accelerate retrogradation, the process by which the starches recrystallize and turn hard.
For longer storage, refrigeration becomes necessary despite its textural impact. Place your dango in an airtight container with a piece of lightly dampened paper towel, seal completely, and refrigerate for up to three days. The dumplings will firm up considerably in the cold, but this is manageable with proper reheating. Interestingly, this Japanese dango recipe produces dumplings that hold up better than many versions because the combination of rice flours creates a more stable starch structure that resists hardening somewhat better than single-flour doughs.
Reheating refrigerated dango requires gentle heat and added moisture to restore the original texture. The microwave method works surprisingly well: arrange dango on a microwave-safe plate, sprinkle lightly with water, cover with a damp paper towel, and microwave in 10-second intervals until warmed through and softened. Alternatively, steam them for two to three minutes in a bamboo steamer lined with parchment paper—this method most effectively restores the just-made texture. Never reheat by boiling again, as this overcooks the exterior while the center remains cold.
Freezing offers the best option for truly long-term storage, preserving dango for up to one month. Arrange uncooked, shaped dango balls on a parchment-lined baking sheet with space between each, freeze until solid, then transfer to freezer bags with as much air removed as possible. Cook directly from frozen, adding just one extra minute to the boiling time. This method actually works remarkably well, producing results nearly indistinguishable from fresh dango, making it perfect for preparing ahead for gatherings or whenever you want authentic Japanese sweets without the full preparation time.
Your Questions Answered
Can I make dango without shiratamako or joshinko?
While authentic dango requires these specific rice flours for proper texture, you can create a simplified version using mochiko (sweet rice flour) available at most Asian grocers and even some regular supermarkets. Use 200 grams mochiko, 50 grams sugar, and about 180-200ml warm water, adjusting until you achieve an earlobe-like consistency. The texture will be slightly chewier and more elastic than traditional dango made with the joshinko-shiratamako combination, but it still produces enjoyable results that capture the spirit of this Japanese dango recipe. For those unable to source any Asian ingredients, be aware that regular wheat flour won't work—the gluten structure is entirely different and produces completely different results.
How do I prevent the colors from bleeding into each other?
Proper technique during the ice bath stage prevents color bleeding that can muddy your beautiful tri-color presentation. After boiling each color separately, transfer immediately to ice water and let them cool completely before removing. Pat each batch thoroughly dry with paper towels before moving to your work surface. When skewering, handle the dango gently and avoid wet hands, which can reactivate the coloring agents. If you notice slight color transfer despite these precautions, it's usually because the matcha or pink coloring wasn't fully incorporated during kneading, leaving concentrated spots that leach out when wet. The solution is more thorough kneading during the coloring stage.
Can I prepare the dough in advance?
Dango dough doesn't hold well before cooking—it begins drying and forming a skin within 30 minutes of mixing, making it difficult to shape smoothly. However, you can absolutely prepare shaped, uncooked dango several hours ahead. Arrange them on a parchment-lined tray, cover tightly with plastic wrap pressed directly against the surface to prevent air exposure, and refrigerate for up to 8 hours. Bring them to room temperature for 15 minutes before boiling, or add an extra 30 seconds to your cooking time if boiling directly from cold. For even more advance preparation, freeze shaped dango as described in the storage section—this gives you the convenience of having dango ready to cook whenever the craving strikes.
Why are my dango not smooth and glossy?
The glossy, translucent appearance that makes properly prepared dango so visually appealing comes from the ice bath shocking process and proper dough hydration. If your finished dango look dull and matte, you likely didn't shock them long enough in ice water—they need a full two minutes of cold water immersion to develop that sheen. Insufficient kneading during dough preparation also contributes to a dull appearance since the starch structure hasn't developed enough to create that characteristic translucency. Finally, drying out after cooking quickly dulls the surface, so keep your finished dango covered until serving time. Some cooks lightly brush finished dango with a tiny amount of neutral oil for extra shine, though this isn't traditional.
How can I scale this recipe for a large gathering?
This Japanese dango recipe scales beautifully for entertaining—simply multiply all ingredients proportionally and work in batches for the boiling stage. For a gathering of 15-20 people, triple the recipe, which yields approximately 60-75 individual dango balls or 20-25 skewers of three. Your largest challenge will be workspace for shaping all those spheres, so enlist helpers for a fun cooking activity. The beauty of scaling up is that shaped, uncooked dango can wait on trays while you boil in batches—just keep them covered with damp towels. Consider preparing two batches of dough separately rather than one enormous batch, as very large quantities become difficult to knead uniformly and maintain the proper consistency throughout.
Can I make dango without food coloring using only natural ingredients?
Absolutely, and many cooks prefer this approach for a more wholesome sweet. For pink dango, use freeze-dried strawberry powder (about 1-2 teaspoons per portion), which adds both color and subtle fruit flavor, or try beetroot powder for a more earthy pink tone. The green dango already uses natural matcha powder in this recipe, though you could experiment with spirulina powder for a different shade of green, keeping in mind it has a distinct taste. For a yellow variation sometimes seen in four-color dango presentations, turmeric powder provides vibrant color, though use it sparingly as the flavor can overpower. Natural colorants sometimes produce more muted, earthy tones compared to food coloring, but many find these subtle shades more appealing and authentic-looking than bright artificial colors.
Japanese Dango Recipe | Pink White Green Mochi Balls
Authentic tri-color Japanese dango featuring soft, chewy rice flour dumplings in traditional pink, white, and green. Perfect for tea service and gatherings.
Prep Time
25 min
Cook Time
15 min
Total Time
40 min
Servings
18 dango balls (6 skewers)
Ingredients
For 18 dango balls (6 skewers)
- 150 grams joshinko (rice flour)
- 50 grams shiratamako (glutinous rice flour)
- 40 grams granulated sugar
- 160-180ml warm water
- 1 teaspoon matcha powder
- 1/4 teaspoon pink food coloring or 1 teaspoon strawberry powder
- Potato starch or cornstarch for dusting
- Ice water for cooling
- 6 bamboo skewers
Instructions
- 1
Prepare the dough
In a large mixing bowl, combine the joshinko rice flour, shiratamako glutinous rice flour, and granulated sugar. Whisk thoroughly to combine and eliminate any lumps. Gradually add warm water while stirring with chopsticks or a wooden spoon, starting with 160ml and adding more as needed until the mixture comes together into a cohesive dough that feels soft and pliable like an earlobe when pressed.
- 2
Knead the dough
Transfer the dough to a clean work surface lightly dusted with potato starch. Knead firmly and continuously for 5-7 minutes until the texture becomes smooth, elastic, and no longer sticky. If the dough feels too dry and cracks appear, wet your hands slightly and continue kneading to incorporate moisture. If too wet and sticky, dust with additional starch gradually.
- 3
Divide and color
Divide the dough into three equal portions of approximately 80 grams each. Leave one portion plain white. Knead the matcha powder into the second portion for 2-3 minutes until the green color is completely uniform with no streaks. Knead the pink food coloring or strawberry powder into the third portion until evenly colored throughout.
- 4
Shape the dango
Roll each colored portion into a log and cut into 6 equal pieces (18 pieces total). Roll each piece between your palms in a circular motion, applying gentle, even pressure to create perfectly smooth spheres without cracks or creases. Each ball should weigh approximately 10-12 grams for uniform cooking. Place shaped dango on a parchment-lined tray dusted with potato starch.
- 5
Prepare ice bath
Fill a large bowl with ice water and set aside near your cooking area. This ice bath is essential for stopping the cooking process and creating the characteristic glossy appearance of properly made dango.
- 6
Boil the dango
Bring a large pot of water to a rolling boil over high heat. Gently lower 8-10 dango balls into the boiling water, being careful not to overcrowd the pot. The dango will initially sink to the bottom. After 2-3 minutes, they will float to the surface. Once floating, continue boiling for exactly 1 more minute to ensure the centers cook through completely.
- 7
Shock in ice water
Using a slotted spoon, immediately transfer the cooked dango from the boiling water to the prepared ice bath. Let them cool completely for about 2 minutes. This temperature shock sets the texture and creates the glossy, translucent appearance. Repeat the boiling and shocking process with the remaining dango, working in batches.
- 8
Drain and dry
Remove the cooled dango from the ice water using the slotted spoon and place them on a clean kitchen towel or paper towels. Pat gently but thoroughly to remove all surface moisture. This prevents the colors from bleeding when you skewer them.
- 9
Skewer and serve
Thread three dango balls onto each bamboo skewer in the traditional order: pink, white, then green (or any color combination you prefer). Push them close together so they just touch. Serve immediately for the best texture, or cover with a damp towel and keep at room temperature for up to 4 hours.
Nutrition Facts
Per serving (estimated)
85 calories
Calories
19g
Carbs
1g
Protein
0.2g
Fat
0.5g
Fiber
2mg
Sodium
7g
Sugar


