Ladybug Chocolate Covered Oreos - Fun No-Bake Treats
Make adorable Ladybug Chocolate Covered Oreos! Easy no-bake treats perfect for parties. Simple tutorial with tips for perfect results every time.
cookwithlucia.com/recipes/irresistible-ladybug-chocolate-covered-oreos-fun-no-bake-treats
There's something magical about transforming a simple cookie into an adorable work of edible art. These Ladybug Chocolate Covered Oreos are exactly that kind of kitchen magic—crispy chocolate wafers draped in silky melted chocolate, then decorated with charming little spots and faces that turn them into the cutest ladybugs you've ever seen. The first time I made these delightful treats, I was looking for something fun to make with my nieces on a lazy afternoon. We needed a project that was simple enough for little hands but impressive enough to make everyone feel like a pastry chef. When I pulled up photos of ladybug cookies online, their eyes lit up with excitement, and we spent the whole afternoon giggling, dipping, and decorating. The best part? Watching their proud faces as they presented their creations to the family later that evening. What I love most about Ladybug Chocolate Covered Oreos is that they require absolutely no baking—just a little patience while the chocolate sets and a lot of room for creativity. In this post, I'll walk you through everything you need to know to create these irresistible treats, from choosing the right chocolate to mastering the decorating technique. Whether you're planning a special gathering, looking for a fun activity to do with kids, or simply want to add some whimsy to your dessert table, these adorable cookies are about to become your new favorite no-bake project.

What Are Ladybug Chocolate Covered Oreos?
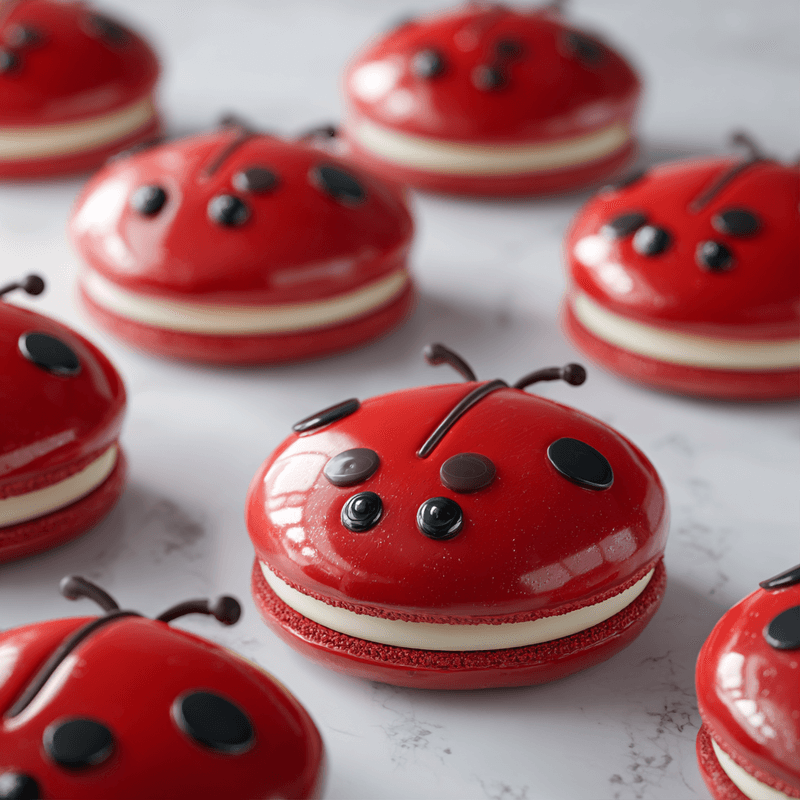
Have you ever looked at a regular cookie and thought, "You know what this needs? A complete makeover into an adorable insect"? That's essentially the delightful concept behind Ladybug Chocolate Covered Oreos. These charming treats start with everyone's favorite sandwich cookie—the classic Oreo with its distinctive chocolate wafers and sweet cream filling. We then give each cookie a luxurious bath in smooth, melted red chocolate (or white chocolate tinted red), creating a glossy coating that serves as our ladybug's vibrant shell. Once the red coating is set, we add the finishing touches: a contrasting chocolate line down the middle to represent the ladybug's wings, tiny dots for spots, and sometimes even little candy eyes and antennae to bring our little bug friends to life. The result is a treat that's as fun to make as it is to eat, combining the beloved taste of Oreos with the smooth richness of quality chocolate. These Ladybug Chocolate Covered Oreos have become incredibly popular for gatherings, as gifts, and as interactive cooking projects because they're surprisingly simple to create yet look professionally crafted. Ready to transform your kitchen into a ladybug factory?
Why You'll Love This Ladybug Chocolate Covered Oreos Recipe
No Baking Required: The beauty of Ladybug Chocolate Covered Oreos lies in their simplicity—there's not a single oven involved in this entire process. You're working exclusively with melting and decorating, which means no worrying about temperature adjustments, rising times, or potential baking disasters. This makes them perfect for hot summer days when you want something sweet but can't bear to turn on the oven, and ideal for beginner cooks who might feel intimidated by traditional baking.
Incredibly Kid-Friendly: If you're looking for an activity to do with children, these Ladybug Chocolate Covered Oreos are absolutely perfect. Kids can help with dipping the cookies, adding the spots, and positioning the decorative elements. The process is forgiving enough that imperfect decorations still look adorable, and children love the instant gratification of seeing their edible art come to life. Plus, there's minimal mess compared to flour-based baking projects.
Stunning Visual Impact: Despite their simple preparation, these treats look absolutely impressive when displayed on a platter. The bright red coating catches the eye immediately, and the playful ladybug design brings smiles to everyone who sees them. They're the kind of treat that makes people ask, "Did you really make these yourself?" The visual wow factor far exceeds the actual effort required.
Completely Customizable: While the classic red ladybug is traditional, you can easily adapt these Ladybug Chocolate Covered Oreos to fit any color scheme or theme. Use different colored chocolate melts to create butterflies, bees, or other creatures. Adjust the decorations to match seasonal themes or personal preferences. The basic technique remains the same, but the creative possibilities are endless.
Budget-Friendly Indulgence: Unlike elaborate desserts that require specialty ingredients and expensive equipment, these treats come together with just a few affordable items: a package of Oreos, some chocolate melts, and basic decorating supplies. You can create dozens of impressive treats without breaking your grocery budget, making them perfect for feeding a crowd.
Perfect for Make-Ahead Prep: Need treats for an upcoming event but don't want last-minute stress? These Ladybug Chocolate Covered Oreos are ideal for advance preparation. They store beautifully for up to two weeks when kept in an airtight container, and they actually taste even better after the flavors have had time to meld together. Make them days ahead and enjoy a stress-free celebration.
Key Ingredients and What They Bring
Let's talk about what goes into making these adorable Ladybug Chocolate Covered Oreos and why each component matters. The foundation of our recipe is, of course, the Oreo cookies themselves. I prefer using regular-sized Oreos rather than minis or double-stuffed varieties because they provide the perfect canvas size for decorating. The classic chocolate cookie offers a sturdy base that holds up beautifully to the dipping process without falling apart, and that familiar Oreo flavor provides a delicious contrast to the sweet chocolate coating.
The star ingredient is red candy melts or red chocolate coating wafers. I've tried both traditional chocolate tinted with food coloring and pre-colored candy melts, and I consistently get better results with candy melts. They're specifically formulated to create a smooth, glossy coating that sets up firm at room temperature. The vibrant red color is already incorporated, so you don't need to worry about achieving the right shade or dealing with the texture issues that can occur when adding liquid food coloring to regular chocolate. If you prefer a more natural approach, you can absolutely use white chocolate tinted with gel food coloring, just be sure to use gel rather than liquid to maintain the proper consistency.
For the decorative details, we need black candy melts or dark chocolate for creating the centerline, spots, and sometimes the head of our ladybug. The contrast between the bright red body and the dark spots is what really makes these Ladybug Chocolate Covered Oreos recognizable as ladybugs. I find that black candy melts work slightly better than dark chocolate because they maintain a deeper, more opaque color, but dark chocolate will certainly work if that's what you have on hand.
Candy eyes are optional but add an irresistible charm to your ladybug creations. These little edible eyes, available in the baking aisle of most craft stores, bring personality and whimsy to each cookie. They transform the treats from simple decorated cookies into characterful little creatures. If you can't find candy eyes or prefer to keep things simpler, you can easily create eyes using tiny dots of white and black chocolate.
Finally, you'll want to have some vegetable oil or coconut oil available for thinning your chocolate if needed. Sometimes candy melts can be a bit thick, making it difficult to achieve a smooth, even coating on your cookies. Adding just a teaspoon or two of oil to your melted chocolate creates a thinner consistency that's much easier to work with and produces a more professional-looking finish on your Ladybug Chocolate Covered Oreos.
How to Make Ladybug Chocolate Covered Oreos — Quick Overview
The process of creating these charming Ladybug Chocolate Covered Oreos is wonderfully straightforward and surprisingly meditative. You'll begin by setting up your workspace with parchment paper or wax paper to create a non-stick surface for your cookies to dry on. Melt your red candy melts in the microwave in short thirty-second bursts, stirring between each interval until the chocolate is completely smooth and fluid. This gentle melting method prevents the chocolate from scorching and ensures a silky texture.
Once your red chocolate is perfectly melted, you'll dip each Oreo into the chocolate, using a fork to lift it out and allowing excess chocolate to drip back into the bowl. This technique ensures a thin, even coating that won't overwhelm the cookie. Place each dipped cookie onto your prepared parchment paper and immediately add any decorations that need to be set into the wet chocolate. The entire dipping and initial decorating process moves quickly, and you'll find yourself in a rhythm that's both productive and relaxing.
After the red chocolate coating has fully set—which typically takes about fifteen to twenty minutes at room temperature—you'll melt your black chocolate and transfer it to a piping bag or a small plastic bag with the corner snipped off. This is when the real artistry begins, as you pipe a line down the center of each cookie to create the wing division, then add small dots to represent the ladybug's spots. The beauty of this step is that imperfection adds to the charm; no two ladybugs in nature are identical, so your cookies don't need to be either. From start to finish, you can complete a batch of these Ladybug Chocolate Covered Oreos in about forty-five minutes, with most of that time being hands-off waiting for chocolate to set.
Top Tips for Perfecting Ladybug Chocolate Covered Oreos
The quality of your chocolate makes an enormous difference in both the taste and appearance of your Ladybug Chocolate Covered Oreos. Invest in good-quality candy melts from reputable brands rather than the cheapest option available. Higher-quality chocolate melts more smoothly, tastes better, and creates a more professional-looking glossy finish. I've found that certain budget brands can have a waxy texture and artificial taste that detracts from the overall experience, so it's worth spending a bit more for noticeably better results.
Temperature control is crucial when working with candy melts. Always melt your chocolate in short intervals, stirring thoroughly between each session in the microwave. Overheated chocolate can seize up, becoming grainy and unworkable, or it can scorch, developing a burnt flavor that ruins your entire batch. If you find your chocolate is getting too thick as you work, you can briefly re-warm it for ten to fifteen seconds, but resist the temptation to overheat. Room temperature cookies work best for dipping—if they're too cold from the refrigerator, condensation can form and create texture issues with your chocolate coating.
When dipping your cookies, develop a gentle touch and a consistent technique. I like to place each Oreo on a fork, lower it completely into the melted chocolate, then lift it out and gently tap the fork against the side of the bowl to remove excess coating. This tapping motion helps create a thin, even layer rather than a thick, heavy coating that obscures the cookie beneath. If you end up with a bit of chocolate pooling at the bottom after placing the cookie on parchment, that's perfectly normal and will flatten out as it sets.
Timing is everything when adding decorations to your Ladybug Chocolate Covered Oreos. Candy eyes and any sprinkles need to be added while the red chocolate is still wet, as they won't adhere once the coating has hardened. However, the black details should only be added after the red layer is completely set, otherwise the colors will blend together and create a muddy appearance. I usually dip all my cookies first, let them set completely, then go back and add all the black details in one session.
For the most professional-looking ladybug spots and details, invest in a small squeeze bottle or learn to work with a piping bag. While you can certainly use a spoon or toothpick to add spots, a piping bag gives you much more control over the size and placement of each dot. If you're using a plastic bag as a makeshift piping bag, cut the smallest possible opening at first—you can always make it larger if needed, but you can't make it smaller once it's cut. Practice your piping technique on parchment paper before moving to the actual cookies.
Consider the environment where you're working when making these treats. Chocolate work is best done in a cool, dry kitchen. If you're working in a hot, humid environment, your chocolate may not set properly and could remain tacky or develop a dull finish. If your kitchen is particularly warm, you can place your dipped cookies in the refrigerator for five to ten minutes to help the chocolate set more quickly, though be aware that this can sometimes cause condensation issues when you bring them back to room temperature.
Don't be afraid to embrace imperfection and have fun with the decorating process. Some of the most charming Ladybug Chocolate Covered Oreos are the ones with slightly wonky spots or asymmetrical details. Remember that you're creating whimsical treats, not technical masterpieces, and the handmade quality is part of their appeal. Kids especially love when each ladybug has its own personality, so resist the urge to make everything perfectly uniform.
Variations and Flavor Twists
While classic red ladybugs are absolutely adorable, there's a whole world of creative possibilities waiting to be explored with this basic chocolate-covered Oreo technique. Try creating bumblebee cookies by using yellow candy melts and adding black stripes across the cookie instead of spots. Add small white candy or chocolate pieces to represent wings, and suddenly you have an entire garden of insects to display alongside your ladybugs. The bumblebee version is particularly popular and just as easy to execute.
For a more elegant approach, create sophisticated monochrome versions using white chocolate coating with dark chocolate details, or vice versa. These simplified color palettes look stunning at formal gatherings and allow the beautiful contrast to speak for itself. You can add edible gold dust or pearl dust to the chocolate coating before it sets for an extra touch of glamour that transforms these Ladybug Chocolate Covered Oreos into something truly special for elegant occasions.
Experiment with different Oreo flavors as your base to create unique taste combinations. Golden Oreos with their vanilla wafers create a lighter-colored foundation that can be particularly beautiful under pastel-colored chocolate coatings. Mint Oreos add a refreshing flavor dimension that pairs wonderfully with dark chocolate coating, while peanut butter Oreos create a richer, more indulgent treat. Each flavor variation offers a new taste experience while maintaining the same adorable decorating concept.
Consider creating seasonal variations by changing the color scheme to match different times of year. Orange and black combinations work perfectly for autumn gatherings, while pink or purple ladybugs can add a playful touch to springtime celebrations. You can even create rainbow assortments by making batches in different colors, giving your dessert table a vibrant, cheerful appearance that appeals to all ages.
For those who want to add extra texture and flavor, try sprinkling crushed nuts, cookie crumbs, or sprinkles onto the wet chocolate coating before it sets. This adds another dimension to your Ladybug Chocolate Covered Oreos and can help customize them to individual preferences. Just remember to add these textural elements before the chocolate sets, and be mindful of any dietary restrictions your guests might have.
What to Serve with Ladybug Chocolate Covered Oreos
These charming Ladybug Chocolate Covered Oreos pair beautifully with cold milk, creating a nostalgic combination that appeals to both children and adults. The creamy milk helps balance the sweetness of the chocolate coating and provides a refreshing contrast to the rich flavors. For a more sophisticated presentation at adult gatherings, consider serving them alongside freshly brewed coffee or espresso. The slight bitterness of coffee complements the sweet chocolate perfectly and creates a more refined dessert experience.
If you're creating a full dessert spread, these cookies work wonderfully as part of a larger display. Arrange them on tiered serving platters alongside fresh fruit like strawberries, grapes, and melon slices. The bright red of the ladybug cookies echoes the natural red tones of strawberries, creating a visually cohesive presentation. The fresh fruit also provides a lighter option for guests who want something less sweet, while the variety keeps your dessert table interesting and appealing.
For a complete themed dessert table, consider pairing your Ladybug Chocolate Covered Oreos with other garden-inspired treats. Sugar cookies shaped like flowers, cupcakes decorated with green frosting to resemble grass, or even a simple sheet cake decorated to look like a garden scene all work beautifully together. This creates an immersive experience that's particularly delightful for children's events or spring and summer gatherings.
Beverage pairings beyond milk and coffee can elevate the experience as well. Hot chocolate makes a comforting companion during cooler months, creating an indulgent chocolate-on-chocolate experience. Fruit smoothies or fresh lemonade provide a bright, refreshing contrast during warmer weather. For gatherings where you want to offer something special, consider creating a simple punch with fruit juices and sparkling water, garnished with fresh berries and mint leaves to continue the garden theme that your Ladybug Chocolate Covered Oreos have established.
Storing and Reheating Tips
Proper storage is key to maintaining the quality and appearance of your Ladybug Chocolate Covered Oreos. Once the chocolate coating has completely set and hardened, arrange your cookies in a single layer in an airtight container, separating layers with parchment paper to prevent them from sticking together or damaging each other's decorations. Stored this way at room temperature in a cool, dry place, your cookies will maintain their optimal texture and flavor for up to two weeks. Avoid storing them in direct sunlight or near heat sources, as this can cause the chocolate to soften or develop a dull, streaky appearance called chocolate bloom.
If you need to store your Ladybug Chocolate Covered Oreos for longer periods, freezing is definitely an option. Place the completely set cookies in a freezer-safe airtight container with parchment paper between layers, and they'll keep beautifully for up to three months. When you're ready to serve them, transfer the container to the refrigerator and let the cookies thaw slowly overnight, then bring them to room temperature before serving. This gradual thawing process prevents condensation from forming on the chocolate coating, which could make it appear wet or cause the colors to run.
The beauty of these treats is that they don't require any reheating—in fact, you never want to reheat them as this would melt the carefully crafted chocolate coating. They're designed to be enjoyed at room temperature, where the chocolate has a pleasant snap and the cookie inside maintains its characteristic crispness. If your cookies have been refrigerated and you want to serve them quickly, simply arrange them on a serving platter and let them sit at room temperature for about thirty minutes before serving.
One important note about storage: humidity is the enemy of chocolate-covered treats. If you live in a particularly humid climate, you may notice that your Ladybug Chocolate Covered Oreos develop a slightly sticky surface or lose their glossy finish when stored at room temperature. In this case, refrigeration is your best option, just be sure to let them come fully to room temperature in their sealed container before opening it to serve, which prevents condensation from forming on the chocolate surface. For events, transport these cookies in a rigid container to prevent shifting and damage to your careful decorating work.
Frequently Asked Questions
Can I make Ladybug Chocolate Covered Oreos ahead of time?
Absolutely! These treats are actually ideal for advance preparation, which is one of their greatest advantages. You can make your Ladybug Chocolate Covered Oreos up to two weeks ahead of time if stored properly in an airtight container at room temperature. In fact, I often prefer making them at least a day or two in advance, as this allows the chocolate coating to fully cure and the flavors to meld together beautifully. Just be sure to store them in a cool, dry place away from strong-smelling foods, as chocolate can absorb odors from its environment.
What if I don't have candy melts? Can I use regular chocolate?
You can definitely use regular chocolate, though the process requires a bit more attention. Regular chocolate needs to be tempered properly to achieve that beautiful glossy finish and proper snap that candy melts give you automatically. If you're using regular chocolate without tempering, your Ladybug Chocolate Covered Oreos may have a dull finish and might need to be stored in the refrigerator to prevent the chocolate from becoming too soft. For the best results with regular chocolate, use high-quality chocolate chips or bars, and consider adding a small amount of vegetable oil to help with consistency.
How do I prevent the Oreos from sliding off the fork while dipping?
The key is to use a fork with relatively wide, sturdy tines and to develop a gentle but confident touch. I find that placing the Oreo flat on the fork rather than trying to spear it works best. Lower the cookie and fork together into the chocolate, submerge completely, then lift straight up and tap gently against the bowl's edge. If you're having persistent trouble, you can also try using a specialized chocolate dipping tool, or even two forks—one to support the cookie from below and one to help guide it. With a bit of practice, you'll develop the perfect technique.
Can I make these without any special decorating tools?
Definitely! While piping bags make the decorating process easier, they're not essential for creating beautiful Ladybug Chocolate Covered Oreos. You can create spots using a toothpick dipped in melted chocolate, or simply drizzle the black chocolate from a spoon. A small plastic bag with the corner cut off makes an excellent makeshift piping bag. Even if your decorations are a bit rustic, the charm of these treats shines through. Remember, real ladybugs aren't perfectly symmetrical, so embrace the handmade quality.
How can I tell when the chocolate coating is completely set?
The chocolate coating should look completely matte rather than shiny, and it should feel dry and firm to the touch. Gently touch the surface with your fingertip—if it leaves a mark or feels at all soft or tacky, it needs more time to set. Depending on your room temperature, this usually takes fifteen to thirty minutes for candy melts. If you're working in a warm environment and the chocolate seems to be taking forever to set, you can place your Ladybug Chocolate Covered Oreos in the refrigerator for five to ten minutes to speed up the process.
Can I make these treats with dietary modifications?
Yes, you can adapt this recipe for various dietary needs! For those avoiding dairy, look for dairy-free candy melts or use quality dark chocolate that's naturally dairy-free. There are also various allergen-friendly sandwich cookies on the market that can substitute for traditional Oreos if needed. Keep in mind that different cookies may have different weights and structures, which could affect how well they hold up to dipping. Always read labels carefully to ensure all ingredients meet your specific dietary requirements, and consider the needs of all your guests when planning your treats.
Ladybug Chocolate Covered Oreos
Adorable no-bake treats featuring Oreo cookies dipped in red chocolate and decorated to look like charming ladybugs. Perfect for parties, gifts, or fun cooking activities with kids.
Prep Time
20 min
Cook Time
0 min
Total Time
45 min
Servings
24 cookies
Ingredients
For 24 cookies
- 24 Oreo cookies, regular size
- 12 ounces red candy melts or red chocolate coating wafers
- 4 ounces black candy melts or dark chocolate
- 1 teaspoon vegetable oil or coconut oil, if needed for thinning
- 48 candy eyes, optional
- Parchment paper or wax paper for cooling
Instructions
- 1
Prepare workspace
Line two large baking sheets with parchment paper or wax paper. This will provide a non-stick surface for your dipped cookies to set on. Arrange your Oreo cookies on the counter within easy reach for efficient dipping.
- 2
Melt red chocolate
Place the red candy melts in a microwave-safe bowl. Microwave in 30-second intervals, stirring thoroughly between each interval, until completely melted and smooth. This should take about 90 seconds to 2 minutes total. If the chocolate seems too thick, stir in vegetable oil half a teaspoon at a time until you reach a smooth, flowing consistency.
- 3
Dip cookies
Place one Oreo cookie on a fork, making sure the fork tines are under the cookie. Lower the cookie completely into the melted red chocolate, ensuring it's fully coated. Lift the cookie out and gently tap the fork against the edge of the bowl several times to allow excess chocolate to drip off.
- 4
Transfer to parchment
Carefully slide the dipped cookie off the fork onto your prepared parchment paper. Use another fork or a toothpick to help release it if necessary. Repeat this process with all remaining cookies, working steadily but without rushing.
- 5
Add candy eyes
If using candy eyes, immediately place two eyes on each cookie while the red chocolate is still wet, positioning them in the upper portion of the cookie where the ladybug's head would be. The wet chocolate will act as glue to hold the eyes in place. Allow the red chocolate to set completely at room temperature, which takes about 20-30 minutes.
- 6
Melt black chocolate
Once the red coating is completely set and firm to the touch, melt the black candy melts using the same microwave method as before. Transfer the melted black chocolate to a small piping bag, plastic squeeze bottle, or a small plastic bag with a tiny corner snipped off.
- 7
Create wing division
Pipe a line of black chocolate down the center of each cookie from top to bottom, creating the division between the ladybug's wings. This line doesn't need to be perfectly straight—slight wobbles add to the handmade charm.
- 8
Add spots
Pipe small dots of black chocolate on either side of the center line to create the ladybug's spots. Traditional ladybugs have anywhere from 3 to 7 spots per wing, but you can add as many or as few as you like. Vary the sizes slightly for a more natural appearance.
- 9
Create head details
If you didn't use candy eyes, pipe two small white dots and then even smaller black dots on top to create eyes. You can also add small black antennae extending from the head area if desired.
- 10
Final setting
Allow the black chocolate details to set completely, about 10-15 minutes at room temperature. Once fully set, carefully transfer the finished Ladybug Chocolate Covered Oreos to a serving platter or storage container.
Nutrition Facts
Per serving (estimated)
145 calories
Calories
20g
Carbs
1g
Protein
7g
Fat
1g
Fiber
85mg
Sodium
14g
Sugar


