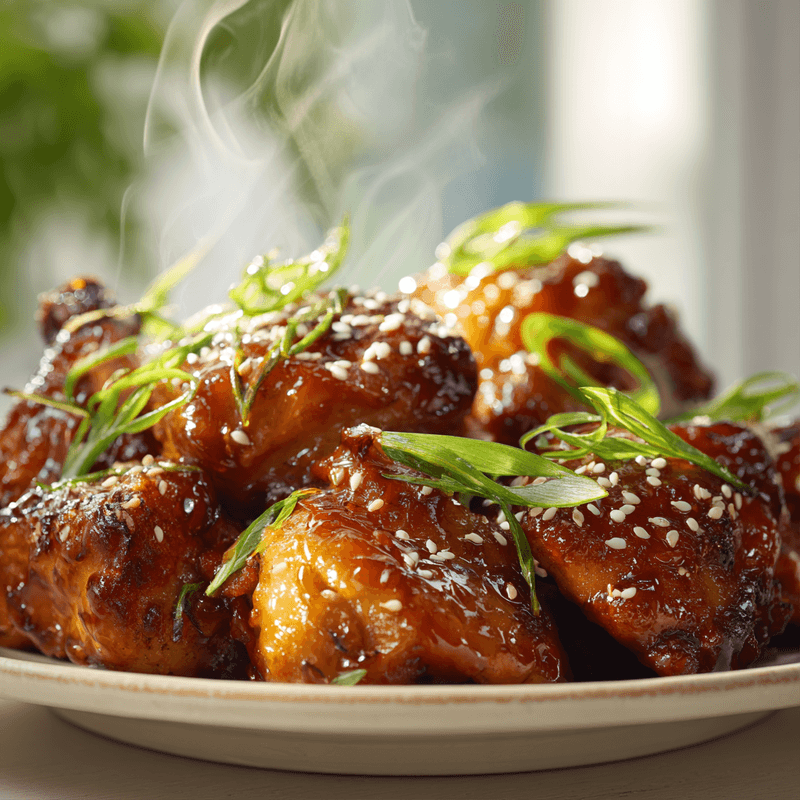
Instant Pot Honey Garlic Chicken - Sweet & Savory Perfection
This Instant Pot Honey Garlic Chicken delivers tender, juicy chicken in a glossy sweet-savory sauce. Ready in 30 minutes with minimal cleanup!
cookwithlucia.com/recipes/instant-pot-honey-garlic-chicken-rasa-malaysia
There's something utterly magical about chicken that emerges from your Instant Pot glistening with a glossy honey garlic glaze, so tender it practically falls apart at the touch of your fork. The first time I made Instant Pot Honey Garlic Chicken, I was skeptical that anything cooked under pressure could deliver restaurant-quality results, but one bite completely changed my perspective. The chicken was incredibly moist, the sauce had that perfect balance of sweet honey and pungent garlic, and the best part? My kitchen stayed remarkably clean with just one pot to wash at the end.
I'll never forget the evening I experimented with this recipe for the first time. My family was coming over for a weeknight dinner, and I was running behind schedule after a long day at work. I threw together what I had in my pantry—chicken thighs, honey, soy sauce, and a generous amount of fresh garlic—hoping for the best. Twenty minutes later, when I released that pressure valve and opened the lid, the aroma that filled my kitchen was absolutely intoxicating. My sister walked in, took one whiff, and declared I'd been secretly cooking for hours. That's the beauty of Instant Pot Honey Garlic Chicken—it tastes like you've labored over it all day, but it's actually one of the easiest weeknight meals you'll ever make.
This recipe has become my go-to whenever I need something impressive but effortless, something that satisfies both kids and adults alike. In this post, I'm going to walk you through everything you need to know to create this incredible dish in your own kitchen. You'll learn the secrets to getting that perfect sauce consistency, discover which ingredients make all the difference, and find out exactly how to adapt this recipe to your family's taste preferences. Let me show you why this has become one of the most requested recipes in my household.
What is Instant Pot Honey Garlic Chicken?
Have you ever craved that perfect combination of sweet and savory that makes your taste buds do a happy dance? That's exactly what Instant Pot Honey Garlic Chicken delivers, and it does so with remarkable efficiency. This dish takes inspiration from Asian-influenced chicken preparations that have become beloved staples in home kitchens across America. The concept is beautifully simple: succulent chicken pieces pressure-cooked in a sauce that harmonizes the floral sweetness of honey with the bold, aromatic punch of fresh garlic.
What makes this particular version so special is how the Instant Pot transforms ordinary ingredients into something extraordinary. The pressure cooking method allows the chicken to absorb all those wonderful flavors while staying incredibly tender and juicy. Unlike traditional stovetop methods where you might risk dry, overcooked chicken, the Instant Pot creates a sealed environment that locks in moisture. The result is chicken with a velvety texture coated in a glossy, finger-licking sauce that clings to every piece.
The flavor profile walks that perfect line between sticky-sweet and savory-umami, with garlic providing an aromatic backbone that keeps the honey from being cloying. It's comfort food that feels both familiar and special, the kind of dish that works equally well for a casual family dinner or when you're trying to impress guests without spending hours in the kitchen. Ready to make this your new signature dish?
Why You'll Love This Instant Pot Honey Garlic Chicken
Incredibly Quick and Hands-Off: This Instant Pot Honey Garlic Chicken goes from raw ingredients to dinner table in about thirty minutes, with most of that time completely hands-off. You simply add everything to the pot, set it, and walk away. No constant stirring, no temperature adjustments, no hovering over the stove. It's the ultimate set-it-and-forget-it meal that frees you up to prep side dishes, help with homework, or simply relax with a cup of tea.
Restaurant-Quality Flavor at Home: The sauce on this chicken rivals anything you'd order at your favorite restaurant. The pressure cooking intensifies the flavors in a way that regular cooking methods simply can't match. Every bite delivers that perfect glaze of sweet honey balanced with robust garlic and savory notes that make you want to lick the plate clean. Friends and family will genuinely think you spent hours perfecting this dish.
Budget-Friendly Without Sacrificing Taste: Chicken thighs are one of the most affordable proteins you can buy, and the other ingredients are simple pantry staples. A batch of Instant Pot Honey Garlic Chicken costs a fraction of what you'd pay for takeout, yet tastes infinitely better. You're getting premium flavor and tender, juicy meat without the premium price tag, making this perfect for feeding a family without breaking the bank.
Foolproof Even for Beginners: If you're new to pressure cooking or intimidated by your Instant Pot, this recipe is the perfect starting point. The steps are straightforward, the ingredient list is simple, and the Instant Pot does all the hard work. There's very little that can go wrong, and you'll build confidence with each successful batch. Even cooking novices can achieve impressive results on their first try.
Naturally Adaptable: This Instant Pot Honey Garlic Chicken serves as a fantastic base recipe that you can customize endlessly. Want it spicier? Add some red pepper flakes. Prefer a citrus note? A splash of lime juice transforms it. You can adjust the sweetness level, add vegetables directly to the pot, or even swap proteins. It's a flexible framework that grows with your cooking skills and adapts to whatever you have on hand.
Perfect for Meal Prep: This dish actually improves after sitting for a day, making it ideal for weekly meal prep. The chicken stays moist and tender, and the flavors deepen beautifully. Make a double batch on the weekend, portion it out, and you've got ready-made lunches or quick dinners throughout the week. It reheats beautifully without drying out, which is a rare quality in chicken dishes.
Key Ingredients and What They Bring
Let's talk about what goes into making this Instant Pot Honey Garlic Chicken so irresistibly delicious. First and foremost, you need bone-in, skin-on chicken thighs, which are the secret to achieving that fall-apart tenderness. The bones add incredible flavor during pressure cooking, while the dark meat stays juicy even under high pressure, unlike chicken breasts which can become rubbery. The skin, when crisped up at the end, adds a textural contrast that elevates the entire dish.
Honey is the star sweetener that gives this recipe its signature glaze and beautiful color. I recommend using a good quality honey with a mild flavor profile so it doesn't overpower the other ingredients. The honey caramelizes slightly during cooking, creating that glossy coating that makes each piece of chicken look magazine-worthy. It also balances the salty and savory elements perfectly, preventing the sauce from becoming one-dimensional.
Fresh garlic is absolutely non-negotiable in this recipe—don't even think about substituting garlic powder here. When you mince up several cloves of fresh garlic, you're releasing oils and compounds that create that unmistakable pungent aroma and complex flavor. The pressure cooking mellows the garlic just enough so it's fragrant and sweet rather than harsh, infusing every bite of the chicken with its essence. I typically use five to six large cloves, but garlic lovers can certainly add more.
Soy sauce provides the essential umami depth and saltiness that anchors the entire flavor profile. It adds that savory complexity that keeps the Instant Pot Honey Garlic Chicken from being just another sweet chicken dish. The soy sauce also contributes to that gorgeous mahogany color the sauce develops. If you need to avoid soy, coconut aminos work as a substitute, though the flavor will be slightly different and less intensely savory.
Rice vinegar brings a subtle tanginess that brightens the entire sauce and cuts through the richness of the honey. This small amount of acidity is crucial for balance—without it, the dish would taste flat and overly sweet. The vinegar also helps tenderize the chicken slightly and adds a pleasant complexity to the finished sauce. Apple cider vinegar can work in a pinch, though rice vinegar is more traditional and has a gentler, less assertive flavor.
Fresh ginger adds warmth and a slight spicy note that complements the garlic beautifully. Just a tablespoon of minced ginger brings an aromatic quality that makes the Instant Pot Honey Garlic Chicken smell absolutely incredible while cooking. Ginger also aids in tenderizing the meat and adds a subtle heat that lingers pleasantly on your palate without being overwhelming. Ground ginger can substitute if necessary, but fresh is always superior.
Cornstarch mixed with water creates the slurry that transforms the cooking liquid into a luscious, clingy sauce. This is what gives you that restaurant-style glaze that coats the chicken perfectly rather than being watery and thin. The cornstarch activates when you use the sauté function after pressure cooking, thickening the sauce within minutes. Without this crucial step, you'd have flavorful broth instead of that signature glossy coating.
How to Make Instant Pot Honey Garlic Chicken — Quick Overview
Making this Instant Pot Honey Garlic Chicken is wonderfully straightforward, even if you're still getting comfortable with your pressure cooker. You'll start by combining honey, soy sauce, garlic, ginger, and rice vinegar directly in the Instant Pot inner pot—no need to dirty extra bowls. Give everything a good whisk to create a fragrant sauce base, then nestle your chicken thighs right into that liquid, making sure each piece gets coated. The raw sauce might seem thin at this point, but trust the process; pressure cooking will work its magic.
Once your chicken is arranged in the pot, you'll secure the lid, set the valve to sealing, and pressure cook on high for about twelve minutes. This brief cooking time is all it takes to transform raw chicken into tender, flavorful perfection. When the timer beeps, you'll do a quick pressure release, carefully opening the valve to let that steam escape. The chicken will be fully cooked and infused with all those wonderful flavors, sitting in a pool of thin but incredibly aromatic liquid.
The final step is where the magic really happens—you'll remove the chicken temporarily, switch the Instant Pot to sauté mode, and add a cornstarch slurry to the liquid. As it bubbles and reduces, that thin liquid transforms into a thick, glossy sauce that clings beautifully to your spoon. Once the sauce reaches the perfect consistency, you'll return the chicken to the pot, coating each piece generously. Some people like to broil the chicken briefly at this point to crisp up the skin, creating a textural contrast between the tender meat and crackling exterior. Within thirty minutes from start to finish, you'll have restaurant-quality Instant Pot Honey Garlic Chicken ready to serve.
Top Tips for Perfecting Instant Pot Honey Garlic Chicken
Choosing the right cut of chicken makes all the difference in this recipe. While you can technically use chicken breasts, I strongly encourage you to stick with bone-in, skin-on thighs for the Instant Pot Honey Garlic Chicken. The dark meat has more fat, which keeps it moist under pressure, and the bones add incredible flavor to the sauce. If you absolutely must use breasts, reduce the cooking time to eight minutes to prevent them from becoming tough and stringy.
Don't skip the browning step if you have an extra five minutes. Before pressure cooking, you can use the sauté function to quickly sear the chicken skin-side down until golden. This adds a depth of flavor and helps render some of the fat, though it's not essential if you're pressed for time. The Instant Pot Honey Garlic Chicken will still be delicious without this step, but browning adds that extra layer of complexity that separates good from extraordinary.
Pay attention to the thickness of your sauce during the reduction phase. After pressure cooking, the liquid will seem too thin, but it thickens quickly once you add the cornstarch slurry and activate the sauté function. Let it bubble for three to five minutes, stirring frequently, until it coats the back of a spoon. If it gets too thick, simply add a tablespoon or two of water to thin it out. The perfect consistency should be like warm maple syrup—pourable but clingy.
Adjust the sweetness level to match your family's preferences. The recipe as written strikes a nice balance, but if your household prefers less sweet dishes, reduce the honey by a quarter and add an extra tablespoon of soy sauce for more savory depth. Conversely, if you're cooking for kids who love sweeter flavors, you can increase the honey slightly. Taste the sauce before returning the chicken to the pot, and adjust as needed.
Always use natural pressure release for the first five minutes, then switch to quick release. This prevents the chicken from becoming tough and allows the meat to relax gradually. An immediate quick release can cause the meat fibers to seize up slightly, resulting in a less tender final product. Those five minutes of natural release also help the flavors settle and meld together beautifully.
For the most impressive presentation, finish your Instant Pot Honey Garlic Chicken under the broiler. After coating the chicken in the thickened sauce, arrange the pieces on a foil-lined baking sheet and broil for three to four minutes until the skin crisps and caramelizes. This creates an incredible textural contrast—crispy, slightly charred skin giving way to tender, sauce-drenched meat underneath. It's an optional step that takes the dish from great to absolutely spectacular.
Garlic intensity varies depending on how you prepare it. For a more mellow garlic flavor, use whole smashed cloves that you can remove before serving. For bold garlic lovers, mince it very fine so it integrates completely into the sauce. I like to use a combination—some minced for flavor throughout and one or two whole cloves for visual appeal. Fresh garlic can burn slightly during the sauté phase, so if you're browning your chicken first, add the garlic after you remove the chicken and just cook it for thirty seconds until fragrant.
Don't overcrowd your Instant Pot, which can lead to uneven cooking. If you're doubling the recipe, you may need to arrange the chicken in two layers, but make sure the bottom layer is fully submerged in liquid. For the best results with Instant Pot Honey Garlic Chicken, stick to no more than three pounds of chicken at a time in a six-quart pot. If feeding a crowd, it's better to make two batches than to pack everything in too tightly.
Variations and Flavor Twists
Transform your Instant Pot Honey Garlic Chicken into a spicy sensation by adding red pepper flakes or sriracha to the sauce mixture. Start with half a teaspoon of crushed red pepper or one tablespoon of sriracha, then adjust according to your heat tolerance. The sweetness of the honey beautifully balances the heat, creating a sweet-spicy combination that's absolutely addictive. You can also add sliced fresh chilies during the pressure cooking phase for a more complex, fruity heat.
For a citrus-forward version, add the zest and juice of one orange to the sauce before pressure cooking. This creates a honey-orange-garlic flavor profile that's bright and refreshing, reminiscent of orange chicken but with more depth. The citrus notes cut through the richness beautifully and add a sophisticated complexity. You can also try lime juice and zest for a more tropical twist on the classic Instant Pot Honey Garlic Chicken.
Make it a complete one-pot meal by adding vegetables directly to the Instant Pot. Place baby potatoes or carrot chunks at the bottom of the pot before adding the chicken, and they'll cook perfectly in the same time. Green beans, bell peppers, or broccoli can be added during the last two minutes of natural pressure release—just open the pot, toss them in, and reseal for a couple minutes. This transforms the dish into a full dinner with minimal extra effort.
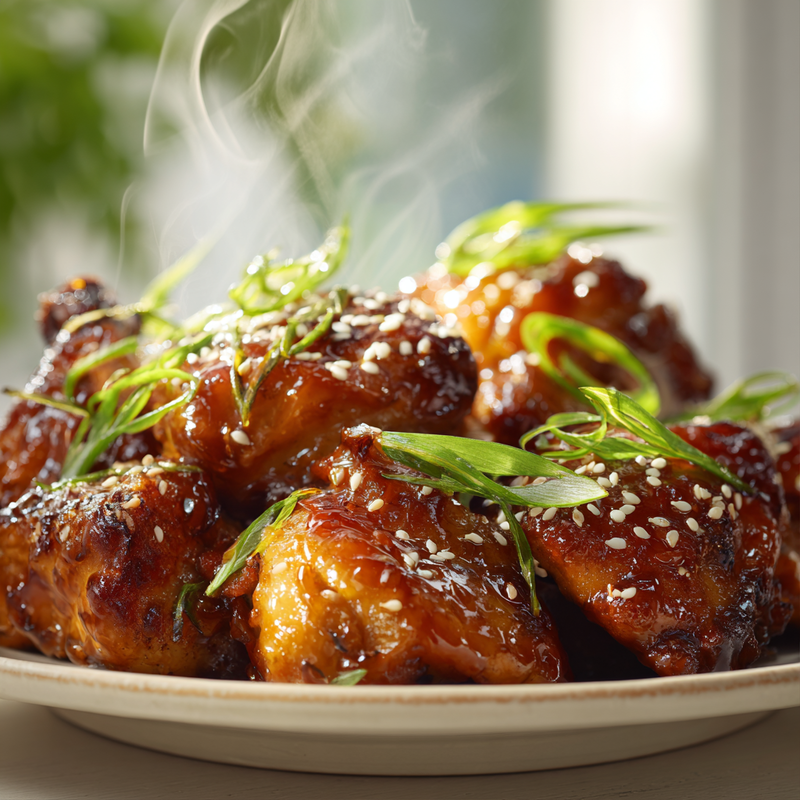
Create a sesame variation by adding two tablespoons of sesame oil to the sauce and garnishing the finished Instant Pot Honey Garlic Chicken with toasted sesame seeds and sliced green onions. The nutty richness of sesame oil pairs beautifully with honey and garlic, adding an extra layer of flavor complexity. This version feels more authentically Asian-inspired and looks gorgeous when served at gatherings.
For a pineapple teriyaki twist, add half a cup of pineapple juice to the sauce mixture and include some pineapple chunks in the pot. The fruit cooks down into the sauce, adding natural sweetness and a tropical flair. This variation is particularly popular with children and makes your Instant Pot Honey Garlic Chicken feel like a vacation meal. The pineapple also contains enzymes that help tenderize the chicken even further.
What to Serve with Instant Pot Honey Garlic Chicken
Steamed jasmine rice or fluffy white rice is the classic accompaniment that soaks up all that gorgeous honey garlic sauce beautifully. The neutral flavor and soft texture of rice provides the perfect backdrop for the bold, sweet-savory chicken. I like to arrange the chicken over a bed of rice and spoon extra sauce over everything, creating a complete meal in one bowl. Cauliflower rice works wonderfully for those watching their carbohydrate intake.
Stir-fried or steamed vegetables add color, nutrition, and textural contrast to your meal. Bright green broccoli florets, snap peas, or bok choy work particularly well, as their slight bitterness balances the sweetness of the Instant Pot Honey Garlic Chicken. A quick vegetable stir-fry with garlic and a splash of soy sauce ties the whole meal together thematically. Roasted Brussels sprouts or green beans also make excellent sides, especially when they're slightly caramelized.
For a more substantial meal, serve this chicken alongside garlic noodles or lo mein. The noodles provide a satisfying, slurp-worthy component that feels indulgent while soaking up the sauce beautifully. Toss the noodles with a bit of butter, garlic, and soy sauce to complement the chicken's flavors. Rice noodles or thick wheat noodles both work wonderfully, giving you options for different textures and dietary needs.
A crisp, refreshing cucumber salad provides a cooling contrast to the rich chicken. Thinly slice cucumbers and toss them with rice vinegar, a touch of honey, sesame oil, and a pinch of salt. This light, crunchy side cuts through the richness of the Instant Pot Honey Garlic Chicken and adds a refreshing element that cleanses your palate between bites. Add some sliced red onion and cilantro for extra flavor and color.
Mashed potatoes might seem like an unconventional pairing, but they're absolutely divine with this chicken. The creamy potatoes soak up the honey garlic sauce like a dream, creating comfort food at its finest. This combination is particularly popular with kids and makes the meal feel more familiar to those who might be hesitant about Asian-inspired flavors. Add some roasted garlic to your mashed potatoes to tie the flavors together even more.
Consider serving a simple green salad dressed with a light vinaigrette to balance the meal. The fresh greens and acidic dressing provide a refreshing counterpoint to the rich, sweet sauce coating the chicken. This is especially nice for lighter appetites or when you want to include more vegetables in your meal. A salad also adds visual appeal and makes the plate feel more complete and restaurant-quality.
Storing and Reheating Tips
Your leftover Instant Pot Honey Garlic Chicken will keep beautifully in the refrigerator for up to four days when stored properly. Transfer the chicken and sauce to an airtight container once it has cooled to room temperature, making sure the chicken pieces are well-coated with sauce to prevent them from drying out. The sauce acts as a protective barrier, keeping the meat moist and flavorful. I actually think this dish tastes even better the next day after the flavors have had time to meld and deepen.
Freezing this chicken is absolutely possible and gives you a convenient meal option for up to three months. Let the chicken cool completely, then portion it into freezer-safe containers or heavy-duty freezer bags, making sure to include plenty of sauce with each portion. Remove as much air as possible before sealing to prevent freezer burn. Label the containers with the date and contents, and freeze flat for easy storage. When you're ready to enjoy it, thaw overnight in the refrigerator for best results.
Reheating Instant Pot Honey Garlic Chicken requires a gentle approach to maintain its tender texture. The stovetop method works beautifully—place the chicken and sauce in a covered pan over medium-low heat, stirring occasionally until heated through completely, which takes about eight to ten minutes. Add a splash of water or chicken broth if the sauce seems too thick or starts to stick. This method preserves the texture best and allows you to refresh the sauce as it reheats.
For quicker reheating, the microwave works in a pinch, though it can slightly toughen the chicken if you're not careful. Place the chicken in a microwave-safe dish, cover it with a damp paper towel to trap moisture, and heat in one-minute intervals at seventy percent power, stirring between intervals. The reduced power prevents hot spots and keeps the chicken from becoming rubbery. The entire process should take three to four minutes depending on portion size.
If you want to restore some of that crispy skin after reheating, pop the sauced chicken under the broiler for two to three minutes after warming it through on the stovetop or in the microwave. This quick blast of high heat re-crisps the skin and caramelizes the sauce slightly, making the reheated Instant Pot Honey Garlic Chicken taste almost freshly made. Watch it carefully during broiling to prevent burning, as the honey in the sauce can go from caramelized to burnt quite quickly.
Frequently Asked Questions
Can I make Instant Pot Honey Garlic Chicken ahead of time?
Absolutely! This dish is fantastic for meal prep and actually improves in flavor after sitting for a day in the refrigerator. Prepare it completely as directed, let it cool, then store it in an airtight container for up to four days. When you're ready to serve, simply reheat gently on the stovetop or in the microwave. Many people prep this on Sunday evening for easy weeknight dinners throughout the week.
Can I use boneless, skinless chicken for this recipe?
While bone-in, skin-on thighs give the best flavor and texture, you can certainly use boneless, skinless thighs or even chicken breasts if that's what you have on hand. Reduce the pressure cooking time to eight minutes for boneless cuts to prevent them from becoming tough and dry. Keep in mind that you'll lose some of that rich flavor that the bones contribute to the sauce, and you won't get that crispy skin finish, but the Instant Pot Honey Garlic Chicken will still be delicious and satisfying.
How do I know when the chicken is fully cooked?
The chicken is done when it reaches an internal temperature of 165°F when checked with a meat thermometer inserted into the thickest part without touching bone. After the recommended pressure cooking time, your chicken should be perfectly cooked through with clear juices running from it when pierced. If you're using larger pieces, you may need to add an extra two minutes of cooking time. When properly cooked, the meat should be tender enough to shred easily with a fork.
Can I double this recipe in my Instant Pot?
You can definitely double the ingredients for Instant Pot Honey Garlic Chicken, but make sure you don't fill your pot more than two-thirds full, which is crucial for safe pressure cooking. A six-quart Instant Pot can handle about three pounds of chicken comfortably, so doubling works if your original recipe uses one and a half pounds. You won't need to adjust the cooking time for a larger batch, but the pot will take longer to come to pressure initially. The sauce-to-chicken ratio should remain the same.
What can I substitute for soy sauce to make this recipe suitable for those avoiding soy?
Coconut aminos are the best substitute for soy sauce in this recipe, providing a similar salty-sweet flavor profile without any soy. Use the same amount called for in the recipe, though note that coconut aminos are slightly sweeter and less salty than soy sauce, so you may want to add a pinch of salt to compensate. Tamari is another option if you're avoiding soy but can tolerate wheat-free soy products. Both alternatives will give you delicious Instant Pot Honey Garlic Chicken that accommodates various dietary needs.
How can I make the sauce thicker or thinner?
If your sauce is too thin after the cornstarch slurry has been added and cooked, simply let it simmer on sauté mode for a few more minutes, stirring frequently until it reaches your desired consistency. For a thicker sauce, you can add another tablespoon of cornstarch mixed with water. If the sauce becomes too thick, thin it out by stirring in water, chicken broth, or even a bit more honey one tablespoon at a time until the Instant Pot Honey Garlic Chicken sauce reaches the perfect clingy consistency that coats the back of your spoon beautifully.
Instant Pot Honey Garlic Chicken
Tender, juicy chicken thighs pressure-cooked in a sweet and savory honey garlic sauce that's glossy, flavorful, and ready in just 30 minutes.
Prep Time
10 min
Cook Time
20 min
Total Time
30 min
Servings
4 servings
Ingredients
For 4 servings
- 2 pounds bone-in, skin-on chicken thighs (about 6 pieces)
- 1/3 cup honey
- 1/4 cup soy sauce (or coconut aminos)
- 5 cloves garlic, minced
- 1 tablespoon fresh ginger, minced
- 2 tablespoons rice vinegar
- 2 tablespoons cornstarch
- 2 tablespoons water
- 1/2 teaspoon black pepper
- 2 green onions, sliced for garnish
- 1 tablespoon sesame seeds, toasted for garnish
Instructions
- 1
Prepare the sauce
In the inner pot of your Instant Pot, whisk together the honey, soy sauce, minced garlic, minced ginger, rice vinegar, and black pepper until well combined. Make sure the honey is fully incorporated into the liquid to create a smooth sauce base.
- 2
Add the chicken
Place the chicken thighs into the sauce mixture in the Instant Pot, turning each piece to coat it with the sauce. Arrange the chicken in a single layer if possible, skin-side up for the best results.
- 3
Pressure cook
Secure the Instant Pot lid and make sure the pressure valve is set to the sealing position. Select the pressure cook or manual setting and set the timer for 12 minutes on high pressure. The pot will take about 8-10 minutes to come to pressure before cooking begins.
- 4
Release pressure
When the cooking time is complete, allow the pressure to release naturally for 5 minutes, then carefully turn the valve to venting to release any remaining pressure. Once all the steam has been released and the pin drops, carefully open the lid away from your face.
- 5
Remove chicken
Using tongs, carefully transfer the cooked chicken thighs to a plate and set aside. The chicken will be fully cooked but sitting in a thin sauce that needs to be thickened.
- 6
Make cornstarch slurry
In a small bowl, whisk together the cornstarch and water until completely smooth with no lumps. This slurry will be used to thicken the cooking liquid into a glossy sauce.
- 7
Thicken the sauce
Turn the Instant Pot to the sauté function on normal or medium heat. Once the liquid begins to bubble, slowly pour in the cornstarch slurry while stirring constantly. Continue cooking and stirring for 3-5 minutes until the sauce thickens to a glossy, syrup-like consistency that coats the back of a spoon.
- 8
Cancel sauté mode
Press the cancel button to turn off the sauté function once the sauce reaches your desired thickness. Be careful not to let it over-thicken, as it will continue to thicken slightly as it cools.
- 9
Coat the chicken
Return the chicken thighs to the Instant Pot, turning them in the thickened sauce to coat each piece thoroughly. Spoon extra sauce over the top of each piece for maximum flavor and that signature glossy appearance.
- 10
Optional broiling step
For crispy skin, arrange the sauce-coated chicken on a foil-lined baking sheet and broil in a preheated oven for 3-4 minutes, watching carefully to prevent burning. The skin should become golden and slightly caramelized.
- 11
Garnish and serve
Transfer the chicken to a serving platter, drizzle with any remaining sauce from the pot, and garnish with sliced green onions and toasted sesame seeds. Serve immediately over rice or with your favorite side dishes while hot.
Nutrition Facts
Per serving (estimated)
420 calories
Calories
32g
Carbs
35g
Protein
16g
Fat
1g
Fiber
720mg
Sodium
26g
Sugar


