
I'll Never Make Chicken Nuggets any Other Way (SO GOOD!!)
These homemade chicken nuggets are crispy, juicy perfection! Learn my foolproof method that beats any store-bought version. Your family will beg for more!
cookwithlucia.com/recipes/ill-never-make-chicken-nuggets-any-other-way-so-good
There's something almost magical about biting into a perfectly crispy chicken nugget with a tender, juicy center that makes you close your eyes and savor the moment. I'll never make chicken nuggets any other way after discovering this method, and I mean that with every fiber of my being. The golden, crunchy exterior shatters with each bite, giving way to succulent chicken that's seasoned all the way through. These aren't your average frozen nuggets from the grocery store—these are the kind that make kids jump with excitement and adults secretly reach for seconds when no one's looking.
Let me tell you how I stumbled upon this game-changing technique. I was hosting a casual family gathering last spring, and my nephew announced he only ate chicken nuggets. Challenge accepted! I refused to serve anything less than spectacular, so I experimented with techniques I'd learned over years of recipe testing. After trying different coating methods, brining times, and frying temperatures, I finally cracked the code. When I served these nuggets, the entire room went silent except for the sound of happy munching. My sister pulled me aside and whispered, "What did you do to these? They're incredible!" That's when I knew I'd never make chicken nuggets any other way.
This recipe is special because it transforms humble chicken breast into restaurant-quality nuggets using ingredients you likely already have in your kitchen. The secret lies in a combination of techniques: a quick buttermilk soak for tenderness, a double-coating method for extra crunch, and precise temperature control during cooking. In this post, I'll walk you through every step of making these incredible nuggets, share my hard-won tips for perfection, and show you how to customize them to your family's preferences. Get ready to become the chicken nugget champion in your household!
What Are These Incredible Chicken Nuggets?
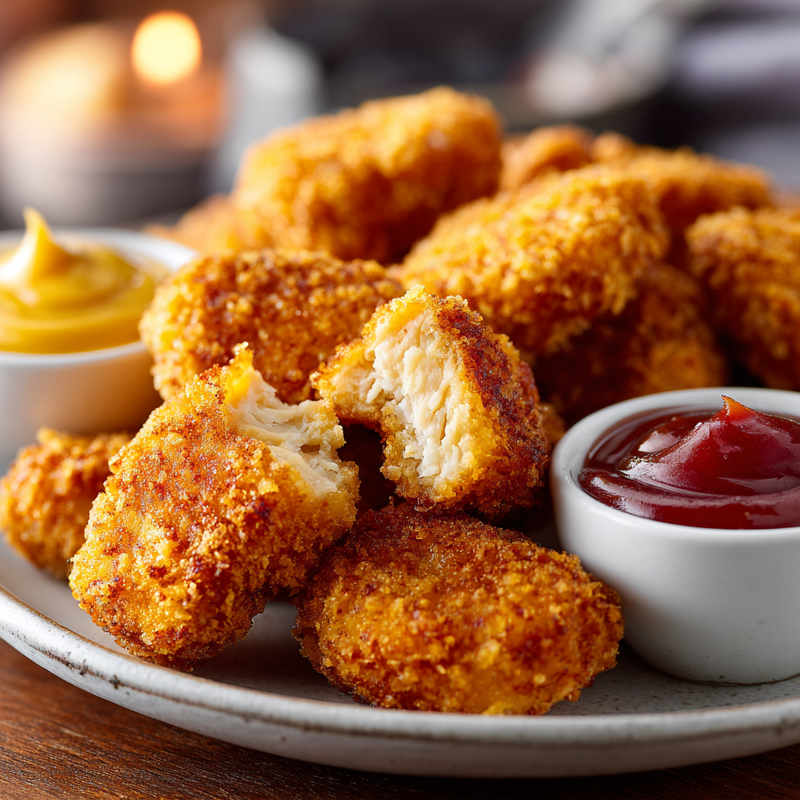
So what exactly makes these chicken nuggets so special that I'll never make them any other way? At their core, they're bite-sized pieces of tender chicken breast coated in a perfectly seasoned, incredibly crispy breading that stays crunchy even as they cool. Unlike the mystery-meat nuggets you might remember from fast food joints, these feature real, identifiable chicken that you cut yourself, ensuring quality and freshness in every single bite.
The technique draws inspiration from classic Southern fried chicken methods but adapts them for smaller, kid-friendly portions that cook quickly and evenly. The buttermilk marinade tenderizes the meat while infusing subtle tang, and the double-breading technique creates layers of texture that are simply irresistible. What sets these apart is the seasoning blend that goes into both the chicken and the coating, ensuring flavor in every layer rather than just on the surface.
The flavor profile is savory and satisfying with hints of garlic, paprika, and herbs that appeal to both children and adults. They're golden brown perfection on the outside, snowy white and juicy on the inside, with a satisfying crunch that rivals any restaurant version. Whether you're serving them for a weeknight dinner or a casual get-together, these chicken nuggets deliver every single time. Trust me, once you try this method, you'll understand why I'll never make chicken nuggets any other way!
Why You'll Love This Chicken Nugget Recipe
Incredibly Simple Despite Impressive Results: These chicken nuggets might taste like they came from a high-end restaurant, but the actual process is straightforward enough for beginner cooks. You don't need any fancy equipment or hard-to-find ingredients—just basic kitchen tools and pantry staples. The steps are intuitive and forgiving, making this recipe perfect for cooking with kids or for those nights when you want something special without the stress.
Budget-Friendly Family Meal: Chicken breast is one of the most economical proteins available, and this recipe stretches it beautifully. For less than the cost of premium frozen nuggets, you'll create a batch that tastes infinitely better and feeds your whole family. There's no waste, no fillers, just pure chicken goodness that gives you more value for your money while delivering superior taste and nutrition.
Customizable to Every Preference: The beauty of making these chicken nuggets from scratch is that you control everything. Want them spicier? Add more heat to the breading. Need them milder for little ones? Dial back the seasonings. You can adjust the size, shape, and flavor profile to match your family's exact preferences, something you simply cannot do with store-bought versions.
Perfect Texture Every Single Time: The double-coating method I use ensures that crispy, crunchy exterior that makes these nuggets so addictive. They stay crispy for longer than single-coated versions, maintaining their texture even as they sit on the serving platter. The inside remains tender and juicy thanks to the buttermilk soak, creating that perfect contrast of textures that makes you reach for just one more.
Meal Prep Champion: These chicken nuggets are fantastic for preparing ahead and storing for busy weeknights. They freeze beautifully and reheat like a dream, making them ideal for batch cooking. Make a double batch on the weekend, and you'll have quick, homemade meals ready to go whenever hunger strikes. They're so much better than anything you can buy frozen that your family will actually get excited about leftovers.
Crowd-Pleasing Appeal: I've yet to meet someone who doesn't love these nuggets. They're universally appealing, making them perfect for gatherings where you have picky eaters or diverse tastes to accommodate. While trendy recipes come and go, perfectly executed chicken nuggets remain timelessly popular, and this version elevates them to something truly special.
Key Ingredients and What They Bring
Let's talk about what goes into making these the best chicken nuggets you'll ever taste. The star of the show is boneless, skinless chicken breast, which provides lean, tender meat that cooks quickly and evenly. I prefer chicken breast over thighs for nuggets because it has a mild flavor that appeals to all ages and a firm texture that holds up beautifully to the breading and frying process. Cut the chicken into uniform pieces about one to two inches in size to ensure they cook at the same rate.
Buttermilk is absolutely essential to this recipe and one of the reasons I'll never make chicken nuggets any other way. The acidity in buttermilk gently breaks down the protein fibers in the chicken, resulting in incredibly tender meat. It also adds a subtle tang that enhances the overall flavor profile and helps the breading adhere perfectly to the chicken. If you don't have buttermilk on hand, you can make a quick substitute by adding a tablespoon of lemon juice to regular milk and letting it sit for five minutes.
All-purpose flour forms the base of our coating system, creating that foundation layer that helps everything else stick. The flour dries the surface of the chicken slightly, which is crucial for achieving maximum crispiness. I season the flour generously because this is where much of the flavor gets locked in. For the crunchiest results, some of the seasoned flour gets mixed with a bit of buttermilk to create small clumps that create extra-crispy bits in the final coating.
The seasoning blend is where the magic happens. I use a combination of garlic powder, onion powder, paprika, black pepper, and salt to create a savory, well-rounded flavor that's not too spicy but far from boring. The paprika adds a beautiful golden color and a hint of sweetness, while the garlic and onion powders provide that savory depth that makes these nuggets so craveable. You can adjust the ratios to suit your taste, but I've found this combination to be universally loved.
Eggs serve as the binding agent that helps the final coating stick to the flour-dusted chicken. They create a sticky surface that grabs onto every bit of breading, ensuring complete coverage. I whisk the eggs thoroughly with a splash of water to thin them slightly, which makes them easier to work with and creates a thinner, crisper coating rather than a thick, bready one.
Finally, the cooking oil you choose matters more than you might think. I prefer an oil with a high smoke point and neutral flavor, such as vegetable, canola, or sunflower oil. These oils can handle the high temperatures needed for proper frying without burning or imparting unwanted flavors. The right oil temperature is crucial—too low and your nuggets absorb excess oil and turn greasy, too high and they burn on the outside before cooking through.
How to Make These Perfect Chicken Nuggets — Quick Overview
The process of making these incredible chicken nuggets is surprisingly straightforward once you understand the flow. You'll start by cutting your chicken breast into uniform, bite-sized pieces and submerging them in buttermilk for at least thirty minutes, though longer is even better if you have the time. This marinating step is non-negotiable—it's what transforms ordinary chicken into tender, flavorful nuggets that make this recipe so special. While the chicken soaks, you'll set up your breading station with seasoned flour, beaten eggs, and your final coating mixture.
The coating process uses a smart double-dredge technique that creates incredible texture. Each piece of chicken gets dragged through seasoned flour first, which creates a dry surface. Then it goes through the egg wash, which adds moisture and stickiness. Finally, it gets pressed into the flour mixture again, but this time the flour has some clumpy, craggy bits mixed in from reserved buttermilk, which creates those extra-crispy ridges and bumps that make the texture so interesting and satisfying. This three-step process takes just minutes but makes all the difference in the final result.
Once coated, the nuggets go into oil heated to exactly 350°F, where they fry for about four to five minutes until deeply golden brown and cooked through. The relatively high heat creates rapid surface cooking that seals in the juices while developing that satisfying crunch. You'll know they're done when they float to the top, turn a gorgeous golden color, and reach an internal temperature of 165°F. After draining briefly on a wire rack or paper towels, they're ready to serve immediately while at peak crispiness. From start to finish, including marinating time, you're looking at about an hour of total time, with only about twenty minutes of active cooking. The results are so superior to any other method that I'll never make chicken nuggets any other way!
Top Tips for Perfecting Your Chicken Nuggets
The first secret to success is maintaining consistent oil temperature throughout the frying process. Invest in an inexpensive cooking thermometer if you don't already have one, because guessing leads to inconsistent results. When the oil is too cool, the nuggets absorb excess oil and turn greasy and soggy. When it's too hot, the outside burns before the inside cooks through. Keep that temperature steady at 350°F by adjusting your heat between batches and avoiding overcrowding the pan, which causes the temperature to drop significantly.
Don't skip the resting time after coating your nuggets and before frying them. Let the breaded pieces sit on a rack or plate for about five to ten minutes before they hit the oil. This brief rest allows the coating to adhere better and set up slightly, which means it's less likely to fall off during frying. I learned this tip from a professional chef, and it's made a tremendous difference in how well my breading stays intact. The wait is minimal but the payoff is substantial.
Cut your chicken pieces to a uniform size, aiming for about one to one-and-a-half inch chunks. This consistency ensures that every nugget cooks at the same rate, so you don't end up with some pieces that are overcooked and dry while others are still raw in the center. Use a sharp knife and take your time with this step—it's worth the extra minute or two of attention. If you notice any pieces that are significantly larger, just cut them smaller to match the rest.
Season aggressively at every stage of the process. Add salt and spices to the buttermilk marinade, season the flour generously, and even add a pinch of salt to the beaten eggs. Layered seasoning creates depth of flavor that penetrates the entire nugget rather than just sitting on the surface. Many home cooks underseason out of caution, but properly seasoned chicken nuggets should taste boldly delicious, not bland. You can always serve extra condiments on the side for those who want more, but start with a well-seasoned base.
Work in small batches when frying, even though it's tempting to cook everything at once to save time. Overcrowding the pan drops the oil temperature dramatically and creates steam, which is the enemy of crispiness. Fry only four or five nuggets at a time depending on your pan size, leaving plenty of space between them for the oil to circulate. Yes, this means the cooking process takes a bit longer, but it's the difference between mediocre nuggets and the spectacular ones that make me say I'll never make chicken nuggets any other way.
Drain your finished nuggets on a wire rack set over a baking sheet rather than on paper towels if possible. While paper towels work in a pinch, a wire rack allows air to circulate all around the nuggets, preventing the bottoms from getting soggy as they cool. This small detail helps maintain that all-over crispiness that makes these nuggets so exceptional. If you plan to keep them warm while finishing the batch, place the rack in a 200°F oven.
For extra insurance against dry chicken, you can brine your chicken pieces in salted water for an hour before the buttermilk soak, or simply ensure you don't overcook them. Use an instant-read thermometer to check that the internal temperature reaches exactly 165°F—no more, no less. Chicken breast can go from perfectly juicy to disappointingly dry in just a minute or two of overcooking, so pay attention during those final moments of frying. The visual cues of golden brown color and floating to the surface are good indicators, but temperature is the most reliable measure.
Variations and Flavor Twists
For a spicier version that adults often prefer, add cayenne pepper, hot paprika, or your favorite chili powder to the flour mixture. Start with half a teaspoon and adjust upward based on your heat tolerance. You can also add a dash of hot sauce to the buttermilk marinade for flavor that penetrates deep into the meat. This spicy variation pairs beautifully with cooling dips and turns ordinary chicken nuggets into something with serious personality.
Create an herb-crusted version by adding dried herbs like oregano, basil, thyme, and parsley to your flour mixture. This Italian-inspired twist gives the nuggets a more sophisticated flavor profile that works wonderfully with marinara dipping sauce. Use about two tablespoons of mixed dried herbs in your coating, and consider adding a bit of grated parmesan-style cheese to the flour for extra savory depth.
For a lighter option, you can bake these chicken nuggets instead of frying them, though they won't be quite as crispy. Arrange the breaded nuggets on a wire rack set over a baking sheet, spray them generously with cooking oil, and bake at 425°F for about 18 to 20 minutes, flipping halfway through. The results are still delicious and much lower in fat, making this a great alternative for those watching their oil intake. I'll never make chicken nuggets any other way when frying, but baking is a solid backup method.
Try a gluten-free version by substituting the all-purpose flour with a gluten-free flour blend or finely ground almonds mixed with cornstarch. The texture will be slightly different but still delicious and crispy. Make sure all your other ingredients are certified gluten-free, including checking that your seasonings haven't been processed in facilities with cross-contamination concerns. This adaptation allows everyone to enjoy these incredible nuggets regardless of dietary restrictions.
For an Asian-inspired twist, add ground ginger, five-spice powder, and sesame seeds to your coating mixture, and serve the finished nuggets with a sweet chili or soy-based dipping sauce. This variation completely changes the flavor profile while maintaining that perfect crispy texture that makes these nuggets so special. The sesame seeds add visual appeal and a nutty flavor that complements the chicken beautifully.
What to Serve with These Chicken Nuggets
Classic french fries are the traditional pairing for a reason—the combination of crispy chicken and hot, salty fries is simply unbeatable. Whether you make them from scratch or use frozen, the pairing works because both elements have that satisfying crunch and savory flavor that complement rather than compete with each other. For a slightly healthier option, try baked sweet potato fries, which add a hint of sweetness that contrasts nicely with the savory nuggets.
A fresh, crisp coleslaw provides cool, crunchy contrast to the hot, crispy nuggets. The creamy, tangy dressing cuts through the richness of the fried chicken, cleansing your palate between bites. You can make a traditional cabbage-based slaw or try a more colorful version with shredded carrots, red cabbage, and a light vinaigrette. This pairing turns the meal into something more balanced and refreshing.
Corn on the cob, whether grilled, boiled, or roasted, makes a fantastic side dish that adds sweetness and a completely different texture to the meal. Brush the corn with herb-infused oil and sprinkle with your favorite seasonings for extra flavor. This pairing works especially well for casual family dinners and feels wholesome and satisfying without being heavy.
A simple garden salad with mixed greens, cherry tomatoes, cucumbers, and a light vinaigrette adds freshness and vegetables to balance the fried chicken. This combination is perfect when you want the indulgence of crispy nuggets but also want to feel good about including plenty of fresh produce. Let everyone customize their salad with their favorite vegetables and dressings.
Don't forget about the dipping sauces, which are practically mandatory with chicken nuggets! Offer a variety including honey mustard, ranch dressing, barbecue sauce, and ketchup to please everyone at the table. You can also make a special sauce by mixing mayonnaise with a bit of hot sauce and a squeeze of lemon juice. Having multiple sauce options turns the meal into an interactive, fun experience where everyone can customize each bite.
For a complete meal solution, serve these nuggets inside soft dinner rolls with lettuce, tomato, and your favorite sauce to create chicken nugget sliders. This presentation elevates the humble nugget into something that feels special enough for guests while remaining totally approachable and fun. Add some pickle slices and you've got a meal that rivals any restaurant offering.
Storing and Reheating Tips
Freshly cooked chicken nuggets can be stored in an airtight container in the refrigerator for up to four days, though they're definitely at their best within the first two days. Let them cool completely to room temperature before storing to prevent condensation from forming inside the container, which would make them soggy. I like to place a paper towel in the bottom of the container to absorb any excess moisture that might develop during storage.
For longer storage, these nuggets freeze exceptionally well for up to three months. Arrange the completely cooled nuggets in a single layer on a baking sheet and freeze until solid, then transfer them to a freezer-safe bag or container. This flash-freezing method prevents them from sticking together, so you can remove just the amount you need rather than having to thaw the entire batch. Label the container with the date so you can keep track of freshness.
When it comes to reheating, the oven method produces the best results for maintaining that crispy texture that makes these nuggets so special. Preheat your oven to 375°F, arrange the nuggets on a wire rack set over a baking sheet, and heat for about 10 to 12 minutes if refrigerated, or 15 to 18 minutes if frozen. The circulating air around the nuggets helps them crisp up again rather than steaming in their own moisture.
If you're short on time, an air fryer is absolutely fantastic for reheating these chicken nuggets. Set it to 350°F and heat refrigerated nuggets for about 5 minutes, or frozen ones for 8 to 10 minutes. The air fryer's rapid air circulation recreates that fresh-from-the-fryer crispiness better than any other reheating method. This is honestly one of the best uses for an air fryer if you have one.
The microwave works in a pinch but won't give you crispy results—expect the nuggets to be soft and tender but lacking that crunchy exterior. If you must use the microwave, place the nuggets on a microwave-safe plate lined with a paper towel and heat in 30-second intervals until warmed through. They'll still taste good, but you'll lose that textural element that makes these nuggets so memorable. For the full experience that reminds you why I'll never make chicken nuggets any other way, stick with oven or air fryer reheating whenever possible.
Frequently Asked Questions
Can I make these chicken nuggets ahead of time?
Absolutely! You can prepare these nuggets through the breading stage and refrigerate them for up to 24 hours before frying. This actually allows the coating to set even better, resulting in breading that adheres beautifully during cooking. You can also fully cook them, freeze them, and reheat as needed, making them perfect for meal prep and busy weeknights when you need dinner in a hurry.
What's the best way to know when the nuggets are fully cooked?
The most reliable method is using an instant-read thermometer to check that the internal temperature reaches 165°F in the thickest part of the nugget. Visual cues include a deep golden brown color on the outside and the nuggets floating to the surface of the oil. If you cut into one, the meat should be opaque white throughout with no pink remaining, and the juices should run clear.
Can I use chicken thighs instead of chicken breast?
Yes, you can substitute boneless, skinless chicken thighs for a slightly richer, more flavorful result. Thigh meat is more forgiving and stays juicier even if slightly overcooked, making it a great option if you're nervous about drying out the chicken. The cooking time and method remain exactly the same, though the flavor will be a bit more pronounced than the milder breast meat.
How can I make these nuggets without a deep fryer?
You don't need any special equipment—a heavy-bottomed pot or deep skillet with about two inches of oil works perfectly. Use a thermometer to monitor the temperature and adjust your heat as needed to maintain 350°F. I actually prefer this method because it gives you more control and doesn't require storing a bulky appliance. Just be careful with hot oil and never leave it unattended.
Can I scale this recipe up for a large gathering?
Definitely! This recipe multiplies easily, though keep in mind that the frying process can only be done in small batches regardless of how much chicken you prepare. For large gatherings, consider frying the nuggets in batches and keeping the finished ones warm in a 200°F oven until all are done. You can also enlist help with the breading process to move things along more quickly.
Why do my nuggets sometimes lose their coating during frying?
This usually happens when the coating hasn't had time to set before hitting the oil, or when the oil temperature is incorrect. Make sure to let the breaded nuggets rest for 5 to 10 minutes before frying, and verify that your oil is at the proper temperature of 350°F. Also ensure each piece is thoroughly coated in every layer—any bare spots are vulnerable to the coating separating during cooking. Following these steps is why I'll never make chicken nuggets any other way—the technique ensures perfect results every time!
I'll Never Make Chicken Nuggets any Other Way (SO GOOD!!)
Incredibly crispy, tender homemade chicken nuggets with a perfectly seasoned coating and juicy interior. These restaurant-quality nuggets are made with simple ingredients and a foolproof double-breading technique.
Prep Time
20 min
Cook Time
25 min
Total Time
45 min
Servings
6 servings
Ingredients
For 6 servings
- 2 pounds boneless, skinless chicken breast, cut into 1-inch pieces
- 2 cups buttermilk
- 2 cups all-purpose flour, divided
- 2 teaspoons salt, divided
- 1 teaspoon black pepper, divided
- 1 and 1/2 teaspoons garlic powder
- 1 and 1/2 teaspoons onion powder
- 1 and 1/2 teaspoons paprika
- 1/2 teaspoon dried oregano
- 3 large eggs
- 2 tablespoons water
- Vegetable oil for frying (about 4 cups)
Instructions
- 1
Marinate the chicken
Cut the chicken breast into uniform 1-inch pieces and place them in a large bowl. Pour the buttermilk over the chicken, ensuring all pieces are submerged. Cover and refrigerate for at least 30 minutes, or up to 4 hours for maximum tenderness.
- 2
Prepare breading station
Set up three shallow dishes for breading. In the first dish, combine 1 and 1/2 cups flour, 1 and 1/2 teaspoons salt, 3/4 teaspoon black pepper, garlic powder, onion powder, paprika, and oregano. Mix well to distribute the seasonings evenly throughout the flour.
- 3
Prepare egg wash
In the second dish, whisk together the eggs, water, and remaining 1/4 teaspoon each of salt and pepper until completely combined. The water thins the eggs slightly for easier coating and a crisper final texture.
- 4
Create textured coating
Place the remaining 1/2 cup flour in the third dish. Take 3 tablespoons of the buttermilk from the marinating chicken and drizzle it into this flour, mixing with a fork to create small clumps. These clumps will create extra-crispy bits on the finished nuggets.
- 5
Bread the chicken
Remove chicken pieces from buttermilk, allowing excess to drip off. Dredge each piece in the first seasoned flour mixture, coating completely. Then dip in the egg wash, letting excess drip off. Finally, press firmly into the clumpy flour mixture, ensuring complete coverage. Place breaded nuggets on a wire rack and let rest for 5-10 minutes.
- 6
Heat the oil
Pour oil into a heavy-bottomed pot or deep skillet to a depth of about 2 inches. Heat over medium-high heat until the oil reaches exactly 350°F on a cooking thermometer. This temperature is crucial for achieving crispy nuggets without burning.
- 7
Fry the nuggets
Working in small batches of 4-5 nuggets, carefully lower the chicken into the hot oil using tongs or a slotted spoon. Fry for 4-5 minutes, turning occasionally, until deep golden brown and floating to the surface. Use a thermometer to verify the internal temperature reaches 165°F.
- 8
Drain and serve
Remove the cooked nuggets with a slotted spoon and transfer to a wire rack set over a baking sheet, or to a paper towel-lined plate. Allow the oil to return to 350°F between batches. Season the hot nuggets with a small pinch of salt if desired, and serve immediately while crispy and hot with your favorite dipping sauces.
Nutrition Facts
Per serving (estimated)
385 calories
Calories
28g
Carbs
38g
Protein
12g
Fat
1g
Fiber
680mg
Sodium
4g
Sugar


