Healthy Sourdough Discard Granola Bars Recipe
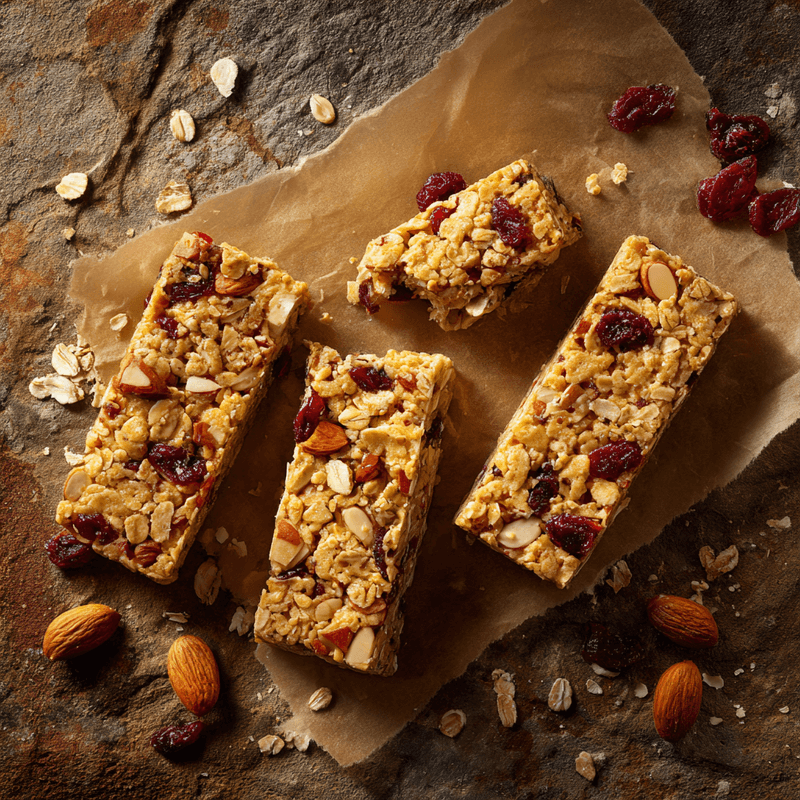
Transform sourdough discard into chewy, nutritious granola bars! These healthy homemade bars are packed with oats, nuts, and natural sweetness.
cookwithlucia.com/recipes/healthy-sourdough-discard-granola-bars
Nobody wants to spend an hour making snacks and then face a mountain of mixing bowls, baking sheets, and sticky spoons. That's the beauty of these healthy sourdough discard granola bars—they come together in one bowl, bake on one pan, and deliver weeks' worth of wholesome snacks with minimal cleanup. The tangy depth from sourdough starter adds a subtle complexity you won't find in store-bought bars, while oats, nuts, and dried fruit create that perfect chewy-crispy texture we all crave.
Picture pulling a pan of golden-brown bars from your oven, their edges crisp and caramelized, the center still soft and yielding. The aroma of toasted oats and warm cinnamon fills your kitchen, and you know you've just created something that rivals anything from the grocery store—except better, because you control every ingredient. These bars look like you fussed for hours, but the truth? You stirred everything together, pressed it into a pan, and let the oven do the work. That sourdough discard you've been feeling guilty about? It just became the secret ingredient that binds everything together while adding beneficial probiotics and a barely-there tang that makes these bars impossibly moreish.

The One-Pan Philosophy
When you're working with ingredients like oats, nuts, and sticky sweeteners, keeping everything in one bowl and one pan isn't just convenient—it's strategic. Granola bars thrive on simplicity because overmixing or complicated techniques can turn them crumbly or rock-hard. By combining your dry ingredients first, then folding in the wet components including that precious sourdough discard, you create an even distribution without overworking the mixture. The sourdough starter acts as both a binding agent and a flavor enhancer, working alongside nut butter and honey to create cohesion.
The beauty of a single pan is temperature consistency. When you press your mixture into one even layer, heat circulates uniformly, creating edges that crisp up while the center stays tender and chewy. This isn't the kind of recipe where different components need different cooking times—everything comes together as one cohesive unit, baking simultaneously to golden perfection. It's both the laziest and smartest approach because you're letting chemistry and heat do the heavy lifting while you simply assemble and wait.
What Goes In
At the heart of these healthy sourdough discard granola bars are rolled oats—the old-fashioned kind that still have texture and heft. Quick oats will turn mushy, while steel-cut oats won't soften enough in the baking time. Those rolled oats create the signature chewy texture and provide fiber that keeps you satisfied. Combined with chopped almonds and sunflower seeds, you've got crunch, protein, and healthy fats that make these bars genuinely nourishing rather than glorified candy.
Your sourdough discard is the unexpected hero here, contributing moisture, subtle tanginess, and binding power that helps everything stick together without excessive sweeteners. Whether your starter is freshly fed or straight from the fridge doesn't matter much—the wild yeasts are mostly inactive once baked, so you're primarily benefiting from the fermented flour's unique properties. A quarter cup of starter goes a long way in a batch of bars.
Nut butter provides richness and additional binding—almond butter, cashew butter, or even tahini work beautifully alongside the classic choice of natural creamy nut butter. Look for the kind where oil pools on top, without added sugars or stabilizers. Honey or pure maple syrup adds just enough sweetness to balance the earthy oats and tangy starter, while also contributing to that coveted chewiness. Dried cranberries or chopped dates bring concentrated fruity sweetness and prevent the bars from feeling too virtuous.
A pinch of cinnamon and vanilla extract might seem like small additions, but they're what elevate these from basic to bakery-worthy. The cinnamon plays beautifully with the sourdough's tang, while vanilla rounds out all the flavors into something cohesive. If you're missing an ingredient, swap freely—substitute pecans for almonds, use coconut flakes instead of some oats, or swap dried cherries for cranberries based on what's languishing in your pantry.
Assembly and Cooking
Start by preheating your oven to 325°F (165°C)—a moderate temperature that allows the bars to cook through without burning the edges before the center sets. Line an 8x8-inch square pan or 9x9-inch pan with parchment paper, leaving overhang on two sides to create handles for easy removal later. This step is non-negotiable if you want intact bars rather than crumbly pieces stuck to your pan.
In your largest mixing bowl, combine three cups of rolled oats with one cup of chopped nuts, half a cup of seeds, half a cup of dried fruit, one teaspoon of cinnamon, and a quarter teaspoon of salt. Stir these dry ingredients thoroughly so every spoonful gets an even distribution of goodies. In a smaller bowl or measuring cup, whisk together half a cup of nut butter, a third cup of honey or maple syrup, quarter cup of sourdough discard, and one teaspoon of vanilla extract until relatively smooth—some texture from the nut butter is fine.
Pour the wet mixture over the dry ingredients and stir with a sturdy wooden spoon or spatula, pressing and folding rather than just stirring. You want every oat coated with the sticky mixture, but this takes some effort. Your arm might get tired—that's normal. Keep working it until you don't see any dry pockets. The mixture should hold together when you squeeze a handful; if it's too crumbly, add an extra tablespoon of nut butter or honey.
Transfer everything to your prepared pan and here's where technique matters: press firmly and evenly with the back of a measuring cup or your hands (dampened slightly to prevent sticking). Really compress that mixture—the more tightly packed, the better your bars will hold together when cut. Create an even layer that reaches all corners. Bake for 28 to 35 minutes, until the edges turn golden brown and the top looks set and slightly darker. The center might seem a bit soft, but it will firm as it cools.
Secrets for One-Pan Success
The single most important factor in granola bar success is the press. Many recipes fail because people gently pat the mixture into the pan, leaving air pockets that create crumble rather than cohesion. You need to apply serious pressure, compacting everything so tightly that ingredients have no choice but to stick together as they bake. Use a flat-bottomed glass or measuring cup to press down with your full weight, working from the center outward to the edges and corners.
Don't overbake these healthy sourdough discard granola bars in pursuit of crispness—they'll continue firming as they cool, and bars baked too long become tooth-breakingly hard once they reach room temperature. Remove them when the edges are golden and the top looks dry but the center still has a bit of give when gently pressed. That residual heat will finish the job as they cool completely in the pan.
Temperature matters for your wet ingredients too. If your nut butter comes straight from the fridge, it won't incorporate smoothly with the honey and sourdough discard. Warm it slightly—just fifteen seconds in the microwave or a few minutes at room temperature—so everything blends into a cohesive binding agent. Cold ingredients create uneven distribution and clumpy bars.
The cooling period requires patience. Let your bars cool completely in the pan for at least two hours before attempting to cut them. I know the temptation to dig in while warm is overwhelming, but premature cutting results in bars that fall apart. Once cool, use your parchment overhang to lift the entire slab out, place it on a cutting board, and use a sharp knife to cut clean lines. Wipe the blade between cuts for the neatest edges.
For extra insurance against crumbling, you can refrigerate the fully cooled slab for thirty minutes before cutting. The cold firms up the binding ingredients just enough to make cutting foolproof. Some bakers even score the bars lightly while still slightly warm, then complete the cuts once fully cooled, which gives you the best of both approaches.
Rounding Out the Meal
These healthy sourdough discard granola bars shine as portable snacks, but they also play well as part of a complete breakfast or light meal. Serve them alongside thick yogurt swirled with honey and fresh berries for a weekend morning spread that feels special without requiring you to stand over a stove. The probiotics in both the yogurt and sourdough starter create a gut-friendly combination that starts your day right.
Pair a bar with a smoothie for a post-workout refuel—the carbohydrates from oats provide energy while the nuts and seeds deliver protein and healthy fats for recovery. Breaking a bar into chunks over smoothie bowls adds textural contrast that makes breakfast feel more substantial and satisfying than liquid alone.
For afternoon tea or coffee, these bars need nothing more than a hot beverage to feel complete. Their natural sweetness satisfies without being cloying, and the complex flavors from fermented starter mean they taste sophisticated enough for guests. Arrange them on a simple plate with fresh fruit and a small bowl of nut butter for dipping, and you've created an impressive spread with minimal effort.
Leftovers and Next-Day Ideas
Once cut, store your healthy sourdough discard granola bars in an airtight container at room temperature for up to one week, or refrigerate them for two weeks. Layer parchment paper between stacked bars to prevent them from sticking together if your kitchen runs warm. The texture stays remarkably consistent—unlike many homemade granola bars that either dry out or turn soggy, these maintain their chewy-crisp balance thanks to the moisture-regulating properties of sourdough starter.
For longer storage, wrap individual bars tightly in plastic wrap or parchment, then freeze them in a freezer bag for up to three months. Pull one out in the morning and it'll be perfectly thawed by mid-morning snack time, or eat them frozen for a firmer, almost candy-bar-like texture on hot days. The honey keeps them from freezing solid, so they remain somewhat pliable even straight from the freezer.
When bars start to lose their appeal whole, crumble them over yogurt parfaits or ice cream for an instant streusel-like topping. Pulse a few bars in the food processor to create a textured crumb coating for chicken, or press into the bottom of a springform pan as a no-bake crust for cream-topped desserts. That sourdough tang adds unexpected depth to sweet applications that normally taste one-dimensional.
Answers to Your Questions
Can I use active sourdough starter instead of discard?
Absolutely—active starter works perfectly in these healthy sourdough discard granola bars, though you might notice slightly more rise and a more pronounced tang. The baking process kills the yeast activity, so you won't get actual leavening, but freshly fed starter contributes more complex flavor. If your starter is particularly liquidy, reduce other liquids slightly by a tablespoon or so to maintain the proper consistency.
What if my bars fall apart when I cut them?
Crumbly bars usually result from insufficient pressing during assembly or cutting too soon. Make sure you've really compressed the mixture—it should feel almost uncomfortably tight in the pan. Always let bars cool completely, ideally for two to three hours, before cutting. If you're still having issues, increase the binding ingredients slightly: add an extra tablespoon of nut butter or honey, or increase the sourdough discard to one-third cup.
Can I make these without nuts for allergies?
Definitely—replace chopped nuts with additional seeds like pumpkin seeds, sunflower seeds, or hemp hearts to maintain the protein and healthy fats. Substitute the nut butter with tahini or sunflower seed butter, which bind just as effectively. The texture and nutrition remain comparable while being completely nut-free. Just verify your oats are processed in a nut-free facility if allergies are severe.
How do I make the bars crispier or chewier?
For crispier healthy sourdough discard granola bars, reduce the sourdough discard to three tablespoons and bake five minutes longer at the same temperature, allowing more moisture to evaporate. For chewier bars, increase the honey by one to two tablespoons and press the mixture even more compactly, which creates a denser texture. You can also underbake slightly by three to four minutes, pulling them when the edges just start to brown.
Can I double this recipe?
You can, but I recommend using two 8x8-inch pans rather than one larger pan to maintain the ideal thickness. Bars that are too thick bake unevenly—the edges overcook before the center sets—while bars that are too thin become hard and crispy rather than chewy. If you want to use a 9x13-inch pan for a double batch, extend baking time by five to seven minutes and watch carefully for even browning.
Should I use sourdough discard straight from the fridge?
Yes, cold discard works perfectly—no need to bring it to room temperature first. The other wet ingredients are usually at room temperature, which brings the overall mixture to a workable consistency. If your discard is particularly thick or stiff, you might need to whisk it vigorously with the honey and nut butter to break up any clumps, but temperature itself doesn't affect the final result since everything bakes together.
Making This Recipe Your Own
The framework of these healthy sourdough discard granola bars is endlessly adaptable once you understand the ratios. The basic formula is three parts oats to one-and-a-half parts mix-ins (nuts, seeds, dried fruit), bound together with roughly three-quarters cup of sticky wet ingredients plus your sourdough discard. As long as you maintain these proportions, you can swap components based on season, preference, or what's available.
Try a tropical version with unsweetened coconut flakes, macadamia nuts, dried pineapple, and a splash of coconut extract. Or go savory-sweet with pumpkin seeds, dried apricots, a pinch of cardamom, and orange zest. A chocolate variation works beautifully with cacao nibs or mini chocolate chips (dairy-free if needed), almond butter, and dried cherries. Each variation maintains the sourdough starter's subtle complexity while showcasing different flavor profiles.
Seasonal adaptation keeps these bars interesting year-round. In autumn, use pecans, dried apples, and warm spices like nutmeg and ginger. Winter calls for cranberries, pistachios, and a hint of orange zest. Spring might feature strawberries, almonds, and lemon zest, while summer could showcase dried cherries, hazelnuts, and vanilla. The sourdough discard acts as a neutral canvas that enhances rather than competes with these seasonal additions.
For a protein boost, stir in a quarter cup of hemp hearts or chia seeds, or replace some oats with protein powder (reduce other dry ingredients slightly to compensate). Kids love these bars studded with mini chocolate chips and rolled in a bit of cinnamon sugar before baking. Health-focused versions can replace all sweeteners with mashed banana or applesauce, though you'll need to increase baking time to account for the extra moisture.
The Sourdough Advantage
Using sourdough discard in granola bars isn't just about reducing waste—though that's certainly a worthy goal given how much discard most bakers accumulate. The fermented flour brings genuine benefits that improve both nutrition and flavor. During fermentation, wild yeasts and bacteria break down complex carbohydrates and proteins, making them easier to digest and increasing the bioavailability of minerals like iron, zinc, and magnesium that are naturally present in whole grains.
That subtle tang from fermentation adds a sophisticated depth you simply can't replicate with commercial ingredients. It's not sour in an aggressive way—more like a whisper of complexity that makes you take a second bite trying to identify what makes these bars taste so much better than others. The acidity also acts as a natural preservative, helping your homemade bars stay fresh longer without artificial additives.
From a textural standpoint, sourdough starter contributes moisture without making bars soggy because the flour in the starter absorbs liquid gradually as the bars cool. This creates a more forgiving texture that stays chewy longer rather than drying out or getting stale quickly. The proteins in the fermented flour also aid in binding, meaning you need less added sugar and fat to hold everything together compared to conventional granola bar recipes.
Even unfed discard that's been languishing in your refrigerator for a week or two works perfectly in these healthy sourdough discard granola bars. You're not relying on leavening power, so the age and activity level of your starter matter far less than in bread baking. This makes granola bars an ideal discard project—you can bake them right before feeding your starter, using up discard that would otherwise go to waste while creating nutritious snacks for the week ahead.
Why Homemade Beats Store-Bought
Walk down the granola bar aisle and you'll find products that seem healthy until you read the ingredient list: mysterious gums and stabilizers, inflammatory oils, excessive sugars hiding under a dozen different names, and sometimes questionable preservatives. Many commercial bars contain more sugar per serving than a cookie, yet market themselves as nutritious. Making your own healthy sourdough discard granola bars means you control every ingredient, choosing quality over convenience.
Cost comparison favors homemade too. A box of decent granola bars might cost five to seven dollars for eight to ten bars, while the ingredients for a homemade batch—assuming you're using discard you already have—costs perhaps three to four dollars and yields twelve to sixteen bars depending on how you cut them. The math becomes even more favorable if you buy oats, nuts, and dried fruit in bulk.
The customization factor can't be overstated. Store-bought options cater to mass appeal, which means they're usually loaded with extra sweetness to please the broadest audience. When you make your own, you adjust sweetness to your preference, amp up nuts and seeds for more protein and healthy fats, or reduce dried fruit if you're watching sugar. You can also accommodate dietary restrictions that make commercial options limited or expensive—making these nut-free, using specific sweeteners, or adjusting texture is simple when you're the one in control.
Freshness is another huge advantage. Commercial bars sit in warehouses and on shelves for months, maintained by preservatives that keep them shelf-stable but not necessarily delicious. Your homemade version tastes vibrantly fresh because you baked it recently, with ingredients you selected for quality. The difference in flavor and texture is immediately apparent—these bars taste like real food, not processed convenience.
Teaching Moments in the Kitchen
Baking these healthy sourdough discard granola bars offers wonderful opportunities to involve family members in the kitchen, especially young helpers who might not have the patience or skill for more complex recipes. Measuring oats and stirring ingredients provides math practice and motor skill development for children, while the forgiving nature of the recipe means small mistakes rarely ruin the final product. Kids love seeing how disparate ingredients transform into cohesive bars through the magic of heat and binding.
The sourdough component opens conversations about fermentation, wild yeasts, and how humans have preserved and enhanced foods for thousands of years. Explaining that the bubbles in starter come from living organisms captures curiosity in a way that few science lessons can match. Watching discard that might seem like garbage transform into delicious bars teaches valuable lessons about resourcefulness and reducing waste.
For older kids and teens learning to cook independently, this recipe builds confidence because it's nearly foolproof while still requiring some technique. They learn about the importance of ingredient ratios, how to tell when something is properly baked, and how patience during cooling leads to better results. These are foundational skills that transfer to countless other recipes, taught through a project that yields tangible, delicious rewards they can share with friends.
The Satisfaction of Simple Excellence
There's profound satisfaction in pulling together a few wholesome ingredients and creating something that nourishes your family while tasting genuinely delicious. These healthy sourdough discard granola bars don't pretend to be health food—they're treats that happen to be nutritious, which is perhaps the best kind of recipe. The oats provide sustained energy, nuts and seeds deliver protein and healthy fats, and that sourdough discard contributes probiotics and complex flavors while helping you feel good about reducing waste.
Every time you reach for one of these bars instead of a packaged snack, you're making a choice that benefits your health, your budget, and your sense of accomplishment. You made this. You took flour, water, and wild yeasts that you've been cultivating, combined them with pantry staples, and created real food without artificial anything. In a world of ultra-processed convenience, that's increasingly rare and valuable.
The beauty of mastering one good granola bar recipe is how it becomes a template you'll use for years. Once you've made these healthy sourdough discard granola bars a few times, you'll develop an intuition for the texture of the raw mixture, how golden is golden enough, and which variations your household prefers. This recipe becomes part of your rotation, something you make almost without thinking when the snack drawer empties or your starter jar overflows. That kind of effortless competence in the kitchen, where you're no longer following recipes step-by-step but cooking from understanding, is one of life's quiet joys.
Healthy Sourdough Discard Granola Bars
Chewy, nutritious homemade granola bars that transform sourdough discard into portable snacks packed with oats, nuts, seeds, and natural sweetness. Perfect for reducing waste while creating wholesome treats.
Prep Time
15 min
Cook Time
32 min
Total Time
47 min
Servings
12 bars
Ingredients
For 12 bars
- 3 cups rolled oats (old-fashioned)
- 1 cup almonds, roughly chopped
- 1/2 cup sunflower seeds
- 1/2 cup dried cranberries or chopped dates
- 1 teaspoon ground cinnamon
- 1/4 teaspoon salt
- 1/2 cup natural almond butter or cashew butter
- 1/3 cup honey or pure maple syrup
- 1/4 cup sourdough discard (fed or unfed)
- 1 teaspoon vanilla extract
Instructions
- 1
Prepare pan and preheat
Preheat your oven to 325°F (165°C). Line an 8x8-inch or 9x9-inch square baking pan with parchment paper, leaving overhang on two opposite sides to create handles for easy removal later. This ensures your bars won't stick and makes cleanup effortless.
- 2
Combine dry ingredients
In a large mixing bowl, combine the rolled oats, chopped almonds, sunflower seeds, dried cranberries, cinnamon, and salt. Stir thoroughly with a wooden spoon or spatula until all ingredients are evenly distributed throughout the mixture. This ensures every bite has a good balance of flavors and textures.
- 3
Mix wet ingredients
In a medium bowl or large measuring cup, whisk together the nut butter, honey or maple syrup, sourdough discard, and vanilla extract until relatively smooth and well combined. If your nut butter is cold, warm it slightly for 15 seconds in the microwave to help it blend more easily with the other wet ingredients.
- 4
Combine wet and dry
Pour the wet ingredient mixture over the dry ingredients. Using a sturdy wooden spoon or spatula, stir and fold the mixture together, pressing and working it until every oat is coated and there are no dry pockets remaining. This may take 2-3 minutes of vigorous stirring—the mixture should hold together when squeezed in your hand.
- 5
Press into pan
Transfer the mixture to your prepared pan. Using the back of a measuring cup, a flat-bottomed glass, or your dampened hands, press the mixture down very firmly and evenly into the pan. Apply significant pressure to compress everything tightly—this is crucial for bars that hold together when cut. Make sure the mixture reaches all corners and the surface is level.
- 6
Bake until golden
Place the pan in the preheated oven and bake for 28 to 35 minutes, until the edges turn golden brown and the top looks set and dry. The center may still seem slightly soft, which is normal—it will firm up as it cools. Rotate the pan halfway through baking for even browning if your oven has hot spots.
- 7
Cool completely
Remove the pan from the oven and place it on a wire rack. Allow the bars to cool completely in the pan for at least 2 hours, or until they reach room temperature. Resist the temptation to cut them while warm, as they need this time to set properly and will crumble if cut too soon.
- 8
Cut and store
Once completely cool, use the parchment paper overhang to lift the entire slab out of the pan and onto a cutting board. Using a sharp knife, cut into 12 bars, wiping the blade clean between cuts for neat edges. Store bars in an airtight container at room temperature for up to 1 week, or refrigerate for up to 2 weeks.
Nutrition Facts
Per serving (estimated)
245 calories
Calories
28g
Carbs
7g
Protein
12g
Fat
4g
Fiber
65mg
Sodium
11g
Sugar


