Gluten-Free Vanilla Buttermilk Cupcakes Recipe
Master gluten-free vanilla buttermilk cupcakes with this detailed guide. Light, fluffy texture and rich flavor—you won't miss the gluten!
cookwithlucia.com/recipes/gluten-free-vanilla-buttermilk-cupcakes
There's something profoundly comforting about a perfectly baked vanilla cupcake. The tender crumb, the delicate sweetness, the way it practically melts on your tongue—it's a reminder that simple pleasures can be the most memorable. When I first tasted a truly exceptional gluten-free vanilla buttermilk cupcake at a local bakery, I was stunned. It wasn't just "good for gluten-free." It was genuinely spectacular, rivaling any traditional cupcake I'd ever had. The tangy buttermilk gave it a subtle complexity, while the gluten-free flour blend created an incredibly tender texture that made me question everything I thought I knew about gluten-free baking.
I won't pretend this recipe is a quick weeknight project. Gluten-free vanilla buttermilk cupcakes require attention to detail, proper measuring techniques, and a willingness to understand how alternative flours behave differently than wheat. But here's what I can promise: if you follow this guide carefully, you'll create cupcakes that will make everyone at your table ask for seconds—and nobody will guess they're gluten-free. Whether you're baking for someone with celiac disease, exploring gluten-free options for your own health, or simply curious about expanding your baking repertoire, this is your comprehensive guide to mastering these delightful treats. We're going to dive deep into technique, troubleshoot common issues, and ensure you understand not just what to do, but why you're doing it.
The Origins and History
Cupcakes as we know them today emerged in American cookbooks in the late 18th century, originally called "number cakes" or "cup cakes" because they were measured by the cupful rather than weighed. This made them remarkably democratic—anyone could bake them without fancy kitchen scales. The individual portion size made them practical for gatherings and perfect for sharing, which is why they've remained beloved for over two centuries.
The addition of buttermilk to cake recipes became popular in the American South, where buttermilk was a common byproduct of butter-making and home cooks were resourceful about using every ingredient available. Buttermilk's acidity not only added a pleasant tang but also reacted with leavening agents to create exceptionally tender crumb structures. This chemical reaction became the foundation for some of the most celebrated American cakes.
Gluten-free baking, meanwhile, has undergone a remarkable transformation over the past two decades. What once produced dense, gritty results now rivals traditional baking thanks to better flour blends, improved understanding of hydration ratios, and the addition of binding agents like xanthan gum. Modern gluten-free vanilla buttermilk cupcakes represent the perfect marriage of traditional technique and contemporary innovation, proving that dietary restrictions don't mean sacrificing quality or flavor. The evolution continues as home bakers share discoveries and refine methods, making gluten-free baking more accessible and successful than ever before.
Understanding the Flavor Profile
Gluten-free vanilla buttermilk cupcakes offer a beautifully balanced flavor profile that's more complex than you might expect from such seemingly simple ingredients. The dominant note is sweet vanilla—warm, floral, and comforting—but it's the supporting players that make these cupcakes truly special. The buttermilk contributes a subtle tanginess that cuts through the sweetness, preventing the cupcakes from becoming cloying while adding a sophisticated depth that keeps you coming back for another bite.
The butter provides richness and a creamy, almost nutty undertone that rounds out the flavor profile, while a touch of salt enhances all the other flavors and makes the vanilla sing. When baked properly, you'll also notice a hint of caramelization on the top and edges where the natural sugars have browned slightly, adding another layer of complexity.
Texturally, these cupcakes should be incredibly tender and moist, with a fine, even crumb that's slightly denser than wheat-based cupcakes but still remarkably light. The top should have a delicate crust that gives way to a soft, almost velvety interior. When you bite into one, it should compress gently without being gummy or falling apart, and it should leave just a slight moisture on your fingertips—the sign of a perfectly balanced recipe. The overall experience should be one of delicate sweetness, subtle tang, and melt-in-your-mouth tenderness.
Essential Ingredients Explained
The gluten-free flour blend is your foundation, and quality matters immensely. Look for a blend that contains rice flour, potato starch, and tapioca starch—this trio creates the best texture for gluten-free vanilla buttermilk cupcakes. Avoid single-flour approaches; you need the combination to mimic wheat flour's properties. Bob's Red Mill 1-to-1 Baking Flour or King Arthur Measure for Measure both work beautifully because they include xanthan gum. If your blend doesn't contain xanthan gum, you'll need to add a quarter teaspoon per cup of flour to provide structure and prevent crumbling.
Buttermilk is non-negotiable for achieving that signature tang and tender crumb. The lactic acid in buttermilk tenderizes the protein structure and reacts with baking soda to create lift. If you absolutely cannot find buttermilk, you can make a substitute by adding one tablespoon of lemon juice or white vinegar to a scant cup of milk and letting it sit for five minutes. However, real buttermilk truly delivers superior flavor and texture.
High-quality vanilla extract transforms these cupcakes from good to extraordinary. Pure vanilla extract, not imitation, contains hundreds of flavor compounds that create complexity and warmth. Madagascar vanilla offers classic, creamy notes, while Tahitian vanilla provides a more floral character. Use at least two teaspoons for proper vanilla flavor that doesn't disappear during baking.
Butter should be unsalted and at room temperature—this is crucial for proper creaming. When butter and sugar are creamed together, tiny air pockets form that expand during baking, creating lift and tenderness. Cold butter won't incorporate properly, and melted butter won't hold those essential air bubbles. Plan ahead and leave your butter out for about an hour before baking.
Eggs provide structure, moisture, and richness. They should also be at room temperature so they emulsify properly with the butter mixture. Cold eggs can cause the batter to separate or curdle, resulting in a denser texture. If you forget to take them out ahead of time, place them in a bowl of warm water for five minutes.
Granulated sugar sweetens, of course, but it also contributes to tenderness by interfering with gluten-free flour proteins and helps create that delicate crust. Don't substitute with coconut sugar or other alternatives here—they contain too much moisture and will affect the texture significantly.
Baking powder and baking soda work together to create lift. The baking soda reacts with the acidic buttermilk immediately, while the baking powder (which is double-acting) provides additional rise both when mixed and when heated. Make sure your leaveners are fresh—they lose potency after about six months.
Salt might seem minor, but it's absolutely essential for balancing sweetness and enhancing all the other flavors in your gluten-free vanilla buttermilk cupcakes. Even a small amount makes vanilla taste more vibrant and prevents the cupcakes from tasting flat or one-dimensional.
Mastering the Technique
The journey to perfect gluten-free vanilla buttermilk cupcakes begins with proper mise en place. Before you touch a single ingredient, preheat your oven to 350°F and line your cupcake pan with paper liners. Bring all refrigerated ingredients to room temperature—this single step prevents countless texture issues. Measure your gluten-free flour using the spoon-and-level method: spoon flour into your measuring cup and level it with a knife. Scooping directly from the bag compacts the flour and can add up to 25% more flour than the recipe intends, resulting in dry, dense cupcakes.
The creaming stage is where magic happens. Beat room-temperature butter and sugar together for a full three to four minutes until the mixture is pale, fluffy, and has increased in volume noticeably. This isn't just mixing—you're incorporating thousands of tiny air bubbles that will help your cupcakes rise. The mixture should look almost white and have a light, mousse-like texture. Scrape down the bowl at least twice during this process to ensure even mixing.
When adding eggs, incorporate them one at a time, beating well after each addition. This allows the emulsion to form properly, creating a smooth, cohesive batter. If you add all the eggs at once, the mixture may look curdled and separated, which compromises the final texture of your gluten-free vanilla buttermilk cupcakes. Add the vanilla extract with the eggs so it distributes evenly throughout the batter.
The dry and wet ingredient addition requires a gentle hand. Mix your gluten-free flour blend, baking powder, baking soda, and salt in a separate bowl. Add this to your creamed mixture in three additions, alternating with the buttermilk in two additions, always beginning and ending with the dry ingredients. Mix on low speed just until each addition disappears—overmixing develops the starches in gluten-free flour and creates gummy texture. The batter should be smooth and thick, resembling a very soft ice cream consistency.
Filling the cupcake liners properly ensures even baking and beautiful domed tops. Fill each liner about two-thirds full—a spring-loaded ice cream scoop works perfectly for this and ensures uniform size. Tap the filled pan gently on the counter a few times to release any large air bubbles. Bake for 18 to 22 minutes, rotating the pan halfway through for even browning. The cupcakes are done when a toothpick inserted in the center comes out with just a few moist crumbs and the tops spring back when lightly pressed.
Cooling is the final critical stage. Let the cupcakes cool in the pan for five minutes, then transfer them to a wire rack. This prevents condensation from forming on the bottoms, which would make them soggy. Cool completely before frosting—warm cupcakes will melt your frosting and create a mess. Patience during this final stage ensures your gluten-free vanilla buttermilk cupcakes maintain their perfect texture.
Common Pitfalls and How to Fix Them
Dense, heavy cupcakes are the most common complaint in gluten-free baking, and they usually result from too much flour or undermixed butter and sugar. If you find your gluten-free vanilla buttermilk cupcakes turning out compact rather than light and fluffy, first evaluate your measuring technique. Switch to weighing your flour if possible—120 grams per cup is the standard. Also, ensure you're creaming the butter and sugar for the full recommended time; this is where most of your lift originates in the absence of gluten's structure.
Gummy or sticky centers indicate overmixing after adding the flour. Remember that gluten-free flours don't develop gluten, but they do contain starches that can become gluey when overworked, especially in the presence of moisture. Mix only until the ingredients just combine—a few small lumps are far better than a gummy texture. If you've already made this mistake, there's unfortunately no fix for the finished cupcakes, but you'll know for next time to use a lighter hand and mix on the lowest speed.
Cupcakes that dome excessively or develop peaks in the center suggest your oven temperature is too high. The outside sets too quickly, forcing all the rise to concentrate in the center. Invest in an oven thermometer—many home ovens run 25 degrees hotter or cooler than the dial indicates. If your gluten-free vanilla buttermilk cupcakes consistently peak, lower your oven temperature by 25 degrees and extend the baking time slightly.
Dry, crumbly cupcakes can result from overbaking, too much flour, or insufficient fat. Check them at the earliest recommended time and remember that they'll continue cooking slightly as they cool. If you're certain your measurements and timing are correct, your flour blend might be the culprit—some contain more absorbent starches than others. Try adding an extra tablespoon of buttermilk to the batter or brush the cooled cupcakes with a simple syrup made from equal parts sugar and water.
Sunken centers usually mean undermixing or opening the oven door too early. The structure hasn't set before the leavening gases escape, causing collapse. Resist the urge to check your cupcakes before the 15-minute mark, and when you do rotate the pan, work quickly and close the door gently. Also ensure your leavening agents are fresh—expired baking powder won't provide enough lift to support the structure.
If your cupcakes stick to the liners, it's likely because they weren't completely cool when you tried to peel them, or there wasn't enough fat in the batter to create release. Always cool your gluten-free vanilla buttermilk cupcakes completely, and consider using high-quality foil or parchment liners, which release more easily than standard paper ones.
Regional Twists Worth Trying
In Italian baking traditions, vanilla cupcakes often incorporate almond extract alongside vanilla, creating a sophisticated flavor reminiscent of traditional amaretti. Replace half a teaspoon of vanilla extract with almond extract in your gluten-free vanilla buttermilk cupcakes, and fold in two tablespoons of finely ground blanched almonds. The result is subtly nutty with a more complex aromatic profile that pairs beautifully with cream cheese or mascarpone frosting.
French-inspired versions sometimes include a hint of citrus to brighten the vanilla. Add the finely grated zest of one lemon or orange to your butter and sugar during the creaming stage—the oils in the zest will infuse the butter, creating a delicate citrus note that doesn't overpower the vanilla but adds wonderful freshness. This variation is particularly lovely for afternoon tea or gatherings during warmer months.
In the American South, some bakers add a quarter cup of sour cream along with the buttermilk for an even richer, more tender crumb. This increases the fat content slightly and adds an extra dimension of tang. If you try this variation, reduce the buttermilk by two tablespoons to maintain the proper batter consistency. The result is incredibly moist cupcakes that stay fresh even longer.
Middle Eastern influences might incorporate rose water or orange blossom water—just a teaspoon or two—for a subtly floral note that transforms your gluten-free vanilla buttermilk cupcakes into something exotic and memorable. These floral waters are potent, so start conservatively and taste the batter before baking. Pair these variations with a simple glaze rather than heavy frosting to let the delicate flavors shine.
The Perfect Spread
Gluten-free vanilla buttermilk cupcakes shine as part of a thoughtfully composed dessert table. For family gatherings, arrange them on a tiered stand alongside fresh seasonal fruit—strawberries, blueberries, and raspberries add gorgeous color and provide a refreshing contrast to the rich cupcakes. The fruit's acidity balances the sweetness beautifully and gives guests a lighter option between servings.
Beverage pairings elevate the entire experience. Serve these cupcakes with hot tea—Earl Grey's bergamot notes complement vanilla wonderfully, while chamomile provides a soothing, honey-like sweetness that doesn't compete with the cupcakes. For cold beverages, consider fresh lemonade or sparkling water with muddled mint and cucumber. These bright, clean flavors cleanse the palate between bites.
If you're creating a more elaborate dessert course, consider offering two frosting options: a classic vanilla buttercream and a tangy cream cheese frosting. Set out small bowls of toppings—toasted coconut flakes, chocolate shavings, crushed freeze-dried strawberries, or chopped pistachios—and let guests customize their cupcakes. This interactive element makes the dessert course more memorable and accommodates different taste preferences.
For a complete dessert spread, add a simple vanilla ice cream or sorbet option. The cold, creamy texture provides wonderful contrast to the tender cupcakes, and guests who want a lighter finish can choose just the frozen dessert. A beautiful arrangement might include your gluten-free vanilla buttermilk cupcakes as the centerpiece, surrounded by small bowls of ice cream, fresh fruit, and perhaps a chocolate sauce for drizzling. The variety ensures everyone finds something they love while maintaining a cohesive flavor story.
Keeping and Reheating
Properly stored gluten-free vanilla buttermilk cupcakes maintain their tender texture and fresh flavor for up to four days at room temperature. Place them in an airtight container, arranging them in a single layer if possible, or separating layers with parchment paper to prevent frosting damage. Keep them away from direct sunlight and heat sources, which can cause the frosting to melt or the cupcakes to dry out. If your kitchen is particularly warm, you can refrigerate them, though this may slightly firm the texture.
Unfrosted cupcakes actually improve slightly overnight as the crumb continues to hydrate and the flavors meld together. The buttermilk's moisture distributes more evenly throughout, creating an even more tender texture. If you're baking ahead for an event, consider preparing the cupcakes one day in advance and frosting them the day of serving for the best possible presentation and texture.
For longer storage, gluten-free vanilla buttermilk cupcakes freeze exceptionally well for up to three months. Wrap unfrosted cupcakes individually in plastic wrap, then place them in a freezer-safe container or zip-top bag. This double protection prevents freezer burn and preserves moisture. To thaw, remove the desired number of cupcakes and let them come to room temperature on the counter for about two hours. You can frost them once they've completely thawed—they'll taste freshly baked.
Reheating isn't typically necessary for cupcakes, but if you prefer yours slightly warm, microwave a single unfrosted cupcake for about 10 seconds on fifty-percent power. This gentle warming brings out the vanilla aroma and creates an almost cake-like tenderness. Never microwave frosted cupcakes, as the frosting will melt into a mess. Instead, let frosted cupcakes come to room temperature naturally, which takes about 30 minutes if they've been refrigerated. The texture and flavor are always best when the cupcakes aren't served cold.
Your Questions Answered
Can I make gluten-free vanilla buttermilk cupcakes dairy-free as well?
Yes, though the texture and flavor will differ slightly from the original. Replace the butter with a high-quality vegan butter stick (not margarine or spreads, which contain too much water). For the buttermilk, use unsweetened almond milk or oat milk with one tablespoon of lemon juice stirred in and left to sit for five minutes. The cupcakes will be slightly less rich but still delicious and tender, making them suitable for those avoiding dairy.
Why do my gluten-free cupcakes have a gritty texture?
Grittiness usually indicates your flour blend contains too much rice flour or the starches haven't fully hydrated. Allow your mixed batter to rest for ten minutes before filling the cupcake liners—this gives the starches time to absorb moisture and swell, resulting in a smoother texture. Also ensure you're using superfine rice flour rather than regular rice flour, which has a coarser grind. Some bakers find that blends with more tapioca and potato starch relative to rice flour produce the smoothest gluten-free vanilla buttermilk cupcakes.
Can I double this recipe for a larger gathering?
Absolutely—this recipe doubles and even triples beautifully. However, mix each batch separately rather than combining all ingredients at once in a massive bowl. Your mixer may struggle to properly cream large quantities of butter and sugar, resulting in uneven texture. Mixing in batches also prevents overmixing, which is easier to do when working with large volumes. You can bake multiple pans simultaneously if your oven accommodates them, just rotate their positions halfway through for even baking.
How can I make these cupcakes less sweet?
Reduce the sugar by up to a quarter cup without dramatically affecting texture, though the cupcakes will be less tender and won't brown as nicely. A better approach is to pair your gluten-free vanilla buttermilk cupcakes with a less-sweet frosting, such as a tangy cream cheese frosting or a lightly sweetened whipped cream. You can also serve them with fresh berries, whose natural tartness balances the sweetness perfectly, or simply dust them with powdered sugar instead of frosting them heavily.
What's the best way to ensure consistent cupcake sizes?
A spring-loaded ice cream scoop is your best tool for perfectly uniform gluten-free vanilla buttermilk cupcakes. A number 16 scoop (which holds about 1/4 cup) works perfectly for standard cupcake liners. Consistent sizing ensures even baking—all cupcakes will finish at the same time and develop the same texture and color. If you don't have a scoop, use a measuring cup and fill each liner with exactly 1/4 cup of batter, leveling it off each time for precision.
Can I use this batter to make a layer cake instead?
Yes, this recipe adapts well to two 8-inch round cake pans. Grease and line the bottoms with parchment circles for easy release, and bake at 350°F for 25 to 30 minutes, until a toothpick comes out clean. The baking time is longer than cupcakes because the batter is deeper, so start checking at 25 minutes and watch carefully to avoid overbaking. Let the cakes cool in the pans for ten minutes before turning them out onto racks. The result is a tender, delicious gluten-free vanilla buttermilk layer cake perfect for special occasions.
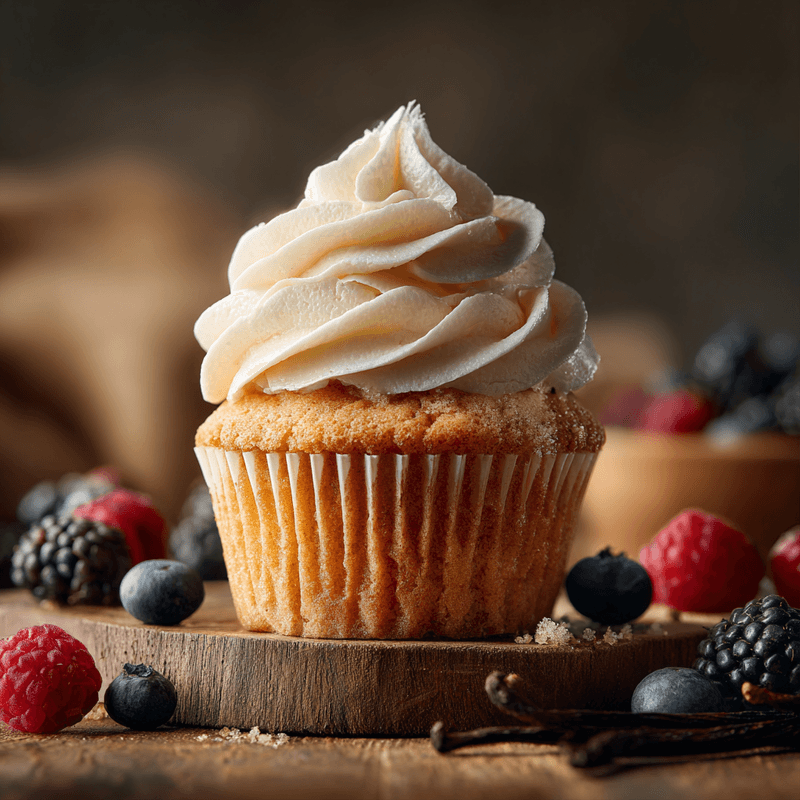
Gluten-Free Vanilla Buttermilk Cupcakes
Incredibly tender and moist gluten-free cupcakes with a delicate vanilla flavor and subtle buttermilk tang. These cupcakes have a fine crumb and taste just like traditional cupcakes.
Prep Time
20 min
Cook Time
20 min
Total Time
40 min
Servings
12 cupcakes
Ingredients
For 12 cupcakes
- 1 3/4 cups (210g) gluten-free all-purpose flour blend with xanthan gum
- 1 1/2 teaspoons baking powder
- 1/4 teaspoon baking soda
- 1/2 teaspoon salt
- 1/2 cup (113g) unsalted butter, room temperature
- 1 cup (200g) granulated sugar
- 2 large eggs, room temperature
- 2 teaspoons pure vanilla extract
- 3/4 cup (180ml) buttermilk, room temperature
Instructions
- 1
Prepare pan and preheat
Preheat your oven to 350°F (175°C). Line a standard 12-cup muffin pan with paper cupcake liners. Ensure all your refrigerated ingredients have come to room temperature for best results.
- 2
Mix dry ingredients
In a medium bowl, whisk together the gluten-free flour blend, baking powder, baking soda, and salt until evenly combined. Set this mixture aside while you prepare the wet ingredients.
- 3
Cream butter and sugar
In a large mixing bowl or stand mixer, beat the room-temperature butter and sugar together on medium-high speed for 3 to 4 minutes. The mixture should become pale, fluffy, and nearly double in volume. Scrape down the sides of the bowl at least twice during this process to ensure even mixing.
- 4
Add eggs and vanilla
Add the eggs one at a time, beating well after each addition until fully incorporated. The mixture should look smooth and cohesive, not separated or curdled. Add the vanilla extract and beat until evenly distributed throughout the batter.
- 5
Alternate dry and wet
With the mixer on low speed, add the flour mixture in three additions, alternating with the buttermilk in two additions. Begin and end with the flour mixture. Mix only until each addition just disappears—do not overmix, as this can create a gummy texture in gluten-free baked goods.
- 6
Rest the batter
Let the finished batter rest for 5 to 10 minutes at room temperature. This resting period allows the starches in the gluten-free flour to fully hydrate, which creates a smoother texture in the finished cupcakes.
- 7
Fill cupcake liners
Divide the batter evenly among the prepared cupcake liners, filling each about two-thirds full. A spring-loaded ice cream scoop works perfectly for this task and ensures uniform sizes. Tap the pan gently on the counter a few times to release any large air bubbles.
- 8
Bake the cupcakes
Bake for 18 to 22 minutes, rotating the pan halfway through baking for even browning. The cupcakes are done when the tops spring back when lightly pressed and a toothpick inserted in the center comes out with just a few moist crumbs.
- 9
Cool properly
Remove the pan from the oven and let the cupcakes cool in the pan for 5 minutes. Then transfer them to a wire cooling rack to cool completely before frosting, which takes about 45 minutes to an hour.
- 10
Frost and serve
Once completely cool, frost the cupcakes with your choice of frosting. Vanilla buttercream, cream cheese frosting, or chocolate ganache all pair beautifully with these vanilla cupcakes. Store any leftovers in an airtight container at room temperature for up to 4 days.
Nutrition Facts
Per serving (estimated)
245 calories
Calories
38g
Carbs
3g
Protein
10g
Fat
1g
Fiber
195mg
Sodium
22g
Sugar


