Easy Easter Poke Cake Recipe For Spring Gatherings
This easy Easter poke cake recipe delivers vibrant spring colors and fluffy vanilla cake soaked in fruity gelatin. Ready in under an hour for celebrations!
cookwithlucia.com/recipes/easy-easter-poke-cake-recipe-for-spring
We all know that feeling when you're planning a spring gathering and realize you need a show-stopping dessert that won't keep you in the kitchen all day. Between preparing the main dishes, setting up decorations, and coordinating everything for your guests, the last thing you need is a complicated cake recipe that requires advanced baking skills and hours of your time. That's exactly where this easy Easter poke cake recipe comes to the rescue, transforming simple pantry ingredients into a stunning centerpiece that looks like you spent all morning decorating it.
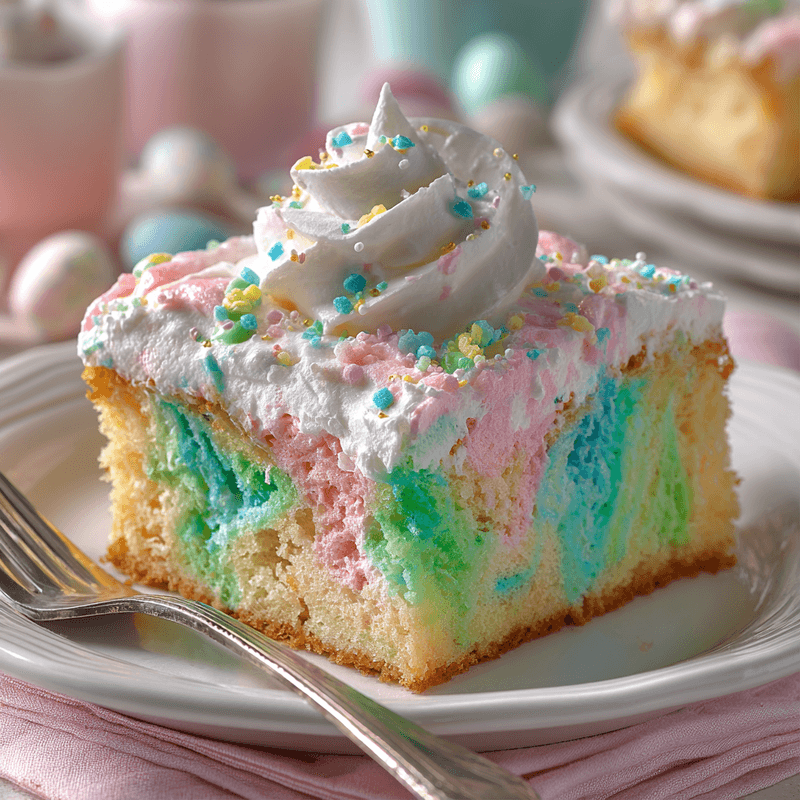
Imagine cutting into a pillowy vanilla cake dotted with jewel-toned pockets of fruity sweetness, crowned with clouds of whipped topping and pastel sprinkles that practically announce the arrival of spring. The beauty of this easy Easter poke cake recipe is that it looks incredibly impressive but relies on a brilliant shortcut: instead of intricate frosting work, you simply poke holes in the cake and pour flavored gelatin right through, creating those gorgeous swirls of color that make every slice Instagram-worthy. The result is a dessert that stays incredibly moist for days, feeds a crowd without breaking your budget, and requires zero special decorating skills.
I promise you'll have this stunning cake from mixing bowl to refrigerator in less than an hour of active work, and after a quick chill, it'll be ready to wow your guests at any spring celebration.

Why This Is Your New Weeknight Go-To
It's ridiculously fast for the wow factor you get. While traditional layer cakes demand careful assembly and frosting expertise, this easy Easter poke cake recipe skips all that fussy work. You bake one simple sheet cake, poke it full of holes, and let the gelatin do the decorating for you. Total hands-on time? About 45 minutes, with most of that being passive baking time while you tackle other tasks.
Cleanup is minimal compared to traditional cakes. You'll use exactly one baking pan, one mixing bowl, and a few measuring cups. No pastry bags, no offset spatulas, no multiple cake pans to wash and dry. The entire dessert gets assembled, served, and stored in the same 9x13 pan, which means you can focus on enjoying your gathering instead of scrubbing dishes afterward.
Every ingredient is a common pantry or grocery staple. This easy Easter poke cake recipe doesn't send you hunting through specialty baking stores for unusual ingredients. You'll find everything at your regular supermarket: basic cake mix, gelatin in spring colors, and whipped topping. No exotic extracts, no hard-to-find decorations, no expensive specialty items that you'll use once and never touch again.
Kids absolutely love the colorful surprise inside. When you cut into this cake and reveal those vibrant streaks of color running through the tender crumb, children's faces light up every single time. The fruity gelatin pockets add little bursts of flavor that make each bite exciting, and the playful colors make this dessert feel like a celebration on a plate.
It actually tastes better the next day. Unlike many cakes that dry out over time, this one improves as it sits. The gelatin continues to infuse moisture throughout the cake, the flavors meld together beautifully, and the texture becomes even more luscious. That means you can make this easy Easter poke cake recipe a full day ahead without any quality loss.
Simple Ingredients, Big Flavor
The foundation starts with a standard vanilla cake mix, which gives you consistent results every time without the measuring and sifting that scratch cakes require. Choose a white or vanilla variety so the colorful gelatin really pops against the pale background. You'll prepare it according to package directions, which typically means adding eggs, oil, and water.
Flavored gelatin in spring colors creates those signature colorful pockets that make this easy Easter poke cake recipe so special. I recommend using three different colors like strawberry (pink), lime (green), and berry blue or lemon (blue or yellow) to create that classic pastel spring palette. Each 3-ounce box gets dissolved in boiling water, then you'll pour it over specific sections of the cake.
Whipped topping forms the fluffy cloud-like frosting that crowns this dessert. An 8-ounce container spreads beautifully across the entire cake, and its light texture balances the dense, moist cake underneath. If you prefer, you can substitute with freshly whipped heavy cream sweetened with a touch of sugar, though the stabilized whipped topping holds up better for make-ahead situations.
Pastel sprinkles add that final festive touch that transforms this from everyday dessert to celebration cake. Look for spring mixes with soft pinks, yellows, greens, and blues, or choose shaped sprinkles like flowers, butterflies, or eggs. A few tablespoons scattered across the top adds visual appeal and a slight crunch.
Vegetable oil keeps the cake incredibly moist and tender. Some cake mixes call for melted butter, but oil creates a softer crumb that stays fresh longer. Use any neutral-flavored oil you have on hand, whether that's canola, vegetable, or light olive oil.
Eggs provide structure and richness to the cake base. Most standard cake mixes require three large eggs, which help create that perfect tender yet sturdy texture that holds up to all that gelatin soaking through.
If you're missing any ingredient, this easy Easter poke cake recipe is forgiving. No whipped topping? Use homemade whipped cream. Can't find spring-colored gelatin? Any flavors work, or stick with just one or two colors instead of three. Out of sprinkles? Fresh berries or toasted coconut make beautiful garnishes too.
Step-by-Step in Plain English
Stage One: Bake Your Canvas. Preheat your oven according to the cake mix package directions, usually around 350°F. Mix up your cake batter following the instructions exactly, then pour it into a greased 9x13-inch baking pan. Slide it into the oven and bake until a toothpick inserted in the center comes out clean, typically 25-30 minutes. The top should spring back when you gently press it, and the edges will just start pulling away from the pan sides.
Stage Two: Poke and Prepare. Once your cake comes out of the oven, let it cool for about 15 minutes, just until it's warm but not piping hot. Then comes the fun part: grab the handle of a wooden spoon and poke holes all over the cake, spacing them about an inch apart. You want to go almost all the way through to the bottom, creating channels for that gelatin to flow through. While you're poking, bring water to a boil for your gelatin.
Stage Three: Create Your Color Zones. Dissolve each gelatin flavor in 1 cup of boiling water, stirring for about 2 minutes until completely dissolved. Here's the trick for this easy Easter poke cake recipe: mentally divide your cake into thirds. Slowly pour the first color over one third of the cake, letting it seep down into all those holes you created. Pour the second color over the middle third, and the third color over the final section. You'll see the gelatin disappear into the cake like magic.
Stage Four: Patience Pays Off. This is the hardest part, but it's crucial. Cover your pan with plastic wrap and refrigerate for at least 3 hours, though overnight is even better. This chilling time allows the gelatin to fully set inside those pockets, creating those distinct colorful streaks. If you skip this step and frost too early, the gelatin will bleed into your topping and create a muddy mess instead of pretty pastel swirls.
Stage Five: The Grand Finale. Once your cake is thoroughly chilled and the gelatin has set firm, spread your whipped topping evenly across the entire surface. Use a spatula to create swirls and peaks if you want a more decorative look, or keep it smooth and simple. Scatter your sprinkles across the top in whatever pattern makes you happy. That's it, you're done! Your easy Easter poke cake recipe is ready to slice and serve.
Stage Six: Serving Time. When you're ready to serve, use a sharp knife wiped clean between cuts to get those picture-perfect slices that show off all three colors. Each piece should reveal beautiful streaks of color running through the moist vanilla cake, topped with that fluffy cloud of whipped topping.
Pro Shortcuts and Time-Savers
Make it a day ahead for zero stress. This easy Easter poke cake recipe is actually designed to be prepared in advance. Mix and bake the cake one evening, poke and pour the gelatin before bed, then add the topping and sprinkles the next morning. You'll have a stunning dessert ready to go with minimal last-minute effort.
Use a meat fork or skewer for perfect holes. While a wooden spoon handle works fine, a large meat fork or bamboo skewer creates cleaner holes that don't tear the cake. If you have a plastic straw, that works brilliantly too. Just poke straight down, wiggle slightly, and pull out.
Prep your gelatin assembly line style. Before you start pouring, mix all three gelatin flavors and line them up in order. Use a measuring cup with a spout for each one to make controlled pouring easier. This prevents you from fumbling with hot liquids while trying to remember which section gets which color.
Double up for large gatherings without extra work. Need to feed a bigger crowd? This easy Easter poke cake recipe doubles perfectly. Simply make two cakes in two pans using the same method. Since they chill overnight anyway, there's no additional active time involved, just a bit more oven space.
Freeze portions for future celebrations. Cut the cake into individual servings and freeze them in airtight containers separated by parchment paper. Thaw in the refrigerator for a few hours when you need a quick dessert, and you'll have homemade cake ready without any work.
Ways to Switch It Up
Try a chocolate base for contrast. Swap the vanilla cake mix for chocolate or devil's food cake mix to create dramatic contrast with your colorful gelatin. The dark background makes the bright colors pop even more spectacularly, and chocolate-lovers will appreciate the richer flavor profile.
Go tropical with coconut and citrus. Use coconut cake mix, lime and orange gelatin, and top with shredded coconut instead of sprinkles. This variation transforms your easy Easter poke cake recipe into a refreshing warm-weather dessert that feels like a vacation on a plate.
Make it fancy with fresh berries. Skip the sprinkles and arrange fresh strawberries, blueberries, and raspberries across the whipped topping in a decorative pattern. The fresh fruit adds natural sweetness and makes the cake feel more sophisticated for adult gatherings.
Create an ombre effect with one color. Instead of three different flavors, use three boxes of the same gelatin but pour them at different concentrations. Mix the first box with 1 cup boiling water, the second with 1.5 cups, and the third with 2 cups. Pour from darkest to lightest across the cake for a gorgeous gradient.
Add a layer of cream between cake and topping. Before spreading the whipped topping, mix 8 ounces of softened cream cheese with 1/2 cup sugar and spread it over the chilled cake. This adds a tangy richness that balances the sweet gelatin, similar to cream cheese frosting but lighter.
Storing Leftovers the Right Way
This easy Easter poke cake recipe keeps beautifully in the refrigerator for up to 5 days when properly covered. Simply place plastic wrap directly on the surface if you've already cut into it, or cover the entire pan tightly with plastic wrap or aluminum foil if it's still whole. The moisture from the gelatin actually helps preserve the cake, preventing it from drying out like regular cakes do.
For longer storage, this cake freezes surprisingly well for up to 2 months. Cut it into individual portions and wrap each piece tightly in plastic wrap, then place them in a freezer-safe container or zip-top bag. The whipped topping may separate slightly upon thawing, but the texture and flavor remain excellent. Thaw frozen slices in the refrigerator overnight rather than at room temperature to maintain the best texture.
When it comes to reheating, this dessert is actually best served cold straight from the refrigerator. The chilled temperature keeps the gelatin firm and the whipped topping stable. However, if you prefer a less cold dessert, let individual slices sit at room temperature for about 10-15 minutes before serving. Avoid microwaving, as the heat will melt both the gelatin and whipped topping into a soupy mess.
Leftover cake makes an excellent base for trifles later in the week. Cube the cake, layer it in glasses with fresh fruit and extra whipped topping, and you've got a completely new dessert without any additional cooking.
Quick Answers to Common Questions
Can I make this easy Easter poke cake recipe the night before my gathering?
Absolutely, and I actually recommend it! The cake needs at least 3 hours to chill after you add the gelatin, so making it the night before ensures the flavors fully develop and the gelatin sets completely. Just wait to add the whipped topping and sprinkles until the morning of your event, or add them the night before if you need to be completely hands-off on the day of your gathering. The whipped topping holds up perfectly in the refrigerator overnight.
What if I don't have a wooden spoon for poking holes?
You have plenty of options! A thick chopstick, the handle of a silicone spatula, a plastic drinking straw, a meat thermometer, or even a large bamboo skewer all work perfectly. The goal is something round and about 1/2 inch in diameter that can create clean holes without tearing the cake. Some people even use the thick end of a frosting tip. Just make sure whatever you use is clean and poke straight down rather than at an angle.
Can I double this recipe for a really big crowd?
Yes, this easy Easter poke cake recipe doubles beautifully. Simply prepare two separate cakes in two 9x13 pans following the same method for each. Since they bake separately and chill separately, there's no tricky adjustment to timing or technique. One cake typically serves 12-15 people, so two cakes will easily handle a gathering of 24-30 guests with generous portions.
How can I make the colors more vibrant?
For more intense color, reduce the amount of water you mix with each gelatin packet from 1 cup to 3/4 cup. The more concentrated gelatin solution creates deeper, more saturated colors running through your cake. Just be aware that the flavor will also be slightly stronger. Another trick is to use the cake while it's still quite warm (not hot) when you pour the gelatin, as the holes stay more open and accept more liquid.
Can I use homemade cake instead of a mix?
Definitely! Any basic vanilla or white cake recipe that fits a 9x13 pan works perfectly for this easy Easter poke cake recipe. Just make sure your homemade cake has a fairly tender, open crumb structure so the gelatin can penetrate well. Dense pound cakes don't absorb the gelatin as effectively. Your homemade cake should bake up light and fluffy for the best results.
What's the best way to transport this to a gathering?
Keep the cake in its baking pan and cover it tightly with plastic wrap or the pan's lid if it has one. Place the pan on a flat surface in your vehicle, ideally in a cooler with ice packs underneath if you're traveling more than 30 minutes or in warm weather. The gelatin can start to soften in heat, and the whipped topping can melt, so keeping it cool is essential. This easy Easter poke cake recipe travels well as long as you keep it level and chilled during transport.
Easy Easter Poke Cake Recipe For Spring
A stunning spring dessert featuring vanilla cake soaked with colorful fruity gelatin and topped with fluffy whipped topping. Perfect for gatherings with minimal effort and maximum visual impact.
Prep Time
20 min
Cook Time
30 min
Total Time
3h 50m
Servings
12 servings
Ingredients
For 12 servings
- 1 box (15.25 oz) white or vanilla cake mix
- 3 large eggs
- 1/3 cup vegetable oil
- 1 cup water
- 1 box (3 oz) strawberry flavored gelatin
- 1 box (3 oz) lime flavored gelatin
- 1 box (3 oz) berry blue or lemon flavored gelatin
- 3 cups boiling water, divided
- 1 container (8 oz) whipped topping, thawed
- 3 tablespoons pastel sprinkles
Instructions
- 1
Prepare cake batter
Preheat your oven to 350°F and grease a 9x13-inch baking pan with cooking spray or butter. In a large mixing bowl, combine the cake mix, eggs, vegetable oil, and 1 cup of water. Beat with an electric mixer on medium speed for 2 minutes until the batter is smooth and well combined.
- 2
Bake the cake
Pour the prepared batter into your greased baking pan and spread it evenly to the edges. Bake in the preheated oven for 25-30 minutes, or until a toothpick inserted in the center comes out clean and the top springs back when lightly pressed. The edges should just begin to pull away from the pan sides.
- 3
Cool and poke
Remove the cake from the oven and let it cool in the pan for 15 minutes until warm but not hot to the touch. Using the handle of a wooden spoon, poke holes all over the surface of the cake, spacing them about 1 inch apart and pushing almost all the way to the bottom of the pan. You should have approximately 40-50 holes throughout the cake.
- 4
Prepare gelatin mixtures
While the cake is cooling, bring 3 cups of water to a boil. In three separate bowls or large measuring cups, dissolve each gelatin flavor in 1 cup of boiling water, stirring for about 2 minutes until the powder is completely dissolved and no granules remain.
- 5
Pour gelatin colors
Mentally divide your poked cake into three equal sections lengthwise. Slowly pour the first gelatin color over one-third of the cake, letting it seep down into the holes. Pour the second color over the middle third, and the third color over the final section. Work slowly to keep the colors relatively separate, though some blending at the edges is natural and creates a beautiful effect.
- 6
Chill the cake
Cover the entire pan tightly with plastic wrap, making sure it doesn't touch the surface of the wet cake. Refrigerate for at least 3 hours, but preferably overnight, to allow the gelatin to fully set inside the cake and create those signature colorful pockets.
- 7
Add topping
Once the cake is thoroughly chilled and the gelatin has set firm to the touch, remove the plastic wrap. Spread the thawed whipped topping evenly across the entire surface of the cake using a spatula, creating swirls and peaks for visual appeal if desired.
- 8
Garnish and serve
Scatter the pastel sprinkles evenly over the whipped topping for a festive finish. Keep the cake refrigerated until ready to serve. Use a sharp knife, wiping it clean between cuts, to slice into 12 equal pieces that showcase the colorful gelatin streaks running through the vanilla cake.
Nutrition Facts
Per serving (estimated)
285 calories
Calories
42g
Carbs
4g
Protein
11g
Fat
0g
Fiber
320mg
Sodium
28g
Sugar


