Easy Easter Poke Cake Dessert Recipe | Colorful & Fun
This Easy Easter Poke Cake Dessert is a colorful, moist treat perfect for spring gatherings. Simple steps create a stunning dessert everyone loves!
cookwithlucia.com/recipes/easy-easter-poke-cake-dessert
Picture a dessert table adorned with vibrant pastel colors, where every slice reveals swirls of jewel-toned sweetness soaked into tender, fluffy cake. The easy Easter poke cake dessert is one of those creations that brings pure joy to any spring gathering, with its playful presentation and irresistible combination of moist cake, flavored gelatin, and creamy topping. This dessert captures the essence of seasonal celebrations without requiring advanced baking skills or specialty equipment.
What makes this dessert so special is its accessibility. The technique of poking holes in warm cake and filling them with flavored liquid creates pockets of intense flavor and stunning visual appeal when you cut into it. The result is a cake that's impossibly moist, beautifully colored, and genuinely impressive despite being remarkably simple to prepare. Whether you're hosting a spring brunch, planning a family gathering, or simply want to brighten a weekend with something sweet and cheerful, this easy Easter poke cake dessert delivers on all fronts.
The beauty of this recipe lies in its forgiving nature and endless customization options. You can adjust the colors to match any spring palette, experiment with different flavor combinations, and even prepare it a day ahead. This is the kind of dessert that makes you look like a professional baker while requiring minimal time and effort in the kitchen.

A Taste of the Culture
Poke cakes emerged in American home baking during the 1970s, born from the creative minds of home cooks looking for ways to add moisture and flavor to simple sheet cakes. The technique quickly became a beloved part of potluck culture and family gatherings across the country. These desserts represent the American tradition of making impressive treats from accessible, everyday ingredients that anyone can find at their local grocery store.
The easy Easter poke cake dessert specifically embodies the American love for seasonal celebrations and colorful, fun food presentations. Unlike more formal European pastries or elaborate tortes, poke cakes celebrate simplicity and visual impact over technical complexity. They're designed to feed a crowd, travel well to gatherings, and spark conversations when that first slice reveals the colorful interior.
This dessert reflects core values of American home baking: efficiency, creativity, and inclusiveness. It's a recipe that welcomes novice bakers while still delighting experienced ones. The poke cake tradition shows how American cooks transformed basic ingredients into something memorable through clever technique rather than expensive components. Regional variations exist, with Southern bakers often adding extra sweetness, Midwestern cooks focusing on fruit flavors, and coastal regions experimenting with tropical twists.
The communal aspect of poke cakes matters too. These are rarely small, individual desserts. They're meant to be shared, cut into generous squares, and enjoyed together. The easy Easter poke cake dessert carries forward this tradition of generosity and gathering, making it perfect for spring celebrations when families come together after the long winter months.
The Ingredients That Define This Dish
The foundation of any exceptional easy Easter poke cake dessert starts with the cake base itself. While you can certainly bake from scratch, a quality vanilla or white cake mix provides consistent results and saves time without sacrificing flavor. Look for mixes that list real ingredients rather than excessive additives. The cake needs to be sturdy enough to withstand poking and soaking without falling apart, yet tender enough to remain light and fluffy.
Flavored gelatin is the star ingredient that transforms ordinary cake into something magical. The gelatin mixture seeps into the poked holes, creating ribbons of concentrated flavor and vibrant color throughout the cake. Traditional spring colors include pastel pink, yellow, blue, and green, though you can choose any combination that appeals to you. The gelatin also adds moisture that keeps the cake fresh for days. When selecting gelatin, consider flavor pairings with your cake—strawberry, lemon, lime, and berry blue work beautifully together.
The whipped topping provides essential contrast to the sweet, flavored cake layers below. Many bakers use frozen whipped topping for convenience and stability, especially if the cake will sit out during a gathering. However, freshly whipped cream sweetened with a touch of sugar and vanilla creates a more luxurious finish. If using fresh whipped cream, add a tablespoon of powdered sugar per cup of cream to help stabilize it.
Decorative elements bring the easy Easter poke cake dessert to life visually. Pastel candies, sprinkles in spring colors, or even fresh fruit can crown your creation. Look for decorations that won't bleed color into the white topping or become soggy from moisture. Chocolate eggs, jellybeans, or colorful sugar pearls work exceptionally well. These finishing touches transform a simple sheet cake into a festive centerpiece.
Eggs, oil, and water (or milk) activate your cake mix and contribute to texture. Using milk instead of water adds richness, while the oil keeps the cake moist. Fresh eggs at room temperature incorporate more smoothly into the batter, creating better structure. Some bakers add an extra egg yolk to boxed cake mixes for an even more tender crumb that rivals bakery-quality cakes.
Cooking the Authentic Way
Begin by preparing your baking environment properly. Preheat your oven according to the cake mix directions, typically 350°F, and prepare a 9x13-inch baking pan by spraying it thoroughly with cooking spray or greasing with oil. This size pan is crucial for achieving the right cake thickness—too thin and it falls apart when poked, too thick and the gelatin won't penetrate properly. Mix your cake batter according to package directions, incorporating any enhancements like extra eggs or substituting milk for water.
Bake the cake until a toothpick inserted in the center comes out clean, usually 25-35 minutes depending on your oven. The cake should spring back when lightly touched and just begin pulling away from the pan edges. This stage requires attention because overbaking creates a dry base that won't absorb the gelatin mixture well, while underbaking leaves you with a soggy center. The aroma of vanilla and butter will fill your kitchen, signaling that the cake is nearly ready.
The poking stage is where this dessert gets its name and its magic. Remove the cake from the oven and let it cool for just 10-15 minutes—it should still be quite warm. Using the round handle of a wooden spoon, poke holes across the entire surface, spacing them about one inch apart. Push the handle about three-quarters of the way through the cake. This creates channels for the gelatin to flow into while maintaining enough cake structure to hold everything together.
Prepare your gelatin according to package directions but use slightly less water than called for to create a more concentrated flavor. You'll typically prepare two or three different colors. Pour each gelatin flavor over different sections of the warm cake, watching as it seeps into the holes. You can create distinct color sections, a checkerboard pattern, or pour randomly for an abstract design. The warm cake helps the gelatin absorb quickly and evenly. Refrigerate the cake for at least three hours or overnight to allow the gelatin to fully set.
The final assembly brings all elements together. Once the gelatin has completely set and the cake is thoroughly chilled, spread your whipped topping evenly across the entire surface. Use a spatula to create smooth, even coverage that seals in all the colorful gelatin below. This white canvas sets the stage for your decorative toppings. Sprinkle your chosen decorations across the top, creating patterns or scattering them randomly for a festive, cheerful appearance. The easy Easter poke cake dessert should look as delightful as it tastes.
Bringing It All Together
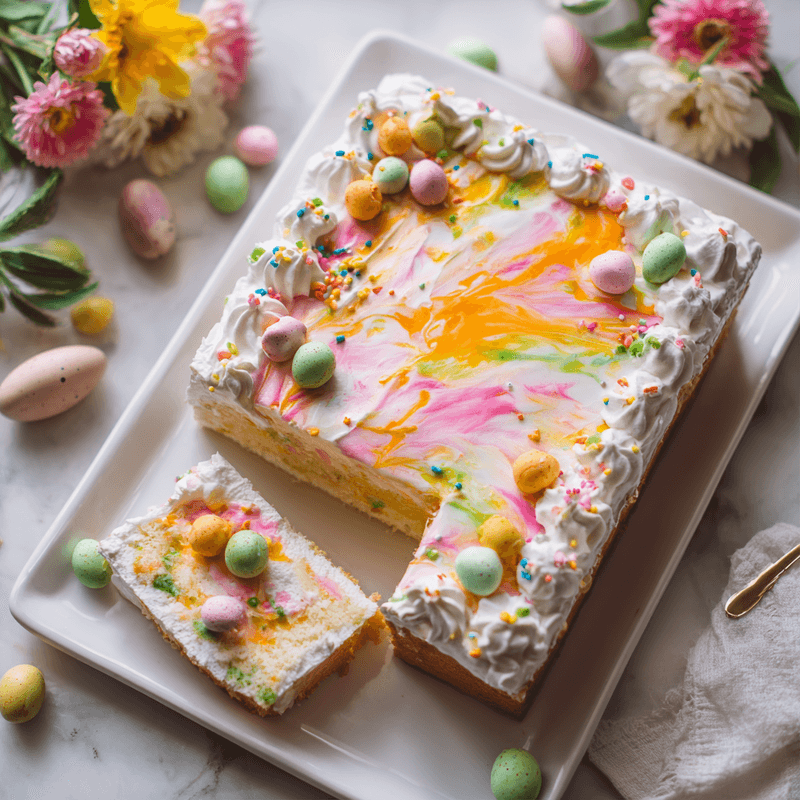
When you slice into a properly prepared easy Easter poke cake dessert, each piece should reveal distinct streaks or pockets of vibrant color against the white cake. The gelatin creates a marbled effect that makes every slice unique and visually stunning. The cool, creamy topping contrasts beautifully with the sweet, fruity cake beneath, creating textural interest with each forkful.
Traditional presentation involves cutting the cake into generous squares, typically 12-15 servings from a 9x13-inch pan. Each square should show off the colorful interior, and the white topping provides the perfect backdrop for your decorative elements. Some bakers like to add a few extra decorations to individual slices just before serving, ensuring every plate looks special.
This dessert is quintessentially American in its serving style—casual, generous, and designed for easy distribution at gatherings. There's no need for special plates or utensils; simple dessert plates and forks are perfect. The easy Easter poke cake dessert works beautifully on a buffet table where guests can serve themselves, and it holds up well at room temperature for a couple of hours, though it's best kept chilled until shortly before serving.
The eating experience combines multiple textures and flavors in each bite. The tender cake provides softness, the gelatin-soaked sections offer bursts of fruit flavor, and the creamy topping adds richness. The decorative candies might provide a bit of crunch or chew, depending on what you've chosen. Together, these elements create a dessert that's satisfying without being overly heavy.
Make It Your Own
The beauty of the easy Easter poke cake dessert lies in its adaptability to different tastes and dietary needs. For a tropical twist, use coconut cake mix with pineapple and mango-flavored gelatin, then top with toasted coconut flakes. This variation brings sunny, exotic flavors to your spring table. You could also try lemon cake with berry-flavored gelatin for a sweet-tart combination that feels both sophisticated and playful.
Adjust the sweetness level by using sugar-free gelatin and reduced-sugar cake mixes without sacrificing the visual appeal or basic technique. This makes the dessert more accessible to those watching their sugar intake while still delivering that wow factor when you cut into it. You can also reduce the amount of whipped topping or use a lighter version to decrease overall calories and richness.
For chocolate lovers who might find the traditional version too fruity, create a chocolate poke cake using chocolate cake mix and chocolate or vanilla pudding instead of gelatin. This creates a richer, more decadent dessert while maintaining the essential poke cake technique. Top with chocolate whipped cream and chocolate eggs for a cohesive flavor profile.
Introduce hesitant eaters to this dessert by letting them choose their favorite gelatin flavors or help with the decorating process. Children especially love the interactive nature of poking holes and watching the colorful liquid disappear into the cake. You can even assign different family members different color sections, making it a collaborative creation that everyone feels invested in enjoying.
Keeping and Reusing Leftovers
The easy Easter poke cake dessert stores exceptionally well in the refrigerator for up to five days when properly covered. Use plastic wrap pressed directly against any cut edges to prevent the cake from drying out, or store the entire pan covered with foil or a fitted lid. The gelatin actually helps preserve moisture, so this cake often tastes even better on the second or third day as the flavors meld together.
Individual slices can be wrapped in plastic wrap and stored in an airtight container, making them perfect for packed lunches or quick afternoon treats throughout the week. The portable nature of these wrapped slices means you can easily share leftovers with neighbors or friends who couldn't attend your original gathering.
Freezing is possible but requires some considerations. The whipped topping may separate slightly upon thawing, and the texture of the gelatin-soaked sections can become slightly weepy. If you do freeze portions, wrap them tightly in plastic wrap and then foil, and thaw overnight in the refrigerator rather than at room temperature. The flavor remains good, though the texture won't be quite as pristine as fresh.
Leftover cake can be transformed into trifles by cutting it into cubes and layering with fresh whipped cream and fruit in clear glasses. This presentation gives new life to day-old cake while creating an entirely different dessert experience that looks intentional and elegant rather than like repurposed leftovers.
Your Questions Answered
Can I make this easy Easter poke cake dessert completely from scratch?
Absolutely! While the recipe traditionally uses a cake mix for convenience, you can substitute your favorite white or vanilla cake recipe baked in a 9x13-inch pan. Just ensure the cake is sturdy enough to withstand poking and has a fairly tight crumb. The technique remains exactly the same regardless of whether you start with a mix or homemade batter.
How far in advance can I prepare this dessert?
The easy Easter poke cake dessert actually benefits from advance preparation. You can make it up to two days before serving, which allows the flavors to fully develop and meld together. Prepare the cake and add the gelatin, then refrigerate overnight. Add the whipped topping and decorations the day of serving, or up to 24 hours ahead if using stabilized whipped topping rather than fresh whipped cream.
What if I can't find the gelatin colors I want?
Gelatin comes in limited flavors, but you're not restricted to the standard options. Mix different flavors to create custom colors—combining lemon and berry blue creates green, for instance. You can also use clear unflavored gelatin mixed with fruit juice for more natural coloring and flavoring, though the colors may be less vibrant than commercial gelatin produces.
Is there a dairy-free version of this recipe?
Yes, the easy Easter poke cake dessert adapts well to dairy-free diets. Use a dairy-free cake mix or recipe, and top with coconut whipped cream instead of traditional whipped topping. Many stores now carry dairy-free frozen whipped toppings as well. The gelatin component is naturally dairy-free, so that portion requires no modification at all.
How do I transport this cake to a gathering?
Keep the cake in its baking pan and cover tightly with foil or a fitted lid. Transport in a cooler with ice packs if traveling more than 30 minutes, as the whipped topping and gelatin need to stay chilled. The 9x13-inch pan is designed to be portable, and the cake is sturdy enough to travel well. Just keep the pan level during transport to maintain the pretty appearance.
Can I use fresh fruit instead of candy for decoration?
Fresh fruit makes a beautiful and lighter alternative to candy decorations on your easy Easter poke cake dessert. Sliced strawberries, blueberries, raspberries, or kiwi all work wonderfully and add natural color. Add fresh fruit just before serving rather than hours ahead, as the fruit may release juice that can make the whipped topping watery or cause colors to bleed. Pat fruit dry with paper towels before arranging on the cake for best results.
Easy Easter Poke Cake Dessert
A colorful, moist sheet cake infused with flavored gelatin and topped with whipped cream. Perfect for spring gatherings and celebrations.
Prep Time
20 min
Cook Time
30 min
Total Time
3h 50m
Servings
12 servings
Ingredients
For 12 servings
- 1 box (15.25 oz) white or vanilla cake mix
- 3 large eggs, at room temperature
- 1/3 cup vegetable oil
- 1 cup whole milk
- 1 package (3 oz) strawberry flavored gelatin
- 1 package (3 oz) lemon flavored gelatin
- 1 package (3 oz) lime flavored gelatin
- 3 cups boiling water, divided
- 1 container (8 oz) frozen whipped topping, thawed, or 2 cups freshly whipped cream
- 2 tablespoons powdered sugar (if using fresh whipped cream)
- 1 cup pastel candies or sprinkles for decoration
- Cooking spray for pan
Instructions
- 1
Prepare and bake cake
Preheat oven to 350°F and spray a 9x13-inch baking pan with cooking spray. In a large bowl, combine cake mix, eggs, oil, and milk, beating with an electric mixer for 2 minutes until smooth and well combined. Pour batter into prepared pan and bake for 28-32 minutes until a toothpick inserted in the center comes out clean and the cake springs back when lightly touched.
- 2
Poke holes in cake
Remove cake from oven and let cool for 10-15 minutes while still quite warm. Using the round handle of a wooden spoon, poke holes across the entire surface of the cake, spacing them about 1 inch apart. Push the handle about three-quarters of the way through the cake, creating channels throughout but not puncturing the bottom.
- 3
Prepare gelatin mixtures
In three separate bowls, prepare each gelatin flavor by mixing each 3 oz package with 1 cup of boiling water, stirring for 2 minutes until completely dissolved. Let the gelatin mixtures cool for about 5 minutes but remain liquid. You want them warm but not boiling hot when poured over the cake.
- 4
Pour gelatin over cake
Working with one color at a time, slowly pour each gelatin flavor over different sections of the warm cake, allowing it to seep into the poked holes. You can create distinct color sections, diagonal stripes, or pour randomly for an abstract pattern. Watch as the colored liquid disappears into the holes, filling the channels you created.
- 5
Chill the cake
Cover the cake loosely with plastic wrap or foil and refrigerate for at least 3 hours or preferably overnight. This allows the gelatin to fully set and the flavors to penetrate throughout the cake. The cake should be completely chilled and firm before adding the topping.
- 6
Prepare whipped topping
If using fresh whipped cream, beat 2 cups of heavy cream with 2 tablespoons powdered sugar and 1 teaspoon vanilla extract until stiff peaks form. If using frozen whipped topping, ensure it's completely thawed. The topping should be spreadable but hold its shape.
- 7
Top and decorate
Spread the whipped topping evenly across the entire surface of the chilled cake using a spatula, creating a smooth white layer that covers all the colorful gelatin below. Make sure to spread it to all edges for complete coverage.
- 8
Add final decorations
Sprinkle pastel candies, sprinkles, or other decorations across the top of the whipped topping in your desired pattern. Press them very lightly into the topping so they adhere but don't sink. Refrigerate until ready to serve, keeping the cake chilled for best texture and food safety.
Nutrition Facts
Per serving (estimated)
340 calories
Calories
52g
Carbs
4g
Protein
13g
Fat
0g
Fiber
320mg
Sodium
38g
Sugar


