Easy Easter Brownies with Pastel Chocolate Egg Topping
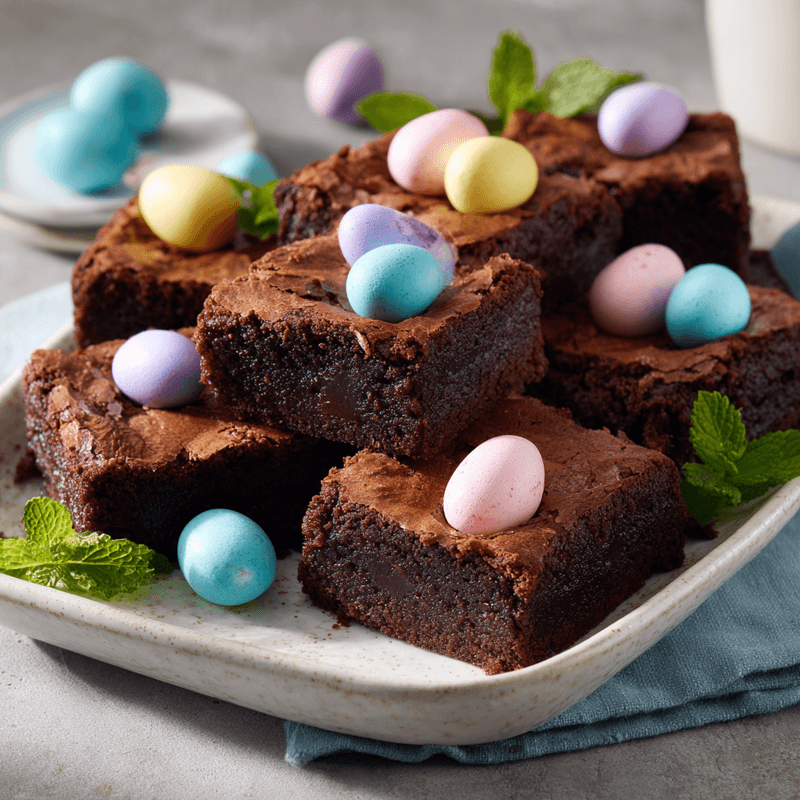
Rich, fudgy brownies topped with colorful pastel chocolate eggs. Perfect for spring gatherings, simple to make, and absolutely delicious!
cookwithlucia.com/recipes/easy-easter-brownies-with-pastel-chocolate-egg-topping
There's something magical about the first warm days of spring when you throw open the windows and let fresh air sweep through your kitchen. The gentle breeze carries the promise of renewal, and suddenly, you're craving something sweet, celebratory, and beautifully simple. That's exactly the moment when these pastel-topped brownies came into my regular rotation.
I've always believed that the best desserts don't require culinary expertise or a pantry full of specialty ingredients. What drew me to perfect this particular brownie recipe was the desire to create something that looks absolutely stunning on a dessert table but comes together in under an hour with ingredients you probably already have. The secret lies in achieving that perfect fudgy interior with crisp edges, then crowning each square with glossy pastel chocolate eggs that catch the light and bring instant spring energy to your table.
What sets these easy Easter brownies with pastel chocolate egg topping apart is the contrast between rich, deeply chocolate brownies and the sweet crunch of candy-coated eggs. The chocolate base is intensely flavored but not overly sweet, which means the pastel eggs add just the right amount of extra sweetness and visual celebration. Whether you're planning a spring gathering, need a dessert for a weekend potluck, or simply want to brighten someone's day, you'll walk away from this recipe with a foolproof technique and a show-stopping dessert that tastes even better than it looks.

The Story Behind This Dish
Brownies have been an American kitchen staple since the late 1800s, with countless origin stories claiming to be the true first recipe. What we know for certain is that this chocolate square quickly became beloved for its simplicity and rich flavor. Unlike layer cakes that require precise timing and frosting skills, brownies forgive minor timing variations and need nothing more than a simple pan and basic mixing.
Over generations, home bakers have adapted the basic brownie formula to suit every occasion and season. The beauty of brownies lies in their versatility as a blank canvas. While bakeries often overcomplicate them with multiple layers and fancy glazes, the homemade version shines in its honest simplicity. A truly great brownie needs only quality cocoa, the right ratio of butter to sugar, and proper baking time.
What makes the homemade version superior is control over texture and ingredient quality. You decide whether you want fudgy or cakey, and you can adjust sweetness to your preference. Adding seasonal toppings like pastel chocolate eggs transforms an everyday treat into something special without requiring any advanced baking techniques. The result is a dessert that tastes like pure chocolate indulgence while looking festive and thoughtful.
What Makes This Recipe Special
Foolproof Fudgy Texture: These easy Easter brownies with pastel chocolate egg topping use a specific ratio of butter to flour that guarantees that coveted fudgy center every single time. You'll never end up with dry, cakey brownies again because the method builds in moisture insurance through melted chocolate and an extra egg yolk.
One-Bowl Simplicity: Everything comes together in a single bowl with minimal equipment. You don't need a stand mixer, multiple mixing bowls, or any special tools. Just a good whisk, a saucepan for melting, and your baking pan. This means less cleanup and more time enjoying your creation.
Stunning Visual Impact: The pastel chocolate eggs scattered across the top create an instant wow factor. The glossy candy shells in soft pinks, blues, yellows, and purples catch the light beautifully and signal spring celebration without any piping skills or frosting expertise required.
Budget-Friendly Ingredients: Every component is affordable and widely available. You're not hunting down expensive chocolate bars or specialty flours. Basic cocoa powder, standard all-purpose flour, and regular butter create extraordinary results when combined correctly.
Customizable for Any Gathering: While the pastel eggs make these perfect for spring events, you can easily adapt the topping to suit any occasion. The brownie base remains consistently delicious regardless of decoration, and the eggs can be pressed in before or after baking depending on your preferred presentation.
Make-Ahead Friendly: These brownies actually improve after a day of rest as the flavors deepen and the texture becomes even more fudgy. You can bake them two days ahead, store them covered, and add the egg topping just before serving for maximum freshness and crunch.
Breaking Down the Ingredients
The foundation of exceptional brownies starts with high-quality cocoa powder, which provides all the deep chocolate flavor without the expense of bar chocolate. Dutch-process cocoa creates a smoother, less acidic taste, while natural cocoa offers brighter, fruitier notes. Either works beautifully, but I tend to reach for natural cocoa because it plays well with the sweetness of those pastel eggs.
Unsalted butter is your moisture and richness carrier, and using real butter rather than substitutes makes an enormous difference in final flavor. When you melt the butter completely and let it cool slightly before adding eggs, you create an emulsion that distributes fat evenly throughout the batter. This is what gives you those signature crackly tops and fudgy centers.
Granulated sugar does double duty here, providing sweetness while also contributing to structure and that shiny, paper-thin crust that forms on top as the brownies bake. The sugar dissolves into the butter and eggs, creating tiny air pockets that give brownies their characteristic dense-yet-tender crumb.
Eggs bind everything together while adding richness, and the extra yolk in this recipe tips the texture firmly into fudgy territory. Whole eggs alone would create a cakier result, but that additional yolk increases fat content and creates a more custard-like interior texture.
All-purpose flour provides just enough structure to hold everything together without making the brownies tough or dry. The relatively small amount of flour compared to butter and sugar is what keeps these brownies in the fudgy category rather than cake-like.
Vanilla extract amplifies the chocolate flavor in ways that seem almost magical, bringing forward deeper notes and rounding out any bitter edges. Pure vanilla is worth the investment here because its complex flavor profile shines through even when paired with intense chocolate.
The pastel chocolate eggs are your festive crown jewel, adding visual celebration and a delightful textural contrast. Their candy shells provide a satisfying crunch against the soft brownie, while the chocolate centers echo the base flavor. Look for eggs with quality chocolate interiors rather than hollow candies for the best eating experience.
A pinch of salt is essential for balancing sweetness and enhancing every other flavor in the recipe. Without it, the brownies would taste flat and one-dimensional, but that small addition makes the chocolate taste more intensely chocolatey and the sweetness more complex.
The Cooking Process Explained
The journey to perfect easy Easter brownies with pastel chocolate egg topping begins with properly melting your butter and letting it cool to room temperature. This cooling step is crucial because adding eggs to hot butter will scramble them, creating an unpleasant texture. Once your butter reaches a warm-but-not-hot temperature, you whisk in the sugar vigorously until the mixture lightens slightly in color and becomes smooth and glossy.
Next comes the egg incorporation stage, where you add eggs one at a time, whisking thoroughly after each addition. This gradual process creates a proper emulsion that will hold air and create that signature shiny top crust. The mixture should look thick, glossy, and almost ribbon-like when you lift the whisk. This is when you add your vanilla extract, whisking it through completely so every bite carries that warm vanilla note.
The dry ingredient addition requires a gentle hand and a shift from whisk to spatula. You'll combine your cocoa powder, flour, and salt in a separate step, then fold them into the wet ingredients using broad, sweeping motions. The goal is to mix just until no flour streaks remain, stopping before you overdevelop the gluten. Overmixing at this stage creates tough, cakey brownies instead of the fudgy texture we're after.
Pour the thick batter into your prepared pan and spread it evenly into corners, using your spatula to smooth the top. The batter will be quite thick, almost like frosting, which is exactly what you want. This density is what creates that fudgy interior. At this point, you can either press your pastel eggs gently into the unbaked batter or wait to add them after baking, depending on whether you want them slightly sunken and baked-in or sitting proudly on top.
Baking happens in a preheated oven at a moderate temperature, and the timing is everything. You're looking for edges that pull away slightly from the pan and a center that looks set but still has a slight jiggle when you gently shake the pan. A toothpick inserted two inches from the edge should come out with a few moist crumbs clinging to it. Remember that brownies continue cooking from residual heat even after you remove them from the oven, so slightly underbaking ensures you don't end up with dry results.
Mistakes to Avoid
The most common mistake when making these easy Easter brownies with pastel chocolate egg topping is overbaking, which transforms fudgy perfection into dry disappointment. Set your timer for five minutes less than the recipe suggests and check for doneness with the jiggle test rather than relying solely on time. Every oven has hot spots and temperature variations, so trust visual and tactile cues over the clock.
Using a pan that's the wrong size throws off the entire baking time and texture balance. A larger pan spreads the batter thinner, creating cakey brownies that bake too quickly, while a smaller pan makes the batter too thick and leaves you with an undercooked center and burnt edges. Stick with the specified pan size, or adjust your baking time significantly if you must substitute.
Skipping the cooling period before cutting is tempting but disastrous for presentation. Hot brownies crumble and stick to your knife, creating ragged edges and uneven squares. Let your pan cool completely at room temperature for at least two hours, or speed the process by refrigerating for one hour. Cold brownies cut into perfect, clean squares with sharp edges.
Adding the pastel eggs too early in the baking process can cause their candy coating to crack, bleed color, or melt entirely. If you want a baked-in look, add them during the final five minutes of baking. For the brightest, most vibrant appearance, wait until the brownies cool completely and press them gently into the top, where they'll stick naturally to the slightly tacky surface.
Using old, stale cocoa powder robs your brownies of deep chocolate flavor and can even introduce off-tastes. Cocoa powder loses potency over time, especially if stored in a warm or humid environment. Give your cocoa a sniff before using it—it should smell richly chocolatey, not dusty or flat. Fresh cocoa makes a remarkable difference in the final intensity of your brownies.
How to Serve This
These easy Easter brownies with pastel chocolate egg topping shine brightest when served on a simple white platter that lets the pastel colors pop. Cut them into generous squares and arrange them in a single layer with the egg toppings facing up, creating a mosaic of spring colors that draws the eye immediately. For a more casual gathering, serve them straight from the pan with a stack of napkins nearby.
Pair these brownies with fresh strawberries and cream for a classic spring combination that balances the richness of chocolate with bright fruit and cool dairy. The strawberries add a pop of red that complements the pastel eggs, while their slight tartness cuts through the sweetness beautifully. Whipped cream adds a light, airy contrast to the dense brownie texture.
For a more indulgent presentation, serve slightly warmed brownies with a scoop of vanilla ice cream melting over the top. The temperature contrast between warm brownie and cold ice cream creates a luxurious mouthfeel, and the melting ice cream forms a spontaneous sauce that ties everything together. The pastel eggs add delightful crunchy surprises throughout each bite.
On weeknight evenings, these brownies need nothing more than a cold glass of milk or a cup of coffee to feel complete. The simplicity of a brownie square and a beverage turns an ordinary Tuesday into something a bit more special without requiring any extra effort or planning.
For spring gatherings, create a dessert board by surrounding your brownie squares with fresh mint sprigs, additional pastel eggs in small bowls, and some fresh berries. This builds visual interest and gives guests options for customizing their plates. The casual, help-yourself nature of a dessert board feels welcoming and relaxed.
Make-Ahead and Storage Guide
These easy Easter brownies with pastel chocolate egg topping store beautifully at room temperature for up to four days when kept in an airtight container. Layer parchment paper between stacked brownies to prevent the pastel eggs from sticking to the brownie above them. Room temperature storage actually enhances the fudgy texture as the brownies settle and the flavors deepen.
For refrigerator storage, these brownies keep for up to one week in a sealed container. The cool temperature firms them up considerably, which some people prefer for a denser, almost truffle-like texture. Let refrigerated brownies sit at room temperature for about twenty minutes before serving to allow the texture to soften slightly and the flavors to bloom.
Freezing works exceptionally well with brownies, extending their life to three months without quality loss. Wrap individual squares tightly in plastic wrap, then place them in a freezer-safe container or bag. This individual wrapping allows you to thaw only what you need rather than committing to the entire batch. Frozen brownies thaw at room temperature in about two hours.
If you plan to freeze these brownies, add the pastel egg topping after thawing rather than before freezing. The freeze-thaw cycle can cause the candy coating to crack, weep, or discolor, compromising both appearance and texture. Simply press fresh eggs into the thawed brownies and they'll look as beautiful as freshly made.
For reheating individual portions, microwave a brownie square for fifteen to twenty seconds until just warm throughout. This gentle warming brings back that fresh-from-the-oven quality without drying out the brownie. Avoid overheating, which can make the chocolate taste burnt and turn the texture tough and rubbery.
Reader Questions Answered
Can I use different types of chocolate eggs or candy for topping?
Absolutely! While pastel chocolate eggs create that spring aesthetic, you can swap them for any candy-coated chocolate pieces, chocolate chips, or even chopped chocolate bars. Mini chocolate eggs work particularly well because their size creates better distribution across the brownie surface. Just ensure whatever topping you choose can withstand the heat if you're adding it before or during baking.
How do I prevent my brownies from sticking to the pan?
The best insurance against sticking is lining your pan with parchment paper, leaving overhang on two sides to create handles for lifting. Grease the pan lightly first so the parchment adheres, then grease the parchment itself. This double-layer approach means you can lift the entire brownie slab out of the pan before cutting, which gives you cleaner edges and eliminates the corner-cutting struggle entirely.
Can I make these brownies in a different pan size?
You can adapt the recipe to different pan sizes, but you'll need to adjust baking time significantly. A 9x13-inch pan will create thinner brownies that bake in about twenty to twenty-five minutes, while an 8x8-inch pan makes thicker brownies that need thirty-five to forty minutes. Watch for the visual cues of set edges and a slightly jiggly center rather than relying on a specific time.
What's the best way to cut clean brownie squares?
The secret to bakery-perfect squares is a sharp knife, warm water, and patience. Run your knife under hot water, wipe it completely dry, then make one cut. Wipe the blade clean, run it under hot water again, dry it, and make your next cut. This repetitive process seems tedious but creates edges so clean they look professionally cut. Cold or room-temperature brownies cut more cleanly than warm ones.
Can I reduce the sugar in these brownies?
Sugar plays multiple roles beyond sweetness in brownies, contributing to texture, moisture, and that shiny top crust. Reducing sugar by more than twenty-five percent will noticeably affect texture, creating drier, less fudgy brownies with a duller appearance. If you prefer less sweetness, consider reducing the sugar by just two tablespoons and using darker cocoa powder, which has deeper, less sweet flavor notes that balance the overall taste.
Are these brownies suitable for children?
These easy Easter brownies with pastel chocolate egg topping are absolutely perfect for young ones! The colorful eggs make them visually exciting, and the chocolate flavor is universally appealing without being too intense. The texture is soft enough for little mouths, and you can cut them into smaller squares for appropriate portion sizes. Just be mindful that the pastel eggs can be a choking hazard for very young children under three years old.
Easy Easter Brownies with Pastel Chocolate Egg Topping
Rich, fudgy chocolate brownies topped with colorful pastel chocolate eggs. Perfect for spring gatherings, these one-bowl brownies are simple to make and absolutely delicious.
Prep Time
15 min
Cook Time
30 min
Total Time
45 min
Servings
16 brownies
Ingredients
For 16 brownies
- 1/2 cup (115g) unsalted butter, melted and cooled
- 1 cup (200g) granulated sugar
- 2 large eggs, at room temperature
- 1 large egg yolk, at room temperature
- 1 teaspoon pure vanilla extract
- 1/3 cup (40g) unsweetened cocoa powder
- 1/2 cup (65g) all-purpose flour
- 1/4 teaspoon salt
- 1 cup pastel chocolate eggs, for topping
Instructions
- 1
Prepare pan and preheat
Preheat your oven to 350°F (175°C). Line an 8x8-inch baking pan with parchment paper, leaving overhang on two sides to create handles for easy removal. Lightly grease the parchment paper with butter or cooking spray.
- 2
Melt and cool butter
Melt the butter in a medium saucepan over low heat or in the microwave in thirty-second intervals. Once completely melted, remove from heat and let cool for about five minutes until warm but not hot to the touch. This prevents scrambling the eggs in the next step.
- 3
Combine butter and sugar
Pour the cooled melted butter into a large mixing bowl. Add the granulated sugar and whisk vigorously for about one minute until the mixture is smooth, glossy, and slightly lighter in color. This creates the foundation for your fudgy texture.
- 4
Add eggs and vanilla
Add the whole eggs and egg yolk one at a time, whisking thoroughly after each addition until fully incorporated. The mixture should look thick and ribbon-like. Add the vanilla extract and whisk until evenly distributed throughout the batter.
- 5
Combine dry ingredients
In a separate small bowl, whisk together the cocoa powder, flour, and salt until evenly combined. This ensures the cocoa is evenly distributed and prevents lumps in your final batter.
- 6
Fold in dry ingredients
Add the dry ingredient mixture to the wet ingredients all at once. Using a rubber spatula, fold gently with broad sweeping motions until just combined and no flour streaks remain. Do not overmix as this can make the brownies tough and cakey rather than fudgy.
- 7
Transfer to pan
Pour the thick batter into your prepared pan and spread it evenly into all corners using your spatula. Smooth the top surface as evenly as possible. The batter will be quite thick and dense, which is exactly right for fudgy brownies.
- 8
Bake brownies
Bake in the preheated oven for twenty-eight to thirty-two minutes, until the edges pull away slightly from the pan and the center looks set but still has a slight jiggle when gently shaken. A toothpick inserted two inches from the edge should come out with a few moist crumbs. Do not overbake.
- 9
Add pastel eggs
Remove the brownies from the oven and immediately press the pastel chocolate eggs gently into the top surface in a decorative pattern, spacing them evenly. The eggs will stick to the warm brownies naturally. Alternatively, wait until completely cooled to add eggs for brighter colors.
- 10
Cool completely
Let the brownies cool in the pan at room temperature for at least two hours, or refrigerate for one hour until completely cool and set. This cooling period is essential for clean cutting and proper texture development.
- 11
Cut and serve
Using the parchment paper handles, lift the entire brownie slab out of the pan onto a cutting board. Use a sharp knife, wiping it clean between cuts, to slice into sixteen squares. Serve at room temperature for the best fudgy texture.
Nutrition Facts
Per serving (estimated)
185 calories
Calories
26g
Carbs
3g
Protein
9g
Fat
1g
Fiber
55mg
Sodium
20g
Sugar


