Easy Strawberry Cheesecake Dump Cake Recipe
Master this simple strawberry cheesecake dump cake with minimal effort and maximum flavor. No mixing required—just layer, bake, and enjoy!
cookwithlucia.com/recipes/easter-strawberry-cheesecake-dump-cake
There's something almost magical about a dessert that requires no mixing bowls, no stand mixer, and no complicated techniques—yet delivers bakery-worthy results every single time. The strawberry cheesecake dump cake is exactly that kind of recipe, and once you understand the brilliance behind its simplicity, you'll find yourself reaching for this method again and again for family gatherings, weekend dinners, or any time you need an impressive dessert without the stress.
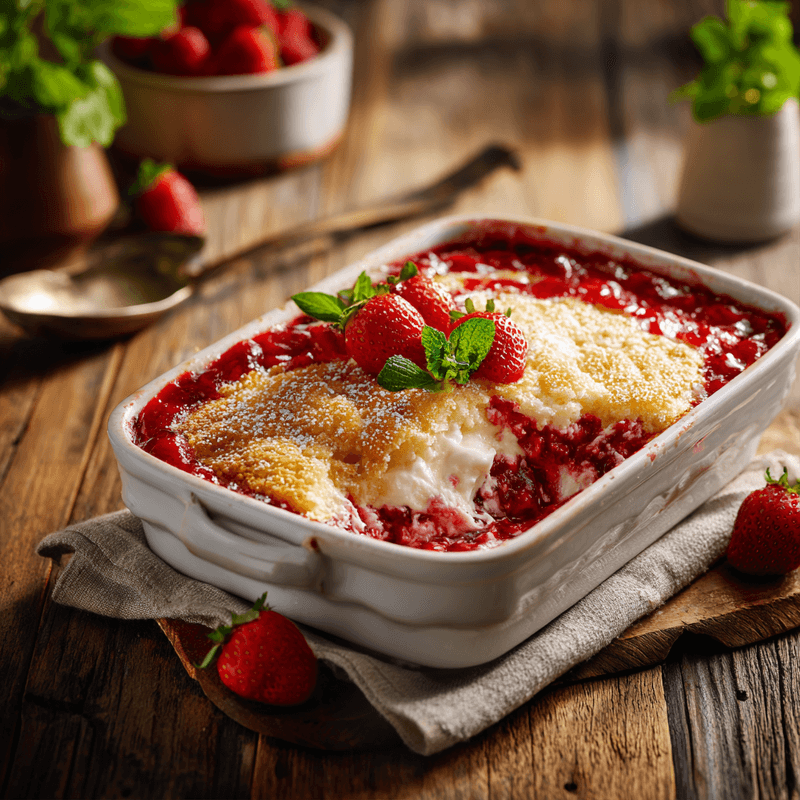
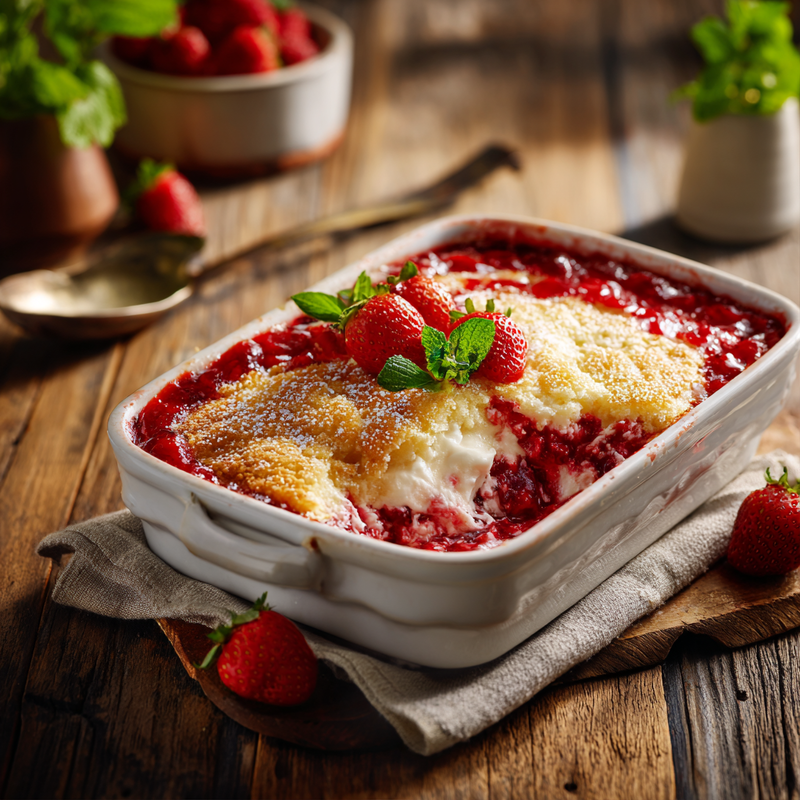
The perfect strawberry cheesecake dump cake showcases three distinct layers that meld together during baking: a fruity strawberry base that bubbles up around the edges, pockets of tangy cream cheese that create luxurious custard-like swirls, and a golden, buttery cake topping with crispy edges and tender spots where the moisture seeps through. It's the ultimate contrast of textures and temperatures—best served warm with the cheesecake layer still soft and molten, or chilled for a more set, almost trifle-like consistency.
I know the name "dump cake" might sound too casual for something this delicious, and you might wonder if something so easy can really taste homemade. But that's exactly the beauty of mastering this technique. Once you understand why each layer goes down in a specific order and what role each ingredient plays, you'll see that this isn't a shortcut—it's smart baking. The method harnesses the power of steam, fat distribution, and controlled layering to create something that would normally require multiple steps and precise timing.
The Science Behind the Method
The genius of a strawberry cheesecake dump cake lies in understanding moisture migration and fat distribution during the baking process. When you layer wet ingredients at the bottom and dry cake mix on top, then dot everything with butter, you're creating a self-regulating system where steam rises from the fruit, activating the leavening agents in the cake mix while the melting butter creates pockets of richness and helps form that coveted golden crust.
The cream cheese layer is where food science gets particularly interesting. As the oven heat penetrates the dish, the cream cheese softens and begins to melt into the strawberry layer below while the cake mix above partially sinks into it. This creates an emulsion—tiny droplets of fat suspended in the fruit juices—that gives you those creamy, tangy pockets throughout the finished dessert. The sugar in both the fruit filling and cake mix helps retain moisture while contributing to Maillard browning on the surface.
What makes this technique so forgiving is that the multiple layers insulate each other. The fruit layer can't scorch because it's protected by the cake layer above. The cake layer can't dry out because it's constantly being moistened from below by rising steam. Understanding this interplay means you can adapt the basic method to countless flavor combinations, adjusting baking times based on the moisture content of your fruit layer and the depth of your baking dish. This knowledge transforms you from someone following a recipe into a baker who truly understands how ingredients interact with heat and time.
Tools and Ingredients You'll Need
For a proper strawberry cheesecake dump cake, you'll need a 9x13-inch baking dish—glass or ceramic works beautifully because you can see the bubbling edges, though metal pans conduct heat more efficiently if you prefer a crispier bottom. If you only have a 9x9-inch square pan, you can halve the recipe, though the layers will be thicker and may need an extra ten to fifteen minutes of baking time. A larger roasting pan works too, but your dessert will be shallower with more crispy topping relative to the creamy center.
The ingredients themselves are remarkably simple but each plays a crucial role. Strawberry pie filling provides consistent moisture and sweetness—the cornstarch already in the filling prevents the bottom from becoming soupy. Fresh strawberries can work, but you'll need to macerate them with sugar and cornstarch first, which defeats the ease of this method. The cream cheese must be cut into small cubes or dolloped in spoonfuls throughout the middle layer; this distribution is key to getting those tangy pockets in every serving rather than one solid cheesecake layer that doesn't integrate well.
Your cake mix should be a quality white or yellow variety—check the ingredients to ensure it's halal-compliant, avoiding any animal-derived emulsifiers or questionable additives. The leavening agents in the mix (baking powder and baking soda) are activated by the moisture rising from below, so you don't need to add eggs or oil as you would if making the cake normally. Finally, butter is essential—margarine or oil spreads won't create the same crispy golden patches. You'll need a full stick, sliced thin so it melts evenly across the surface. A sharp knife or bench scraper makes quick work of slicing cold butter into thin pats.
The Method, Step by Step
Begin by preheating your oven to 350°F and positioning a rack in the center position—this ensures even heat distribution from all sides. While the oven heats, take your cream cheese out of the refrigerator and cut it into half-inch cubes. Cold cream cheese is actually easier to cut cleanly, and the cubes will soften perfectly during baking, so don't worry about bringing it to room temperature first. This is one of the beautiful efficiencies of the strawberry cheesecake dump cake method.
Spread your strawberry pie filling across the bottom of an ungreased 9x13-inch baking dish, using a spatula to distribute it evenly into every corner. The layer should be relatively uniform in thickness—about half an inch to three-quarters of an inch deep. This evenness matters because it ensures consistent moisture release during baking. Now scatter your cream cheese cubes across the strawberry layer, spacing them roughly an inch apart. You want good distribution so every spoonful of the finished dessert includes some of that tangy creaminess, but they don't need to be mathematically precise.
Next comes the cake mix layer, and this is where your technique determines your final texture. Pour the dry cake mix directly from the box over the cream cheese and strawberry layers, then use a spatula or the back of a spoon to gently spread it into an even layer that covers everything beneath. Don't press down or pack it—you want it to sit lightly on top like a blanket of snow. This loose layer allows steam to rise through it while the butter melts down into it, creating that ideal combination of crispy and tender spots.
Slice your cold butter into thin pats—about an eighth of an inch thick—and lay them across the entire surface of the cake mix, overlapping slightly. You're aiming for nearly complete coverage because wherever butter touches, you'll get golden browning and rich flavor. Any spots without butter will still cook through from the steam below, but they'll be paler and less crispy. Some bakers like to leave a few bare spots intentionally for texture contrast, which is a perfectly valid choice once you understand the principle.
Slide the dish into your preheated oven and set a timer for forty-five minutes. During baking, you'll notice the most wonderful transformation: the butter melts and seeps into the cake mix, the edges begin to bubble as the fruit heats and releases steam, and your kitchen fills with the aroma of baking cake mingled with sweet strawberries. At the forty-five minute mark, check for visual cues: the top should be golden brown with some darker crispy patches, and the edges should be bubbling vigorously. If the center still looks pale or the bubbling is minimal, give it another five to ten minutes.
When it's done, remove the strawberry cheesecake dump cake from the oven and let it rest for at least fifteen minutes before serving. During this resting time, the layers settle slightly and the cream cheese pockets firm up just enough to be scoopable rather than completely liquid. The dessert will continue to thicken as it cools, so consider what texture you're after: serve it warm and it's more like a cobbler with molten cheesecake pockets, or let it cool completely for a firmer, more sliceable consistency that shows off the distinct layers.
Troubleshooting Guide
If your strawberry cheesecake dump cake comes out with a soggy top layer that never crisped up, the most likely culprit is insufficient butter coverage or butter that was melted before adding. The butter needs to be solid when it goes on so it melts gradually during baking, allowing the cake mix beneath to hydrate and form structure before becoming saturated. Next time, ensure your butter slices cover at least ninety percent of the surface and go straight from the refrigerator to the dish. You can also try increasing the oven temperature to 375°F for the final ten minutes to encourage more browning.
A watery or soupy bottom layer usually means your fruit filling had too much liquid or the dish didn't bake long enough for the starches to fully activate and thicken. Strawberry pie filling should be gel-like straight from the can—if it pours easily, it has too much juice. Drain off some of the excess liquid before spreading it in the pan, or stir in a tablespoon of cornstarch. Also ensure you're baking until the edges bubble vigorously; that bubbling is visual confirmation that the mixture has reached the temperature needed for the cornstarch to thicken properly.
If you find the cream cheese created one solid layer instead of distributed pockets, the cubes were likely too large or placed too close together, causing them to merge during baking. Cut smaller cubes—no larger than half an inch—and space them with at least three-quarters of an inch between each piece. The cream cheese will spread somewhat as it melts, so starting with good distribution and smaller pieces gives you those delightful surprise pockets of tanginess throughout the dessert rather than one heavy layer.
An overly sweet result sometimes happens with certain brands of pie filling and cake mix combinations. If your first attempt tastes too sugary, try using a reduced-sugar pie filling or add a tablespoon of lemon juice to the strawberry layer before adding the other components. The acidity cuts through the sweetness and also brightens the strawberry flavor, making the whole strawberry cheesecake dump cake taste more complex and less one-dimensional. Some bakers even add a pinch of salt to the dry cake mix before spreading it to enhance all the flavors.
Taking It to the Next Level
Once you've mastered the basic strawberry cheesecake dump cake, professional bakers add sophistication through strategic flavor layering. Try sprinkling a teaspoon of vanilla bean paste or a tablespoon of freeze-dried strawberry powder into the dry cake mix before spreading it—this amplifies the strawberry presence without adding moisture. You can also nestle fresh strawberry slices into the pie filling layer for bursts of bright, less-sweet fruit that contrast beautifully with the cooked filling.
For a more complex flavor profile, brown your butter before slicing and freezing it briefly to resolidify. Browned butter adds nutty, caramel notes that make people wonder what your secret ingredient is. Another advanced technique is creating a streusel-style topping by mixing a quarter cup of the dry cake mix with two tablespoons of cold butter and a handful of sliced almonds, then sprinkling this mixture over the plain cake mix layer for added texture and visual appeal.
Texture contrast elevates any dessert from good to memorable. Try adding a middle layer of crushed vanilla wafers or graham crackers between the strawberry filling and cream cheese cubes—this creates a distinct cheesecake-crust element that makes each bite even more interesting. Professional pastry chefs also know that a small amount of complementary spice can transform a simple dessert: a quarter teaspoon of cardamom or a half teaspoon of cinnamon in the cake mix layer adds warmth and complexity without overwhelming the strawberry and cream cheese flavors.
Storing Your Results
A strawberry cheesecake dump cake keeps beautifully for up to four days when stored properly, making it an excellent make-ahead dessert for gatherings. Let the dessert cool completely to room temperature first—covering it while still warm creates condensation that makes the topping soggy. Once cooled, cover the baking dish tightly with plastic wrap or aluminum foil and refrigerate. The cold actually helps the layers set further, so many people prefer the texture of chilled strawberry cheesecake dump cake over the warm version.
When you're ready to serve leftovers, you have options depending on your texture preference. For that fresh-baked experience, scoop a portion into a microwave-safe bowl and heat for thirty to forty-five seconds until the cream cheese pockets become molten again and the fruit layer is warm. Alternatively, reheat larger portions in a 300°F oven for about fifteen minutes, covered with foil to prevent the top from drying out. Some people genuinely prefer it cold, straight from the refrigerator, where it takes on an almost icebox-cake quality with distinct, firm layers.
Freezing is possible but requires a bit more care to maintain quality. Cut the cooled dessert into individual portions and wrap each tightly in plastic wrap, then place in a freezer-safe container or bag. Frozen portions keep for up to two months. Thaw overnight in the refrigerator rather than at room temperature to prevent excess moisture from making the cake layer gummy. The texture won't be quite as perfect as fresh, but it's still delicious and means you can always have a homemade dessert option ready when unexpected guests arrive.
Common Questions
Can I make this without a stand mixer or hand mixer?
Absolutely—that's the entire point of a strawberry cheesecake dump cake! This method requires no mixing equipment whatsoever. You simply layer the ingredients in order and let the oven do all the work of combining them. The technique was specifically designed for ease, making it perfect for beginner bakers or anyone who wants a spectacular dessert without dirtying multiple bowls and mixers.
What if I live at high altitude—do I need to adjust anything?
High altitude baking typically requires adjustments, but dump cakes are surprisingly forgiving because they're not relying on precise leavening for structure. If you're above five thousand feet, try increasing the oven temperature by twenty-five degrees and reducing the baking time by five to ten minutes, checking for visual doneness cues rather than relying solely on time. The lower air pressure means moisture evaporates faster, so your dessert may finish sooner than the standard timing suggests.
Can I double this recipe for a crowd?
You can absolutely scale up, but rather than doubling in one giant pan, I recommend making two separate 9x13-inch dishes. A single pan with double the depth would require significantly longer baking time and risks an undercooked center before the top burns. Two standard pans bake more evenly and also give you flexibility—you can serve one warm and refrigerate the other for later, or even try a flavor variation in the second pan.
Why did my cake mix stay powdery in some spots?
This happens when the butter coverage was uneven or the cake mix was piled too thickly in certain areas. The butter carries moisture into the dry mix, so any spots without butter stay relatively dry. To fix this in future batches, ensure your butter slices overlap slightly for complete coverage, and spread the cake mix in an even, level layer—no mounds or valleys. A small amount of powdery texture around the very edges is normal and actually provides nice textural contrast.
Can I prepare this ahead and bake it later?
You can assemble the strawberry cheesecake dump cake up to the point of adding the butter, cover it tightly, and refrigerate for up to eight hours before baking. Add the butter slices just before the dish goes into the oven so they don't soften and sink into the cake mix during the waiting period. This make-ahead approach is perfect for busy days when you want to do the prep work in the morning and bake fresh for an evening gathering.
What's the best way to serve this dessert?
Serving options are wonderfully flexible based on the occasion and your personal preference. For a casual family dinner, scoop portions directly from the baking dish into bowls while it's still warm, perhaps adding a dollop of whipped cream or a scoop of vanilla ice cream that melts into the warm fruit and cake. For a more elegant presentation at gatherings, let the dessert cool completely so it firms up, then cut neat squares and plate them with a drizzle of cream, fresh strawberry garnish, and a light dusting of powdered sugar. The contrast between the ruby-red fruit peeking through, the creamy white cheesecake pockets, and the golden cake topping makes for a visually stunning dessert that photographs beautifully and tastes even better than it looks.
Strawberry Cheesecake Dump Cake
An easy layered dessert featuring strawberry pie filling, cream cheese pockets, and a buttery cake topping that bakes into a delicious combination of textures with minimal effort.
Prep Time
10 min
Cook Time
50 min
Total Time
60 min
Servings
12 servings
Ingredients
For 12 servings
- 2 cans (21 ounces each) strawberry pie filling
- 8 ounces cream cheese, cut into 1/2-inch cubes
- 1 box (15.25 ounces) white or yellow cake mix
- 1/2 cup (1 stick) unsalted butter, sliced into thin pats
- Optional: whipped cream or vanilla ice cream for serving
Instructions
- 1
Preheat oven
Preheat your oven to 350°F and position a rack in the center. While the oven heats, prepare your ingredients so everything is ready for quick assembly.
- 2
Prepare cream cheese
Cut the cold cream cheese into half-inch cubes using a sharp knife. Keeping the cream cheese cold makes it easier to cut cleanly and the cubes will soften perfectly during baking.
- 3
Layer strawberry filling
Spread both cans of strawberry pie filling evenly across the bottom of an ungreased 9x13-inch baking dish. Use a spatula to distribute the filling into every corner, creating a uniform layer about half to three-quarters of an inch deep.
- 4
Add cream cheese
Scatter the cream cheese cubes evenly across the strawberry layer, spacing them roughly an inch apart. Good distribution ensures every serving will include some of the tangy cream cheese pockets.
- 5
Layer cake mix
Pour the dry cake mix directly from the box over the cream cheese and strawberry layers. Gently spread it into an even layer using a spatula, covering everything beneath without pressing down or packing it tightly.
- 6
Top with butter
Slice the cold butter into thin pats about an eighth of an inch thick. Lay the butter slices across the entire surface of the cake mix, overlapping slightly to achieve nearly complete coverage for even browning and rich flavor.
- 7
Bake
Bake in the preheated oven for forty-five to fifty-five minutes, until the top is golden brown with some darker crispy patches and the edges are bubbling vigorously. The center should no longer look pale or dry.
- 8
Cool and serve
Remove from the oven and let rest for at least fifteen minutes before serving. This allows the layers to settle and the cream cheese to firm up slightly. Serve warm with whipped cream or ice cream, or refrigerate for a firmer, more sliceable texture.
Nutrition Facts
Per serving (estimated)
385 calories
Calories
58g
Carbs
4g
Protein
16g
Fat
1g
Fiber
340mg
Sodium
42g
Sugar


