
Easter Poke Cake: A Delightful Spring Treat Recipe!
This Easter Poke Cake is a colorful spring dessert perfect for gatherings. Moist vanilla cake soaked in fruity gelatin with fluffy frosting.
cookwithlucia.com/recipes/easter-poke-cake-a-delightful-spring-treat-recipe
There's something magical about a dessert that transforms as it sits, where flavors meld and deepen into something even more extraordinary. This Easter Poke Cake delivers exactly that kind of wonder, with its vibrant layers of color seeping through tender vanilla cake, creating a mosaic of springtime joy in every slice. Instead of spending your evenings wondering what sweet treat to serve at your next gathering, imagine having a stunning, crowd-pleasing dessert already prepared and resting in your refrigerator. This cake isn't just beautiful—it's engineered for advance preparation, making it the ultimate stress-free dessert for spring celebrations, family gatherings, or any occasion when you want to impress without the last-minute panic. The beauty of this Easter Poke Cake lies in its patient transformation: the longer it sits, the more the flavored gelatin penetrates the cake's crumb, creating pockets of sweet, fruity intensity that contrast beautifully with the fluffy frosting crown. One focused afternoon of baking gives you a dessert that actually improves over several days, ready whenever you need a slice of celebration.
Why This Recipe Is Perfect for Meal Prep
The Easter Poke Cake stands out as an exceptional make-ahead dessert because its structure actually benefits from extended refrigeration time. Unlike many cakes that dry out or lose their appeal after a day, this poke cake reaches its peak flavor and texture after sitting for at least 24 hours, allowing the gelatin mixture to fully permeate every corner of the cake. The moisture from the poke holes prevents any dryness, while the whipped topping creates a protective seal that keeps everything fresh and luscious. From a practical standpoint, this dessert requires no assembly at serving time—simply slice and plate, making it ideal for busy hosts who want to focus on guests rather than kitchen tasks. The ingredient stability is another crucial advantage: both the baked cake base and the gelatin mixture are shelf-stable components that transform into something greater when combined, and the finished product maintains its quality for up to five days when properly stored. Nutritionally, each portion delivers a controlled serving size that satisfies sweet cravings without the temptation to overbake or overprepare multiple desserts throughout the week. The visual appeal remains consistent from day one through day five, with those signature colorful streaks staying vibrant and inviting, ensuring that your last slice looks just as Instagram-worthy as the first.
What You'll Need
For this Easter Poke Cake, you'll start with a box of white or vanilla cake mix as your foundation—this isn't about cutting corners, but about creating a reliably tender crumb that holds up to the poking and soaking process without falling apart. Purchase the specific ingredients called for on the box (typically eggs, vegetable oil, and water), and consider buying the larger dozen of eggs if you're planning to prep multiple desserts this week. The star players are three to four packets of fruity gelatin in spring colors—think strawberry for pink, lime for green, lemon for yellow, and berry blue for that signature Easter palette. When buying gelatin, opt for the individual packets rather than the large containers, as they're pre-measured and reduce the chance of error during your batch cooking session. You'll need an eight-ounce container of frozen whipped topping, which should be moved to your refrigerator the night before your prep day to thaw slowly and evenly. For decoration, grab a bag of pastel-colored sprinkles or mini chocolate eggs to scatter across the top just before serving—buy these in sealed packages that can sit in your pantry until needed. A standard 9x13-inch baking dish is essential, preferably a light-colored metal or glass pan that distributes heat evenly and won't react with the acidic gelatin. Invest in quality storage: either a snap-on plastic lid specifically designed for your baking dish size, or heavy-duty aluminum foil that creates an airtight seal to prevent the cake from absorbing refrigerator odors.
The Batch Cooking Method
Begin your Easter Poke Cake session by preheating your oven and preparing your baking dish with a light coating of cooking spray—doing this first means your oven reaches optimal temperature by the time your batter is ready. Mix your cake batter according to package directions, taking care not to overmix, which can create a tough texture that resists the gelatin absorption we're aiming for. Pour the batter into your prepared pan and bake according to timing instructions, but start checking five minutes before the recommended time with a toothpick test—poke cakes actually benefit from being slightly underbaked, as they'll firm up during the soaking process. The moment your cake emerges from the oven, set a timer for fifteen minutes to let it cool just enough to handle without collapsing, then begin the signature poking process using the round handle of a wooden spoon. Space your pokes about one inch apart across the entire surface, pressing down until you hit the bottom of the pan but being careful not to tear through the sides of each hole. While the cake continues cooling to room temperature (about 30 more minutes), prepare your gelatin mixtures by dissolving each flavor in separate bowls with boiling water, then adding cold water according to package directions—but use slightly less cold water than called for to create a more concentrated flavor that won't oversaturate the cake. Working with one color at a time, carefully drizzle the liquid gelatin over sections of the cake, using a spoon to guide it into the poke holes and creating your desired pattern—some prefer distinct stripes while others enjoy a more marbled, organic look. Once all colors are applied and you see the gelatin pooling slightly on the surface, transfer the uncovered cake to your refrigerator for a minimum of four hours, though overnight is ideal for full absorption. The final assembly step happens just before your first serving: spread the thawed whipped topping evenly across the entire surface, then add your decorative elements, cover tightly, and return to the refrigerator where it will wait patiently for up to five days.
The Weekly Game Plan
For optimal Easter Poke Cake enjoyment throughout your week, I recommend starting your prep on a weekend afternoon when you have two to three hours of unhurried kitchen time. Sunday works beautifully as your baking day: mix and bake the cake in the early afternoon, complete the poking and gelatin application by mid-afternoon, and let the cake rest overnight in your refrigerator while the flavors develop their full potential. Monday evening or Tuesday morning, add your whipped topping and decorative elements, which means your cake is fully ready for serving from Tuesday through Saturday—a solid five-day window. To prevent dessert fatigue when eating the same cake multiple times, vary your presentation throughout the week: serve Tuesday's portion with fresh sliced strawberries on the side, Wednesday's with a drizzle of berry sauce, Thursday's alongside a cup of mint tea, and Friday's with a handful of fresh berries mixed into vanilla yogurt. This Easter Poke Cake particularly shines when you're planning for a specific gathering—if you're hosting on Saturday, bake on Thursday, apply gelatin Thursday evening, add topping Friday morning, and your cake hits its absolute peak flavor right when guests arrive. For families preparing multiple desserts, consider baking two cakes simultaneously in different pans: one traditional Easter Poke Cake with pastel colors, and another using different gelatin flavors like orange and grape for variety. The beauty of this schedule is its flexibility—unlike desserts requiring precise timing, this cake forgives you if life gets busy, remaining delicious whether you serve it on day two or day five.
Smart Storage and Reheating
Proper storage transforms this Easter Poke Cake from a good dessert into a great make-ahead solution, and your container choice matters significantly. Glass baking dishes with snap-on lids offer the gold standard: they don't absorb odors, maintain consistent temperature, and create a tight seal that prevents the whipped topping from drying out or absorbing refrigerator smells. If you're using your original metal baking pan, invest in a fitted plastic lid rather than relying on plastic wrap, which tends to stick to the frosting and ruin your beautiful presentation when removed. For households concerned about space, this cake can be pre-sliced and stored in individual airtight containers, though I only recommend this approach if you're certain about portion control—there's something about seeing the whole cake that maintains the special-occasion feeling throughout the week. In the refrigerator, position your cake on a middle shelf where temperature remains most consistent, away from the back wall where it's coldest and away from the door where temperature fluctuates with opening and closing. This Easter Poke Cake maintains premium quality for five days refrigerated, with day two through day four representing the absolute peak when gelatin flavor fully develops but before any textural degradation begins. Freezing is possible but not ideal: the whipped topping can separate upon thawing, and the gelatin-soaked cake becomes slightly spongy rather than tender. If you must freeze, do so before adding the whipped topping, wrap individual slices tightly in plastic wrap then aluminum foil, and freeze for up to one month. This dessert is meant to be served chilled directly from the refrigerator—no reheating necessary, which eliminates the biggest obstacle in dessert meal prep. Simply remove your desired portion, let it sit at room temperature for about five minutes if you prefer a slightly softer texture, and serve with a clean, sharp knife that's been dipped in hot water and wiped dry for the cleanest slices.
Customization Ideas
The Easter Poke Cake framework invites endless creativity while maintaining its make-ahead convenience. Swap the vanilla cake base for chocolate, creating a dramatic contrast with bright gelatin colors that pop even more vibrantly against the dark crumb. For a more sophisticated flavor profile, use lemon cake mix with coordinating citrus gelatin flavors like lemon, lime, and orange, then top with lemon-flavored whipped cream instead of plain. Dietary adaptations work beautifully: gluten-free cake mixes produce excellent results when you follow the poking technique precisely, and dairy-free whipped toppings create an equally fluffy crown that holds up through days of storage. Transform this into a tropical variation by using coconut cake, pineapple and mango gelatin, and topping with toasted coconut flakes. The gelatin colors can match any theme or season—use red and pink for romantic gatherings, orange and black for autumn celebrations, or red and green for winter festivities. For adults seeking more complex flavors, reduce the water in your gelatin mixture and replace half with brewed herbal tea or fruit juice for intensified taste. Scale this recipe up by using a half-sheet pan instead of a 9x13, which serves a crowd of 20-24 and stores just as well when properly covered. Individual portions can be baked in muffin tins, poked with a skewer, and topped individually—perfect for grab-and-go desserts or varied flavor combinations across a single batch.
Meal Prep FAQ
How long does this Easter Poke Cake actually last in the refrigerator?
When properly stored with an airtight lid or tight foil covering, this cake maintains excellent quality for five full days after the whipped topping is applied. The gelatin-soaked cake actually improves through day three, and while the topping may show slight weeping by day five, the flavor remains delicious and safe to eat.
What type of container works best for storing this cake?
A glass or ceramic 9x13 baking dish with a fitted snap-on lid provides ideal storage, maintaining consistent moisture and preventing odor absorption. If using the original baking pan, invest in a fitted plastic lid rather than plastic wrap, which sticks to the frosting and ruins presentation when removed.
Can I reheat individual slices if I prefer warm cake?
This Easter Poke Cake is designed to be served chilled, and reheating isn't recommended as it melts the whipped topping and causes the gelatin to become runny. If you prefer less-cold dessert, simply let your slice sit at room temperature for five to ten minutes before eating.
Is this cake suitable for packing in lunchboxes?
Absolutely, though you'll need an insulated lunchbox with an ice pack to maintain food safety since this cake requires refrigeration. Pack slices in small airtight containers, and consider adding the decorative elements separately to prevent them from bleeding color or becoming soggy.
How can I prevent getting tired of eating the same dessert all week?
Vary your accompaniments and presentation: pair different slices with fresh fruit, flavored yogurt, or different beverages. You can also make half the cake with one set of gelatin colors and the other half with different flavors, essentially creating two desserts in one pan.
Will the cake dry out even with the poke holes?
The poke holes actually prevent drying by creating channels for the gelatin moisture to penetrate throughout the cake. Combined with the protective whipped topping layer and proper airtight storage, this Easter Poke Cake stays remarkably moist through its entire storage life, often more so than regular frosted cakes.
Easter Poke Cake
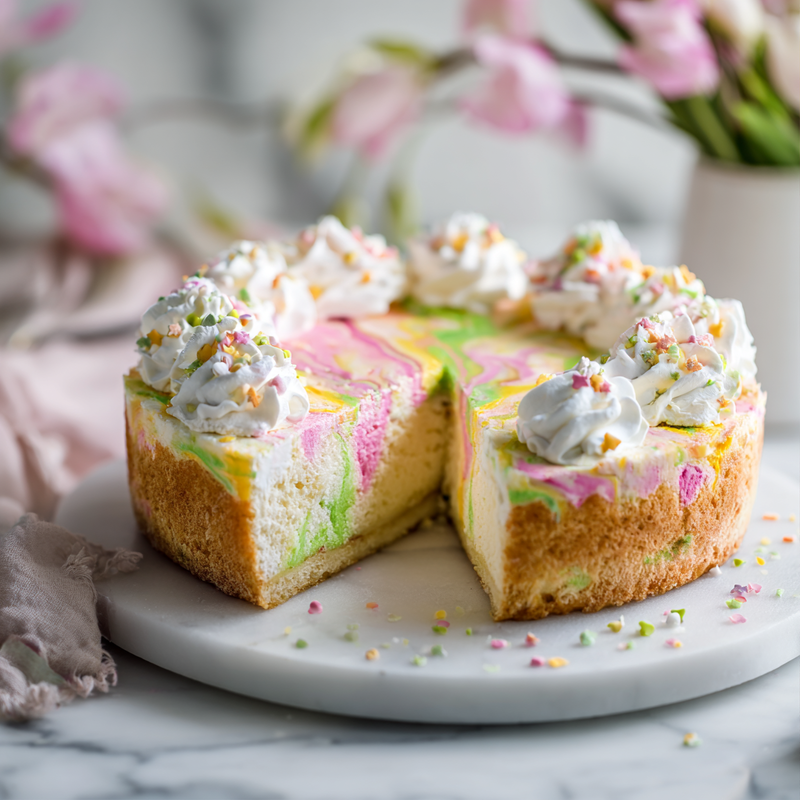
A vibrant spring dessert featuring moist vanilla cake infused with colorful fruity gelatin and topped with fluffy whipped topping. Perfect for make-ahead preparation and spring gatherings.
Prep Time
20 min
Cook Time
30 min
Total Time
4h 50m
Servings
12 servings
Ingredients
For 12 servings
- 1 box (15.25 oz) white or vanilla cake mix
- 3 large eggs
- 1/3 cup vegetable oil
- 1 cup water
- 1 package (3 oz) strawberry gelatin
- 1 package (3 oz) lime gelatin
- 1 package (3 oz) lemon gelatin
- 3 cups boiling water, divided
- 2 cups cold water, divided
- 1 container (8 oz) frozen whipped topping, thawed
- 1/2 cup pastel sprinkles or mini chocolate eggs, for decoration
Instructions
- 1
Prepare and bake cake
Preheat oven to 350°F (175°C). Spray a 9x13-inch baking pan with cooking spray. In a large bowl, combine cake mix, eggs, oil, and water according to package directions. Mix until smooth but do not overmix. Pour batter into prepared pan and bake for 28-32 minutes, until a toothpick inserted in center comes out clean.
- 2
Cool and poke cake
Remove cake from oven and let cool for 15 minutes. Using the round handle of a wooden spoon, poke holes all over the cake surface, spacing them about 1 inch apart. Press down until you reach the bottom of the pan, creating channels for the gelatin to flow through.
- 3
Prepare gelatin mixtures
In three separate medium bowls, prepare each gelatin flavor by dissolving one package in 1 cup of boiling water. Stir for 2 minutes until completely dissolved. Add 2/3 cup cold water to each bowl (slightly less than package directions for more concentrated flavor) and stir to combine.
- 4
Apply gelatin colors
Working with one color at a time, slowly drizzle the liquid gelatin over different sections of the cake, using a spoon to guide it into the poke holes. Create stripes, swirls, or random patterns as desired. Allow the gelatin to pool slightly on the surface before moving to the next color.
- 5
First refrigeration
Once all three gelatin colors have been applied, carefully transfer the uncovered cake to the refrigerator. Chill for at least 4 hours, but preferably overnight (8-12 hours), to allow the gelatin to fully absorb into the cake and set properly.
- 6
Add whipped topping
Remove cake from refrigerator. Ensure whipped topping is fully thawed and smooth. Spread the entire container of whipped topping evenly across the top of the cake using an offset spatula or the back of a spoon, creating a smooth, fluffy layer that covers all the colorful gelatin.
- 7
Decorate cake
Scatter pastel sprinkles or mini chocolate eggs evenly over the whipped topping layer. Gently press them down slightly so they adhere. You can create patterns, borders, or random distribution based on your preference.
- 8
Final chill and serve
Cover the cake tightly with a fitted lid or aluminum foil, being careful not to disturb the topping. Return to refrigerator for at least 1 hour before serving to allow the topping to firm up. Slice with a clean, sharp knife and serve chilled directly from the refrigerator.
Nutrition Facts
Per serving (estimated)
285 calories
Calories
42g
Carbs
3g
Protein
12g
Fat
0g
Fiber
320mg
Sodium
28g
Sugar


