
Easter Dirt Cups Dessert: A Fun, Festive Treat
Learn to make delightful dirt cups dessert with chocolate pudding, crushed cookies, and gummy worms. Perfect for spring gatherings and kids' parties!
cookwithlucia.com/recipes/easter-dirt-cups-dessert
There's something universally joyful about a dessert that makes you smile before you even take the first bite. Dirt cups dessert, with their playful layers of rich chocolate pudding, crumbled cookie "dirt," and cheerful gummy decorations, capture that sense of whimsy perfectly. This beloved American treat became a staple at spring gatherings and children's celebrations starting in the 1990s, offering a delightful combination of textures and flavors that appeals to both young dessert lovers and adults who appreciate a touch of nostalgia. The genius of this dessert lies in its simplicity—no baking required, yet the presentation is spectacular and memorable.
I'll be honest with you: the first time I encountered a truly well-made dirt cups dessert at a neighborhood gathering, I was charmed by how something so simple could generate such genuine delight around the table. The contrast between the silky chocolate pudding and the crunchy cookie crumbles creates a textural experience that keeps every spoonful interesting. While this recipe doesn't require advanced techniques or specialized equipment, it does reward attention to detail—the quality of your chocolate pudding, the texture of your cookie crumbles, and the thoughtfulness of your assembly all contribute to the final result.
This guide will walk you through every aspect of creating dirt cups dessert that look adorable and taste even better. We'll explore the best chocolate bases, discuss cookie options for that perfect "dirt" texture, and cover presentation ideas that will make your dessert table the centerpiece of any spring celebration or family gathering. Whether you're making these for a children's party or simply want to bring a smile to your dinner guests, this recipe is worth the small effort it requires.
The Origins and History
The dirt cups dessert emerged during the 1990s as part of a broader trend toward playful, interactive desserts that blurred the line between food and entertainment. While the exact origin is difficult to pinpoint, food historians trace its popularity to the rise of themed parties and the growing emphasis on making children's celebrations more creative and memorable. The concept was brilliantly simple: take familiar, beloved ingredients and present them in an unexpected way that delights the imagination.
What made dirt cups dessert particularly appealing was their accessibility—every ingredient could be found at a standard grocery store, and no special equipment was needed beyond clear cups and a mixing bowl. The dessert quickly spread through schools, community centers, and family gatherings across America, with each region adding its own creative touches. Some versions incorporated crushed graham crackers for a sandier texture, while others added layers of cream cheese for richness.
The dessert gained further popularity through parenting magazines and early food blogs, which recognized its potential as both a fun activity to make with children and an impressive-looking treat that required minimal culinary skill. Over time, variations emerged for different occasions and dietary needs, but the classic combination of chocolate pudding and cookie crumbles remained the gold standard. Today, dirt cups dessert have evolved from a purely children's novelty into a nostalgic treat that adults genuinely enjoy, with sophisticated versions appearing at casual gatherings and potlucks alongside more traditional desserts.
Understanding the Flavor Profile
The beauty of dirt cups dessert lies in the harmonious balance of rich chocolate sweetness against the slightly bitter, toasty notes of crushed chocolate cookies. The pudding layer provides a creamy, velvety sweetness that's never cloying—when made properly, it carries deep cocoa notes with a subtle dairy richness that feels indulgent without being heavy. The cookie crumbles add not just texture but also a complementary flavor dimension, with their slightly darker, more complex chocolate taste and hints of vanilla.
What makes this dessert so satisfying is the textural interplay that happens with every spoonful. You experience the smooth, cool creaminess of the pudding first, followed immediately by the satisfying crunch of cookie crumbles that gradually soften as they mingle with the pudding. If you've added whipped topping between layers, there's also a light, airy element that provides contrast to the denser components. The gummy decorations contribute a chewy, fruity sweetness that offers a pleasant surprise and keeps the chocolate from dominating completely.
The overall effect should be dessert that tastes decidedly chocolatey but not monotonous, with enough textural variety to keep each bite interesting. When properly assembled, dirt cups dessert deliver a cool, refreshing quality that makes them particularly appealing for spring and summer gatherings, while the chocolate elements provide enough richness to feel like a proper indulgence rather than just a light treat.
Essential Ingredients Explained
The chocolate pudding forms the foundation of your dirt cups dessert, and your choice here significantly impacts the final result. Instant chocolate pudding mix offers convenience and consistent results—look for brands with real cocoa listed prominently in the ingredients rather than artificial flavors. The pudding should set firmly enough to hold its shape when layered but remain creamy and smooth rather than rubbery. Cold whole milk creates the richest pudding, though you can use lower-fat milk if preferred; just know the texture will be slightly less luxurious.
Chocolate sandwich cookies are the traditional choice for creating that convincing "dirt" appearance, and they work beautifully because their dark color and fine crumb texture mimic soil remarkably well. The key is achieving the right consistency—not powdered, but not chunky either. You want small, varied pieces that look natural and provide crunch without being difficult to eat. Some bakers swear by chocolate graham crackers for a slightly different texture, while others prefer chocolate wafer cookies for a finer, more uniform crumb.
Whipped topping adds a crucial layer of lightness and visual appeal to dirt cups dessert. Whether you use prepared whipped topping from a tub or make your own whipped cream, this layer breaks up the density of the pudding and provides a beautiful white stripe when viewed through clear cups. If making your own, add a touch of vanilla extract and just enough sugar to lightly sweeten—you want it to complement rather than compete with the chocolate layers.
Clear plastic cups or small glass jars are essential for showcasing the beautiful layers you've created. The cups should be large enough to accommodate multiple layers—typically six to eight ounces—but not so large that the proportions become awkward. Clear vessels transform what could be a simple pudding cup into an impressive dessert presentation. Gummy worms or other gummy decorations add the playful finishing touch that makes dirt cups dessert so charming. Look for brightly colored varieties that contrast beautifully with the dark chocolate layers. The chewy texture and fruity flavor provide a delightful counterpoint to all that chocolate.
Vanilla extract enhances the chocolate pudding even when using a mix, adding depth and rounding out the flavor. Just a teaspoon mixed into your prepared pudding makes a noticeable difference. Finally, consider adding crushed nuts or toffee bits as optional mix-ins for adult versions of dirt cups dessert—these add sophistication and textural interest that elevates the dessert beyond its playful origins.
Mastering the Technique
The preparation of dirt cups dessert begins with properly mixing your chocolate pudding to achieve that perfectly smooth, creamy consistency. Pour your cold milk into a mixing bowl and gradually whisk in the pudding mix, beating continuously for about two minutes. The key is incorporating enough air to make the pudding light and creamy while ensuring no lumps remain. Let the pudding rest in the refrigerator for at least five minutes to set properly—rushing this step results in pudding that's too thin to layer effectively. You'll know it's ready when it mounds slightly on a spoon and holds its shape without being stiff.
Crushing your cookies requires a gentle touch and the right technique to achieve that perfect "dirt" texture for your dirt cups dessert. Place the cookies in a large zip-top bag, pressing out excess air before sealing. Use a rolling pin or the bottom of a heavy pan to crush them, applying firm but controlled pressure. Work in a rolling motion rather than pounding, which can create too much fine powder. You're aiming for a mixture of textures—mostly small pebble-sized pieces with some finer crumbs mixed in. Check the texture every few rolls and stop when about seventy percent of the cookies are crushed to your desired size. Reserve some slightly larger pieces for the top layer, as these create visual interest and better mimic the appearance of garden soil.
Assembly is where your dirt cups dessert truly comes together, and the layering technique matters more than you might think. Start with a generous spoonful of cookie crumbles at the bottom of each cup—this base layer should be about a quarter inch thick. Next, pipe or spoon in a layer of chocolate pudding, using a gentle hand to avoid disturbing the cookie layer below. If you're including whipped topping, add a thin layer now, spreading it carefully to the edges so it's visible through the clear cup. Repeat these layers once more, ending with a final generous topping of cookie crumbles that completely covers the pudding beneath.
The final decorating stage is where dirt cups dessert transform from simple layered pudding into something truly special. Press gummy worms halfway into the top cookie layer, allowing them to drape naturally over the edge or poke up as if crawling through dirt. Vary their positions for a more natural, playful look—some peeking out, others mostly buried. If you're feeling creative, add other edible decorations like candy rocks, mint leaves to suggest grass, or small chocolate eggs nestled in the "dirt." The goal is creating a scene that makes people smile while keeping the decorations edible and complementary to the chocolate base.
Refrigeration is the final technical step that many people underestimate when making dirt cups dessert. While the dessert is technically ready to eat immediately after assembly, allowing it to chill for at least two hours—or ideally four to six hours—allows the flavors to meld and the cookie crumbles to soften slightly where they touch the pudding. This creates more cohesive bites where the textures blend beautifully rather than remaining completely separate. The top layer of cookies should stay relatively crunchy, but the interior layers develop a more integrated texture that's genuinely delightful.
Common Pitfalls and How to Fix Them
One of the most frequent issues when making dirt cups dessert is pudding that's too runny or too thick, both of which compromise the final result. If your pudding is too thin and won't hold its layers, you likely didn't whisk it long enough or used milk that wasn't cold enough. The fix is to return it to the refrigerator for another fifteen to twenty minutes, whisking briefly every five minutes to help it set. If it's still too thin after thirty minutes total chilling time, you can fold in a small amount of additional instant pudding mix—about one tablespoon per two cups of prepared pudding—and whisk thoroughly before chilling again. Conversely, if your pudding becomes too thick and stiff, gently fold in a tablespoon or two of cold milk until it reaches a more spoonable consistency.
Cookie crumbles that are too fine create a muddy, unappetizing appearance rather than the charming "dirt" effect you want in your dirt cups dessert. If you've over-crushed your cookies into a powder, don't start over—instead, crush a few additional cookies more carefully, leaving them in larger pieces, and mix these into your over-processed crumbs. This creates varied texture and saves your batch. The opposite problem—cookies that are too chunky—makes the dessert difficult to eat and layers poorly. Simply return the large pieces to your bag and crush them further, checking the texture frequently.
Layering problems often arise when people work too quickly or use the wrong tools for their dirt cups dessert assembly. If your layers are mixing together and creating a muddy appearance, slow down and use a piping bag or a spoon with a gentle hand. When adding pudding, deposit it in the center of the cup first, then carefully spread it outward with the back of your spoon. This technique minimizes disturbance to the cookie layer below. If you've already mixed layers accidentally, embrace it—the dessert will still taste wonderful even if the visual presentation isn't perfect.
Decorations that sink into the pudding instead of perching on top indicate that you either didn't add enough cookie crumbles as a top layer or added your decorations before the pudding had properly set. The solution for future batches is ensuring your final cookie layer is thick enough—at least a half inch—and well-distributed to create a stable surface. If your gummy worms have already sunk, gently remove them, add more cookie crumbles to the top, and reposition the decorations. For particularly soft gummy candies, try chilling them briefly before adding to your dirt cups dessert so they're firmer and less likely to sink.
Storage issues can affect even perfectly made dirt cups dessert if not handled properly. If your dessert becomes watery after refrigeration, condensation is forming inside your storage container. Always cover individual cups with plastic wrap, pressing it directly onto the surface before refrigerating, or use cups with tight-fitting lids. If you're stacking cups, place paper towels between layers to absorb any moisture. If your cookie topping becomes soggy, it's actually the cookies properly absorbing moisture from the pudding—this is normal for the interior layers but shouldn't happen to the very top layer if you've added it correctly and the dessert hasn't been stored for too long.
Regional Twists Worth Trying
Across different regions of America, creative home cooks have developed variations on dirt cups dessert that reflect local preferences and ingredient availability. In the South, some bakers incorporate crushed pecans or walnuts into the cookie crumbles, adding a toasty, nutty dimension that complements the chocolate beautifully. Others fold a bit of cream cheese into the pudding layer, creating a richer, tangier base reminiscent of chocolate cheesecake. This Southern-style version tends to be more indulgent and dessert-like, moving away from the purely playful children's treat into something adults genuinely crave.
The Midwest variation often features layers of peanut butter, either mixed into the pudding or added as a separate thin layer between the chocolate pudding and whipped topping. Some versions use crushed peanut butter sandwich cookies mixed with the chocolate cookies for the "dirt" layer, creating a flavor combination that's distinctly American and utterly delicious. The addition of peanut butter makes dirt cups dessert more substantial and satisfying while maintaining the playful presentation.
Coastal regions, particularly in the Northeast, sometimes create "beach" themed versions using crushed vanilla cookies or graham crackers to simulate sand rather than dirt, topped with gummy fish or sharks instead of worms. While technically a departure from traditional dirt cups dessert, these variations maintain the same layered pudding concept and playful spirit. The vanilla-chocolate combination is less intensely sweet and appeals to those who find all-chocolate versions too rich.
Modern variations inspired by global flavors have also emerged, with some creative bakers adding a layer of dulce de leche or caramel between the pudding layers, or incorporating crushed cookies with different flavors like mint or orange cream. These international-inspired twists on dirt cups dessert demonstrate how a simple, whimsical American dessert can serve as a canvas for diverse flavor combinations while maintaining its essential charm and accessibility.
The Perfect Spread
When serving dirt cups dessert as part of a larger celebration or family gathering, consider the complete dessert experience you're creating. These individual cups are naturally self-contained, making them perfect for casual outdoor gatherings where guests are standing or children are running around. Pair them with lighter, fruit-based desserts like berry salad or fruit skewers to provide contrast—the fresh, tart flavors of seasonal fruit beautifully balance the rich chocolate of your dirt cups.
For a cohesive spring celebration spread, arrange your dirt cups dessert on a serving tray lined with artificial grass or green tissue paper, creating a garden theme that enhances their playful appearance. Surround them with other treats that complement rather than compete—perhaps sugar cookies decorated with pastel icing, lemon bars, or coconut macaroons. The variety of flavors and textures keeps guests interested while the dirt cups remain the visual centerpiece.
Beverage pairings matter more than many people realize when serving dirt cups dessert. Cold milk is the obvious choice, particularly for children, but consider offering iced coffee or cold brew for adults—the coffee's slight bitterness cuts through the sweetness beautifully. Fruit punches or lemonade also work well, providing acidic brightness that refreshes the palate between bites of rich chocolate pudding. For more sophisticated gatherings, consider a dessert tea service with mint or chamomile tea, which complement chocolate wonderfully.
The presentation context affects how people experience your dirt cups dessert. For children's parties, set them out on a low table where little hands can easily reach them, perhaps with each child's name written on their cup. For mixed-age gatherings, create a dessert station where dirt cups are displayed alongside serving spoons, extra gummy worms for decoration, and napkins, allowing guests to customize their portions. This interactive element adds to the fun and makes the dessert feel like an experience rather than just something sweet to eat.
Keeping and Reheating
Proper storage is essential for maintaining the quality of your dirt cups dessert, and fortunately, they're quite forgiving if handled correctly. Assembled dirt cups can be refrigerated for up to three days when properly covered—use plastic wrap pressed directly against the surface of each cup, or if your cups have lids, seal them tightly. The key is preventing air exposure, which can cause the pudding to develop a skin and the cookie crumbles to become excessively soggy. Store them on a flat surface in your refrigerator rather than stacking if possible, as this prevents the weight of upper cups from compressing lower ones.
Interestingly, dirt cups dessert actually improve slightly after a few hours of refrigeration, making them an excellent make-ahead option for gatherings. The cookies soften where they contact the pudding, creating a more integrated texture that many people prefer to the initially crunchy layers. The flavors also meld together, with the chocolate notes becoming more harmonious. However, don't make them more than a day ahead if you want any crunch remaining in your cookie layers—after twenty-four hours, most of the texture contrast will have softened considerably.
Freezing dirt cups dessert is possible but comes with caveats. The pudding base freezes reasonably well, though it may become slightly grainy upon thawing. The bigger issue is the whipped topping, which can separate and become watery when frozen and thawed. If you do freeze them, leave off the gummy decorations and top cookie layer, adding these fresh after thawing. Freeze individual cups wrapped tightly in plastic wrap and aluminum foil for up to one month. Thaw overnight in the refrigerator, never at room temperature, and add fresh cookie crumbles and decorations just before serving.
There's no reheating involved with dirt cups dessert since they're meant to be served cold, but bringing them to the proper serving temperature matters for optimal flavor and texture. Remove them from the refrigerator about five minutes before serving if your kitchen is warm—this slight tempering allows the chocolate flavor to become more pronounced and the pudding to soften just enough for the perfect creamy texture. In cooler environments, you can serve them directly from the refrigerator. Never leave dirt cups at room temperature for more than two hours, as the dairy-based pudding can become unsafe to eat.
Your Questions Answered
Can I make dirt cups dessert with homemade pudding instead of instant mix?
Absolutely, and many people prefer the deeper, more complex chocolate flavor that homemade pudding provides. Prepare your favorite chocolate pudding recipe from scratch using cocoa powder, sugar, milk, and cornstarch or egg yolks as a thickener. The key is making it slightly thicker than you would for eating plain, as you need it to support layers without becoming runny. Let your homemade pudding cool completely before assembling your dirt cups dessert, and be aware that it will need longer chilling time—at least four hours or overnight—to set properly in the layered format.
What can I substitute for the gummy worms if I can't find them?
Many alternatives work beautifully for decorating dirt cups dessert while maintaining the playful garden theme. Gummy butterflies, ladybugs, or flowers create a spring garden effect that's equally charming. For a simpler approach, use fresh mint leaves or small fresh berries to suggest a garden setting. Chocolate-covered raisins or chocolate chips can represent "rocks" in your dirt. If you're making these for more sophisticated gatherings, consider candied violets or edible flowers for an elegant take on the dirt cup concept that's still whimsical but more refined.
How far in advance can I assemble dirt cups dessert for a large gathering?
For optimal texture and presentation, assemble your dirt cups dessert no more than twenty-four hours before serving, though twelve to eighteen hours is ideal. This timing allows the flavors to meld without the cookie layers becoming completely soggy. If you're making a very large quantity, consider prepping components separately—making and chilling the pudding, crushing the cookies, and preparing the whipped topping all a day ahead, then assembling the cups the morning of your event. This assembly-line approach is efficient for large batches and ensures every cup is fresh. Add gummy decorations no more than a few hours before serving to prevent them from hardening or becoming too soft.
Can I make a larger family-style version instead of individual cups?
You certainly can create a trifle-style version of dirt cups dessert in a large clear bowl, which makes an impressive centerpiece and simplifies serving for very large groups. Use the same layering technique in a trifle bowl or large glass serving dish, creating thicker layers that are visible from the side. The proportions remain the same—alternate cookie crumbles, pudding, and whipped topping, ending with a thick layer of cookies on top. Decorating a large version is particularly fun, as you can create elaborate scenes with multiple gummy creatures, candy decorations, and even small plastic shovels or rakes pushed into the "dirt" for added whimsy. Serve with a large spoon, scooping down through all layers for each portion.
What's the best way to transport dirt cups dessert to a gathering?
Transporting these delicate desserts requires some planning to maintain their beautiful layers and prevent spills. If your cups have lids, that's ideal—simply stack them carefully in a sturdy box or carrier, placing crumpled paper towels or cloth between layers to prevent shifting. For cups without lids, cover each tightly with plastic wrap, then arrange them in a shallow box where they fit snugly enough not to slide around. A rimmed baking sheet works well for smaller quantities. Keep them upright and on a flat surface during transport, and bring them in from the car immediately upon arrival, going straight to the refrigerator. If your drive is longer than thirty minutes, consider transporting them in a cooler with ice packs positioned carefully so they don't tip the cups.
How can I make dirt cups dessert more suitable for adult palates?
Elevating dirt cups dessert for adult gatherings is easier than you might think while maintaining their essential charm. Use dark chocolate pudding made with high-quality cocoa powder for a more sophisticated, less sweet base. Add a tablespoon of espresso powder to your pudding for depth, or fold in a bit of mascarpone cheese for richness. Instead of regular sandwich cookies, try using chocolate biscotti or amaretti cookies for your "dirt" layer—the added texture and complex flavor makes a significant difference. Consider adding a thin layer of chocolate ganache or a sprinkle of sea salt between layers. For decorations, skip the bright gummy worms in favor of chocolate-covered espresso beans, fresh berries, or edible flowers. These simple adjustments transform dirt cups dessert from a children's novelty into a dessert that adults genuinely appreciate for its flavor, not just its nostalgia factor.
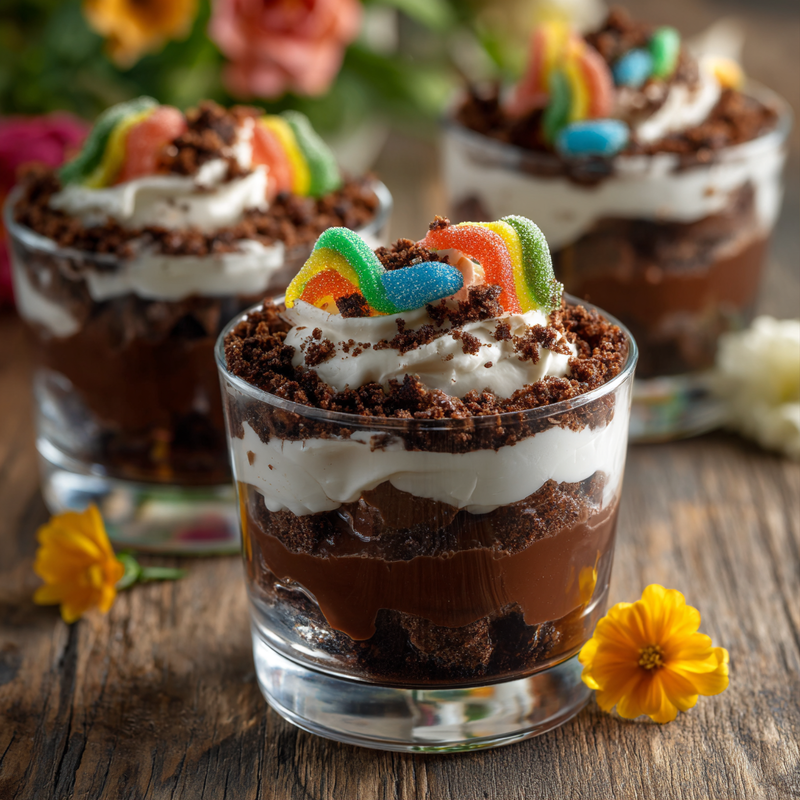
Easter Dirt Cups Dessert
A playful layered dessert featuring chocolate pudding, crushed cookie 'dirt,' whipped topping, and gummy worm decorations. Perfect for spring celebrations and family gatherings.
Prep Time
20 min
Cook Time
0 min
Total Time
4h 20m
Servings
8 servings
Ingredients
For 8 servings
- 2 packages (3.9 ounces each) instant chocolate pudding mix
- 4 cups cold whole milk
- 1 teaspoon vanilla extract
- 1 package (14.3 ounces) chocolate sandwich cookies, crushed into crumbs
- 2 cups whipped topping, thawed if frozen
- 16-20 gummy worms or other gummy candies
- 8 clear plastic cups or small glass jars (6-8 ounce capacity)
- Optional: fresh mint leaves for garnish
Instructions
- 1
Prepare the pudding
In a large mixing bowl, combine the instant chocolate pudding mix with cold milk. Whisk vigorously for 2 minutes until smooth and well combined. Add vanilla extract and whisk briefly to incorporate. Refrigerate for 5-10 minutes until the pudding sets to a thick, spoonable consistency that will hold its shape in layers.
- 2
Crush the cookies
Place the chocolate sandwich cookies in a large zip-top plastic bag, pressing out excess air before sealing. Using a rolling pin or the bottom of a heavy pan, crush the cookies into varied-sized crumbs with a texture resembling dirt. Most pieces should be small and pebble-sized, with some finer crumbs mixed throughout. Avoid crushing into a fine powder.
- 3
Create the first layer
Spoon approximately 2-3 tablespoons of crushed cookie crumbs into the bottom of each clear cup, creating an even layer about 1/4 inch thick. Gently tap the cups on the counter to settle the crumbs into an even base layer that will support the pudding above.
- 4
Add pudding layer
Spoon or pipe about 1/4 cup of prepared chocolate pudding over the cookie layer in each cup. Use the back of a spoon to gently spread the pudding to the edges, being careful not to disturb the cookie layer beneath. The pudding layer should be approximately 1/2 inch thick.
- 5
Add whipped topping
Spoon about 2 tablespoons of whipped topping over the pudding layer in each cup. Spread gently and evenly to create a white layer visible through the sides of the clear cups. This layer adds lightness and visual appeal to the dessert.
- 6
Repeat layers
Add another layer of cookie crumbs (about 2 tablespoons per cup), followed by another layer of pudding (about 1/4 cup), creating a second tier of the dessert. These repeated layers create visual interest and ensure every spoonful has the perfect ratio of pudding to cookie crumbles.
- 7
Create final topping
Finish each cup with a generous layer of crushed cookie crumbs, approximately 3-4 tablespoons per cup, completely covering the pudding beneath. This top layer should be thick enough to support the gummy decorations and create the "dirt" appearance that makes the dessert so charming.
- 8
Add decorations
Press 2-3 gummy worms halfway into the top cookie layer of each cup, positioning them so they appear to be crawling through the dirt. Vary their positions for a natural, playful look. If desired, add fresh mint leaves to suggest grass or other edible decorations.
- 9
Chill and serve
Cover each cup with plastic wrap or lids and refrigerate for at least 2-4 hours before serving, though 4-6 hours is ideal. This chilling time allows the flavors to meld and the cookies to soften slightly where they touch the pudding, creating a more cohesive texture. Serve cold directly from the refrigerator.
Nutrition Facts
Per serving (estimated)
385 calories
Calories
58g
Carbs
6g
Protein
15g
Fat
2g
Fiber
520mg
Sodium
42g
Sugar


