Easter Dirt Cake Casserole | No-Bake Spring Dessert
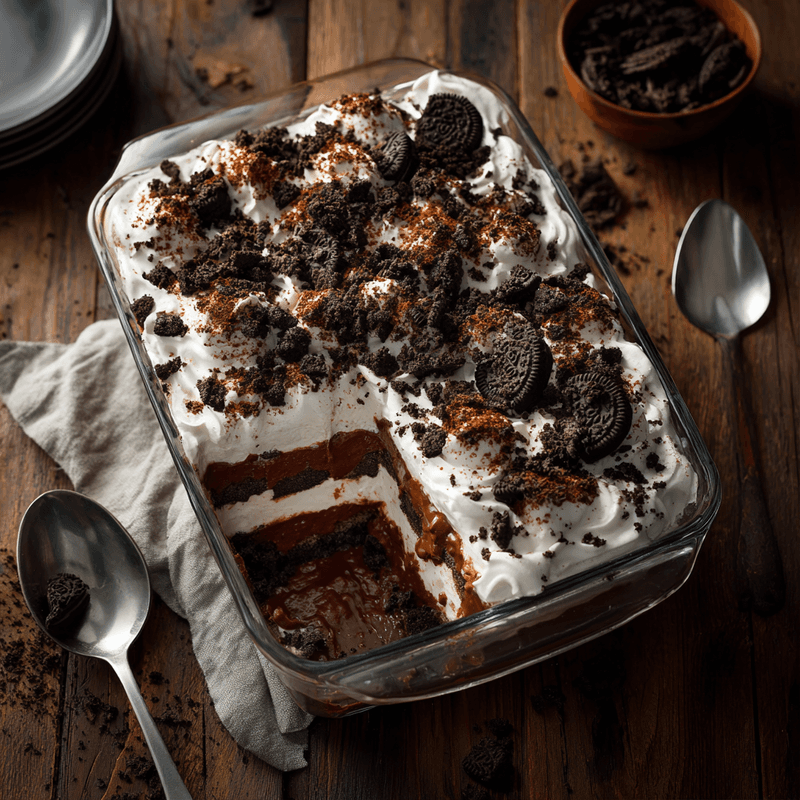
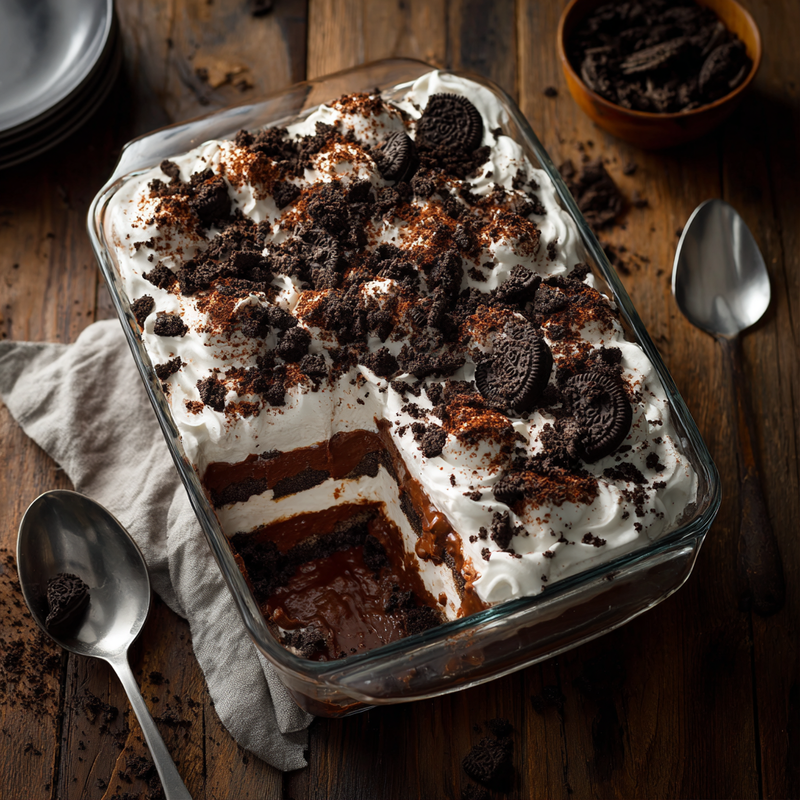
Creamy no-bake dirt cake casserole perfect for spring gatherings. Layers of chocolate cookies, cream cheese, and pudding. Make ahead and serve chilled!
cookwithlucia.com/recipes/easter-dirt-cake-casserole-creamy-no-bake-spring-dessert
There's something magical about desserts that look like they came from a fancy bakery but actually require zero oven time. This creamy no-bake dirt cake casserole is exactly that kind of showstopper—layers of rich chocolate cookie crumbs, silky cream cheese filling, and velvety pudding that come together in less than thirty minutes of active work. While most people think of elaborate cakes when planning for spring gatherings or family celebrations, this casserole-style dessert offers all the wow factor with a fraction of the effort.
The beauty of this dirt cake casserole lies in its make-ahead magic. You can assemble it the night before your gathering, let it chill overnight, and watch it transform into a perfectly set, spoonable dessert that feeds a crowd. No last-minute stress, no oven monitoring, no worrying about cake layers sliding or frosting melting. Just pure, creamy chocolate bliss that gets better as it sits in the refrigerator, allowing the cookie crumbs to soften slightly and all those flavors to meld together into something truly special.
I love how this dessert brings a playful element to any spring table. The chocolate cookie "dirt" layers create visual drama, while the creamy filling provides that luxurious mouthfeel everyone craves. Whether you're hosting a weekend brunch, planning a family dinner, or simply want something special for a cozy evening at home, this no-bake dirt cake casserole delivers impressive results with minimal kitchen time. Let me walk you through exactly how to make this spring dessert a regular part of your celebration repertoire.
Why This Recipe Is Perfect for Meal Prep
Dessert meal prep might sound unusual, but this dirt cake casserole is genuinely built for advance preparation. The cream cheese and pudding layers actually benefit from extended refrigeration time, becoming firmer and more cohesive with each passing hour. Unlike fresh fruit desserts that oxidize or whipped cream toppings that deflate, every component here maintains its integrity for days.
The chocolate sandwich cookies that form the "dirt" layers have a fascinating transformation during storage. Initially crisp and crunchy, they gradually absorb moisture from the creamy layers, softening into a texture that's somewhere between cookie and cake. This isn't a flaw—it's the whole point. That moisture migration creates the signature texture that makes dirt cake so addictive. After three days in the refrigerator, you'll have the ideal consistency where cookies are soft but still provide structure.
From a nutritional balance perspective, this dessert offers surprising satisfaction. The cream cheese provides protein and fat that create lasting fullness, while the pudding adds calcium. The cookies contribute carbohydrates for quick energy. When portioned appropriately, this dirt cake casserole becomes a controlled indulgence rather than an endless temptation, especially when you divide it into individual servings right after assembly.
The hands-off nature of this recipe makes it perfect for busy schedules. You can prep components during commercial breaks, assemble everything in one focused session, and have dessert solved for an entire week of lunches or after-dinner treats. The total hands-on time is under thirty minutes, with the refrigerator doing all the heavy lifting while you focus on other tasks.
What You'll Need
The ingredient list for this no-bake dirt cake casserole is refreshingly short, with items you likely already have or can easily find at any grocery store. Start with a full package of chocolate sandwich cookies—the classic kind with cream filling. You'll need about thirty-six cookies total, which you'll crush into crumbs. I recommend pulsing them in a food processor for the most even texture, but placing them in a sealed bag and crushing with a rolling pin works perfectly too.
For the creamy base layer, grab two blocks of full-fat cream cheese at room temperature. This temperature detail matters enormously for meal prep success. Cold cream cheese creates lumps that never fully smooth out, even with vigorous mixing. Set your cream cheese on the counter for at least an hour before you begin, or use the defrost setting on your microwave in ten-second bursts. You'll also need half a cup of softened butter to blend with the cream cheese, creating that rich, luxurious foundation.
The pudding component requires two packages of instant chocolate pudding mix and cold milk. Instant pudding is essential here because it sets quickly without cooking, allowing you to layer everything efficiently. Make sure you're buying instant, not cook-and-serve pudding. You'll also need a container of frozen whipped topping, thawed overnight in the refrigerator. Some of this gets folded into the cream cheese mixture, while more gets layered throughout.
Container selection impacts your meal prep success significantly. A 9x13 inch glass baking dish is ideal—glass doesn't retain odors, allows you to see those beautiful layers from the side, and provides plenty of surface area for even portions. If you're planning individual meal prep servings, small glass or plastic containers with tight-fitting lids work wonderfully. For bulk buying efficiency, stock up on chocolate sandwich cookies when they're on sale. They have a long shelf life, and you'll want to make this dirt cake casserole repeatedly once you taste it.
The Batch Cooking Method
Begin your dirt cake casserole assembly by crushing your chocolate sandwich cookies while the cream cheese softens. This parallel processing saves valuable time. Place cookies in a food processor and pulse until you have fine crumbs with some slightly larger pieces for textural interest. If working manually, seal cookies in a heavy-duty plastic bag and crush with a rolling pin, checking frequently to ensure even sizing. You want crumbs that resemble coarse sand, not powder. Set aside about three-quarters of the crumbs and reserve the rest for topping.
In a large mixing bowl, beat together the softened cream cheese and butter with an electric mixer until completely smooth and fluffy. This takes about three minutes on medium speed. Scrape down the bowl sides frequently to ensure no cream cheese chunks hide at the bottom. Add one cup of powdered sugar and continue beating until fully incorporated. The mixture should look pale and airy. Fold in half of the thawed whipped topping using a spatula, cutting through the center and folding over the edges to maintain as much airiness as possible.
For the pudding layer, whisk together the instant chocolate pudding mix with cold milk in a separate bowl. Use a wire whisk and beat vigorously for two full minutes until the mixture thickens noticeably. Don't skip this whisking time—proper hydration ensures the pudding sets firmly enough to support the layers above it. Let it rest for five minutes while you prepare your assembly station. Gather your baking dish, cookie crumbs, cream cheese mixture, pudding, and remaining whipped topping.
Now comes the assembly line approach that makes this dirt cake casserole so efficient. Spread half the cookie crumbs across the bottom of your baking dish, pressing gently to create an even layer. Spread the entire cream cheese mixture over the crumbs, using an offset spatula to reach corners and create a smooth surface. Pour the prepared chocolate pudding over the cream cheese layer, spreading carefully to avoid disturbing the layer beneath. Top with the remaining whipped topping, spreading to the edges. Finally, sprinkle the reserved cookie crumbs over everything, creating that signature "dirt" appearance.
The total active cooking time for this dirt cake casserole is approximately twenty-five minutes, with zero passive cooking since nothing goes in the oven. However, the passive chilling time is crucial—plan for at least four hours, though overnight is better. If you're batch prepping for the week, this timing works beautifully: assemble on Sunday afternoon, chill overnight, and portion on Monday morning.
The Weekly Game Plan
For optimal meal prep efficiency with this no-bake dirt cake casserole, I recommend a Sunday afternoon prep session. Around three or four o'clock gives you plenty of time to assemble everything, clean up your workspace, and still have the dessert fully set by Monday morning. Start by setting out your cream cheese and butter immediately after lunch to ensure they're perfectly softened by prep time. Thaw your whipped topping in the refrigerator starting Saturday night.
Sunday becomes your focused assembly day. Follow the batch cooking method outlined above, working steadily through each layer. Once your dirt cake casserole is assembled in the baking dish, cover it tightly with plastic wrap or aluminum foil. Make sure the covering doesn't touch the top cookie crumb layer if possible. Transfer to the refrigerator and let it work its magic overnight. This extended chill time allows the cream cheese layer to firm up, the pudding to set completely, and those cookie crumbs to begin their textural transformation.
Monday morning, decide whether you want to keep the dessert as one large casserole or portion it into individual servings. For true meal prep efficiency, I cut the entire casserole into twelve equal portions and transfer them to individual containers. This approach controls portions automatically and makes grabbing dessert throughout the week effortless. Use a sharp knife dipped in hot water, wiping clean between cuts for neat edges. Scoop each portion carefully with a spatula to maintain those distinct layers.
Throughout the week, your dirt cake casserole remains ready to serve. Days one through three offer the best texture, with cookies that are softened but still maintain some structure. Days four and five see the cookies fully integrated into the creamy layers, creating an almost trifle-like consistency. Both stages are delicious—just different. To add variety across the week, consider garnishing individual servings differently each day: crushed cookies on Monday, a drizzle of chocolate syrup on Tuesday, fresh strawberries on Wednesday. This keeps the base recipe interesting while requiring minimal extra effort.
Smart Storage and Reheating
Container selection dramatically impacts how well this dirt cake casserole maintains its quality throughout the week. Glass containers with airtight lids rank highest for several reasons: they don't absorb odors from the chocolate, they allow you to admire those gorgeous layers, and they clean up beautifully in the dishwasher. If you're storing the entire casserole undivided, keep it in the original 9x13 dish with plastic wrap pressed directly against the surface to prevent drying, then cover the entire dish with foil for extra protection.
For individual portions, compartmentalized containers aren't necessary since this is a standalone dessert, but containers around two-cup capacity work perfectly for generous servings. Plastic containers are fine for short-term storage, but avoid thin, flimsy options that might crack when stacked in a full refrigerator. Stack containers carefully, placing heavier items on the bottom to avoid crushing the delicate whipped topping layer.
The refrigerator life of this no-bake dirt cake casserole extends a full five days when stored properly at 40°F or below. The cream cheese and pudding layers remain food-safe, and the cookies, while increasingly soft, never become unpleasantly soggy. Beyond five days, the whipped topping may begin to separate slightly, and the overall texture becomes more pudding-like throughout. If you notice any off smells or discoloration, discard the dessert, though this is rare with proper storage.
Freezer storage works surprisingly well for longer-term meal prep. Portion the dirt cake casserole into individual freezer-safe containers, leaving a quarter-inch headspace for expansion. Freeze for up to one month. Thaw portions overnight in the refrigerator rather than at room temperature to maintain food safety and texture. The whipped topping may become slightly more airy after freezing, and the cookies will be softer, but the overall dessert remains delicious.
This is a serve-cold dessert, so reheating doesn't apply in the traditional sense. Simply remove from the refrigerator ten minutes before serving to take the chill off slightly, which allows the flavors to bloom more fully on your palate. If you've frozen portions, the same ten-minute counter time after thawing helps achieve ideal serving temperature. For brown-bag lunches or office meal prep, this dirt cake casserole travels beautifully in an insulated lunch bag with an ice pack, staying perfectly chilled until your afternoon dessert break.
Customization Ideas
While the classic chocolate version of this dirt cake casserole is beloved for good reason, the base formula invites endless creativity. Swap the chocolate sandwich cookies for vanilla, lemon, or even mint varieties to completely transform the flavor profile. Vanilla cookies with vanilla pudding create an elegant, sophisticated version, while mint cookies with chocolate pudding deliver refreshing contrast perfect for warm spring afternoons.
The pudding component offers another major customization point. Try vanilla pudding for a lighter feel, or butterscotch for caramel-like richness. For chocolate lovers, use chocolate cream cheese pudding for even more intense cocoa flavor. Just maintain the same quantity—two packages of instant pudding to three cups of cold milk. The setting chemistry remains consistent across flavors.
To make this dirt cake casserole work for different dietary needs, several straightforward swaps maintain the overall structure. Use reduced-fat cream cheese and sugar-free pudding to lower calories significantly. Dairy-free cream cheese and pudding made with plant-based milk accommodate lactose intolerance, though you'll want to test your specific brands as setting times may vary. The texture won't be identical, but it remains satisfyingly creamy.
Scaling up for family meal prep versus individual portions simply requires math. The recipe as written serves twelve generous portions. Double everything for a crowd of twenty-four, using two 9x13 dishes. For smaller households, halve the recipe and use an 8x8 square pan. The layering technique and chilling time remain exactly the same regardless of scale.
Meal Prep FAQ
How long does this dirt cake casserole really last in the refrigerator?
When stored properly in an airtight container at consistent refrigerator temperature, this dessert maintains excellent quality for five full days. The cream cheese and pudding layers contain enough preservative properties to stay fresh, and the cookies continue to soften gradually without becoming unpleasant. After day five, the texture becomes more uniform and pudding-like, which some people actually prefer. Always use your senses to check—if it smells off or shows any mold, discard it immediately.
What containers work best for individual portions?
Glass containers with snap-on lids in two-cup capacity are my top recommendation. They preserve the distinct layers visually, which makes grabbing your prepared dessert more appealing throughout the week. The glass doesn't absorb chocolate odors and cleans up perfectly. If using plastic, choose thicker containers marked microwave-safe even though you won't heat this dessert, as that designation usually indicates more durable construction that stacks well without cracking.
Can I reheat this dessert or does it need to stay cold?
This no-bake dirt cake casserole is designed to be served chilled, so reheating not only isn't necessary, it would actually damage the texture. The whipped topping would melt, the pudding would become liquid, and the cream cheese would separate. Simply remove from the refrigerator about ten minutes before serving to take the edge off the cold temperature. This brief tempering allows the flavors to become more pronounced on your palate.
How do I pack this for work lunches without making a mess?
The key is proper portioning and sealing. Cut your servings cleanly using a hot, wet knife, then transfer each portion to its own container with a tight-fitting lid. Place the container upright in an insulated lunch bag with an ice pack to maintain temperature and prevent shifting. If you're concerned about the top getting messy, place a small piece of parchment paper directly on the whipped topping before sealing the lid. This prevents any topping from sticking to the lid during transport.
Will kids eat this for school lunches, and is it appropriate?
Many families successfully pack this dirt cake casserole for older children's lunches, especially when school policies allow homemade desserts. The playful "dirt" appearance appeals to kids, and the creamy texture is universally loved. However, keep food safety in mind—ensure your child's lunch bag keeps the dessert cold until lunchtime, as dairy-based desserts shouldn't sit at room temperature for extended periods. Pack it with an ice pack and position it away from any warm lunch items.
How can I avoid getting tired of eating the same dessert all week?
The secret to preventing meal prep fatigue with this dirt cake casserole is strategic garnishing and presentation changes. Keep the base dessert simple, then dress each serving differently throughout the week. Monday might feature extra cookie crumbs on top, Tuesday gets a drizzle of chocolate syrup, Wednesday includes fresh strawberries, Thursday gets a dollop of extra whipped topping, and Friday features a sprinkle of cocoa powder. These small variations keep your palate interested while maintaining the efficiency of batch preparation. You're eating the same base dessert, but your brain registers each serving as slightly different, which prevents that "not this again" feeling that derails so many meal prep efforts.
No-Bake Dirt Cake Casserole
A creamy, layered no-bake dessert featuring chocolate sandwich cookies, cream cheese filling, and chocolate pudding. Perfect for spring gatherings and makes enough to feed a crowd.
Prep Time
25 min
Cook Time
0 min
Total Time
4h 25m
Servings
12 servings
Ingredients
For 12 servings
- 36 chocolate sandwich cookies, crushed into crumbs
- 16 ounces cream cheese, softened to room temperature
- 1/2 cup unsalted butter, softened to room temperature
- 1 cup powdered sugar
- 12 ounces frozen whipped topping, thawed and divided
- 2 packages (3.9 ounces each) instant chocolate pudding mix
- 3 cups cold whole milk
Instructions
- 1
Crush the cookies
Place the chocolate sandwich cookies in a food processor and pulse until they form fine crumbs with some slightly larger pieces for texture. Alternatively, seal cookies in a heavy-duty plastic bag and crush with a rolling pin until they resemble coarse sand. Set aside three-quarters of the crumbs for layering and reserve the remaining quarter for topping.
- 2
Prepare cream cheese mixture
In a large mixing bowl, beat the softened cream cheese and butter together with an electric mixer on medium speed for about three minutes until completely smooth and fluffy. Scrape down the bowl sides frequently to ensure no lumps remain. The mixture should look pale and airy when properly combined.
- 3
Add sugar and whipped topping
Add the powdered sugar to the cream cheese mixture and continue beating until fully incorporated, about one minute. Fold in half of the thawed whipped topping using a spatula, cutting through the center and folding over the edges to maintain airiness. Set this cream cheese mixture aside.
- 4
Prepare chocolate pudding
In a separate bowl, whisk together the instant chocolate pudding mix with the cold milk using a wire whisk. Beat vigorously for two full minutes until the mixture thickens noticeably and becomes smooth. Let the pudding rest for five minutes to allow it to set to the proper consistency.
- 5
Create cookie base layer
Spread half of the cookie crumbs across the bottom of a 9x13 inch baking dish, pressing gently with your hands or the bottom of a measuring cup to create an even, compact layer. This forms the foundation that supports all the other layers.
- 6
Add cream cheese layer
Spread the entire cream cheese mixture over the cookie crumb base, using an offset spatula to reach all corners and create a smooth, even surface. Work carefully to avoid disturbing the cookie layer beneath. This layer should be uniform in thickness from edge to edge.
- 7
Layer the pudding
Pour the prepared chocolate pudding over the cream cheese layer, spreading carefully with a spatula to distribute it evenly without disturbing the cream cheese beneath. Start from the center and work outward to the edges, maintaining distinct layers.
- 8
Add final toppings
Spread the remaining whipped topping over the pudding layer, covering it completely from edge to edge. Sprinkle the reserved cookie crumbs evenly over the whipped topping to create the signature "dirt" appearance. Press very lightly so the crumbs adhere slightly to the topping.
- 9
Chill and set
Cover the baking dish tightly with plastic wrap or aluminum foil, ensuring the covering doesn't touch the top cookie crumb layer if possible. Refrigerate for at least four hours or overnight until all layers are completely set and firm. The longer chilling time allows flavors to meld and creates the best texture.
- 10
Portion and serve
When ready to serve, cut the dirt cake casserole into twelve equal portions using a sharp knife dipped in hot water, wiping clean between cuts for neat edges. Use a spatula to carefully lift each portion, maintaining the distinct layers. Serve chilled and store any leftovers covered in the refrigerator for up to five days.
Nutrition Facts
Per serving (estimated)
425 calories
Calories
52g
Carbs
6g
Protein
22g
Fat
1g
Fiber
380mg
Sodium
38g
Sugar


