Easter Dirt Cake Casserole: Amazing Spring Dessert Treat
Discover how to make an amazing Easter Dirt Cake Casserole with layers of creamy pudding, cookies, and toppings. Perfect for spring gatherings!
cookwithlucia.com/recipes/easter-dirt-cake-casserole-amazing-spring-dessert-treat
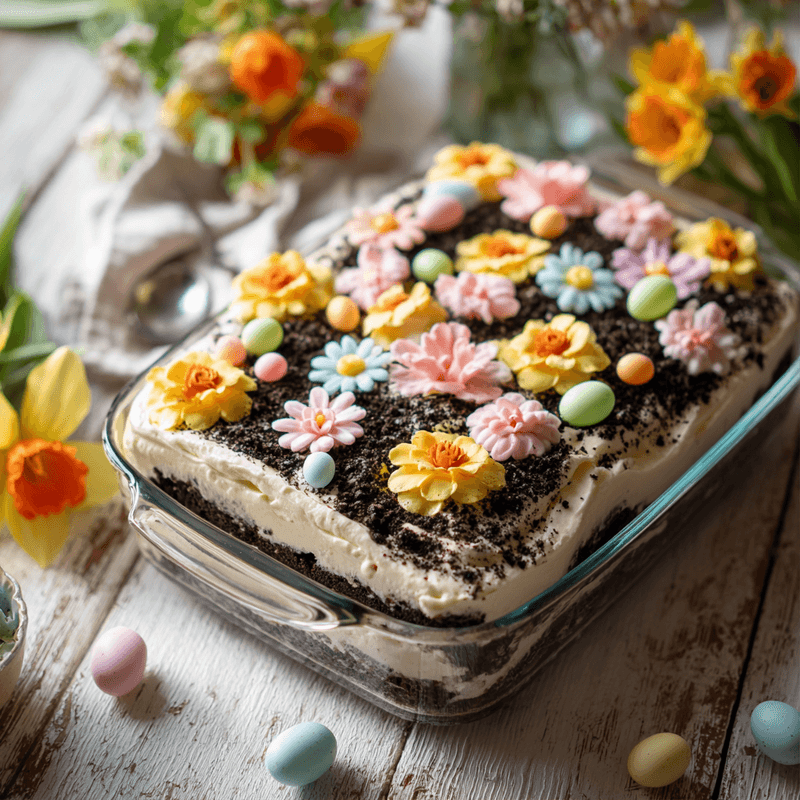
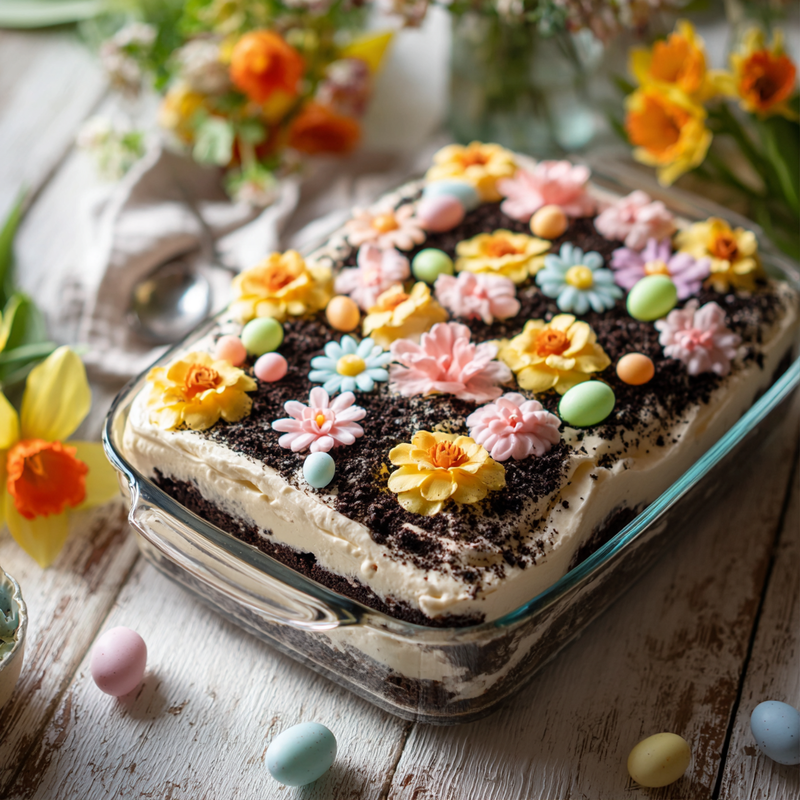
There's something wonderfully playful about a dessert that looks like a garden pot but tastes like pure indulgence. The Easter Dirt Cake Casserole has become a beloved tradition at spring gatherings across America, delighting both children and adults with its whimsical presentation and irresistible layers of creamy sweetness. This amazing spring dessert treat combines crushed chocolate cookies that mimic rich soil, velvety pudding layers that provide luxurious creaminess, and playful toppings that transform an ordinary casserole dish into an edible garden scene.
I first encountered a truly exceptional version of this dessert at a community potluck, where the hostess had assembled it in a clear glass dish so every gorgeous layer was visible. The contrast between the dark cookie crumbs and the pale cream filling was striking, and the taste exceeded even the impressive visual appeal. Yes, this Easter Dirt Cake Casserole requires some planning and assembly time, but I promise you that the delighted reactions from your guests make every minute worthwhile.
What makes this dessert special isn't just its charming appearance but the perfect balance of textures and flavors in every spoonful. You get the satisfying crunch of cookie crumbs, the smooth richness of cream cheese and pudding, and the light airiness of whipped topping all working together in harmony. This isn't a complicated baking project requiring precise temperatures or delicate techniques, but it does ask for your attention to detail in layering and chilling. Consider this your complete guide to mastering an amazing spring dessert treat that will become your go-to for every springtime celebration.
The Origins and History
The dirt cake concept emerged in American home kitchens during the 1980s, when creative home cooks began exploring fun, no-bake desserts that could feed a crowd without heating up the kitchen. The original dirt cake was typically served in clean flower pots, complete with artificial flowers stuck into the "dirt" for maximum garden authenticity. This playful presentation made it an instant hit at spring and summer gatherings, where the novelty factor was just as important as the taste.
As the dessert evolved, home cooks discovered that assembling it in a casserole dish made serving much easier while still maintaining the visual appeal. The casserole version became particularly popular for larger gatherings, allowing hosts to prepare a substantial dessert that could be scooped and served quickly. Regional variations began to appear, with some versions incorporating different pudding flavors, others adding layers of fruit, and creative cooks experimenting with various cookie bases beyond the traditional chocolate sandwich cookies.
The Easter Dirt Cake Casserole represents a seasonal adaptation of this beloved classic, embracing the spring theme with garden-inspired decorations and pastel colors. Modern versions often feature themed decorations that make the dessert feel festive and celebratory. The dessert has remained popular because it perfectly balances ease of preparation with impressive presentation, making it ideal for busy hosts who want to serve something memorable without spending hours in the kitchen. Food historians note that dirt cake belongs to a broader category of American "dump desserts" and layered treats that prioritized fun and accessibility over culinary sophistication.
Understanding the Flavor Profile
The flavor foundation of this amazing spring dessert treat centers on the rich, bittersweet taste of chocolate sandwich cookies, which provide a deep cocoa flavor without being overly sweet. These cookies, when crushed into fine crumbs, create a taste reminiscent of chocolate cake crumbs with a subtle sweetness that serves as the perfect counterpoint to the creamy layers. The slight bitterness of the cocoa balances beautifully with the sweeter components, preventing the dessert from becoming cloying.
The cream cheese and pudding layer delivers luxurious richness with tangy undertones from the cream cheese cutting through the vanilla sweetness of the pudding. This combination creates what I call the "cheesecake effect" – that perfect balance of sweet and slightly tart that keeps you reaching for another bite. The whipped topping adds airiness and a subtle dairy sweetness that lightens the overall experience, making each spoonful feel indulgent yet surprisingly not heavy.
Texturally, the Easter Dirt Cake Casserole is all about contrast and layering. You experience the initial softness of the whipped topping, followed by the creamy smoothness of the pudding mixture, and finally the delightful crunch and slight resistance of the cookie crumbs. When properly chilled, the layers maintain their distinct textures while the flavors meld together beautifully. The cookie crumbs soften slightly where they meet the creamy layers, creating pleasant gradations of texture rather than stark divisions.
Essential Ingredients Explained
Chocolate sandwich cookies form the foundation of your dirt layer, and the quality of these cookies directly impacts your final result. Look for cookies with a deep, dark cocoa color and a rich chocolate scent when you open the package. The filling can remain in the cookies – in fact, it adds a subtle vanilla sweetness to the crumb mixture. You'll need about two full packages for a proper casserole, as skimping on the cookie layer makes the dessert look sparse and unbalanced. Crush them into varied sizes, from fine powder to small pebbles, to create the most realistic dirt appearance.
Cream cheese must be full-fat and brought to complete room temperature before mixing. Cold cream cheese will create lumps no matter how long you beat it, ruining the silky texture that makes this dessert special. The cream cheese provides tangy richness and helps stabilize the filling so it holds its shape when served. Some recipes use reduced-fat versions, but I find they make the filling taste slightly artificial and don't provide the same luxurious mouthfeel that makes each bite memorable.
Instant vanilla pudding mix creates the classic flavor profile, though you can experiment with other flavors like French vanilla or even chocolate for a more intense experience. The instant variety is crucial because you're not actually cooking the pudding – you're using the mix to thicken and flavor the cream mixture. Make sure to use pudding mix, not ready-made pudding cups, as the mix contains the thickening agents necessary for proper consistency. Two boxes provide enough pudding flavor to stand up to the rich cream cheese without being overwhelming.
Whole milk works best for preparing the pudding base because the fat content helps create a richer, more satisfying flavor. Lower-fat milk produces a thinner, less flavorful result that doesn't hold up well in the layered structure. The milk should be cold when you whisk it with the pudding mix, as this helps the thickening agents activate properly. Use exactly the amount called for in your recipe, as adding extra liquid will prevent the pudding from setting to the right consistency.
Whipped topping should be thawed completely if you're using frozen, and it must be folded gently into the cream cheese mixture to maintain its airiness. This ingredient provides the light, fluffy quality that keeps the Easter Dirt Cake Casserole from feeling too heavy or dense. Some cooks prefer to make fresh whipped cream, which adds a more sophisticated dairy flavor, though this requires stabilizing the cream with a bit of sugar and vanilla. The choice between whipped topping and fresh cream affects both flavor and stability, with whipped topping being more beginner-friendly.
Powdered sugar sweetens the cream cheese layer while dissolving completely without adding graininess. Granulated sugar would leave a gritty texture, while powdered sugar blends seamlessly into the soft cream cheese. Don't reduce the amount thinking you'll make the dessert healthier – the sugar is necessary for both flavor balance and proper texture. The slight sweetness it provides helps marry all the other flavors together.
Vanilla extract enhances all the other flavors, particularly important in a dessert where you're layering multiple components. Use pure vanilla extract rather than imitation for the best flavor, as the artificial versions can taste harsh and one-dimensional. Just a tablespoon brings warmth and depth to the cream mixture, making it taste more complex and interesting.
Decorative toppings transform this dessert into a true Easter celebration. Consider items like pastel-colored candies, candy flowers, jelly beans in spring colors, or even fresh edible flowers if you want an elegant presentation. These elements should be added just before serving to maintain their visual appeal and prevent colors from bleeding into the cream layers.
Mastering the Technique
Begin by preparing your cream cheese mixture, which forms the heart of this amazing spring dessert treat. Beat the room-temperature cream cheese with an electric mixer until it's completely smooth and fluffy, with no lumps visible. This usually takes about two minutes on medium speed, and rushing this step will result in a grainy filling. Add the powdered sugar gradually while continuing to beat, allowing it to incorporate fully before adding more. The mixture should look pale and light when properly beaten.
Prepare the pudding mixture in a separate bowl by whisking the pudding mix with cold milk until it begins to thicken, which typically takes about two minutes of vigorous whisking. Let this sit for a few minutes to fully set before combining it with the cream cheese mixture. The pudding should reach a soft-set consistency – not as firm as fully set pudding, but thick enough to hold its shape on a spoon. Fold the pudding into the cream cheese mixture gently but thoroughly, ensuring no streaks of white cream cheese remain visible throughout the tan pudding mixture.
Fold in your whipped topping with a gentle hand, using a rubber spatula to cut down through the center of the mixture, then sweep along the bottom and up the side in a smooth motion. Rotate the bowl a quarter turn and repeat until the whipped topping is fully incorporated but the mixture still looks light and airy. Overmixing at this stage will deflate the whipped topping and result in a denser, less appealing texture. The final cream mixture should be smooth, pale, and fluffy, with a consistency similar to mousse.
Crush your chocolate sandwich cookies using your preferred method – either in a food processor for quick, even crumbs, or in a sealed plastic bag with a rolling pin for more varied textures. I prefer a combination of methods: process half the cookies into fine crumbs, then crush the remaining half by hand to create some larger pieces. This variation creates the most realistic "dirt" appearance and provides interesting textural contrast. Reserve about one cup of crumbs for the top layer, keeping them separate from the amount you'll use for the bottom and middle layers.
Layer your Easter Dirt Cake Casserole in a clear glass dish if possible, as visibility of the layers enhances the presentation dramatically. Spread half the cookie crumbs evenly across the bottom of your dish, pressing them down very gently to create a compact layer. Spread half the cream mixture over the cookies, using an offset spatula to smooth it into an even layer that reaches all the way to the edges. Add another layer of cookie crumbs, using about half of your remaining crumbs, then top with the rest of the cream mixture. Finish with a generous layer of cookie crumbs on top, creating gentle mounds and valleys to mimic garden soil.
Refrigerate the assembled casserole for at least four hours, though overnight is ideal for the best texture and easiest serving. During this chilling time, the cookie crumbs will soften slightly where they touch the cream layers, while the cream mixture will firm up and set properly. The flavors will also meld together, creating a more cohesive taste experience. Just before serving, add your decorative toppings, pressing them gently into the top cookie layer to secure them in place.
Common Pitfalls and How to Fix Them
The most frequent mistake occurs when cooks use cold cream cheese, resulting in a lumpy filling that never becomes smooth no matter how long you beat it. If you've already started mixing and notice lumps, stop and let the mixture sit at room temperature for thirty minutes, then beat again. For future preparations, remove your cream cheese from the refrigerator at least two hours before you plan to start, or soften it in the microwave using ten-second intervals at fifty percent power, checking frequently to ensure it softens without melting.
Watery layers develop when the pudding mixture hasn't been given adequate time to set before combining with other ingredients, or when you've added too much milk. If your assembled casserole looks soupy, you can try adding an additional small box of pudding mix to the cream mixture and folding gently, though this may alter the flavor balance slightly. Prevention is easier: always measure milk precisely and let the pudding mixture sit for at least five minutes after whisking to achieve proper thickness before proceeding.
Deflated, dense cream layers happen when you overmix after adding the whipped topping, or when you use a heavy hand while spreading the layers. The key is folding rather than stirring, and using gentle pressure when spreading. If you notice your mixture losing volume during folding, stop immediately even if you still see a few white streaks – those will disappear during spreading and are preferable to a deflated mixture. Remember that the whipped topping provides airiness, and treating it roughly destroys those essential air bubbles.
Too-soft cookie crumbs that turn muddy and lose their textural appeal result from under-crushing the cookies or from adding the decorative toppings too far in advance. Cookie crumbs should range from fine powder to pea-sized pieces, with very few larger chunks. If your "dirt" looks more like rocks, crush the cookies more thoroughly. For toppings that bleed color, always add them within an hour of serving, and consider choosing candies with more stable coatings that won't dissolve into the cream.
Unbalanced sweetness happens when you modify the sugar amounts or use sweetened whipped cream in addition to whipped topping. This Easter Dirt Cake Casserole is designed as a sweet dessert, but it shouldn't taste cloying. If you find your version too sweet, reduce the powdered sugar by a quarter cup next time, or use a dark chocolate cookie with less sweet filling. You can't fix excessive sweetness after assembly, but you can serve smaller portions with unsweetened coffee or plain fresh berries on the side to balance each bite.
Regional Twists Worth Trying
The Southern variation incorporates chopped pecans or toasted coconut into the cookie crumb layers, adding nutty richness and additional textural interest. Some Southern cooks also add a layer of sliced fresh strawberries in the middle, which introduces a tart fruitiness that cuts through the rich cream. This version works beautifully for spring gatherings when strawberries are at peak season, and the red berries create a gorgeous surprise layer when you scoop through the chocolate "dirt."
The Midwest comfort version uses peanut butter sandwich cookies instead of chocolate ones, creating a tan "dirt" with a nutty, slightly salty undertone. This variation often includes a swirl of melted chocolate through the cream layers, adding visual interest and intensifying the chocolate-peanut butter combination that many people find irresistible. The peanut butter cookies soften more quickly than chocolate ones, creating an almost cake-like texture in the bottom layer after overnight chilling.
The tropical adaptation replaces vanilla pudding with coconut cream pudding and uses vanilla sandwich cookies for white "sand" instead of chocolate "dirt." Decorated with candy shells and gummy sea creatures instead of garden themes, this version transforms the Easter Dirt Cake Casserole into a beach-themed dessert perfect for warmer climates. Some cooks add a layer of passion fruit curd or pineapple preserves for bright, tangy flavor that evokes tropical beaches.
The elegant adult version incorporates espresso powder into the cream mixture and uses dark chocolate cookies with higher cocoa content for a more sophisticated, less sweet result. This variation might be garnished with chocolate shavings and fresh mint leaves rather than colorful candies, creating a dessert that feels appropriate for evening gatherings. The coffee notes enhance the chocolate flavor while adding complexity that appeals to more refined palates.
The Perfect Spread
This amazing spring dessert treat shines as the centerpiece of a dessert table, where its playful presentation draws attention and sparks conversation. Serve it alongside lighter desserts like fruit salad, lemon bars, or simple butter cookies to provide variety in both flavor intensity and texture. The richness of the Easter Dirt Cake Casserole means a little goes a long way, so pairing it with refreshing, fruit-forward options helps balance the overall dessert experience.
For beverage pairings, consider offering both coffee and cold milk, as the dessert's sweetness calls for drinks that can cut through the richness. Freshly brewed coffee with its slight bitterness provides excellent contrast, while cold milk offers a nostalgic, comforting accompaniment that many guests will appreciate. Herbal teas like mint or chamomile also work beautifully, offering palate-cleansing properties between bites.
When planning your serving setup, use a large spoon or serving spatula that can scoop through all the layers at once, ensuring each portion includes cookie crumbs, cream, and toppings. Provide dessert plates rather than bowls, as the casserole holds together well enough to serve on flat plates and looks more attractive this way. Consider setting out extra whipped topping and cookie crumbs so guests can customize their portions according to their preferences.
Keeping and Reheating
Store your Easter Dirt Cake Casserole covered tightly with plastic wrap or aluminum foil in the refrigerator for up to three days, though it tastes best within the first forty-eight hours. The dessert actually improves slightly after the first night of chilling, as the flavors meld and the textures settle into perfect harmony. The cookie layers will continue to soften gradually, so by day three, the texture becomes more uniform and cake-like rather than distinctly layered.
This dessert cannot be frozen successfully because the whipped topping and cream cheese mixture separate and become watery upon thawing, resulting in an unappealing, grainy texture. The cookie crumbs also become unpleasantly soggy when frozen and thawed. If you need to prepare dessert well in advance, make the cream mixture up to two days ahead and store it separately from the cookies, then assemble the layers the day before your gathering.
No reheating is necessary or recommended for this chilled dessert – in fact, warming would ruin the texture completely. Always serve it cold, straight from the refrigerator. If you've stored it for a day or more and the top cookie layer has softened more than you'd like, simply add a fresh sprinkle of crushed cookies just before serving to restore some crunch. The decorative toppings may need refreshing if they've absorbed moisture or had their colors bleed slightly.
Leftovers can be portioned into individual serving containers for quick desserts throughout the week. These individual portions actually hold up slightly better than serving repeatedly from a large casserole, as you're not repeatedly exposing all the dessert to temperature changes and air. Some people enjoy eating leftover dirt cake for breakfast with their coffee, though I'll leave that decision to your personal preferences.
Your Questions Answered
Can I make this Easter Dirt Cake Casserole dairy-free for guests with dietary restrictions?
You can create a dairy-free version using plant-based cream cheese, non-dairy milk, and coconut whipped topping, though the flavor and texture will differ noticeably from the traditional version. The plant-based cream cheese tends to be slightly less tangy and may require additional lemon juice to achieve similar flavor complexity. Coconut whipped topping works well and provides good stability, though it adds a subtle coconut flavor that some people may notice. Make sure your chocolate sandwich cookies are also dairy-free, as many traditional brands contain milk products.
How far in advance can I prepare this amazing spring dessert treat for a large gathering?
Assemble your casserole up to twenty-four hours before serving for optimal texture and flavor, storing it covered in the refrigerator until about thirty minutes before you plan to present it. Add decorative toppings no more than two hours before serving to prevent color bleeding and maintain their visual appeal. If you're preparing for a very large crowd, you can make the cream mixture up to two days in advance and store it separately, then crush cookies and assemble everything the day before. This staged approach reduces last-minute stress while ensuring the best possible quality.
What size casserole dish works best, and can I double the recipe?
A nine-by-thirteen-inch casserole dish is ideal for the standard recipe, providing proper layer depth and serving twelve to sixteen people depending on portion size. You can absolutely double the recipe using two separate dishes rather than one enormous container, as extremely deep layers don't set as well and become difficult to serve attractively. For smaller gatherings, halve the recipe and use an eight-by-eight-inch square dish, which serves six to eight people comfortably. Glass dishes showcase the layers beautifully, but ceramic or even disposable aluminum pans work if you need portability.
Can I substitute homemade whipped cream for the whipped topping?
Fresh whipped cream can replace whipped topping, but you must stabilize it with gelatin or powdered sugar to prevent deflating and becoming watery after several hours. Whip heavy cream to stiff peaks with powdered sugar and vanilla, using about two cups of cream to replace an eight-ounce container of whipped topping. The homemade version provides superior flavor with a more natural dairy taste, though it requires more effort and skill to prepare properly. Some cooks prefer a combination approach, using half whipped topping for stability and half fresh whipped cream for enhanced flavor.
What's the best way to transport this dessert to a potluck or gathering?
Transport your Easter Dirt Cake Casserole in the dish you assembled it in, covered tightly with plastic wrap and then aluminum foil to prevent shifting. Place the dish in a box or container that holds it level and prevents sliding during transit, surrounding it with towels if needed for stability. Keep the dessert cold by transporting it in a cooler with ice packs positioned around but not directly on top of the dish. Add your decorative toppings after arrival rather than before leaving home, bringing them in a separate small container. This approach ensures your dessert arrives looking as beautiful as when you assembled it.
How can I make the presentation even more impressive for special occasions?
Elevate your presentation by using a trifle dish instead of a casserole, creating vertical layers that showcase the beautiful stripes of chocolate and cream. Pipe the cream mixture using a large pastry bag for more controlled, elegant layers rather than spreading with a spatula. Create themed decorations using modeling chocolate shaped into flowers, butterflies, or other spring symbols instead of simple candies. Edge the serving dish with fresh edible flowers like pansies or violas for a sophisticated garden aesthetic. For evening events, consider adding edible glitter or luster dust to the top cookie layer for subtle sparkle that catches the light beautifully.
Easter Dirt Cake Casserole Amazing Spring Dessert Treat
A playful layered dessert featuring chocolate cookie crumbs, creamy vanilla pudding, and cream cheese filling, perfect for spring celebrations.
Prep Time
30 min
Cook Time
0 min
Total Time
4h 30m
Servings
16 servings
Ingredients
For 16 servings
- 2 packages (14.3 oz each) chocolate sandwich cookies, crushed
- 16 oz cream cheese, softened to room temperature
- 1 cup powdered sugar
- 2 boxes (3.4 oz each) instant vanilla pudding mix
- 3 cups whole milk, cold
- 12 oz whipped topping, thawed and divided
- 1 tablespoon pure vanilla extract
- Pastel-colored candies for decoration
- Candy flowers or jelly beans for garnish
Instructions
- 1
Prepare cream cheese base
In a large mixing bowl, beat the softened cream cheese with an electric mixer on medium speed for about 2 minutes until completely smooth and fluffy with no lumps visible. Gradually add the powdered sugar while continuing to beat, allowing it to incorporate fully. The mixture should look pale and light when properly beaten.
- 2
Make pudding mixture
In a separate bowl, whisk together the instant vanilla pudding mix and cold milk vigorously for about 2 minutes until the mixture begins to thicken. Let the pudding sit for 5 minutes to fully set to a soft-set consistency that holds its shape on a spoon.
- 3
Combine cream and pudding
Add the vanilla extract to the cream cheese mixture, then fold in the prepared pudding gently but thoroughly using a rubber spatula. Continue folding until no streaks of white cream cheese remain visible and the mixture is uniform in color and texture.
- 4
Fold in whipped topping
Reserve 1 cup of whipped topping for later use. Gently fold the remaining whipped topping into the cream cheese and pudding mixture using a cutting and sweeping motion. Rotate the bowl and continue folding until fully incorporated but still light and airy, being careful not to deflate the mixture.
- 5
Crush the cookies
Crush the chocolate sandwich cookies into crumbs using a food processor or by placing them in a sealed plastic bag and crushing with a rolling pin. Create a mixture of fine crumbs and some slightly larger pieces for texture. Reserve 1 cup of crumbs for the top layer.
- 6
Create first cookie layer
Spread half of the remaining cookie crumbs evenly across the bottom of a 9x13-inch glass casserole dish. Press them down very gently to create a compact but not overly compressed layer that covers the entire bottom.
- 7
Add first cream layer
Spread half of the cream mixture over the cookie crumbs using an offset spatula. Smooth it into an even layer that reaches all the way to the edges of the dish, creating a uniform thickness throughout.
- 8
Build middle layers
Add another layer using half of your remaining cookie crumbs, spreading them evenly over the cream layer. Top with the rest of the cream mixture, spreading it smooth and even just as you did with the first cream layer.
- 9
Create final dirt layer
Sprinkle the reserved 1 cup of cookie crumbs over the top cream layer, creating gentle mounds and valleys to mimic the appearance of garden soil. Don't press these crumbs down – leave them loose for the most realistic texture.
- 10
Chill the casserole
Cover the casserole dish tightly with plastic wrap and refrigerate for at least 4 hours, though overnight is ideal. This chilling time allows the layers to set properly and the flavors to meld together beautifully.
- 11
Add decorations and serve
Just before serving, remove the plastic wrap and decorate the top with pastel-colored candies, candy flowers, or jelly beans, pressing them gently into the cookie crumb layer. Use a large spoon to scoop through all layers, serving on dessert plates for the best presentation.
Nutrition Facts
Per serving (estimated)
385 calories
Calories
52g
Carbs
5g
Protein
18g
Fat
2g
Fiber
420mg
Sodium
38g
Sugar


