
Easy Easter Chocolate Cookies Recipe (Ready in 30 Minutes)
Soft, fudgy chocolate cookies perfect for spring gatherings. Simple ingredients, one bowl, and ready in 30 minutes. Your family will love these!
cookwithlucia.com/recipes/easter-chocolate-cookies
We all know that feeling: a special spring gathering is coming up, you want to bring something homemade and delicious, but between work, errands, and everything else on your plate, there's barely time to breathe. You need something that looks impressive, tastes amazing, and doesn't require you to camp out in the kitchen for hours.
That's exactly where these chocolate cookies come in. They're soft, intensely chocolatey, and have that perfect crackled top that makes them look like they came from a fancy bakery. The best part? You can have a batch cooling on your counter in just 30 minutes, start to finish. One bowl, no mixer required, and ingredients you probably already have in your pantry. These cookies are rich with cocoa, studded with chocolate chips, and have a texture that's somehow both fudgy and tender at the same time.
I'm going to walk you through every single step, share my favorite shortcuts, and show you how to make these cookies work for your schedule. Whether you're baking for a spring celebration, a weekend family gathering, or just because you deserve something sweet on a Tuesday afternoon, this recipe has your back. From mixing bowl to cookie jar in under half an hour – let's do this.
Why This Is Your New Weeknight Go-To
One Bowl Wonder: You'll mix everything in a single bowl with just a wooden spoon. No stand mixer to haul out, no multiple bowls cluttering your counter, and cleanup takes about two minutes. The dough comes together so quickly that you'll wonder why you ever made complicated cookies before.
Pantry Staples Only: Flour, cocoa powder, sugar, eggs, butter, and chocolate chips. That's it. No exotic extracts, no specialty ingredients that cost a fortune and sit in your pantry forever. Everything you need is probably in your kitchen right now, which means these chocolate cookies can happen on a whim.
Foolproof Texture: The recipe is engineered to work every single time. The high cocoa content keeps them soft and fudgy, while just the right amount of flour gives them structure without making them cakey. Even if you slightly overbake them, they'll still be delicious.
Family Approved: These cookies have that perfect balance of chocolate intensity that kids love but adults appreciate too. They're not too sweet, not too bitter, just deeply chocolatey with pockets of melty chocolate chips throughout. I've yet to meet someone who doesn't reach for seconds.
Make-Ahead Friendly: The dough scoops and freezes beautifully, which means you can have fresh-baked chocolate cookies whenever you want them. Scoop the dough, freeze the balls, and bake them straight from frozen with just two extra minutes in the oven.
Impressive Results: That gorgeous crackled top happens naturally as they bake. You don't need to do anything special – the cookies just develop these beautiful cracks that make them look professionally made. Perfect for bringing to gatherings where you want to impress without the stress.
Simple Ingredients, Big Flavor
Let's talk about what goes into these chocolate cookies and why each ingredient matters. All-purpose flour provides structure – we use just enough to hold everything together without making them cakey or dry. You want soft, fudgy cookies, not chocolate cake rounds.
Unsweetened cocoa powder is the chocolate powerhouse here. I use Dutch-process when I have it because it gives a deeper, less acidic chocolate flavor, but natural cocoa works perfectly too. The key is using a full half-cup, which sounds like a lot but creates that intense chocolate taste that makes these cookies special.
Granulated and brown sugar work together beautifully. The granulated sugar helps create those crackly tops, while brown sugar adds moisture and a subtle caramel note that makes the chocolate flavor more complex. Don't skip the brown sugar or substitute all white – you need both.
Butter adds richness and helps create that tender texture. I use unsalted so I can control the salt level, and melting it means no waiting for butter to soften. You can literally pull it straight from the fridge, melt it in the microwave, and get started.
Eggs bind everything together and add structure. Two large eggs give these chocolate cookies their soft, almost brownie-like texture. Make sure they're at room temperature if you can, but if you forget, just run them under warm water for a minute.
Baking powder gives just a tiny bit of lift. We're not looking for puffy cookies here – these should be slightly dense and fudgy – but a small amount of leavening keeps them from being hockey pucks. A teaspoon is all you need.
Chocolate chips are the final touch. Semi-sweet chips work beautifully, but you can use whatever you have. Milk chocolate makes them sweeter and more kid-friendly, while dark chocolate chips create an even more intense chocolate experience. I usually scatter about a cup and a half throughout the dough.
Salt is non-negotiable. A teaspoon might seem like a lot, but it's what makes the chocolate flavor pop and keeps these cookies from tasting flat. If you're using salted butter, cut it back to half a teaspoon.
Step-by-Step in Plain English
Let's break down how to make these chocolate cookies into simple stages that anyone can follow. Stage one is mixing your dry ingredients. In a medium bowl, whisk together the flour, cocoa powder, baking powder, and salt until there are no streaks of cocoa and everything looks uniform. This takes about thirty seconds and ensures you won't have pockets of flour or cocoa in your finished cookies. Set this bowl aside.
Stage two is the wet ingredients. In a large bowl, whisk together your melted butter and both sugars until they're completely combined and slightly glossy. This takes a minute or two of vigorous whisking. Then crack in your eggs and whisk again until the mixture is smooth and lightens in color slightly. You're creating an emulsion that will give your chocolate cookies that perfect texture.
Stage three is bringing it all together. Dump your dry ingredients into the wet ingredients and stir with a wooden spoon or spatula. The dough will look dry and crumbly at first – don't panic. Keep stirring and it will suddenly come together into a thick, fudgy dough. Once you stop seeing dry flour, fold in your chocolate chips. The whole mixing process takes maybe five minutes total.
Stage four is scooping and baking. Use a cookie scoop or two spoons to portion out dough balls about two tablespoons each onto parchment-lined baking sheets. Leave about two inches between them because they'll spread. Pop them in a preheated oven and set your timer for ten minutes. You're looking for cookies that look just set around the edges but still soft in the center.
Stage five is the hardest part – waiting. When you pull these chocolate cookies from the oven, they'll look underdone. The centers will seem too soft, maybe even a little shiny. This is exactly right. Let them cool on the baking sheet for five minutes, during which time they'll continue cooking from residual heat and firm up perfectly. Then transfer them to a cooling rack. That's it – you just made bakery-quality chocolate cookies in your own kitchen.
Pro Shortcuts and Time-Savers
Want to make these chocolate cookies even easier? Measure your dry ingredients ahead of time. On a quiet Sunday afternoon, whisk together several batches' worth of the flour, cocoa, baking powder, and salt. Store each batch in a zip-top bag or container, label it, and stick it in your pantry. When you want fresh cookies, you'll cut your active prep time in half.
Use a cookie scoop – specifically, a medium two-tablespoon scoop. It ensures all your cookies are the same size so they bake evenly, and it's way faster than using two spoons. You can scoop an entire batch in under two minutes. I keep mine in my utensil crock because I use it constantly.
Freeze the dough balls for ultimate convenience. Scoop the entire batch, arrange the balls on a parchment-lined baking sheet, and freeze until solid. Then transfer them to a freezer bag. Whenever you want fresh chocolate cookies, pull out however many you need and bake them straight from frozen. Add just two extra minutes to the baking time.
Line your baking sheets with parchment paper or silicone mats. These cookies aren't particularly sticky, but using liners means zero cleanup. You can slide the whole sheet of parchment off onto the counter when they're done, let them cool, and your pan is still clean. If you bake often, invest in silicone baking mats – they're reusable and last for years.
Make a double batch because these chocolate cookies freeze beautifully after baking too. Let them cool completely, layer them between sheets of parchment in an airtight container, and freeze for up to three months. Pull out a few whenever you need them – they thaw in minutes at room temperature, or you can warm them in the oven for that fresh-baked experience.
Ways to Switch It Up
Once you've made these chocolate cookies the classic way, here are some delicious variations to try. Add a teaspoon of espresso powder to the dry ingredients for mocha chocolate cookies that have an incredible depth of flavor. The coffee doesn't make them taste like coffee – it just amplifies the chocolate and makes it taste even more intense.
Swap the chocolate chips for white chocolate chips or butterscotch chips for a completely different flavor profile. The contrast between the dark cocoa dough and sweet white chocolate is absolutely gorgeous, and it tastes like a sophisticated candy bar. You could even do half dark chocolate and half white chocolate chips.
Make them minty by adding half a teaspoon of peppermint extract to the wet ingredients and using mint chocolate chips. These are incredibly refreshing and perfect for spring gatherings. Just be careful with the extract – a little goes a very long way, and you don't want to overwhelm the chocolate.
Turn them into stuffed chocolate cookies by wrapping each dough ball around a piece of chocolate, a caramel square, or even a halal marshmallow. You'll need to make the dough balls slightly larger and bake them for an extra minute or two, but the gooey surprise in the middle is absolutely worth it.
Add texture by stirring in half a cup of chopped nuts (walnuts or pecans work beautifully) or shredded coconut along with the chocolate chips. The nuts add a satisfying crunch and make these chocolate cookies feel more substantial. Toasting the nuts first amplifies their flavor even more.
Make them gluten-free by using a one-to-one gluten-free flour blend. The high cocoa content and fudgy texture mean these adapt to gluten-free flour better than most cookies. Just make sure your blend contains xanthan gum, and don't overmix the dough.
Storing Leftovers the Right Way
These chocolate cookies stay fresh for quite a while if you store them properly. At room temperature, keep them in an airtight container with a piece of bread tucked inside. The bread releases moisture that keeps the cookies soft without making them soggy. They'll stay perfect for about five days, though I doubt they'll last that long.
For longer storage, these freeze exceptionally well. Stack them between layers of parchment paper in a freezer-safe container or bag, press out as much air as possible, and freeze for up to three months. When you want cookies, just pull out however many you need and let them thaw at room temperature for about fifteen minutes. They taste remarkably fresh.
If you want to refrigerate them, you can, but they'll firm up considerably in the cold. Let them come to room temperature before serving, or warm them in a low oven for a few minutes. I actually love eating these chocolate cookies straight from the fridge in summer – they develop an almost fudge-like texture that's incredibly satisfying.
For reheating, the oven is your best friend. Arrange cookies on a baking sheet and warm them at 300°F for about five minutes. They'll taste fresh-baked again, with slightly melty chocolate chips and that perfect soft texture. The microwave works in a pinch – ten to fifteen seconds per cookie – but they can get a little tough if you overdo it. The toaster oven is the compromise option: quick and convenient, with better results than the microwave.
If your cookies have gotten a bit stale, don't throw them out. Crumble them over ice cream, layer them in parfaits with cream and fresh berries, or pulse them in a food processor to make chocolate cookie crumbs for cheesecake crusts. These chocolate cookies are so chocolatey that they make an excellent ingredient in other desserts even when they're past their prime for eating plain.
Quick Answers to Common Questions
Can I make the dough ahead and refrigerate it?
Absolutely! In fact, chilling the dough can improve the texture and make the cookies even more flavorful as the ingredients have time to meld together. You can refrigerate the dough for up to three days in an airtight container. Just let it sit at room temperature for about fifteen minutes before scooping so it's easier to work with. Cold dough also spreads less, giving you thicker chocolate cookies.
What if I don't have cocoa powder?
You really need cocoa powder for these chocolate cookies – it's the foundation of their flavor. However, if you're in a pinch, you can melt four ounces of unsweetened chocolate, let it cool slightly, and add it to the butter mixture. Reduce the flour by two tablespoons to compensate for the extra fat from the chocolate. The texture will be slightly different but still delicious.
Can I double this recipe?
Definitely! This recipe doubles beautifully. Just mix everything in a very large bowl or split it into two batches if your bowl isn't big enough. The dough can seem like a lot, but it scoops and bakes exactly the same way. This is perfect if you're baking for a large gathering or want to stock your freezer with dough balls for future cookie emergencies.
How do I make these chocolate cookies less sweet?
Reduce the granulated sugar to three-quarters of a cup instead of one cup, and use dark chocolate chips instead of semi-sweet. You can also add a quarter teaspoon of instant espresso powder, which intensifies the chocolate flavor and makes it taste less sugary. Just don't reduce the brown sugar – it's essential for the texture and moisture.
What's the best way to get that crackled top?
The crackled top happens naturally, but you can enhance it by making sure your oven is fully preheated and by not overbaking. The rapid heat causes the sugar crust to form and crack as the cookie expands. Also, don't flatten the dough balls before baking – let them spread naturally in the oven. If you want even more dramatic cracks, you can roll the dough balls in granulated sugar before baking.
Can I use oil instead of butter?
You can substitute vegetable or coconut oil for the butter in these chocolate cookies, but the flavor will be less rich and complex. Use three-quarters cup of oil to replace one cup of butter, since butter contains some water. The texture will be slightly different – a bit more dense and chewy – but they'll still be delicious. Coconut oil gives a subtle tropical note that's actually quite nice with chocolate.
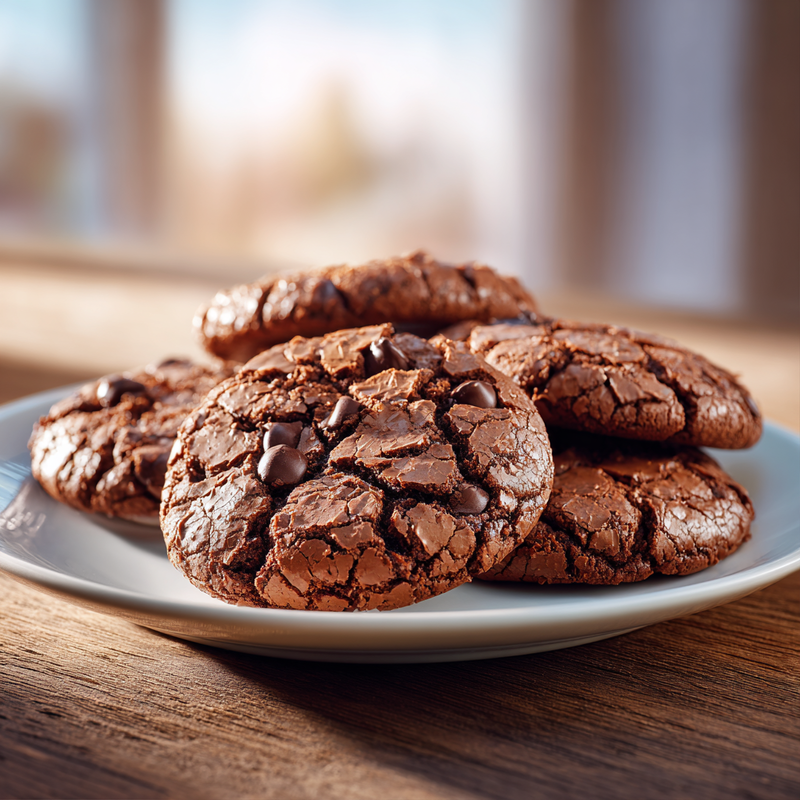
Easter Chocolate Cookies
Soft, fudgy chocolate cookies with a crackled top and melty chocolate chips throughout. Perfect for spring gatherings and ready in just 30 minutes.
Prep Time
10 min
Cook Time
10 min
Total Time
20 min
Servings
24 cookies
Ingredients
For 24 cookies
- 1 cup (125g) all-purpose flour
- 1/2 cup (50g) unsweetened cocoa powder
- 1 teaspoon baking powder
- 1 teaspoon salt
- 1/2 cup (115g) unsalted butter, melted
- 1 cup (200g) granulated sugar
- 1/2 cup (100g) packed light brown sugar
- 2 large eggs, room temperature
- 1 teaspoon vanilla extract
- 1 1/2 cups (255g) semi-sweet chocolate chips
Instructions
- 1
Preheat oven
Preheat your oven to 350°F (175°C). Line two large baking sheets with parchment paper or silicone baking mats and set aside. This ensures your cookies won't stick and makes cleanup effortless.
- 2
Mix dry ingredients
In a medium bowl, whisk together the flour, cocoa powder, baking powder, and salt until completely combined with no streaks of cocoa remaining. This takes about 30 seconds of whisking and ensures even distribution of all dry ingredients throughout your cookies.
- 3
Combine butter and sugars
In a large bowl, whisk together the melted butter, granulated sugar, and brown sugar until smooth and well combined, about 1-2 minutes. The mixture should look glossy and the sugars should be mostly dissolved into the butter.
- 4
Add eggs and vanilla
Add the eggs and vanilla extract to the butter mixture and whisk vigorously for about one minute. The mixture should become lighter in color and slightly thick. You're creating an emulsion that will give your cookies their perfect fudgy texture.
- 5
Incorporate dry ingredients
Add the dry ingredients to the wet ingredients and stir with a wooden spoon or rubber spatula. The mixture will look dry and crumbly at first, but keep stirring and it will come together into a thick, fudgy dough. Mix just until no streaks of flour remain.
- 6
Fold in chocolate chips
Add the chocolate chips to the dough and fold them in with your spatula until they're evenly distributed throughout. The dough will be quite thick and the chips should be scattered throughout rather than sinking to the bottom.
- 7
Scoop cookie dough
Using a medium cookie scoop or two spoons, portion out about 2 tablespoons of dough per cookie onto your prepared baking sheets. Space them about 2 inches apart as they will spread during baking. You should get about 12 cookies per sheet.
- 8
Bake cookies
Bake for 10-11 minutes, until the edges look set but the centers still appear slightly soft and underdone. The cookies will look puffy and may have developed beautiful cracks on top. Don't overbake – they'll firm up as they cool.
- 9
Cool on pan
Remove the baking sheets from the oven and let the cookies cool on the pan for 5 minutes without moving them. During this time, they'll continue to cook from residual heat and will firm up to the perfect texture. This step is crucial for the right consistency.
- 10
Transfer to cooling rack
After 5 minutes, use a spatula to transfer the cookies to a wire cooling rack. Let them cool completely if you can resist eating them warm. The cookies will continue to set as they cool and will be perfectly soft and fudgy once they reach room temperature.
Nutrition Facts
Per serving (estimated)
165 calories
Calories
23g
Carbs
2g
Protein
8g
Fat
1g
Fiber
145mg
Sodium
16g
Sugar


