Easter Bunny Sugar Cookie Cups: Fun & Festive Treats
Learn how to make adorable Easter Bunny Sugar Cookie Cups with soft cookie bases and creamy frosting. Perfect for spring gatherings and family fun!
cookwithlucia.com/recipes/easter-bunny-sugar-cookie-cups
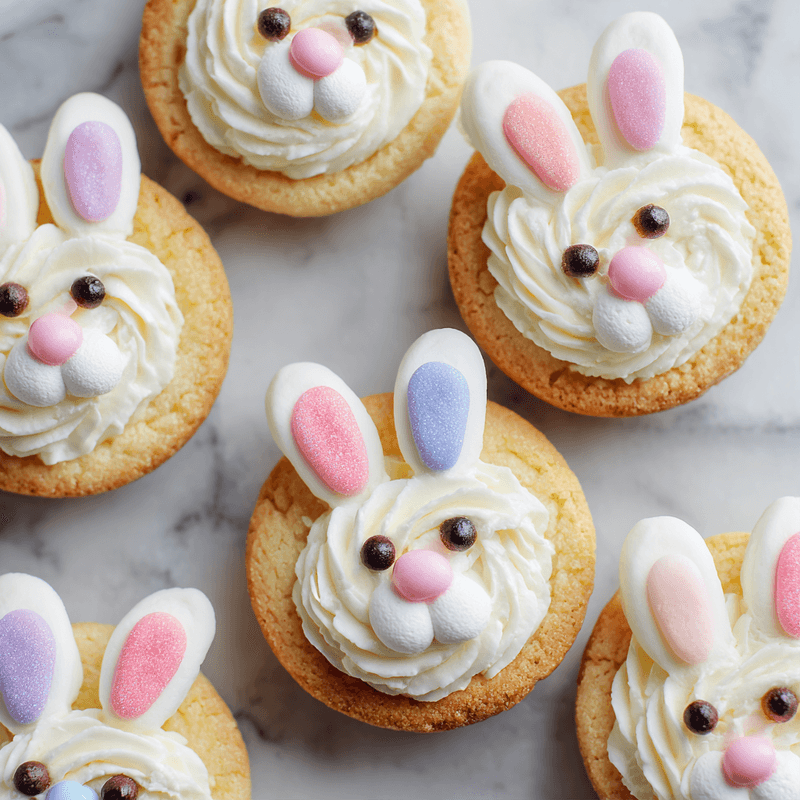
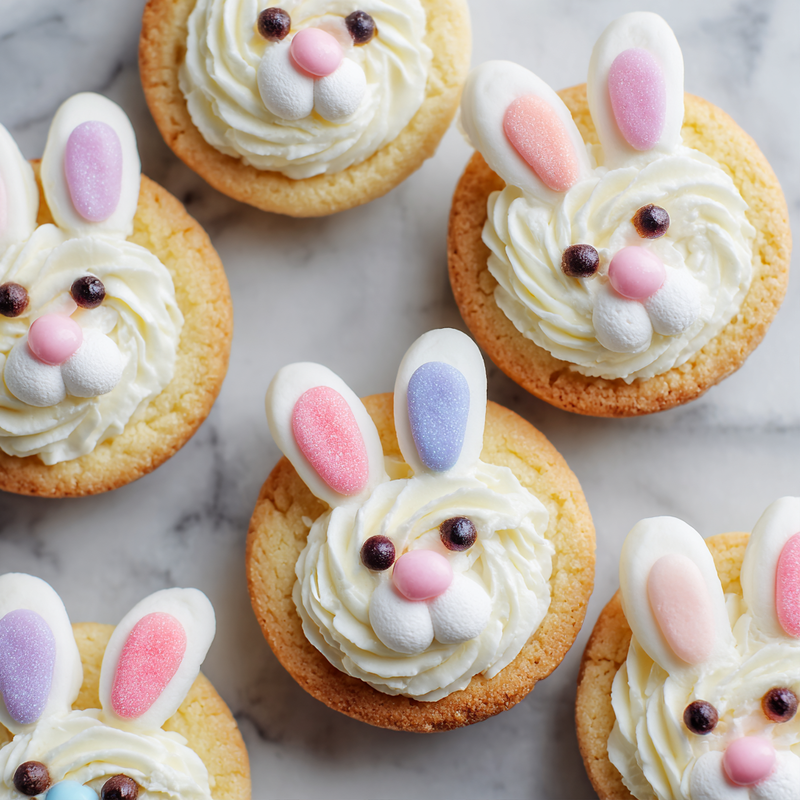
Making treats at home shouldn't feel intimidating or time-consuming, especially when you want something that looks impressive but comes together easily. These Easter Bunny Sugar Cookie Cups prove that beautiful, celebratory desserts can be simple enough for any home baker to master. With soft, buttery cookie cups as the base and a swirl of smooth frosting topped with adorable bunny faces, these little treats bring joy to any spring gathering without requiring advanced decorating skills.
What makes these cookie cups so special is their perfect balance of textures and flavors. The cookie base stays tender and slightly chewy even after baking in a mini muffin tin, creating the ideal vessel for that cloud-like frosting. Unlike flat cookies that can become too crispy or cake that might be too heavy, these Easter Bunny Sugar Cookie Cups hit that sweet spot between cookie and cupcake. The miniature size means you get all the satisfaction of a dessert without feeling overly full, making them perfect for serving alongside other dishes at family gatherings.
I love how these cookie cups transform simple ingredients you probably already have in your pantry into something that feels truly special. The basic sugar cookie dough takes on new life when pressed into mini muffin cups, and the decoration process is so straightforward that even young helpers can join in the fun. Whether you're planning a spring celebration or simply want to brighten up a weekend afternoon, these Easter Bunny Sugar Cookie Cups deliver maximum charm with minimal stress.
Why This Recipe Works for Your Sweet Tooth
These Easter Bunny Sugar Cookie Cups succeed where many dessert recipes fall short because they balance richness with restraint. The cookie base contains just enough butter to provide that melt-in-your-mouth quality without becoming greasy or heavy. Sugar cookies naturally have a neutral sweetness that doesn't overwhelm your palate, which means the frosting can shine without the entire dessert becoming cloying. This thoughtful balance makes them ideal for serving after a meal or as an afternoon treat with tea.
The portion control built into these cookie cups is genuinely helpful for mindful enjoyment. Each cup is perfectly sized to satisfy a sweet craving without the commitment of a full-sized cupcake or large cookie. When you're hosting a gathering, these individual portions mean guests can easily try one without feeling they need to commit to a large slice of cake. The mini muffin tin creates uniform sizes automatically, taking the guesswork out of portioning.
From a practical standpoint, these Easter Bunny Sugar Cookie Cups are remarkably efficient with your time and energy. The dough comes together in one bowl with no chilling required before baking, which means you can go from deciding to bake to pulling finished cookies from the oven in under thirty minutes. The decorating process is forgiving and creative, allowing you to make each bunny face slightly different without any looking wrong. This recipe respects your time while still delivering homemade quality that no store-bought treat can match.
The Ingredient Lineup
All-purpose flour forms the foundation of these cookie cups, providing structure without toughness. I use standard all-purpose flour because it creates that tender crumb we're looking for, but if you need a different option, a gluten-free all-purpose blend with xanthan gum works beautifully. The protein content in all-purpose flour is just right for cookies that hold their cup shape without becoming dense or cakey.
Unsalted butter brings richness and that classic cookie flavor we all crave. Using unsalted butter lets you control the exact amount of salt in the recipe, ensuring balanced flavor throughout. The butter should be softened to room temperature so it creams properly with the sugar, creating those tiny air pockets that give the cookies their tender texture. I always leave my butter on the counter for about an hour before starting, though you can speed this up by cutting it into small cubes.
Granulated sugar does double duty in these Easter Bunny Sugar Cookie Cups, sweetening the dough while also helping create that slightly crisp exterior that gives way to a soft interior. When you cream the butter and sugar together, you're not just mixing ingredients but actually incorporating air that will help the cookies rise slightly and develop their characteristic texture. The amount of sugar here is calibrated to create cookies that taste sweet but not candy-like.
Eggs bind everything together while adding richness and helping the cookies rise just enough to fill the muffin cups properly. I use large eggs at room temperature because they incorporate more smoothly into the butter mixture. The egg also contributes to the golden color of the finished cookies and helps them stay moist for several days after baking.
Vanilla extract is non-negotiable for authentic sugar cookie flavor. Pure vanilla extract contains those complex flavor compounds that make homemade cookies taste distinctly better than anything from a package. Just one teaspoon perfumes the entire batch with that warm, sweet aroma that fills your kitchen and makes everyone ask what you're baking. For the frosting, you'll want vanilla again to complement the sweetness of the powdered sugar.
Baking powder provides the gentle lift that helps these cookie cups puff up slightly in the oven, creating that cup shape we need for holding frosting. It's a small amount because we want cookies, not cakes, but that little bit of rise is crucial for the right texture. Make sure your baking powder is fresh; if it's been sitting in your pantry for over a year, it might have lost its potency.
Putting It Together
Creating these Easter Bunny Sugar Cookie Cups starts with preparing your cookie dough, which is wonderfully straightforward. In a large mixing bowl, cream together your softened butter and granulated sugar using an electric mixer until the mixture looks light and fluffy, which takes about two to three minutes. This creaming process is essential because it incorporates air into the dough, giving your finished cookies that tender texture. Add your egg and vanilla extract, beating until everything is completely combined and the mixture looks smooth and pale yellow.
In a separate bowl, whisk together your dry ingredients: flour, baking powder, and salt. This simple step ensures the baking powder distributes evenly throughout the dough, so every cookie rises uniformly. Gradually add the dry ingredients to your butter mixture, mixing on low speed just until the flour disappears into the dough. Overmixing at this stage can develop the gluten in the flour too much, leading to tough cookies, so stop as soon as you no longer see dry flour streaks.
Shaping the Easter Bunny Sugar Cookie Cups requires just a light coating of cooking spray in your mini muffin tin and a small cookie scoop or spoon. Roll the dough into balls about one tablespoon in size, then place one in each mini muffin cup. Use your thumb or the back of a small spoon to press down in the center of each dough ball, creating a shallow well. The dough will spread and puff slightly as it bakes, forming those perfect little cup shapes that will cradle your frosting. Bake until the edges are just barely golden, usually about ten to twelve minutes, then let them cool completely before removing from the pan.
While your cookie cups cool, prepare the frosting by beating together softened butter, powdered sugar, vanilla extract, and just enough milk to create a smooth, pipeable consistency. The frosting should hold soft peaks when you lift the beaters but still be soft enough to pipe smoothly through a decorating tip. If it's too thick, add milk a teaspoon at a time; if too thin, add more powdered sugar. Once your cookies are completely cool, pipe a generous swirl of frosting into each cup, then add your bunny decorations: mini marshmallows for ears, candy eyes, and a small pink candy or frosting dot for the nose.
Customizing for Your Gathering
These Easter Bunny Sugar Cookie Cups are endlessly adaptable to different flavor preferences and dietary needs. For a chocolate variation, replace one-quarter cup of the flour with unsweetened cocoa powder to create chocolate cookie cups that pair beautifully with vanilla frosting. You could also add a teaspoon of almond extract to the cookie dough in place of some of the vanilla for a more sophisticated flavor profile that adults especially appreciate. The basic formula is forgiving enough to handle these small adjustments without any changes to baking time or technique.
If you're serving guests with different dietary requirements, the recipe adapts well. For a dairy-free version, substitute the butter with an equal amount of vegetable shortening or coconut oil (measured when solid), and use a plant-based milk in the frosting. The texture will be slightly different but still delicious, with the coconut oil version having a subtle tropical note. For gluten-free Easter Bunny Sugar Cookie Cups, use a gluten-free all-purpose flour blend that contains xanthan gum or add half a teaspoon of xanthan gum if your blend doesn't include it.
The decorating possibilities extend far beyond the classic bunny face design. You can tint portions of your frosting with food coloring to create pastel rainbow assortments, or use different candies to give each bunny a unique personality. Some bakers like to add a small dollop of fruit preserves in the cookie cup before adding frosting, creating a filled version with a surprise burst of flavor. Lemon curd works particularly well for a spring-appropriate filling that cuts through the sweetness of the frosting.
For those who want to reduce the sweetness, you can decrease the sugar in the cookie dough by up to one-quarter cup without significantly affecting the texture. The cookies will be slightly less sweet and have a more pronounced butter flavor, which some people prefer. You might also consider using a cream cheese frosting instead of pure buttercream, as the tanginess of cream cheese balances the sugar beautifully and creates a more complex flavor profile on these Easter Bunny Sugar Cookie Cups.
Meal Prep Like a Pro
Baking these Easter Bunny Sugar Cookie Cups in advance makes hosting significantly less stressful. The unfrosted cookie cups store beautifully for up to five days in an airtight container at room temperature, maintaining their soft texture without becoming stale. I recommend placing sheets of parchment paper between layers to prevent them from sticking together. If you want to bake even further ahead, the cooled cookie cups freeze exceptionally well for up to two months when wrapped tightly in plastic wrap and placed in a freezer-safe container.
For the frosting, you can prepare it up to three days in advance and store it in an airtight container in the refrigerator. Before using refrigerated frosting, let it come to room temperature for about an hour, then re-whip it with your mixer to restore its light, fluffy texture. If the frosting seems too stiff after re-whipping, add a teaspoon of milk at a time until you reach the desired consistency. This make-ahead approach means you can spread out the work over several days, doing the baking one day and the decorating another.
When it comes to decorated Easter Bunny Sugar Cookie Cups, timing matters for optimal freshness. These are best enjoyed within two days of decorating, as the frosting begins to form a slight crust and the moisture from the frosting can soften the cookie cup edges after a few days. Store decorated cookie cups in a single layer in an airtight container at room temperature, and avoid stacking them, as the decorations will stick together and become damaged.
If you're preparing these for a specific gathering, I recommend baking the cookie cups two days before, storing them in an airtight container, then decorating them the morning of your event. This schedule ensures everything tastes fresh while still giving you the convenience of not doing everything at the last minute. The decorating process goes quickly once you have all your candies and frosting ready, usually taking about twenty to thirty minutes for a full batch.
Serving Suggestions and Complete Presentations
These Easter Bunny Sugar Cookie Cups shine brightest when presented thoughtfully as part of your dessert spread. Arrange them on a pastel-colored platter or cake stand to emphasize their spring theme, and consider surrounding them with fresh flowers or decorative grass for a festive tablescape. The individual portions make them perfect for buffet-style serving, as guests can easily pick one up without needing plates or forks. For a more elegant presentation, place each cookie cup in a small paper liner before arranging them on your serving platter.
Pairing these cookie cups with beverages enhances the overall experience. They're delightful alongside hot tea, especially floral varieties like chamomile or mint that complement the vanilla flavor. For family gatherings with younger guests, serve them with cold milk or fruit-infused water. The sweetness of the Easter Bunny Sugar Cookie Cups balances nicely with slightly bitter or tart beverages, so don't hesitate to serve them with coffee for adult guests who appreciate that contrast.
Consider the context of your gathering when deciding how many to prepare. As part of a larger dessert table with multiple options, plan for one to two cookie cups per person. If these are the primary dessert, three per person is a safer estimate. The recipe scales easily, so you can double or triple the batch if you're feeding a crowd, though you'll need to bake in multiple batches unless you have several mini muffin tins.
Frequently Asked Questions
Can I make these cookie cups without a mini muffin tin?
You can adapt this recipe to use a regular muffin tin, though the results will be larger and the baking time will increase to about fifteen to eighteen minutes. The cookie cups will be more substantial, which means you might want to adjust your frosting amount accordingly. Alternatively, you can bake these as regular drop cookies on a baking sheet, though you'll lose the cup shape that makes them perfect for holding frosting.
How do I prevent the cookie dough from sticking to the pan?
Thoroughly coating each mini muffin cup with cooking spray or butter is essential for easy removal. I prefer using a cooking spray with flour added, as it creates an even coating that prevents sticking. Let the cookies cool in the pan for about five minutes after removing from the oven, then gently twist each cookie cup as you lift it out with a small offset spatula or butter knife. If they still stick, they likely need another minute of cooling time.
What's the best way to pipe the frosting for a professional look?
Using a piping bag fitted with a large star tip creates those beautiful swirled peaks that make the Easter Bunny Sugar Cookie Cups look bakery-worthy. If you don't have piping equipment, a plastic storage bag with one corner snipped off works surprisingly well. Fill the bag only halfway to maintain control, twist the top to push frosting toward the opening, and apply steady pressure while moving in a circular motion from the outside edge toward the center of each cookie cup.
Can I use store-bought frosting to save time?
Store-bought frosting certainly works if you're short on time, though homemade frosting takes only about five minutes to make and tastes noticeably better. If you do use prepared frosting, look for varieties labeled as "creamy" rather than "whipped," as they'll pipe more easily and hold their shape better. You can improve store-bought frosting by beating it with a mixer for a minute or two, which incorporates air and makes the texture lighter and more appealing on these Easter Bunny Sugar Cookie Cups.
How should I store leftover decorated cookie cups?
Store decorated Easter Bunny Sugar Cookie Cups in an airtight container at room temperature for up to two days. Avoid refrigerating them unless your kitchen is very warm, as refrigeration can make the cookies lose their tender texture and become slightly tough. If you must refrigerate them, let them come to room temperature for about thirty minutes before serving for the best texture and flavor. The frosting may weep slightly if the container isn't truly airtight, so choose your storage container carefully.
Can I freeze these after decorating?
While the unfrosted cookie cups freeze beautifully, I don't recommend freezing decorated ones, as the frosting texture changes significantly upon thawing and the candy decorations can become sticky or discolored. If you need to prepare far in advance, freeze the baked cookie cups and make fresh frosting for decorating after thawing. The cookie cups thaw quickly at room temperature, usually within thirty minutes, making it easy to decorate them the same day you plan to serve them.
Easter Bunny Sugar Cookie Cups
Adorable sugar cookie cups with soft, buttery bases filled with smooth buttercream frosting and decorated with bunny faces. Perfect for spring gatherings.
Prep Time
20 min
Cook Time
12 min
Total Time
32 min
Servings
24 cookie cups
Ingredients
For 24 cookie cups
- 1 and 1/2 cups all-purpose flour
- 1/2 teaspoon baking powder
- 1/4 teaspoon salt
- 1/2 cup unsalted butter, softened to room temperature
- 3/4 cup granulated sugar
- 1 large egg, room temperature
- 1 teaspoon vanilla extract
- 1/2 cup unsalted butter, softened for frosting
- 2 and 1/2 cups powdered sugar
- 1 teaspoon vanilla extract for frosting
- 2 to 3 tablespoons milk
- Pink food coloring, optional
- 24 mini marshmallows, cut in half for ears
- 48 candy eyes
- 24 small pink candies or pink frosting for noses
Instructions
- 1
Preheat and prepare
Preheat your oven to 350°F (175°C). Generously spray a 24-cup mini muffin tin with cooking spray, making sure to coat the bottom and sides of each cup thoroughly to prevent sticking.
- 2
Mix dry ingredients
In a medium bowl, whisk together the flour, baking powder, and salt until well combined. Set this mixture aside while you prepare the wet ingredients.
- 3
Cream butter and sugar
In a large mixing bowl, use an electric mixer to beat the softened butter and granulated sugar together on medium speed for 2 to 3 minutes, until the mixture is light, fluffy, and pale in color. This creaming process incorporates air for tender cookies.
- 4
Add egg and vanilla
Add the egg and vanilla extract to the butter mixture, beating on medium speed until completely incorporated and smooth, about 1 minute. Scrape down the sides of the bowl as needed to ensure even mixing.
- 5
Combine wet and dry
With the mixer on low speed, gradually add the flour mixture to the wet ingredients, mixing just until no dry flour streaks remain. Avoid overmixing, which can make the cookies tough.
- 6
Form cookie cups
Roll the dough into 24 balls, using about 1 tablespoon of dough for each. Place one ball in each prepared mini muffin cup, then use your thumb or the back of a small spoon to press down in the center, creating a shallow well while leaving the edges slightly raised.
- 7
Bake the cookies
Bake for 10 to 12 minutes, until the edges are just barely starting to turn golden but the centers still look slightly underbaked. The cookies will continue to set as they cool. Let them cool in the pan for 5 minutes, then carefully remove to a wire rack to cool completely before frosting.
- 8
Make the frosting
In a large bowl, beat the softened butter for frosting with an electric mixer until creamy, about 1 minute. Gradually add the powdered sugar, one cup at a time, beating on low speed until combined. Add the vanilla extract and 2 tablespoons of milk, then beat on high speed for 2 to 3 minutes until light and fluffy.
- 9
Adjust frosting consistency
Check the frosting consistency; it should hold soft peaks but still be smooth enough to pipe. If too thick, add more milk one teaspoon at a time. If too thin, add more powdered sugar one tablespoon at a time until you reach the desired consistency.
- 10
Pipe the frosting
Transfer the frosting to a piping bag fitted with a large star tip. Pipe a generous swirl of frosting into the center of each cooled cookie cup, starting from the outside edge and working in a circular motion toward the center.
- 11
Create bunny ears
Cut each mini marshmallow in half diagonally to create two ear shapes. Gently press two marshmallow halves into the top of the frosting on each cookie cup to form bunny ears.
- 12
Add facial features
Press two candy eyes into the frosting below the ears on each cookie cup. Add a small pink candy or a tiny dot of pink-tinted frosting below the eyes to create a nose. Serve immediately or store in an airtight container for up to 2 days.
Nutrition Facts
Per serving (estimated)
165 calories
Calories
23g
Carbs
1g
Protein
8g
Fat
0g
Fiber
55mg
Sodium
17g
Sugar


