
Ultimate Chewy Chocolate Brownies Recipe | Pin Desserts
Master the art of perfectly chewy, fudgy chocolate brownies with this detailed guide. Rich chocolate flavor, crackly tops, and soft centers every time.
cookwithlucia.com/recipes/easter-brownies-recipe-chewy-chocolatey-and-festive-pin-desserts
There's something utterly captivating about a perfectly executed chocolate brownie. The glossy, crackly top that gives way to a dense, fudgy interior. The intense chocolate flavor that lingers on your palate. These aren't just any brownies—they're the kind that make people pause mid-conversation, close their eyes, and savor every bite. Whether you're preparing treats for a spring gathering, a weekend family get-together, or simply indulging your chocolate cravings, mastering the art of the perfect brownie is a skill that will serve you for years to come.
I still remember the first time I tasted a truly exceptional brownie—not the cakey, dry version that so many recipes produce, but one with that perfect balance of chewiness and fudginess. The exterior had that paper-thin, shiny crust that crackled slightly when I broke into it, while the interior was dense and moist, with puddles of melted chocolate throughout. That experience changed everything for me, and I became determined to create a recipe that could consistently deliver those results.
I won't pretend this recipe is a quick fifteen-minute affair. Creating these chewy chocolate brownies requires attention to detail, proper technique, and a bit of patience. But here's what I promise: every minute you invest will be rewarded tenfold when you pull that pan from the oven and watch your family's faces light up. This guide will walk you through not just the steps, but the why behind each technique, so you'll understand exactly what creates that perfect texture and how to achieve it every single time.
The Origins and History
The brownie is a distinctly American invention, with its origins traced back to the late 19th century. While the exact origin story is debated, most food historians agree that brownies emerged in the United States sometime in the 1890s. Some accounts credit a socialite in Chicago who asked her pastry chef to create a dessert that was more portable than cake but richer than cookies for a gathering. Others point to a chef at a hotel who accidentally created the confection when a chocolate cake recipe went wonderfully wrong.
What we do know is that the first published brownie recipe appeared in the 1906 edition of "The Boston Cooking-School Cook Book" by Fannie Farmer, though that version was notably different from what we consider a brownie today—it didn't even contain chocolate! The chocolate brownie as we know it gained popularity throughout the 1920s and 1930s, with recipes appearing in newspapers and community cookbooks across America.
Regional variations quickly developed. New England favors a cakier texture, while the Midwest tends toward fudgier versions. Southern bakers often incorporate pecans, while West Coast interpretations sometimes feature sea salt or olive oil. In modern kitchens, the brownie has become a canvas for creativity, with home bakers developing their own signature versions, each fiercely defended as "the best."
The evolution of the perfect brownie recipe reflects changing tastes and available ingredients. Early versions used less chocolate and more flour, producing a cake-like texture. As chocolate became more affordable and accessible in the mid-20th century, recipes began incorporating more of it, leading to the dense, fudgy style that's now so beloved. Today's brownie lovers have strong opinions about texture, with camps divided between fudgy, chewy, and cakey—though this recipe firmly plants its flag in the chewy, fudgy territory.
Understanding the Flavor Profile
The perfect chewy chocolate brownie delivers a complex symphony of flavors that goes far beyond simple sweetness. The dominant note is, of course, deep, bittersweet chocolate—not the mild sweetness of milk chocolate, but a more sophisticated, slightly bitter edge that comes from using quality cocoa and dark chocolate. This bitter foundation is balanced by sugar, which provides not just sweetness but also contributes to that shiny, crackly top through caramelization.
Beneath the chocolate, you'll detect warm notes of vanilla and a subtle saltiness that amplifies every other flavor present. There's also a slight tang from the eggs, which adds depth and prevents the brownies from tasting one-dimensional. When executed properly, these chewy chocolate brownies have a butterscotch-like quality at the edges where the batter caramelizes against the hot pan, creating pockets of concentrated flavor.
The texture journey is equally important to the overall experience. Your teeth should first encounter that thin, delicate crust—almost like the top of a meringue—that shatters with the slightest pressure. Then you sink into the dense, moist interior that's simultaneously fudgy and chewy. The brownies should never feel dry or crumbly; instead, they should have an almost truffle-like quality, with just enough structure to hold together while still feeling luxuriously moist.
The finish is long and satisfying, with chocolate flavor coating your mouth without being cloying or overly sweet. The best brownies leave you wanting another bite not because they're insubstantial, but because the flavor is so well-balanced and satisfying that you can't help but reach for more.
Essential Ingredients Explained
Every ingredient in these chewy chocolate brownies serves a specific purpose, and understanding these roles will help you make informed decisions when shopping and substituting. Let's break down what matters and why.
Butter provides richness, flavor, and contributes to that fudgy texture. Always use real, unsalted butter—never margarine or spreads, which contain water and emulsifiers that will compromise your texture. European-style butter with higher fat content will make your brownies even richer, though standard unsalted butter works beautifully. The butter should be melted and slightly cooled before incorporating, which helps create that dense, fudgy crumb.
Chocolate is obviously the star here, and quality matters tremendously. Use a combination of unsweetened cocoa powder and chopped dark chocolate for maximum depth. The cocoa powder provides intense chocolate flavor and helps create structure, while the chopped chocolate melts into pockets of molten chocolate throughout. Look for cocoa powder that's dark and aromatic—Dutch-process cocoa will give you a darker color and milder flavor, while natural cocoa provides more acidity and brightness.
Sugar does more than sweeten. It creates that coveted shiny, crackly top through a process of dissolving and recrystallizing. Granulated white sugar is essential—don't substitute with brown sugar entirely, as you need those sugar crystals. Some recipes add a small amount of brown sugar for moisture and depth, but white sugar should dominate.
Eggs provide structure, richness, and that slightly chewy texture. They also contribute to the shiny top when beaten properly with the sugar. Use large eggs at room temperature, which incorporate more smoothly than cold eggs. The number of eggs and how vigorously you beat them directly impacts your final texture.
Flour provides structure, but less is more when you want fudgy brownies. All-purpose flour works perfectly—don't use cake flour (too delicate) or bread flour (too much protein, which creates toughness). Measure carefully, preferably by weight, as too much flour is the fastest route to dry, cakey brownies.
Salt is crucial for amplifying chocolate flavor. Don't skip it! Fine sea salt or table salt works best for even distribution. Some bakers also add flaky sea salt on top before baking for textural contrast.
Vanilla extract adds warmth and rounds out the chocolate flavor. Use pure vanilla extract, not imitation, which can taste chemical and sharp. A small amount goes a long way.
Espresso powder is optional but highly recommended. It doesn't make your brownies taste like coffee; instead, it amplifies and deepens the chocolate flavor, making everything taste more intensely chocolatey. If you can't find espresso powder, finely ground instant coffee works as a substitute.
Mastering the Technique
Creating perfectly chewy chocolate brownies isn't about following steps blindly—it's about understanding the science behind each technique so you can recognize what's happening and adjust as needed.
Stage One: Melting and Combining Fats begins with gently melting your butter and chopped chocolate together. This can be done in a double boiler or carefully in the microwave in short bursts. The key is to stop while there are still a few small chunks of chocolate remaining, then stir off the heat until completely smooth. This prevents overheating, which can cause chocolate to seize or become grainy. The mixture should be glossy and homogeneous, warm but not hot.
Stage Two: Building the Sugar Structure is where magic happens. When you add sugar to your melted chocolate mixture and whisk vigorously, you're creating tiny air bubbles and dissolving sugar crystals. This vigorous whisking—for at least two full minutes—is what creates that signature shiny, crackly top. The mixture will lighten slightly in color and become thick and glossy. Many bakers skip this step or don't whisk long enough, which results in dull, matte tops.
Stage Three: Incorporating Eggs should be done one at a time, whisking well after each addition. This ensures proper emulsification and adds more air to your batter, contributing to texture and rise. The eggs should be at room temperature, which allows them to blend more smoothly. After adding eggs, your batter should be thick, glossy, and fall in ribbons from your whisk. This ribbon stage is crucial—if your batter drips thinly, you haven't developed enough structure.
Stage Four: Gentle Folding is where many home bakers go wrong. Once you add your flour, cocoa, and salt, you must switch from whisking to folding with a spatula. Stir just until no dry streaks remain—overmixing at this stage develops gluten, which creates toughness and a cakey texture. The batter should be thick and barely pourable, almost like a very soft cookie dough. If it seems too thin, you've probably undermeasured flour or overbeaten your eggs.
Stage Five: Pan Preparation and Baking requires attention to detail. Line your pan with parchment paper, leaving overhang on two sides for easy removal. Pour the thick batter into the prepared pan and spread it evenly—it won't spread much during baking, so you need to distribute it now. Bake in the center of your preheated oven, and here's the critical part: underbake slightly. When a toothpick inserted in the center comes out with a few moist crumbs (not wet batter, but not clean either), they're done. The brownies will continue cooking from residual heat after you remove them from the oven.
Stage Six: Cooling and Cutting tests your patience but is essential for clean cuts. Let the brownies cool completely in the pan—at least two hours, preferably longer. For the cleanest cuts, refrigerate for an hour, then use a sharp knife dipped in hot water and wiped clean between each cut. This prevents dragging and creates those beautiful, professional-looking squares.
Common Pitfalls and How to Fix Them
Even experienced bakers encounter brownie disasters. Here's how to identify what went wrong and prevent it next time.
If your brownies turn out cakey rather than fudgy, you've likely used too much flour or overbeaten the batter after adding flour. Flour should be measured carefully—spoon it into your measuring cup rather than scooping, which compacts it and gives you more flour than intended. Also check your leavening: these brownies don't need baking powder or baking soda, which create a cakier texture. Finally, make sure you're not overbaking—cakey texture often results from leaving brownies in the oven too long.
If your brownies have a dull, matte top instead of that shiny crackle, you didn't whisk the sugar and chocolate mixture vigorously enough. This step is crucial and tiring—your arm should actually feel a bit fatigued. Whisk for a full two to three minutes, until the mixture noticeably lightens and thickens. Also ensure your oven temperature is accurate; too-low temperatures prevent proper crust formation.
If your brownies are dry and crumbly, you've almost certainly overbaked them. Remember that brownies continue cooking after you remove them from the oven due to residual heat. They should still look slightly underdone in the center when you take them out—moist crumbs on a toothpick are perfect. Also check that you haven't reduced the fat or sugar in the recipe, as both contribute crucial moisture.
If your brownies sink dramatically in the middle, you've incorporated too much air during mixing. While you want to whisk the sugar mixture vigorously, you shouldn't beat the eggs so hard that the batter becomes fluffy and pale. The eggs should be fully incorporated but not overbeaten. Also make sure your oven temperature isn't too high, which can cause rapid rise and subsequent collapse.
If your brownies stick to the pan or fall apart when cutting, your pan preparation was insufficient or you tried to cut them too soon. Always line your pan with parchment paper, not just grease it. Let brownies cool completely—they're fragile when warm and firm up considerably as they cool. For cleanest cuts, refrigerate first and use a hot, clean knife for each cut.
If your chocolate seizes into a grainy mess when melting, you've exposed it to water or overheated it. Make sure all utensils are completely dry when working with chocolate. Melt gently over low heat or in short microwave bursts, stopping before it's fully melted and stirring until smooth. If it does seize, you can sometimes save it by whisking in a tablespoon of warm water or oil, though the texture may not be as smooth.
Regional Twists Worth Trying
Once you've mastered the basic technique for these chewy chocolate brownies, exploring variations can be incredibly rewarding. Different regions and cultures have developed their own takes on this American classic.
Middle Eastern-Inspired Brownies incorporate tahini and toasted sesame seeds for a nutty depth. Swirl a few tablespoons of tahini into the batter before baking, and sprinkle toasted sesame seeds on top. The tahini adds a sophisticated, slightly savory note that balances the sweetness beautifully, while the sesame provides textural contrast. Some versions also include a pinch of cardamom in the batter, which adds a subtle floral complexity.
Mexican Chocolate Brownies take inspiration from traditional Mexican hot chocolate, adding cinnamon and a touch of cayenne pepper. The warmth from the cinnamon and the subtle heat from cayenne (just a pinch—you want intrigue, not fire) create layers of flavor that make each bite more interesting. Some bakers also add a tablespoon of instant espresso powder to deepen the chocolate notes further.
Mediterranean Variation features olive oil in place of some of the butter, creating an incredibly moist texture with a subtle fruity note. Use a mild, fruity olive oil—not a peppery, assertive one. The olive oil also helps the brownies stay moist longer. Top with flaky sea salt and you have a sophisticated, grown-up brownie that's perfect with coffee or tea.
Southeast Asian-Inspired Version incorporates coconut in two ways: melted coconut oil replaces the butter, and toasted coconut flakes are folded into the batter. The coconut oil provides a subtle tropical note, while the toasted coconut adds texture and intensifies the coconut flavor. Some versions also add a small amount of fresh ginger, finely grated, which provides a bright, spicy note that cuts through the richness.
The Perfect Spread
These chewy chocolate brownies are substantial enough to stand alone as a dessert, but creating a complete dessert spread elevates the entire experience and provides options for different preferences.
For a classic presentation, serve the brownies slightly warm with a scoop of vanilla ice cream on the side. The temperature contrast between warm brownies and cold ice cream is magical, and the vanilla provides a creamy counterpoint to the intense chocolate. If you want to be fancy, drizzle some caramel sauce over the ice cream and sprinkle flaky sea salt on top.
Fresh fruit provides a refreshing contrast to rich brownies. Strawberries, raspberries, and blackberries all pair beautifully with chocolate, their slight tartness cutting through the sweetness. For a more elegant presentation, macerate the berries with a tiny bit of sugar for 30 minutes before serving, which draws out their juices and creates a light sauce.
Whipped cream—either plain or lightly sweetened with vanilla—offers another option for those who find ice cream too heavy. The airy, light texture of whipped cream provides contrast without competing with the chocolate flavor. For a Middle Eastern twist, add a tiny amount of rose water to your whipped cream.
Hot beverages are essential for a complete brownie experience. Turkish coffee, with its intense flavor and slight bitterness, complements chocolate beautifully. Mint tea offers a refreshing contrast, while a rich hot chocolate creates an indulgent double-chocolate experience. For something lighter, try jasmine green tea, whose floral notes provide an interesting counterpoint.
Keeping and Reheating
Proper storage ensures your chewy chocolate brownies maintain their perfect texture for days after baking. At room temperature, store brownies in an airtight container with parchment paper between layers if you're stacking them. They'll stay fresh for four to five days, though they rarely last that long! The brownies will actually improve slightly after a day, as the flavors meld and deepen.
For longer storage, brownies freeze exceptionally well. Cut them into individual portions, wrap each one tightly in plastic wrap, then place them all in a freezer-safe container or bag. They'll keep for up to three months in the freezer. The beauty of freezing individual portions is that you can pull out just one or two whenever a chocolate craving strikes, without defrosting the entire batch.
To thaw frozen brownies, simply leave them at room temperature for an hour or two. They'll come back to perfect texture without any loss of quality. Some people actually prefer eating brownies straight from the freezer, when they have a dense, almost fudge-like consistency.
Reheating brownies can restore that just-baked experience. For individual portions, microwave for 10-15 seconds until just warm—not hot—which will soften them and make any chocolate chunks melty again. For a larger portion, wrap brownies in foil and warm in a 300°F oven for about 10 minutes. This gentle heat warms them through without drying them out or making the edges crispy.
One trick professional bakers use: slightly underbake brownies if you know you'll be storing them for several days. The extra moisture helps them stay fudgy even after sitting for a while. Just be sure they're cooked enough to be food-safe—they should not be raw in the center, just slightly less done than you'd normally make them.
Your Questions Answered
Can I make these brownies without eggs?
Eggs play a crucial structural and textural role in these chewy chocolate brownies, so replacing them requires careful consideration. For each egg, you can use a "flax egg" (1 tablespoon ground flaxseed mixed with 3 tablespoons water, left to gel for 5 minutes), though this will make the brownies slightly denser and more crumbly. Applesauce (¼ cup per egg) creates a softer, more cake-like texture, which moves away from the chewy, fudgy ideal we're after. The most successful egg replacement I've found for brownies is aquafaba (3 tablespoons of chickpea cooking liquid per egg), whisked until frothy before adding to the batter, which maintains better structure and chewiness.
How do I know when my brownies are perfectly done?
This is the million-dollar question! The toothpick test is your friend, but you need to interpret it correctly. Insert a toothpick into the center of the pan (not near edges, which cook faster) about 5 minutes before your recipe's suggested baking time. You want moist crumbs clinging to the toothpick—not wet, pourable batter, but definitely not clean. The center should still look slightly underdone and jiggly when you gently shake the pan. Remember that carryover cooking will continue for at least 10-15 minutes after you remove the pan from the oven, so what looks slightly underdone will finish cooking to perfection as it cools.
Can I double this recipe and bake it in a 9x13 inch pan?
Absolutely! Doubling the recipe works perfectly for a standard 9x13 inch pan, which is ideal for larger gatherings. However, you'll need to adjust your baking time, as the thicker layer of batter takes longer to cook through. Start checking for doneness about 10 minutes later than the original recipe suggests, but be prepared that it might take 15-20 minutes longer depending on your oven. The edges will set and pull away from the pan first, while the center should still have that slight jiggle. Use the same toothpick test, checking multiple spots across the pan since larger pans can have hot spots.
Why does my shiny top sometimes crack and sometimes stay smooth?
The surface appearance of your brownies depends on several factors working together. A crackly top forms when you've whisked the sugar and chocolate mixture vigorously, creating a meringue-like layer on top that sets during baking. Oven temperature plays a role too—a slightly higher temperature (around 350°F) encourages cracking, while lower temperatures create smoother tops. The ratio of eggs to sugar matters as well; more sugar relative to eggs promotes crackling. Some bakers actually prefer a smooth top, finding it more elegant, while others love the rustic look of cracks, so both outcomes can be beautiful and delicious.
Can I add mix-ins like nuts or chocolate chips?
Definitely! Mix-ins should be added at the very end, after you've folded in the dry ingredients. For a standard 8x8 or 9x9 inch pan, about ¾ to 1 cup of mix-ins is perfect—enough to distribute throughout without overwhelming the brownies. Toasted walnuts, pecans, or almonds add crunch and nutty flavor. Additional chocolate chips create pockets of melted chocolate, though your brownies are already intensely chocolatey. If adding nuts, toast them first to deepen their flavor and ensure crunch. Fold mix-ins gently into the batter just until distributed, being careful not to overmix, which would develop gluten and create toughness.
How can I make these brownies ahead for a gathering?
These chewy chocolate brownies are actually perfect make-ahead desserts! Bake them up to two days in advance and store at room temperature in an airtight container—they actually improve after a day as flavors meld. For gatherings, you can bake them, let them cool completely, then freeze them up to a month ahead. Thaw overnight in the refrigerator, then bring to room temperature before serving. If you want to serve them warm, cut them while still cool (they cut cleaner), then wrap in foil and warm gently in a low oven for 10-15 minutes just before serving. This make-ahead quality makes them ideal for events when you want impressive desserts without last-minute stress.
Final Thoughts on Brownie Mastery
Mastering these chewy chocolate brownies is a journey worth taking. Unlike many desserts that require specialized equipment or hard-to-find ingredients, brownies are beautifully accessible—requiring only a bowl, a whisk, and ingredients you likely already have in your pantry. Yet within that simplicity lies tremendous opportunity for excellence. The difference between mediocre brownies and transcendent ones comes down to technique, attention to detail, and understanding what you're trying to achieve.
As you make these brownies repeatedly, you'll develop an intuition for how the batter should look and feel at each stage. You'll recognize when your chocolate mixture has been whisked enough, when your batter has reached the perfect consistency, and when your brownies have baked just long enough. This intuition transforms recipe-following into genuine baking skill.
The beauty of these chewy chocolate brownies is their versatility. They're equally at home at a casual weekend gathering or an elegant dinner party. They satisfy children's sweet tooth and impress sophisticated dessert lovers. They can be dressed up with ice cream and berries or enjoyed simply with coffee. They travel well, keep beautifully, and never fail to bring smiles.
Remember that every oven is different, every pan conducts heat differently, and even humidity affects baking. Don't be discouraged if your first batch isn't perfect—each attempt teaches you something about your specific equipment and environment. Take notes on what works and what doesn't. Adjust times and temperatures as needed. The recipe provides the framework, but you'll make it your own through practice and observation.
The most rewarding aspect of perfecting these brownies is sharing them with people you care about. There's something special about pulling a pan of warm, fragrant brownies from the oven and seeing faces light up. Food has this incredible ability to create joy and bring people together, and few desserts accomplish this as reliably as a perfect brownie. Whether you're baking for family, friends, or yourself, these chewy chocolate brownies represent time and care invested in creating something genuinely delicious. And that's always worth celebrating.
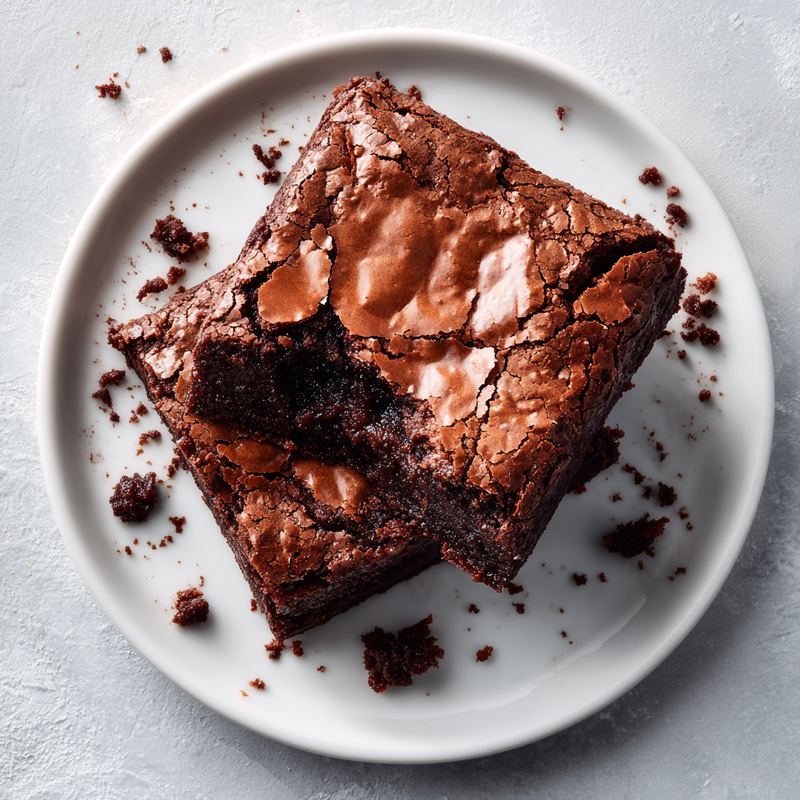
Ultimate Chewy Chocolate Brownies
Rich, fudgy chocolate brownies with a signature shiny, crackly top and intensely chocolatey flavor. These brownies have the perfect chewy texture with a dense, moist interior.
Prep Time
20 min
Cook Time
30 min
Total Time
50 min
Servings
16 brownies
Ingredients
For 16 brownies
- ¾ cup (170g) unsalted butter, cut into pieces
- 8 ounces (225g) dark chocolate (60-70% cacao), roughly chopped
- 1¼ cups (250g) granulated sugar
- 3 large eggs, at room temperature
- 1 tablespoon pure vanilla extract
- ¾ cup (95g) all-purpose flour
- ¼ cup (25g) unsweetened cocoa powder
- ½ teaspoon fine sea salt
- ½ teaspoon instant espresso powder (optional but recommended)
Instructions
- 1
Prepare pan and preheat
Preheat your oven to 350°F (175°C). Line an 8x8-inch or 9x9-inch baking pan with parchment paper, leaving a 2-inch overhang on two opposite sides for easy removal. This overhang acts as handles to lift the brownies out cleanly once cooled.
- 2
Melt chocolate and butter
Combine the butter and chopped dark chocolate in a large heatproof bowl. Set the bowl over a pot of barely simmering water (double boiler method), making sure the bottom of the bowl doesn't touch the water. Stir occasionally until the mixture is almost completely melted, then remove from heat and stir until completely smooth and glossy. Let cool for 5 minutes.
- 3
Build the sugar structure
Add the granulated sugar to the chocolate mixture and whisk vigorously for 2-3 minutes. This vigorous whisking is crucial—your arm should feel tired! The mixture will thicken, become glossy, and lighten slightly in color. This step creates the signature shiny, crackly top on your brownies.
- 4
Incorporate eggs one at a time
Add the eggs one at a time, whisking well after each addition until fully incorporated. The batter should become thick and glossy, falling in ribbons from your whisk when lifted. Add the vanilla extract and whisk until combined. The mixture should look smooth and emulsified.
- 5
Sift and add dry ingredients
In a separate bowl, whisk together the flour, cocoa powder, salt, and espresso powder (if using) to remove any lumps. Sift this dry mixture over the chocolate batter. Using a rubber spatula, gently fold the dry ingredients into the wet ingredients just until no dry streaks remain. Do not overmix—stop as soon as everything is combined. The batter should be very thick, almost like soft cookie dough.
- 6
Transfer to pan
Scrape the thick batter into your prepared pan. Use your spatula to spread it evenly into all corners—it won't spread much during baking, so you need to distribute it evenly now. Smooth the top as best you can, though it doesn't need to be perfectly flat.
- 7
Bake to perfection
Bake in the center of your preheated oven for 28-32 minutes (less time for a 9x9 pan, more for an 8x8 pan). The brownies are done when the edges look set and begin to pull away from the pan, and a toothpick inserted in the center comes out with moist crumbs—not wet batter, but definitely not clean. The center should still jiggle slightly when you gently shake the pan.
- 8
Cool completely
Remove the pan from the oven and place it on a wire rack. Let the brownies cool completely in the pan—this will take at least 2 hours, or you can refrigerate for 1 hour for faster cooling. Cooling is essential for clean cuts and proper texture development.
- 9
Cut and serve
Using the parchment paper overhang, lift the entire brownie slab out of the pan and place it on a cutting board. For the cleanest cuts, dip a sharp knife in hot water, wipe it dry, and make your first cut. Wipe the knife clean and repeat for each cut. Cut into 16 squares and serve at room temperature or slightly warmed.
Nutrition Facts
Per serving (estimated)
285 calories
Calories
32g
Carbs
4g
Protein
17g
Fat
2g
Fiber
95mg
Sodium
25g
Sugar


