
Delicious Bunny Oreo Balls - Fun Easter Treats Recipe
Learn to make adorable Bunny Oreo Balls with cream cheese and cookies! Perfect Easter treats that are easy, no-bake, and loved by kids and adults alike.
cookwithlucia.com/recipes/delicious-bunny-oreo-balls-for-fun-easter-treats-and-quick-easter-desserts
There's something magical about the moment you pull open a package of chocolate sandwich cookies and catch that deep, sweet aroma mixed with cocoa and cream. That scent takes me right back to weekend gatherings where dessert wasn't just food but the centerpiece of connection and joy. When I first discovered how simple it is to transform humble cookies into elegant, adorable treats, I knew I had found something special. These delicious Bunny Oreo Balls for fun Easter treats and quick Easter desserts have become my go-to recipe when I want maximum impact with minimal fuss, and they never fail to bring smiles to every face around the table.
What sets these bunny-shaped treats apart is the perfect balance of textures and the sheer creativity they allow. The smooth, creamy interior contrasts beautifully with the crisp chocolate coating, while the adorable bunny faces add a playful touch that turns a simple sweet into a memorable experience. Whether you're preparing for a spring celebration, a weekend family gathering, or simply want to brighten an ordinary afternoon, these treats deliver both charm and deliciousness in every bite.
By the end of this guide, you'll have mastered not just the basic technique for making these delicious Bunny Oreo Balls for fun Easter treats and quick Easter desserts, but also the little tricks that ensure perfect consistency, adorable presentation, and flavors that will have everyone asking for your recipe. Let's dive into this delightful world of no-bake dessert magic.
The Story Behind This Dish
Oreo balls, also known as cookie truffles, emerged from the American home baking tradition of transforming simple ingredients into celebration-worthy desserts. The genius of this treat lies in its accessibility—just three core ingredients create something that looks and tastes like it came from a professional bakery. Home bakers discovered that crushing chocolate sandwich cookies and binding them with cream cheese created a mixture that could be shaped, coated, and decorated in endless ways.
The bunny variation became particularly beloved during spring gatherings when families sought fun, easy desserts that children could help create. Unlike complicated layer cakes or temperamental pastries, these treats forgive mistakes and welcome creative expression. Each bunny can have its own personality, making the decorating process as enjoyable as the eating.
What makes the homemade version so much better than store-bought alternatives is the freshness factor and the ability to control sweetness levels. Commercial versions often sit on shelves for weeks, losing that just-made quality. When you prepare these delicious Bunny Oreo Balls for fun Easter treats and quick Easter desserts at home, you control every element, from the quality of the chocolate coating to the softness of the cream cheese center.
What Makes This Recipe Special
No-Bake Convenience: These delicious Bunny Oreo Balls for fun Easter treats and quick Easter desserts require absolutely no oven time, making them perfect for warm spring days when you don't want to heat up the kitchen. The entire process happens at room temperature or in the refrigerator, saving energy and keeping your space comfortable.
Kid-Friendly Assembly: Children love every step of this recipe, from crushing cookies to rolling balls to decorating bunny faces. It's a wonderful way to spend quality time together while teaching basic kitchen skills like measuring, mixing, and creative presentation. The forgiving nature of the recipe means little hands can participate without stress.
Budget-Conscious Elegance: With just a few affordable ingredients, you can create two to three dozen impressive treats that look like specialty bakery items. The cost per serving is remarkably low, yet the visual impact and taste rival desserts costing several times more.
Make-Ahead Flexibility: These treats actually improve after a day in the refrigerator as the flavors meld and the texture firms up perfectly. You can prepare them several days before your gathering, freeing up precious time on the actual day of your event.
Customizable Decorations: While this recipe focuses on adorable bunnies, the same base technique works for countless other designs. Once you master these delicious Bunny Oreo Balls for fun Easter treats and quick Easter desserts, you can adapt the decorating style for any season or occasion throughout the year.
Crowd-Pleasing Flavor: The combination of chocolate cookies, tangy cream cheese, and sweet chocolate coating creates a balanced flavor profile that appeals to both children and adults. It's rich without being overwhelming, sweet without being cloying.
Breaking Down the Ingredients
The foundation of these delicious Bunny Oreo Balls for fun Easter treats and quick Easter desserts starts with chocolate sandwich cookies, which provide both structure and flavor. These iconic cookies contain the perfect ratio of chocolate wafer to sweet cream filling, creating a base that's already balanced in sweetness and cocoa intensity. When crushed and combined with other ingredients, they transform from crunchy to creamy while maintaining their distinctive flavor.
Cream cheese serves as the binding agent and adds a subtle tanginess that prevents the treats from becoming one-dimensionally sweet. Always use full-fat cream cheese that's been softened to room temperature—this ensures smooth mixing without lumps. The cream cheese also contributes a luxurious mouthfeel that makes each bite feel indulgent. Its slight tang brightens the overall flavor profile and keeps the richness in check.
The chocolate coating, whether you choose milk, semi-sweet, or white chocolate, provides that satisfying snap when you bite through it and seals in the soft center. Quality coating chocolate melts smoothly and sets with a professional-looking sheen. The coating also serves as the canvas for your decorative elements, holding everything in place while adding an extra layer of chocolate flavor.
Pink coating chocolate or candy melts create the distinctive bunny ears and give your treats their adorable character. These colored coatings melt at similar temperatures to regular chocolate, making them easy to work with. They add visual interest and help identify the treats as special springtime creations rather than standard cookie balls.
Decorating elements like candy eyes, mini chocolate chips, and pink candies bring your bunnies to life. These small touches transform simple spheres into personality-filled characters. The eyes add instant recognition, while the nose and mouth details complete the bunny illusion. Using edible decorations means every part of your delicious Bunny Oreo Balls for fun Easter treats and quick Easter desserts is meant to be enjoyed.
The Cooking Process Explained
The journey begins with crushing your chocolate sandwich cookies into fine crumbs, a process that can happen in a food processor for speed or in a sealed bag with a rolling pin for a therapeutic, hands-on approach. You want the consistency of damp sand—fine enough to hold together when mixed with cream cheese, but not powdered to dust. This texture ensures your final treats have the right density and mouthfeel.
Once your cookies are properly crushed, you'll blend them with softened cream cheese until a uniform dough forms. This mixing stage is crucial—work the mixture until you see no streaks of white and the color is consistent throughout. The mixture should be pliable and slightly sticky, similar to play dough in texture. If it feels too dry, you may need another tablespoon of cream cheese; if too wet, a few more cookie crumbs will balance it out.
Shaping the mixture into uniform balls requires a light touch and slightly damp hands to prevent sticking. Aim for balls about one inch in diameter, roughly the size of a walnut in its shell. Rolling them between your palms creates a smooth surface that will look polished once coated. After shaping, these balls need at least an hour in the refrigerator to firm up, which makes them much easier to dip in chocolate without falling apart.
The chocolate coating stage demands attention to temperature—melted chocolate that's too hot will melt your chilled balls, while chocolate that's too cool will be thick and difficult to work with. Aim for chocolate that's just melted and slightly warm to the touch. Dip each ball using a fork or dipping tool, tap off excess chocolate, and place on parchment paper. Work quickly but calmly, and if your chocolate starts to thicken, a few seconds in the microwave will restore its fluidity.
The final decorating stage is where your delicious Bunny Oreo Balls for fun Easter treats and quick Easter desserts truly come to life. While the chocolate coating is still tacky, position your ears, then add eyes, nose, and mouth details. The chocolate acts as glue, so you have a few minutes to adjust positions before it sets. Once decorated, another brief chill in the refrigerator ensures everything sets firmly and the treats are ready to serve.
Mistakes to Avoid
The most common mistake is using cream cheese straight from the refrigerator, which leads to lumpy, poorly mixed dough with visible white streaks. Always let your cream cheese sit at room temperature for at least thirty minutes before mixing—it should be soft enough to leave an indentation when pressed but not melty or greasy. This simple step ensures smooth, evenly textured treats.
Many home cooks rush the chilling process between steps, resulting in balls that lose their shape when dipped in warm chocolate. Give your shaped balls a full hour in the refrigerator before coating, and don't hesitate to return them to the cold if they start feeling soft during decorating. Patience during chilling makes every subsequent step dramatically easier.
Overheating chocolate is another frequent pitfall that causes it to seize into a grainy, unusable mass. Whether you're using a microwave or double boiler, add heat in short bursts and stir frequently. Chocolate continues melting from residual heat even after you remove the heat source, so stop heating when a few small lumps remain and stir until completely smooth.
Skipping the step of tapping off excess chocolate leads to thick, clunky coatings with puddles at the base and an unprofessional appearance. After dipping each ball, gently tap your dipping fork or spoon against the bowl edge several times to remove excess coating. This creates a thin, even shell that sets beautifully and allows the treat's shape to show through.
Trying to decorate after the chocolate has completely set results in decorations that won't stick and may fall off during handling or serving. Add all decorative elements while the coating is still slightly tacky—usually within two to three minutes of dipping. If you need more working time, you can re-dip just the area where you want to attach decorations with a tiny amount of melted chocolate.
How to Serve This
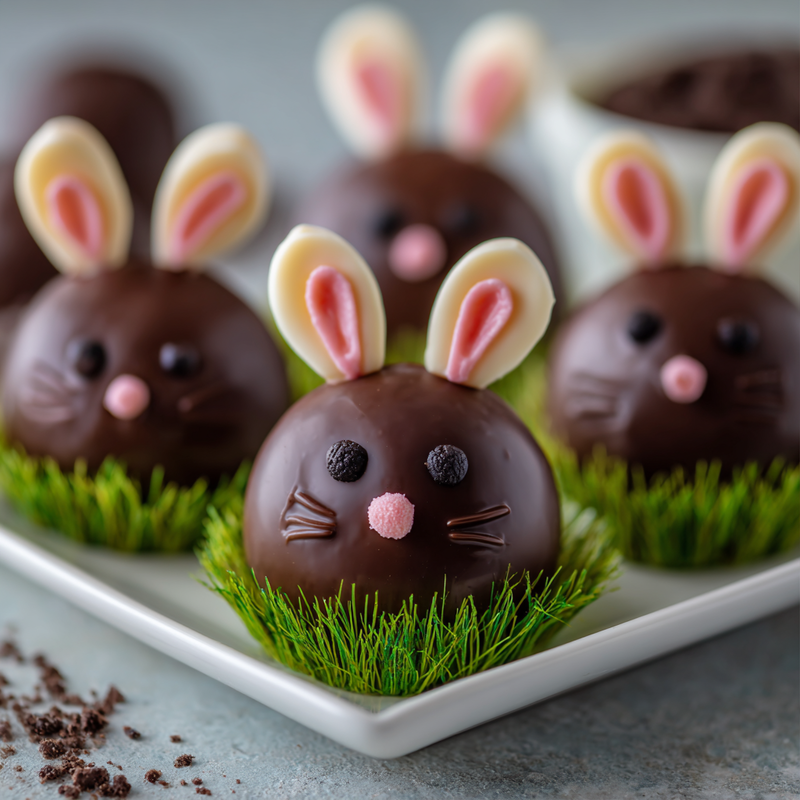
These delicious Bunny Oreo Balls for fun Easter treats and quick Easter desserts shine when arranged on a simple white serving platter, allowing their adorable faces and pastel colors to take center stage. Consider lining your platter with green-tinted coconut flakes to simulate grass, creating an instant springtime scene that delights both children and adults. The contrast between the chocolate treats and the bright green backdrop makes for stunning presentation.
For weekend gatherings, pair these treats with fresh fruit platters featuring strawberries, melon cubes, and grapes to provide a refreshing counterpoint to the rich chocolate. The natural acidity and moisture of fresh fruit cleanses the palate between bites of sweet treats, allowing guests to enjoy multiple pieces without feeling overwhelmed by sweetness.
Serve alongside vanilla bean ice cream or frozen yogurt for an elevated dessert experience that plays with temperature contrasts. The cold, creamy ice cream against the firm chocolate coating and soft interior creates textural interest that makes each bite more enjoyable. A drizzle of caramel or a sprinkle of chopped nuts on the ice cream adds another layer of sophistication.
For casual weeknight treats, simply arrange these bunny balls in cupcake liners and present them in a shallow basket or box. This approach makes individual portions clear and easy to grab, perfect for after-dinner sweets or snack time. The cupcake liners also make transport easier if you're bringing these delicious Bunny Oreo Balls for fun Easter treats and quick Easter desserts to a friend's gathering.
Consider creating a dessert board featuring these treats alongside other complementary items like chocolate-covered strawberries, small cookies, and colorful candies. This abundance approach lets guests build their own dessert experience while making your bunny balls part of a larger, visually impressive spread.
Make-Ahead and Storage Guide
These delicious Bunny Oreo Balls for fun Easter treats and quick Easter desserts store beautifully in the refrigerator for up to two weeks when properly contained. Place them in an airtight container with parchment paper between layers to prevent sticking and protect those delicate bunny faces. The cool temperature keeps the chocolate coating firm and the cream cheese center fresh, actually allowing flavors to deepen and meld over the first few days.
For longer storage, these treats freeze exceptionally well for up to three months. Arrange them in a single layer on a baking sheet and freeze until solid, then transfer to a freezer-safe container or zip-top bag with layers separated by parchment paper. This flash-freezing method prevents them from sticking together and maintains their shape perfectly.
When you're ready to serve frozen treats, transfer them to the refrigerator twelve hours before serving for gentle, even thawing that preserves texture. Avoid thawing at room temperature, which can cause condensation to form on the chocolate coating and create an unappealing appearance. Slow refrigerator thawing ensures they look and taste as fresh as the day you made them.
Reheating isn't necessary or recommended for these treats, as they're designed to be enjoyed chilled or at cool room temperature. If you want to take the edge off the cold, remove them from the refrigerator about fifteen minutes before serving. This brief warming period softens the cream cheese center slightly while maintaining the chocolate coating's structure.
For make-ahead efficiency, you can prepare the cookie-cream cheese mixture up to two days before shaping and coating. Store the mixture in an airtight container in the refrigerator, then let it sit at room temperature for ten minutes before rolling into balls. This staging approach spreads the work across multiple days while ensuring freshness.
Reader Questions Answered
Can I use a different type of cookie for this recipe?
Absolutely! While chocolate sandwich cookies are traditional, you can experiment with vanilla sandwich cookies, peanut butter sandwich cookies, or even chocolate chip cookies for different flavor profiles. Keep in mind that different cookies have varying moisture levels, so you may need to adjust the amount of cream cheese slightly. The key is achieving that moldable, play-dough-like consistency regardless of which cookie you choose.
How can I make these treats without candy eyes if I can't find them?
You have several creative alternatives for making adorable bunny faces without commercial candy eyes. Use mini chocolate chips positioned point-up for eyes, or pipe small dots of white chocolate or vanilla coating and add a tiny dot of melted chocolate in the center once set. You can also use a toothpick dipped in melted chocolate to draw simple eyes directly onto the coating. The personality comes through regardless of the technique you choose.
What's the best way to melt chocolate for smooth, easy coating?
The microwave method works wonderfully when done carefully—place chopped chocolate or candy melts in a microwave-safe bowl and heat in twenty-second intervals, stirring thoroughly between each burst. The chocolate should be smooth, glossy, and just warm to the touch, never hot. Alternatively, use a double boiler by placing chocolate in a heatproof bowl set over simmering water, stirring constantly until melted. Both methods work equally well for creating professional-looking delicious Bunny Oreo Balls for fun Easter treats and quick Easter desserts.
Can I make these treats dairy-free for guests with dietary restrictions?
Yes, with a few simple substitutions you can create delicious dairy-free versions. Replace the cream cheese with dairy-free cream cheese alternative made from cashews or almonds, and use dairy-free chocolate chips or coating chocolate for the outer shell. The texture and flavor remain remarkably similar, and most guests won't notice the difference. Just be sure to check all ingredient labels carefully to ensure they meet your dietary requirements.
How far in advance can I decorate these before a gathering?
You can fully decorate these delicious Bunny Oreo Balls for fun Easter treats and quick Easter desserts up to one week before your gathering without any loss of quality. In fact, making them a few days ahead allows the flavors to meld beautifully and saves you stress on the day of your event. Store them in an airtight container in the refrigerator with parchment paper between layers, and they'll look and taste absolutely fresh when you're ready to serve.
What should I do if my chocolate coating is too thick to work with?
Thick chocolate coating usually means the chocolate has cooled too much or needs a bit of thinning. Return it to the microwave for ten to fifteen seconds, stir well, and check the consistency. If it's still too thick, add a teaspoon of coconut oil or vegetable shortening and stir until smooth—this technique thins the chocolate without affecting the flavor and creates a silkier coating that sets with a beautiful sheen.
Delicious Bunny Oreo Balls for Fun Easter Treats
Adorable no-bake bunny-shaped treats made with chocolate sandwich cookies, cream cheese, and chocolate coating. Perfect for spring gatherings and family celebrations.
Prep Time
30 min
Cook Time
0 min
Total Time
2h 30m
Servings
30 bunny balls
Ingredients
For 30 bunny balls
- 36 chocolate sandwich cookies (like Oreos), finely crushed
- 8 ounces cream cheese, softened to room temperature
- 16 ounces milk chocolate or semi-sweet chocolate coating, melted
- 8 ounces pink candy melts or pink chocolate coating, melted
- 60 candy eyes
- 30 pink heart-shaped candies or mini pink candies for noses
- Black decorating gel or melted chocolate for mouths
Instructions
- 1
Crush the cookies
Place the chocolate sandwich cookies in a food processor and pulse until finely ground to a texture resembling damp sand. Alternatively, place cookies in a large zip-top bag, seal, and crush with a rolling pin until no large pieces remain. Transfer the cookie crumbs to a large mixing bowl.
- 2
Mix with cream cheese
Add the softened cream cheese to the cookie crumbs. Using a spatula or your hands, mix thoroughly until completely combined with no white streaks remaining. The mixture should be uniform in color and have a pliable, slightly sticky consistency similar to play dough.
- 3
Shape into balls
Scoop about one tablespoon of the mixture and roll between your palms to form smooth balls about one inch in diameter. Place each ball on a parchment-lined baking sheet. Continue until all mixture is used, which should yield approximately thirty balls.
- 4
Chill the balls
Place the baking sheet with shaped balls in the refrigerator for at least one hour or until firm to the touch. This chilling step is essential for the balls to hold their shape during the chocolate coating process.
- 5
Melt the chocolate
While the balls chill, melt the milk chocolate or semi-sweet chocolate coating in a microwave-safe bowl in twenty-second intervals, stirring between each interval until smooth and just warm to the touch. Do not overheat. The chocolate should be fluid and glossy.
- 6
Coat the balls
Remove chilled balls from refrigerator. Working with one ball at a time, place it on a fork or dipping tool and submerge in melted chocolate. Lift out and gently tap the fork against the bowl edge several times to remove excess chocolate. Slide the coated ball onto a clean parchment-lined baking sheet.
- 7
Prepare bunny ears
Melt the pink candy melts or pink chocolate coating using the same method as before. On a separate piece of parchment paper, pipe or spoon sixty small oval shapes about one inch long to create bunny ears. Allow these to set for about five minutes until firm but still slightly tacky.
- 8
Attach ears
While the chocolate coating on your balls is still slightly tacky, gently press two pink oval ears onto the top of each ball, positioning them at a slight angle. If the coating has set too much, add a tiny dot of melted chocolate where the ears will attach to help them stick.
- 9
Add facial features
Immediately after attaching ears, press two candy eyes onto each bunny face about halfway down the ball. Position a pink candy nose below and between the eyes. Allow to set for a few minutes.
- 10
Draw mouths
Once the facial features are secure, use black decorating gel or a toothpick dipped in melted chocolate to draw a small smile or two short lines beneath the nose to complete the bunny face. Work gently to avoid smudging.
- 11
Final chill
Return the decorated bunny balls to the refrigerator for at least thirty minutes to allow all chocolate to set completely. This ensures the decorations are firmly attached and the treats are ready to handle.
- 12
Serve and store
Once fully set, transfer the bunny balls to a serving platter or store in an airtight container with parchment paper between layers. Keep refrigerated until ready to serve. These treats are best enjoyed slightly chilled and can be stored for up to two weeks in the refrigerator.
Nutrition Facts
Per serving (estimated)
145 calories
Calories
18g
Carbs
2g
Protein
8g
Fat
1g
Fiber
85mg
Sodium
13g
Sugar


