Creamy No-Bake Mini Cheesecakes for Any Celebration
Light, creamy no-bake mini cheesecakes with a buttery crust. Perfect individual portions for family gatherings. Simple, elegant, and delicious!
cookwithlucia.com/recipes/creamy-no-bake-mini-cheesecakes-perfect-for-easter-dessert-cravings
Introduction
Dessert doesn't have to mean hours in the kitchen or complicated techniques that leave you exhausted. These creamy no-bake mini cheesecakes are my answer to everyone who craves that luxurious, velvety cheesecake experience without turning on the oven or waiting all day for results. Each little cheesecake sits in its own perfect portion, with a golden buttery crust that gives way to the smoothest, dreamiest filling you can imagine.
What makes these mini cheesecakes so special is their texture—impossibly silky and rich, yet surprisingly light on the palate. The cream cheese filling whips up cloud-like, stabilized with just enough gelatin to hold its shape while maintaining that melt-in-your-mouth quality that defines a truly great cheesecake. They're elegant enough for your most important family gatherings, yet simple enough to whip up on a regular weekend when you want something special.
I'm going to show you exactly how to create these stunning individual desserts that look like they came from a fancy bakery. You'll learn the secrets to a crust that stays crisp, a filling that sets perfectly without ever seeing the inside of an oven, and flavor variations that'll keep your dessert rotation exciting for months. This is real indulgence, real satisfaction, and surprisingly real simplicity.

Why This Recipe Works for Your Body
While these creamy no-bake mini cheesecakes are absolutely a treat, they're crafted with quality ingredients that provide actual nourishment alongside their delicious flavor. The cream cheese base delivers protein and calcium, essential nutrients that support bone health and muscle function. Unlike many commercial desserts loaded with artificial stabilizers and preservatives, these mini cheesecakes rely on real dairy and natural ingredients.
The portion control built into this recipe is genuinely helpful for mindful eating. Each mini cheesecake is a complete, satisfying serving that prevents the "just one more slice" mentality that often happens with full-sized desserts. You can enjoy your treat, feel satisfied, and move on without that overstuffed feeling that derails your energy for the rest of the day.
The graham cracker crust provides whole grain content and fiber, especially if you opt for whole wheat graham crackers. The fats from the cream cheese and crust are actually useful for helping your body absorb fat-soluble vitamins from other foods in your meal. When you choose full-fat dairy for these no-bake mini cheesecakes, you're also getting conjugated linoleic acid, which research suggests may support metabolic health.
These desserts beat store-bought options in every way. You control the sugar content, you know exactly what's in them, and you can adjust sweetness to your preference. They're also free from the trans fats and artificial colors found in many commercial cheesecakes, making them a genuinely better choice when you want to celebrate.
The Ingredient Lineup
Let's talk about what goes into these creamy no-bake mini cheesecakes, because understanding your ingredients transforms you from recipe-follower to confident baker. The cream cheese is your foundation—full-fat blocks, never the spreadable kind, which contains stabilizers that interfere with proper whipping. Room temperature cream cheese whips into clouds, incorporating air that gives your filling that professional lightness.
Graham crackers form the crust, and their honey-kissed flavor complements the tangy filling beautifully. You'll crush them into fine crumbs that bind together with melted unsalted butter, creating a base that's sturdy enough to support the filling yet tender enough to cut cleanly with a fork. The butter should be melted but not hot, which would make the crumbs greasy.
Granulated sugar sweetens both crust and filling, but the real magic comes from vanilla extract, which amplifies every flavor in the dessert. Use pure vanilla extract, not imitation—the difference is noticeable in no-bake desserts where flavors aren't concentrated by heat. Heavy cream gets whipped to soft peaks and folded into the filling, creating structure and that coveted silky texture.
Unflavored gelatin acts as your setting agent, giving these no-bake mini cheesecakes the ability to hold their shape without baking. It's completely flavorless and works by forming a delicate network throughout the filling. Lemon juice adds brightness that cuts through the richness, preventing the cheesecakes from tasting heavy or one-dimensional. Just a tablespoon transforms the entire flavor profile.
For swaps: you can use digestive biscuits instead of graham crackers for a different flavor, or try gingersnap cookies for a spicier crust. Dairy-free? Coconut cream and cashew cream cheese work surprisingly well, though you'll need to test the setting time. Want more protein? Greek yogurt can replace up to one-third of the cream cheese for a tangier, protein-boosted version.
Putting It Together
Creating these creamy no-bake mini cheesecakes starts with your crust, and this step sets the foundation for everything that follows. Line your muffin tin with paper liners or use a mini cheesecake pan with removable bottoms for the prettiest presentation. Combine your graham cracker crumbs with melted butter and a touch of sugar, mixing until every crumb is moistened and the mixture holds together when squeezed. Press about two tablespoons into each cup, using the bottom of a small glass or a tart tamper to create an even, compact layer. Pop these into the refrigerator while you make the filling—chilling firms up the butter so the crusts stay intact when you add the creamy layer.
The filling comes together in stages, and this is where technique matters. Bloom your gelatin in cold water first, letting it absorb the liquid and swell. Meanwhile, beat your room-temperature cream cheese with sugar until it's completely smooth and fluffy, scraping down the bowl frequently. This aeration is crucial for texture. In a separate bowl, whip your heavy cream to soft peaks—not stiff, or it won't fold in smoothly. Warm the bloomed gelatin gently until it liquefies, then beat it into the cream cheese mixture along with vanilla and lemon juice.
Now comes the folding, which preserves all those air bubbles you've created. Add a big scoop of whipped cream to the cream cheese mixture and stir it in vigorously to lighten the base. Then gently fold in the remaining whipped cream using a rubber spatula, cutting down through the center and sweeping up the sides. Work just until no white streaks remain. This careful technique is what gives your no-bake mini cheesecakes their incredible mousse-like quality.
Spoon or pipe the filling over your chilled crusts, filling each liner nearly to the top. A piping bag gives you the neatest results and prevents air pockets, but a spoon works perfectly fine if you're patient. Tap the pan gently on the counter to release any trapped bubbles, then smooth the tops with an offset spatula. Cover the entire pan with plastic wrap and refrigerate for at least four hours, though overnight is ideal for the firmest set.
Customizing for Your Goals
These creamy no-bake mini cheesecakes are wonderfully adaptable to different nutritional needs and flavor preferences. If you're looking to increase the protein content, substitute half the cream cheese with plain Greek yogurt, which adds tang and boosts the protein from about 5 grams per serving to nearly 8 grams. The texture becomes slightly lighter and more refreshing, perfect for warmer weather gatherings. You can also add a scoop of unflavored collagen peptides to the filling, which dissolves completely and adds about 10 grams of protein per batch without affecting flavor.
For lower sugar versions, reduce the granulated sugar to one-third cup and add a few drops of liquid stevia or monk fruit sweetener to taste. The cream cheese and cream provide enough body that you don't need as much sugar as you might think. Another option is using naturally sweet toppings like fresh berry compote, which lets you reduce the sugar in the base while still delivering satisfying sweetness in every bite.
Want to make these no-bake mini cheesecakes more substantial as an afternoon snack rather than just dessert? Add two tablespoons of nut butter to the filling for healthy fats and protein, or incorporate ground nuts into the crust for extra nutrition and interesting texture. Almond flour mixed half-and-half with graham cracker crumbs creates a protein-rich, slightly fudgier base.
Kid-friendly modifications work beautifully here. Swirl in a couple tablespoons of strawberry or raspberry puree for natural color and flavor kids love. You can also make a chocolate version by melting two ounces of dark chocolate and folding it into the filling, creating chocolate cheesecakes that still maintain that signature creamy texture. Press a small piece of fresh fruit into the center before chilling for a fun surprise inside.
Meal Prep Like a Pro
The beauty of these creamy no-bake mini cheesecakes is how perfectly they fit into a make-ahead strategy for entertaining or weekly treat prep. These actually improve with time in the refrigerator, as the flavors meld and the texture firms up to perfection. I recommend making them two days before you plan to serve them for optimal results, though they'll keep beautifully for up to five days when stored properly.
For storage, keep the mini cheesecakes in their pan covered tightly with plastic wrap, or transfer them to an airtight container with parchment paper between layers if you need to stack them. The paper liners make this incredibly easy—each cheesecake is already individually wrapped in its own protective layer. If you've made them in a pan with removable bottoms, wait to remove them until a few hours before serving to prevent the edges from drying out.
These no-bake mini cheesecakes freeze exceptionally well, which makes them perfect for planning ahead for special occasions. Freeze them in a single layer on a baking sheet until solid, then transfer to a freezer-safe container with wax paper between layers. They'll keep for up to two months frozen. Thaw overnight in the refrigerator, never at room temperature, which can cause condensation and make them weepy.
If you're meal prepping for the week, consider making the components separately. Press and chill your crusts in their liners, storing them covered in the refrigerator for up to three days. Make the filling the day you want to assemble, which only takes about fifteen minutes of active work. This strategy works brilliantly when you want to involve kids in the cooking process—they can help press crusts one day and watch you pipe filling the next, making it feel like a special project rather than a chore.
Serving Suggestions and Complete Meals
These creamy no-bake mini cheesecakes shine brightest when served slightly chilled but not ice-cold, which allows their flavors to fully bloom on your palate. Remove them from the refrigerator about fifteen minutes before serving for the ideal temperature. The texture is most luxurious at this point—cool and refreshing but soft enough to melt instantly on your tongue.
Top them just before serving to keep everything fresh and beautiful. Fresh berries are classic for a reason—their tartness balances the rich filling perfectly. A light dusting of powdered sugar adds elegance, while a drizzle of berry coulis or lemon curd provides both visual appeal and complementary flavor. For something more decadent, a small dollop of whipped cream and a sprinkle of crushed graham crackers echo the flavors already in the dessert.
These work beautifully as part of a dessert spread at family gatherings. Pair them with fresh fruit skewers, a platter of cookies, and perhaps a simple vanilla or chocolate pudding for variety. The individual portions mean guests can easily sample multiple desserts without overindulging. They're also perfect for lunch boxes as a special treat, or as an after-dinner dessert for weeknight meals when you want something more special than usual.
Portion-wise, one mini cheesecake is a satisfying serving for most people. If you're serving them alongside other rich foods, you might cut them in half to create petite, two-bite portions. For a complete dessert experience, serve with hot tea or coffee, which cuts through the richness and creates a restaurant-quality finish to your meal.
Frequently Asked Questions
Can I make these creamy no-bake mini cheesecakes dairy-free?
Absolutely! Use coconut cream in place of heavy cream, and substitute the cream cheese with cashew-based cream cheese, which is widely available now and has a remarkably similar texture. You'll need to use agar powder instead of gelatin for setting, using about one teaspoon per cup of liquid. The texture will be slightly firmer and less silky, but still delicious.
How long do these no-bake mini cheesecakes need to set?
Minimum four hours in the refrigerator, but overnight is ideal for the firmest texture and best sliceability. The gelatin needs time to fully activate and create that stable structure. If you're in a rush, you can pop them in the freezer for two hours, but the texture will be slightly different—more frozen-dessert-like than creamy-cheesecake-like.
What's the protein content per mini cheesecake?
A standard recipe yields about 5-6 grams of protein per mini cheesecake, primarily from the cream cheese and heavy cream. If you substitute half the cream cheese with Greek yogurt as I mentioned earlier, you'll boost that to approximately 8 grams per serving. Adding a scoop of collagen peptides to the entire batch can increase it even further.
Can I use low-fat cream cheese to reduce calories?
You can, but I don't recommend it for these creamy no-bake mini cheesecakes. Low-fat cream cheese contains more water and stabilizers, which prevents it from whipping up properly and can result in a grainy, less stable filling. The texture simply won't be as luxurious. If you're concerned about richness, try making them smaller or using the Greek yogurt substitution instead.
What's the best way to remove them from the pan?
If you've used paper liners, simply peel them away gently just before serving—they come right off. For silicone molds or pans with removable bottoms, run a thin knife around the edge first, then push up from the bottom. A quick thirty-second stint in the freezer can firm them up just enough to make removal easier without freezing them solid.
How do I prevent the crust from getting soggy?
The key is making sure your crust is well-chilled and firmly packed before adding the filling, and ensuring your filling isn't too warm when you add it. The gelatin in the filling creates a barrier that prevents moisture from migrating into the crust. Storing them properly covered also helps, as it prevents condensation from forming and dripping down into the crust layer.
Troubleshooting Your No-Bake Mini Cheesecakes
Even straightforward recipes like these creamy no-bake mini cheesecakes can present challenges if you're new to working with gelatin or no-bake desserts. The most common issue is filling that won't set properly, which usually stems from not allowing the gelatin to bloom fully or not giving the desserts enough refrigeration time. Make sure you're using the correct ratio—one envelope of unflavored gelatin per two cups of liquid ingredients sets these perfectly firm but still creamy.
If your filling turns out grainy or curdled, the culprit is usually cream cheese that wasn't at room temperature before beating, or gelatin that was too hot when added to the mixture. Let your cream cheese sit out for at least an hour before starting, and make sure your dissolved gelatin has cooled to barely warm before incorporating it. Beat the cream cheese thoroughly until completely smooth before adding anything else.
Crusts that crumble or won't hold together need more butter. The mixture should feel like wet sand and hold its shape when squeezed. If you've added enough butter and it's still crumbly, your graham crackers might be stale and have absorbed the butter too quickly. Try adding melted butter one tablespoon at a time until you reach the right consistency.
Sometimes the filling separates from the crust during refrigeration, creating a gap. This happens when the crust is too warm when you add the filling, or when the filling itself is too warm and melts the butter in the crust. Always chill your crusts thoroughly, and make sure your filling has cooled to room temperature before piping or spooning it over the crust layer.
Flavor Variations to Keep Things Exciting
Once you've mastered the base recipe for these creamy no-bake mini cheesecakes, the flavor possibilities become endless. A lemon version is spectacular—add the zest of two lemons to the filling along with three tablespoons of fresh lemon juice. The bright citrus flavor makes these taste incredibly fresh and light, perfect for spring and summer gatherings. You can use a gingersnap crust for a ginger-lemon combination that's absolutely divine.
Chocolate lovers should try folding three ounces of melted and cooled dark chocolate into the filling. Use chocolate graham crackers or crushed chocolate cookies for the crust to create a double-chocolate experience. A tiny pinch of espresso powder in the chocolate filling deepens the chocolate flavor without making it taste like coffee.
Berry swirl versions showcase seasonal fruit beautifully. Make a quick berry compote by simmering fresh or frozen berries with a tablespoon of sugar until thickened, then cooling completely. Swirl ribbons of this through your filling before chilling, or layer it between two thinner layers of cheesecake filling for a striped effect that looks stunning when you bite in.
For something truly special, try a honey-lavender variation by infusing your heavy cream with a teaspoon of dried culinary lavender. Heat the cream just until steaming, add the lavender, cover and steep for fifteen minutes, then strain and chill before whipping. Replace half the granulated sugar with honey for a floral, delicate flavor that's sophisticated and unexpected in these no-bake mini cheesecakes.
The Science Behind the Perfect Texture
Understanding what's happening at a molecular level in these creamy no-bake mini cheesecakes helps you troubleshoot and improvise confidently. Gelatin is a protein derived from collagen, and when it dissolves in warm liquid then cools, it forms a three-dimensional network that traps liquid and creates structure. In these cheesecakes, it's giving you the firmness that baked cheesecakes get from eggs, but without any heat.
The whipped cream serves a dual purpose—it adds air for lightness, and the fat molecules coat the gelatin strands, preventing them from forming too tight a network. This is why your no-bake mini cheesecakes set firm enough to hold their shape but still feel creamy and smooth rather than rubbery. The ratio of gelatin to liquid is carefully balanced to achieve this specific texture.
Cream cheese contributes both fat and protein, and when beaten, its protein network stretches and incorporates air bubbles. The fat content prevents ice crystals from forming too large during refrigeration, which is why full-fat cream cheese gives you a smoother result than low-fat versions. The acids in cream cheese and lemon juice also help tenderize the protein network, contributing to that melt-in-your-mouth quality.
Temperature control throughout the process matters enormously. Cold cream whips better because the fat globules are solid and can trap air more efficiently. Room-temperature cream cheese blends smoothly because its fat is soft enough to mix without lumps but not so soft that it's greasy. Understanding these principles means you can adapt the recipe to different conditions in your kitchen and still get excellent results with your creamy no-bake mini cheesecakes.
Making It Beautiful: Presentation Tips
These creamy no-bake mini cheesecakes are already charming in their individual portions, but a few simple presentation touches transform them from homemade treats to bakery-worthy creations. Invest in quality paper liners with interesting patterns or colors that complement your serving occasion. Solid pastels work beautifully for spring gatherings, while metallic gold or silver liners add elegance to formal dinners.
Piping the filling rather than spooning it gives you a smooth, professional top surface. Use a large round tip or simply snip the corner off a disposable piping bag for easy application. If you don't have piping bags, a large zip-top bag works perfectly. The smooth top becomes your canvas for decoration.
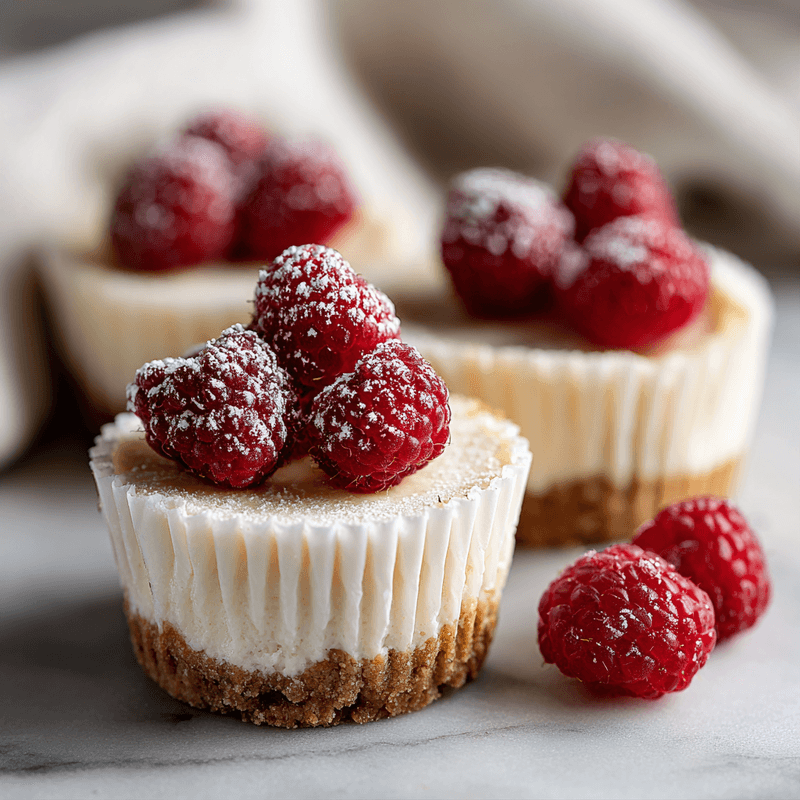
For toppings, think about color contrast and height variation. A single perfect raspberry sits beautifully in the center, while a small pile of mixed berries creates abundance. Candied lemon peel adds sophistication, and chocolate shavings bring drama. Fresh mint leaves provide a pop of green that makes the whole dessert look more vibrant. Apply toppings just before serving so berries don't bleed and whipped cream doesn't deflate.
If you're transporting these no-bake mini cheesecakes to a gathering, a cupcake carrier keeps them perfectly level and protected. Alternatively, arrange them on a cake stand or tiered serving platter for gorgeous vertical presentation that saves table space. Nestle them in shredded paper or arrange them on fresh lemon or lime leaves for a natural, organic look that photographs beautifully.
Why Individual Portions Make Sense
There's something psychologically satisfying about having your own individual dessert, and these creamy no-bake mini cheesecakes deliver that experience perfectly. Unlike slicing a large cheesecake where portion sizes can vary wildly and serving becomes messy, these come pre-portioned and ready to enjoy. There's no guilt about taking too much, no awkward moments trying to cut perfect slices, and no arguments about who got the bigger piece.
From a practical standpoint, individual portions mean easier serving at gatherings. Guests can take one from a platter and move on, keeping the line moving smoothly. There's no need for dessert plates and forks if you're having a casual standing reception—the liner acts as a built-in plate. This makes cleanup significantly easier and reduces the number of dishes you need to wash after your event.
For everyday eating, these no-bake mini cheesecakes support mindful portion control without feeling restrictive. You know exactly what one serving looks like, which helps you enjoy your dessert fully without the vague anxiety of wondering if you've had too much. The defined boundary of the individual portion actually enhances satisfaction rather than diminishing it.
They're also wonderful for variety. You can make half the batch one flavor and half another, giving everyone options without having to make two complete full-sized cheesecakes. This works brilliantly when you're serving a group with different preferences or when you simply can't decide which variation to try and want to test multiple options.
Storage and Food Safety
Proper storage keeps these creamy no-bake mini cheesecakes food-safe and delicious for as long as possible. Because they contain dairy and use gelatin rather than heat for preservation, refrigeration is non-negotiable. They should never sit at room temperature for more than two hours total, including serving time. If you're setting out a dessert table, consider putting out half your batch and replenishing from the refrigerator as needed.
The tight cover is essential because these no-bake mini cheesecakes readily absorb odors from other foods in your refrigerator. Plastic wrap directly on the pan works, but transferring them to an airtight container gives even better protection. If you're stacking them, place parchment or wax paper between layers to prevent sticking and protect those beautiful smooth tops.
When freezing for longer storage, proper wrapping prevents freezer burn and maintains quality. The initial freeze on a baking sheet ensures they freeze individually so they don't stick together. Once solid, wrap each one in plastic wrap, then place all wrapped mini cheesecakes in a freezer bag with the air pressed out. Label with the date and flavor so you remember what you've got.
Thawing should always happen gradually in the refrigerator, never on the counter. Rapid temperature changes can cause condensation, which makes the cheesecakes weepy and can compromise the texture. Plan to move them from freezer to refrigerator the night before you want to serve them. They'll be perfectly thawed and ready to top and serve within twelve hours.
Creamy No-Bake Mini Cheesecakes
Silky smooth individual cheesecakes with a buttery graham cracker crust. No oven required, perfect for any celebration.
Prep Time
25 min
Cook Time
0 min
Total Time
4h 25m
Servings
12 mini cheesecakes
Ingredients
For 12 mini cheesecakes
- 1 cup graham cracker crumbs (about 8 full crackers, finely crushed)
- 3 tablespoons granulated sugar, divided
- 4 tablespoons unsalted butter, melted
- 16 ounces cream cheese, full-fat, at room temperature
- 1/2 cup granulated sugar
- 1 cup heavy cream, cold
- 1 envelope (2 1/4 teaspoons) unflavored gelatin
- 3 tablespoons cold water
- 2 teaspoons pure vanilla extract
- 1 tablespoon fresh lemon juice
- Fresh berries for topping (optional)
- Whipped cream for garnish (optional)
Instructions
- 1
Prepare the pan
Line a 12-cup muffin tin with paper liners or use a mini cheesecake pan with removable bottoms. Set aside while you prepare the crust mixture.
- 2
Make the crust
In a medium bowl, combine graham cracker crumbs, 2 tablespoons sugar, and melted butter. Mix thoroughly until all crumbs are moistened and mixture holds together when pressed. The texture should resemble wet sand.
- 3
Press the crusts
Divide the crumb mixture evenly among the 12 prepared cups, using about 1 1/2 to 2 tablespoons per cup. Press firmly into the bottom of each liner using the bottom of a small glass or tart tamper to create an even, compact layer. Refrigerate while making the filling.
- 4
Bloom the gelatin
Pour the cold water into a small bowl and sprinkle the gelatin evenly over the surface. Let it sit for 5 minutes until the gelatin absorbs the water and swells. This blooming process is essential for proper setting.
- 5
Beat the cream cheese
In a large mixing bowl, beat the room-temperature cream cheese with 1/2 cup sugar using an electric mixer on medium-high speed for 3-4 minutes until completely smooth, fluffy, and no lumps remain. Scrape down the sides and bottom of the bowl frequently to ensure even mixing.
- 6
Whip the cream
In a separate chilled bowl, whip the cold heavy cream with an electric mixer on high speed until soft peaks form, about 2-3 minutes. The peaks should gently fold over when you lift the beaters, not stand straight up. Set aside.
- 7
Dissolve the gelatin
Microwave the bloomed gelatin for 10-15 seconds or heat it gently in a small saucepan just until it liquefies completely. Let it cool for 1 minute until it's just barely warm to the touch, not hot, which would deflate your whipped ingredients.
- 8
Combine filling ingredients
Add the dissolved gelatin, vanilla extract, and lemon juice to the cream cheese mixture. Beat on medium speed for 1 minute until completely incorporated and smooth. The lemon juice adds brightness and helps prevent the filling from tasting too heavy.
- 9
Fold in whipped cream
Add about one-third of the whipped cream to the cream cheese mixture and stir vigorously to lighten the base. Then gently fold in the remaining whipped cream using a rubber spatula, cutting down through the center and sweeping up the sides. Work just until no white streaks remain, being careful not to deflate the mixture.
- 10
Fill the cups
Spoon or pipe the filling over the chilled crusts, dividing it evenly among all 12 cups and filling them nearly to the top. Using a piping bag creates the smoothest tops, but a spoon works well if you smooth the surface with an offset spatula. Tap the pan gently on the counter to release any air bubbles.
- 11
Chill until set
Cover the entire pan tightly with plastic wrap and refrigerate for at least 4 hours or overnight until the cheesecakes are completely set and firm to the touch. Overnight chilling allows the flavors to develop fully and ensures the firmest texture.
- 12
Serve and garnish
Remove the mini cheesecakes from the refrigerator 15 minutes before serving for the best texture and flavor. Peel away paper liners if using, or remove from the pan. Top with fresh berries, a dusting of powdered sugar, or a dollop of whipped cream just before serving.
Nutrition Facts
Per serving (estimated)
285 calories
Calories
21g
Carbs
5g
Protein
21g
Fat
0.5g
Fiber
180mg
Sodium
16g
Sugar


