Classic Pop Tarts with Sourdough Discard Recipe
Transform sourdough discard into flaky homemade pop tarts! Easy pastry dough meets sweet fillings for a breakfast treat with minimal cleanup.
cookwithlucia.com/recipes/classic-pop-tarts-with-sour-dough-discard
Introduction
Nobody loves doing dishes, especially when you're craving something sweet and comforting for breakfast. That's where these classic pop tarts with sourdough discard come in, transforming what would be wasted starter into golden, flaky pastries that rival anything from the store. Instead of juggling multiple bowls, mixers, and rolling surfaces, this recipe streamlines the process into a simple dough that comes together in one bowl, gets filled with your favorite jam or spread, and bakes on a single sheet pan.
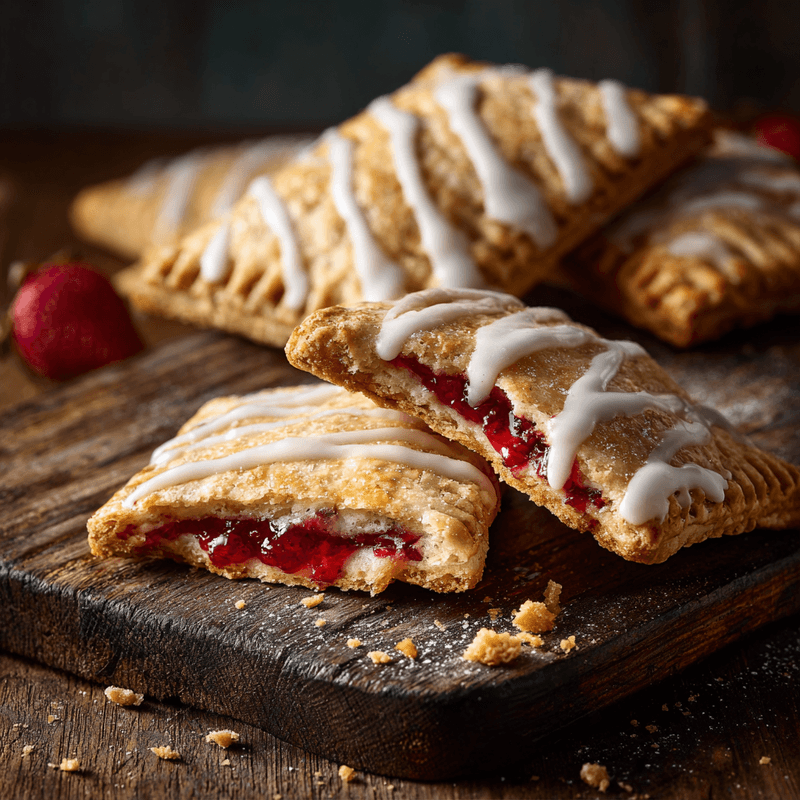
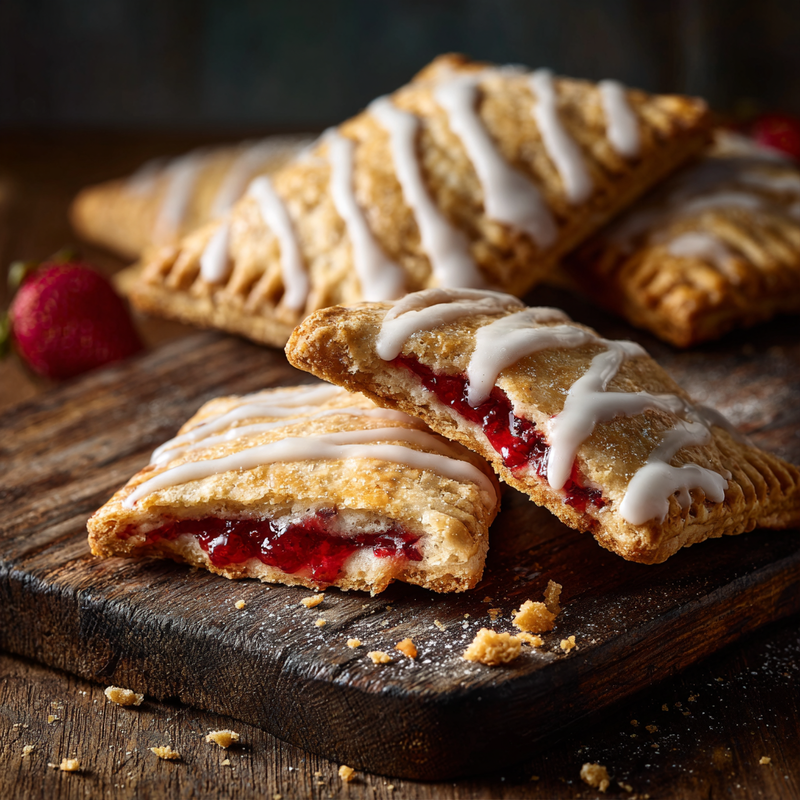
Picture pulling these beauties from the oven: golden rectangles with perfectly crimped edges, their tops glazed and shimmering, with just a hint of filling peeking through the sides. The aroma of buttery pastry mingles with the sweet scent of whatever filling you've chosen, whether it's strawberry jam, chocolate spread, or cinnamon sugar. These classic pop tarts with sourdough discard deliver all the nostalgic joy of the packaged version but with the satisfaction of knowing you made them from scratch and put that discard to good use.
This isn't about complex lamination or professional pastry techniques. It's about turning something you'd normally toss into a breakfast that looks impressive but requires minimal fuss. One bowl for mixing, one surface for rolling, one pan for baking, and suddenly you're serving homemade pastries that'll have everyone asking for seconds.
The One-Pan Philosophy
When I say one-pan for classic pop tarts with sourdough discard, I'm talking about the baking stage where all your hard work comes together. Everything you've assembled, all those little pastry pockets, bake side by side on a single sheet pan, their edges browning at the same rate, their fillings bubbling gently through any small gaps. This is cooking at its most efficient, where you can slide one pan into the oven and walk away knowing that when the timer goes off, breakfast is done.
The beauty of baking multiple pastries together is how the oven's heat circulates evenly around each one, creating that signature crispy exterior while keeping the filling soft and jammy inside. Unlike stovetop cooking where you might need to work in batches, the oven does all the heavy lifting simultaneously. The hot air caramelizes the edges, sets the glaze to a glossy finish, and ensures every pop tart gets the same golden treatment.
This method is both the laziest and smartest way to make breakfast pastries because it removes the stress of timing. You're not flipping individual items or monitoring different pans. You're simply arranging your pop tarts with a bit of space between them, sliding the pan into a preheated oven, and letting physics do its thing. It's the kind of cooking that gives you time to brew coffee, set the table, or just stand by the oven enjoying the incredible smells wafting through your kitchen.
What Goes In
The foundation of these classic pop tarts with sourdough discard starts with your discard itself, that tangy, slightly fermented starter you'd normally pour down the drain. This brings a subtle complexity to the pastry dough that store-bought versions simply can't match. You'll need about one cup of discard, unfed and straight from the fridge, which adds moisture, flavor, and a tender texture to the dough.
All-purpose flour forms the structure, giving these pastries their flaky layers when combined with cold butter. The butter is crucial, and it needs to be very cold, cut into small cubes that get worked into the flour just until the mixture resembles coarse crumbs. This is what creates those lovely flaky layers as the water in the butter turns to steam during baking. I use unsalted butter so I can control the salt level, but salted works in a pinch.
A touch of sugar sweetens the dough just enough without making it too dessert-like, while salt balances everything out and enhances the tangy notes from the sourdough discard. Cold water brings the dough together, added just a tablespoon at a time until the mixture holds when squeezed. You don't want it wet or sticky, just cohesive enough to form into a disk.
For the filling, you have endless options. Fruit jams and preserves work beautifully, especially thicker ones that won't leak out during baking. Chocolate spread, cinnamon sugar mixed with a bit of butter, or even nut butters create different flavor profiles. The key is choosing something thick enough to stay put but spreadable enough to work with. Each pop tart only needs about a tablespoon of filling, so a little goes a long way.
The glaze is optional but highly recommended, made from powdered sugar, a splash of milk or cream, and vanilla extract. This transforms your homemade pop tarts from rustic to bakery-worthy, adding sweetness and visual appeal. You can also skip the glaze and brush the tops with egg wash for a simpler, more savory presentation.
Assembly and Cooking
Making classic pop tarts with sourdough discard begins with the dough, mixed in a single large bowl. Whisk together your flour, sugar, and salt, then add those cold butter cubes. Using a pastry cutter or your fingertips, work the butter into the flour until you have pea-sized pieces throughout. This takes about three to four minutes of steady work, and the mixture should look shaggy and slightly sandy.
Stir in your sourdough discard, then add cold water one tablespoon at a time, stirring with a fork after each addition. The dough will seem dry at first, but suddenly it'll start coming together. Turn it out onto a clean counter and knead it just three or four times until it forms a cohesive mass. Flatten it into a disk about an inch thick, wrap it in plastic, and refrigerate for at least thirty minutes. This rest time is crucial as it allows the gluten to relax and the butter to firm up again.
When you're ready to assemble, roll the chilled dough on a lightly floured surface to about one-eighth inch thickness. Use a ruler and pizza cutter or sharp knife to cut rectangles, roughly three by four inches each. You should get sixteen to eighteen rectangles, which means eight to nine finished pop tarts. Place half the rectangles on a parchment-lined sheet pan, spacing them about two inches apart.
Spoon about a tablespoon of your chosen filling onto the center of each rectangle on the pan, leaving a half-inch border all around. Brush the edges with water or a beaten egg, then place the remaining rectangles on top. Press the edges firmly with a fork to seal, creating those classic crimped edges. Use the fork tines to poke three or four small holes in the top of each pastry to allow steam to escape during baking.
Slide the sheet pan into a preheated 375°F oven and bake for twenty-two to twenty-five minutes, until the pastries are golden brown and the edges are crisp. The filling might bubble through slightly, and that's perfectly fine. Let them cool on the pan for five minutes, then transfer to a wire rack. Once they've cooled to room temperature, drizzle or spread your glaze over the tops if using.
Secrets for One-Pan Success
The most important tip for perfect classic pop tarts with sourdough discard is keeping everything cold throughout the process. Warm butter melts into the flour before baking, which eliminates those flaky layers you're after. If your kitchen is hot, pop the bowl of flour and butter into the freezer for five minutes before adding the liquid ingredients. If the dough feels soft while rolling, slide the whole sheet of rolled dough into the fridge for ten minutes before cutting your rectangles.
Don't overfill these pastries. It's tempting to load them up with extra jam or chocolate, but too much filling will burst through the seams during baking, creating a sticky mess and potentially gluing your pop tarts to the parchment. One tablespoon per pastry is the sweet spot, giving you flavor in every bite without structural issues. Spread the filling slightly toward the edges within that half-inch border, leaving the very edges completely clean for proper sealing.
The fork crimp isn't just decorative; it's functional. Press firmly enough that the two layers of dough fuse together completely. I like to go around the edges twice, creating a double row of fork marks that ensures no gaps where filling can escape. Those vent holes on top are equally important, allowing steam to escape rather than building up pressure that could blow out a side seam.
Spacing on your sheet pan prevents soggy sides. If the pop tarts touch during baking, the areas where they connect won't brown properly, and you'll end up with pale, soft spots. Two inches between each pastry allows hot air to circulate completely, crisping every surface evenly. If you're doubling the recipe, use two pans rather than crowding everything onto one oversized sheet.
Consider blind-baking the bottom rectangles for five minutes before adding filling and topping them. This extra step creates a moisture barrier that prevents soggy bottoms, especially with juicy fruit fillings. Just place the bottom rectangles on your sheet pan, bake for five minutes, let them cool slightly, then proceed with filling and topping as usual. This technique is particularly helpful if you're making these classic pop tarts with sourdough discard ahead of time.
Rounding Out the Meal
While these classic pop tarts with sourdough discard are substantial enough to serve on their own, pairing them with fresh fruit transforms them into a more balanced breakfast. A simple fruit salad of sliced strawberries, blueberries, and melon adds freshness and cuts through the richness of the buttery pastry. The bright acidity of citrus segments works particularly well, offering a palate cleanser between bites of sweet, flaky goodness.
Yogurt makes an excellent companion, especially if you've gone with a fruit-filled pop tart. The tangy creaminess complements the sourdough notes in the pastry and adds protein to make the meal more satisfying. I like to serve a small bowl of plain yogurt drizzled with honey on the side, letting everyone customize their plate. Greek yogurt works beautifully here, its thick texture standing up well against the pastries without making the plate feel heavy.
For beverages, consider something that won't compete with the sweetness of your glazed pop tarts. Strong coffee or tea provides a nice contrast, and the warmth pairs perfectly with the pastries when they're still slightly warm from the oven. Fresh juice, particularly orange or grapefruit, adds brightness and vitamins. If you're serving these for a weekend brunch, a smoothie packed with greens and banana balances the indulgence of homemade pastries with something nutritious and refreshing.
Leftovers and Next-Day Ideas
Storing classic pop tarts with sourdough discard properly keeps them delicious for up to four days. Once completely cooled, stack them between layers of parchment paper in an airtight container at room temperature. The parchment prevents the glaze from sticking to other surfaces, and the sealed container maintains that crispy exterior. Avoid refrigerating them unless you live in a very humid climate, as the cold can make the pastry tough and chewy.
Reheating brings back that fresh-from-the-oven magic. I prefer using a toaster oven set to 325°F for about five minutes, which crisps up the exterior without overheating the filling. A regular toaster works too, though you'll want to use the lowest setting to avoid burning the glaze. If you're reheating several at once, a conventional oven at 300°F for eight to ten minutes does the trick perfectly. The microwave works in a pinch but will soften the pastry rather than crisping it, which some people actually prefer.
For longer storage, these pop tarts freeze beautifully. Wrap each one individually in plastic wrap, then place them all in a freezer bag. They'll keep for up to three months this way. When you're ready to eat one, you can either thaw it overnight at room temperature or pop it straight from the freezer into a toaster or toaster oven. If reheating from frozen, add an extra three to four minutes to the heating time.
Crumbled leftover pop tarts make an unexpected but delicious topping for yogurt parfaits or ice cream. The pastry pieces add a crunchy element similar to granola but with more flavor complexity. You can also pulse them in a food processor to create a crumb mixture for pressing into the bottom of a pan as a quick dessert crust. The combination of buttery pastry and jam or chocolate creates an instant flavor base that works particularly well under cheesecake or pudding desserts.
Answers to Your Questions
Can I use a different type of pan for these pop tarts?
Absolutely, though a standard half-sheet pan works best for even heat distribution and capacity. If you only have a darker non-stick pan, reduce your oven temperature by twenty-five degrees to prevent over-browning on the bottoms. Glass or ceramic baking dishes don't work as well since they heat differently and can cause uneven baking. Whatever pan you choose, lining it with parchment paper is essential for easy removal and cleanup.
What if my sourdough discard is very thick or very thin?
The consistency of your discard affects the dough's hydration, so you may need to adjust accordingly. If your discard is thick and paste-like, you might need an extra tablespoon or two of cold water to bring the dough together. Conversely, if your discard is very thin and liquidy, start with less water and add only as needed. The final dough should be smooth and pliable but not sticky, holding together when squeezed without feeling wet.
How do I prevent the filling from leaking out?
Sealing is everything when making classic pop tarts with sourdough discard. Make sure you leave a full half-inch border around the filling, brush those edges generously with water or egg wash, and press firmly with the fork tines. Going around the edges twice with the fork ensures a strong seal. Also, avoid using fillings that are too thin or runny; if your jam seems loose, simmer it in a small pan for a few minutes to thicken it before using.
Can I make the dough ahead of time?
Yes, and this actually improves the texture. The dough can be made up to two days in advance, wrapped tightly in plastic, and refrigerated. The resting time allows the flour to fully hydrate and the flavors from the sourdough discard to develop more fully. You can also freeze the wrapped dough for up to a month. Thaw it overnight in the refrigerator before rolling it out. Just let it sit at room temperature for ten minutes before rolling if it's too firm straight from the fridge.
What's the best way to get crispy edges?
Crispy edges come from proper oven temperature and not overcrowding the pan. Make sure your oven is fully preheated before the pop tarts go in, and give each pastry enough space for air circulation. Brushing the tops with a light coating of milk or cream before baking encourages browning. Avoid opening the oven door during the first fifteen minutes of baking, as temperature fluctuations can affect the texture. If you want extra crispy results, you can even increase the oven temperature to 400°F and watch them carefully during the last five minutes.
Can I double this recipe on one sheet pan?
Doubling the recipe typically yields more pop tarts than will comfortably fit on a single half-sheet pan with proper spacing. I recommend using two pans if you're making a double batch, which also allows you to bake them simultaneously on different oven racks. If you must use one pan, bake in batches and keep the unbaked pastries in the refrigerator while the first batch bakes. The cold dough actually benefits from the extra rest time, often resulting in even flakier layers in your classic pop tarts with sourdough discard.
The Sourdough Discard Advantage
Using sourdough discard in these pastries isn't just about reducing waste; it genuinely improves the final product. The natural fermentation in the discard adds complex flavor notes that make these classic pop tarts with sourdough discard taste more sophisticated than their commercial counterparts. There's a subtle tanginess that balances the sweetness of the filling and glaze, creating a more interesting eating experience with layers of flavor rather than one-note sugar.
The acidity in sourdough discard also affects the texture of the pastry dough in beneficial ways. It slightly tenderizes the gluten structure, resulting in a pastry that's flaky but not tough. This is particularly helpful if you're newer to pastry making and tend to overwork your dough. The discard provides a buffer against some common beginner mistakes, making it more forgiving than traditional pastry recipes that use just flour, butter, and water.
From a practical standpoint, incorporating discard into these pop tarts means you're getting value from something you'd otherwise throw away. If you maintain a sourdough starter, you know how quickly that discard accumulates, especially if you feed your starter daily. Instead of viewing it as a byproduct, these classic pop tarts with sourdough discard transform it into something delicious and worthwhile. It's sustainable baking at its finest, reducing waste while creating something your whole family will love.
The moisture content in sourdough discard also contributes to the dough's workability. It hydrates the flour while adding structure, creating a dough that rolls out smoothly without tearing or cracking. This makes the shaping and filling process much easier, especially if you're assembling these pastries with help from younger bakers. The dough is resilient enough to handle some rerolling of scraps without becoming tough, which means less waste and more finished pop tarts from a single batch of dough.
Flavor Variations Worth Exploring
Once you've mastered the basic technique for classic pop tarts with sourdough discard, the flavor possibilities are genuinely endless. Savory versions work surprisingly well for breakfast or lunch, filled with ingredients like cream cheese mixed with herbs, caramelized onions, or even a mixture of mashed sweet potato and spices. These savory pop tarts skip the sweet glaze in favor of a simple egg wash, perhaps with a sprinkle of seeds or coarse salt on top.
For sweet variations, consider seasonal fruit fillings that showcase what's fresh and available. In summer, a mixture of fresh berries cooked down with a bit of sugar creates a vibrant, jammy filling. Fall calls for apple butter or pumpkin butter spiced with cinnamon and nutmeg. Winter is perfect for citrus curds or chocolate-hazelnut spread. Spring might inspire you to try apricot preserves or even a light lemon filling made from lemon curd.
Spice blends in the dough itself can completely change the character of your classic pop tarts with sourdough discard. Adding a half teaspoon of cinnamon and a quarter teaspoon of cardamom to the flour mixture creates a warming, aromatic pastry that pairs beautifully with apple or pear fillings. A pinch of orange zest in the dough complements chocolate or berry fillings wonderfully. These subtle additions don't overpower but add depth and interest to every bite.
The glaze offers another opportunity for creativity. Beyond basic vanilla glaze, try adding a tablespoon of fruit juice instead of milk for a complementary flavor. Lemon juice creates a bright, tangy glaze perfect for berry-filled pastries. A touch of almond extract in the glaze pairs beautifully with cherry or apricot fillings. For chocolate-filled pop tarts, consider a chocolate glaze made by melting chocolate with a bit of cream. You can even skip glaze entirely and dust the cooled pastries with powdered sugar for a simpler, more rustic presentation.
Making It a Family Activity
Assembling classic pop tarts with sourdough discard is an ideal project for cooking with family members of all ages. The process involves several distinct steps that can be divided among different skill levels, from measuring ingredients to crimping edges. Younger helpers can mix the dry ingredients, use cookie cutters if you're making non-traditional shapes, or brush the edges with water. Older kids can practice measuring carefully, rolling dough, and assembling the filled pastries.
The repetitive nature of making multiple pop tarts creates a nice rhythm that's both meditative and productive. Set up an assembly line with one person rolling dough, another cutting rectangles, someone else adding filling, and a final person sealing and crimping. This systematic approach speeds up the process while making it feel like a team effort. Everyone takes pride in the finished product, and the shared experience often means these pastries taste even better.
There's also an educational component to making these from scratch. Discussing why we keep ingredients cold, how gluten forms when we mix flour with liquid, and why the oven temperature matters teaches basic food science in a hands-on way. Comparing the homemade version to store-bought pop tarts opens conversations about processed foods, ingredient quality, and the satisfaction of making things yourself. These lessons stick with young bakers far longer than any lecture about nutrition or cooking techniques.
The customization possibilities make it easy to please different tastes within one batch. Make some classic pop tarts with sourdough discard filled with strawberry jam for traditionalists, some with chocolate spread for the chocolate lovers, and maybe a few with cinnamon sugar for those who prefer simpler flavors. Everyone gets to mark their favorites with a fork pattern or initial on top, creating a sense of ownership and anticipation as they wait for their specific pastries to emerge from the oven.
The Joy of Breakfast Pastry Success
There's something deeply satisfying about pulling a pan of homemade pastries from the oven, knowing you created them from simple ingredients and a bit of sourdough discard that would have been wasted. These classic pop tarts with sourdough discard represent the best kind of home baking: accessible, practical, delicious, and impressive. They prove that you don't need professional training or specialized equipment to make bakery-quality treats in your own kitchen.
The beauty of this recipe lies in its versatility and the way it fits into real life. You can make the dough when you have time, refrigerate or freeze it, and bake the pop tarts later when you need them. You can adapt the fillings to use up that partial jar of jam in your fridge or accommodate dietary preferences. You can make them as rustic or polished as your mood dictates, with simple egg wash or elaborate glazing and decorating.
Every batch teaches you something new about working with pastry dough, about your oven's particular quirks, about which flavor combinations your household prefers. Maybe you discover that your kids love the slightly under-baked pop tarts with gooey centers, or that pressing brown sugar and cinnamon onto the glaze before it sets creates an irresistible crunchy topping. These discoveries make each baking session an opportunity for creativity and refinement.
Ultimately, making classic pop tarts with sourdough discard is about more than just breakfast. It's about taking control of what you eat, reducing waste, building skills, and creating moments of warmth in your kitchen. It's about the smell of buttery pastry filling your home and the quiet pride of serving something you made with your own hands. That first bite, when the flaky exterior gives way to sweet filling and you taste that subtle tang from the sourdough, makes every bit of effort worthwhile. This is home baking at its finest, simple ingredients transformed into something special through technique, care, and a little bit of patience.
Classic Pop Tarts with Sourdough Discard
Flaky, buttery homemade pop tarts made with sourdough discard and filled with your choice of jam, chocolate, or cinnamon sugar. A delicious way to use discard while creating breakfast pastries everyone will love.
Prep Time
25 min
Cook Time
25 min
Total Time
50 min
Servings
9 pop tarts
Ingredients
For 9 pop tarts
- 2 cups (240g) all-purpose flour, plus more for dusting
- 1 tablespoon granulated sugar
- 1/2 teaspoon salt
- 1/2 cup (113g) unsalted butter, cold and cut into small cubes
- 1 cup (240g) sourdough discard, unfed and cold
- 3-4 tablespoons cold water
- 9 tablespoons jam, chocolate spread, or cinnamon sugar filling
- 1 large egg, beaten (for egg wash)
- 1 cup (120g) powdered sugar
- 2 tablespoons milk or cream
- 1/2 teaspoon vanilla extract
Instructions
- 1
Make the dough
In a large mixing bowl, whisk together the flour, granulated sugar, and salt until well combined. Add the cold butter cubes and use a pastry cutter or your fingertips to work the butter into the flour mixture until it resembles coarse crumbs with some pea-sized pieces of butter remaining, about 3-4 minutes.
- 2
Add wet ingredients
Stir in the sourdough discard until partially combined. Add cold water one tablespoon at a time, stirring with a fork after each addition, until the dough just comes together when squeezed. Turn the dough out onto a clean work surface and knead gently 3-4 times until it forms a cohesive mass.
- 3
Chill the dough
Flatten the dough into a disk about 1 inch thick, wrap tightly in plastic wrap, and refrigerate for at least 30 minutes or up to 2 days. This rest period allows the gluten to relax and the butter to firm up, which is essential for flaky pastry.
- 4
Roll and cut
On a lightly floured surface, roll the chilled dough to about 1/8 inch thickness. Using a pizza cutter or sharp knife and a ruler, cut the dough into 18 rectangles measuring approximately 3 by 4 inches each. Gather and reroll scraps as needed to get all 18 pieces.
- 5
Prepare for filling
Line a large baking sheet with parchment paper. Place 9 dough rectangles on the prepared sheet, spacing them about 2 inches apart. These will be your bottoms. Keep the remaining 9 rectangles nearby for tops.
- 6
Fill the pastries
Spoon about 1 tablespoon of your chosen filling onto the center of each rectangle on the baking sheet, leaving a 1/2-inch border around all edges. Spread the filling slightly but keep it away from the very edges. Brush the clean borders with beaten egg or water.
- 7
Seal and vent
Place the remaining 9 rectangles over the filled bottoms, aligning the edges carefully. Press firmly around all edges with a fork to seal, creating the classic crimped pattern. Use the fork tines to poke 3-4 small holes in the top of each pastry to allow steam to escape during baking.
- 8
Bake the pop tarts
Preheat your oven to 375°F (190°C). Brush the tops of the assembled pastries lightly with beaten egg if desired for extra browning. Bake for 22-25 minutes until golden brown and the edges are crisp. Let cool on the baking sheet for 5 minutes, then transfer to a wire rack.
- 9
Make the glaze
While the pop tarts cool, whisk together the powdered sugar, milk or cream, and vanilla extract in a small bowl until smooth. Adjust consistency by adding more milk for a thinner glaze or more powdered sugar for a thicker one.
- 10
Glaze and serve
Once the pop tarts have cooled to room temperature, drizzle or spread the glaze over the top of each one. Allow the glaze to set for about 10 minutes before serving. Store any leftovers in an airtight container at room temperature for up to 4 days.
Nutrition Facts
Per serving (estimated)
285 calories
Calories
42g
Carbs
4g
Protein
12g
Fat
1g
Fiber
145mg
Sodium
18g
Sugar


