Cinnamon Roll Bliss Bars Recipe - Easy & Delicious
Discover how to make irresistible Cinnamon Roll Bliss Bars! Soft, gooey, and packed with cinnamon sugar swirls. Perfect for family gatherings.
cookwithlucia.com/recipes/cinnamon-roll-bliss-bars-tastywithyoucom
There's something absolutely magical about the moment you pull a pan of Cinnamon Roll Bliss Bars from the oven. The warm cinnamon aroma fills every corner of your kitchen, that sweet glaze drips down the sides just perfectly, and you know you've created something that'll disappear within minutes. These bars combine everything we love about traditional cinnamon rolls—the tender, pillowy texture, the ribbons of cinnamon sugar, and that luscious cream cheese frosting—but without all the waiting, rolling, and rising time. I first stumbled upon the concept of turning cinnamon rolls into bars during a particularly hectic morning when I was expecting guests and realized I'd never have time to make individual rolls. What started as a time-saving experiment turned into one of my most requested recipes. My nieces and nephews literally squeal when they see these cooling on the counter, and I've watched grown adults go back for thirds without a hint of shame. The beauty of Cinnamon Roll Bliss Bars lies in their simplicity—you get all that cinnamon roll goodness in a fraction of the time, with way less fuss. Whether you're new to baking or you've been doing this for decades, this recipe will quickly become your go-to for weekend treats, family gatherings, or those moments when you need something comforting and sweet. In this post, I'll walk you through every detail you need to master these bars, from ingredient selection to storage tips, plus plenty of variations to make them your own.

What are Cinnamon Roll Bliss Bars?
So what exactly are Cinnamon Roll Bliss Bars, and why should they earn a permanent spot in your recipe collection? Think of them as the brilliant, practical cousin of traditional cinnamon rolls—all the flavor and satisfaction without the intimidation factor. Instead of individually rolled and shaped pastries that require multiple rises and precise shaping, these bars are simply pressed into a pan, layered with cinnamon sugar filling, topped with more dough, and baked to golden perfection. The result is a sheet pan full of soft, gooey, cinnamon-swirled bliss that cuts into perfect squares. They originated from the American tradition of simplifying beloved recipes for busy home cooks, and they've become increasingly popular at gatherings and potlucks because they're so easy to serve and share. The flavor profile is pure comfort—buttery dough, warm cinnamon spice, brown sugar sweetness, and that tangy-sweet cream cheese glaze that brings everything together. What makes Cinnamon Roll Bliss Bars truly special is how they maintain that signature pull-apart texture and gooey center that we crave in cinnamon rolls, but you can make them in under an hour. Ready to discover why these bars will change your morning treat game forever?
Why You'll Love This Cinnamon Roll Bliss Bars Recipe
Ridiculously Easy to Make - Unlike traditional cinnamon rolls that require rolling individual spirals and multiple rise times, these Cinnamon Roll Bliss Bars come together in one pan with minimal effort. You simply press dough into the bottom, spread the cinnamon filling, add the top layer, and bake. No special shaping skills needed, no worrying about perfectly tight spirals, and no anxiety about whether they'll rise properly. Even if you've never made yeasted dough before, you'll nail this recipe on your first try.
Perfect for Feeding a Crowd - When you're hosting family or friends, individual cinnamon rolls mean carefully portioning and plating. With Cinnamon Roll Bliss Bars, you've got a full pan ready to slice and serve however many people show up. They're ideal for breakfast gatherings, afternoon tea, or any time you need a sweet treat that looks impressive but didn't stress you out to make. Plus, everyone gets an equal amount of that coveted gooey center.
Budget-Friendly Ingredients - This recipe relies on pantry staples you probably already have: flour, butter, sugar, cinnamon, and basic dairy products. There's no need for expensive extracts, exotic spices, or specialty items. The ingredient list is straightforward and affordable, making these bars perfect for regular baking without breaking the bank. You can create something that tastes bakery-quality using everyday ingredients.
Incredibly Customizable - Once you master the basic Cinnamon Roll Bliss Bars, you can play with endless variations. Add chopped nuts, fold in raisins, swirl in apple chunks, or experiment with different spice blends. You can adjust the sweetness level, make them more or less cinnamon-forward, or even add a chocolate drizzle. The base recipe is forgiving enough to handle your creative tweaks.
Amazing Texture and Flavor - These bars deliver that perfect combination of soft, tender dough with pockets of melted cinnamon sugar that create little caramelized spots throughout. The cream cheese glaze adds a tangy richness that balances the sweetness beautifully. Every bite gives you multiple textures and layers of flavor, similar to the best cinnamon rolls you've ever tasted, but somehow even more consistent throughout.
Fantastic for Meal Prep - Make a pan on the weekend and enjoy them throughout the week. They stay soft and delicious for days, and they actually reheat beautifully, which isn't always true for baked goods. Having homemade Cinnamon Roll Bliss Bars ready to grab for breakfast or an afternoon snack makes the whole week feel a little more special.
Key Ingredients and What They Bring
Let's talk about what goes into making these Cinnamon Roll Bliss Bars absolutely irresistible, because understanding your ingredients makes you a better baker. The foundation starts with all-purpose flour, which provides the structure for our bars without making them too dense or cake-like. We want that tender, slightly chewy texture that makes cinnamon rolls so addictive, and all-purpose flour delivers perfectly. The butter in this recipe is crucial—it adds richness, flavor, and helps create that melt-in-your-mouth quality. I always use unsalted butter so I can control the salt level precisely, and I make sure it's softened to room temperature for easy mixing and even distribution throughout the dough.
Granulated sugar and brown sugar work together beautifully in these bars. The granulated sugar sweetens the dough itself, while the brown sugar in the cinnamon filling brings moisture and that deep, almost caramel-like flavor that makes the filling so luscious. Brown sugar contains molasses, which keeps everything soft and adds complexity beyond simple sweetness. The cinnamon is obviously the star of the show—I use a generous amount of ground cinnamon in the filling because that's what gives these bars their signature warmth and aroma. Quality matters here; fresh cinnamon from a recently opened jar makes a noticeable difference compared to that bottle that's been sitting in your cabinet for three years.
The cream cheese in the glaze is what elevates these Cinnamon Roll Bliss Bars from good to extraordinary. It provides a tangy counterpoint to all that sweetness and creates a frosting that's luxurious but not overwhelmingly sugary. Make sure your cream cheese is also at room temperature so it blends smoothly without lumps. Milk adds moisture to both the dough and the glaze, helping everything come together with the right consistency. The eggs in the dough act as a binder and add richness, creating a tender crumb that holds together when you cut the bars but still feels light and soft. Each ingredient has its purpose, working together to create those perfect Cinnamon Roll Bliss Bars that disappear from the pan almost instantly.
How to Make Cinnamon Roll Bliss Bars — Quick Overview
Making Cinnamon Roll Bliss Bars is wonderfully straightforward, and I'll give you the big picture before we dive into detailed steps. You'll start by preparing a simple sweet dough that comes together quickly in one bowl—just mix your dry ingredients, cream the butter and sugar, add eggs and milk, then bring it all together into a soft, slightly sticky dough. This process takes maybe ten minutes, and you don't need any fancy equipment or techniques. Once your dough is ready, you'll divide it in half and press one portion into the bottom of your prepared baking pan, creating an even layer that'll become the base of your bars.
Next comes the magic moment where you spread that gorgeous cinnamon-sugar filling over the bottom layer of dough. You'll mix softened butter with brown sugar and cinnamon until it's smooth and spreadable, then gently spread it edge to edge, creating those ribbons of spiced sweetness that'll swirl through every bite. Then you'll crumble or drop small pieces of the remaining dough over the top, covering most of the filling. Don't worry if it's not perfectly even—that rustic, slightly irregular top is part of the charm and creates wonderful texture variations once baked.
The bars bake for about 25 to 30 minutes at 350°F until they're golden brown on top and set in the center. Your kitchen will smell absolutely incredible during this time. Once they've cooled slightly, you'll whip up a quick cream cheese glaze and drizzle it generously over the warm bars, where it'll melt slightly into all the nooks and crannies. From start to finish, you're looking at under an hour, including baking time, to create a pan of Cinnamon Roll Bliss Bars that'll impress everyone who tries them.
Top Tips for Perfecting Cinnamon Roll Bliss Bars
The quality of your cinnamon makes a huge difference in these bars. If your cinnamon has been sitting in the spice cabinet for years, it's probably lost most of its potency and flavor. Invest in a fresh jar of good-quality ground cinnamon, and you'll immediately taste the difference—brighter, warmer, more aromatic. I prefer Ceylon cinnamon for its sweeter, more delicate flavor, but regular cassia cinnamon works beautifully too and provides that bold, spicy kick most of us associate with cinnamon rolls.
Room temperature ingredients are your secret weapon for success with Cinnamon Roll Bliss Bars. When your butter, eggs, and cream cheese are all at room temperature, they combine much more easily and create a smoother, more uniform texture. Cold butter won't cream properly with the sugar, cold eggs can cause the batter to seize up, and cold cream cheese will leave lumps in your glaze. Take everything out of the refrigerator about an hour before you start baking, and you'll notice how much easier the whole process becomes.
Don't overmix your dough—this is crucial for maintaining that tender, soft texture we're after. Once your dry ingredients are incorporated into the wet ingredients, mix just until everything comes together and you don't see dry flour anymore. Overmixing develops the gluten in the flour, which can make your bars tough and chewy instead of light and tender. Think of it like you're folding the dough together rather than beating it into submission.
Line your baking pan with parchment paper, leaving some overhang on two sides. This simple step makes removing and cutting your Cinnamon Roll Bliss Bars infinitely easier. Once they've cooled, you can lift the entire sheet right out of the pan and cut clean squares on a cutting board. Plus, cleanup becomes a breeze when your pan isn't covered in baked-on glaze and cinnamon sugar. I learned this trick years ago and haven't looked back.
Watch your baking time carefully, especially in the last five minutes. Every oven runs a little differently, and the difference between perfectly gooey bars and overdone dry ones can be just a few minutes. You want the top to be golden brown and the center to look set—not jiggly, but also not dried out. A toothpick inserted in the center should come out with just a few moist crumbs. Remember that your Cinnamon Roll Bliss Bars will continue cooking slightly from residual heat even after you remove them from the oven.
Let the bars cool for at least 15 minutes before adding the glaze, but don't wait until they're completely cold. You want them warm enough that the glaze melts slightly and seeps into the surface, creating that bakery-style finish where the frosting is part of the bar rather than just sitting on top. This timing creates the most delicious, integrated flavor experience.
For the most even baking, place your pan in the center of the oven and resist the urge to open the door frequently to check on them. Each time you open the oven, the temperature drops significantly, which can affect how evenly your Cinnamon Roll Bliss Bars bake. Trust the process, set your timer, and check once you're in the recommended time window.
Variations and Flavor Twists
Once you've mastered the basic Cinnamon Roll Bliss Bars, the world of variations opens wide. Try an apple cinnamon version by folding diced fresh apples tossed with a bit of lemon juice into your cinnamon filling. The apples add little pockets of tartness and extra moisture, plus their natural pectin helps create an almost jam-like consistency in spots. This variation tastes like autumn in bar form and pairs wonderfully with a cup of hot tea.
For a nutty twist, fold toasted pecans or walnuts into the cinnamon filling layer. Toast the nuts first in a dry skillet for a few minutes to intensify their flavor and add extra crunch. The nuts add textural contrast and a sophisticated depth that makes these bars feel a bit more special. You could also sprinkle chopped nuts over the top before baking for a gorgeous presentation.
Create a cream cheese swirl version by mixing softened cream cheese with a bit of sugar and an egg, then dolloping spoonfuls of this mixture over the cinnamon filling before adding the top dough layer. As the Cinnamon Roll Bliss Bars bake, the cream cheese creates beautiful marbled streaks and adds extra tanginess and richness. This variation tastes almost like a cinnamon roll cheesecake hybrid.
If you love a spicier flavor profile, boost the cinnamon and add a pinch of cardamom, nutmeg, and ground ginger to your filling. These warming spices transform the bars into something more complex and aromatic. The cardamom especially adds an almost floral note that makes people ask, "What's that amazing flavor I'm tasting?" This spiced version is perfect for cozy weekend mornings.
For a chocolate lover's take, sprinkle chocolate chips over the cinnamon filling before adding the top dough layer. As the bars bake, the chocolate melts into gooey pockets of richness that complement the cinnamon beautifully. You could even drizzle melted chocolate over the cream cheese glaze for an extra decadent finish. These Cinnamon Roll Bliss Bars become something entirely new—familiar yet excitingly different.
What to Serve with Cinnamon Roll Bliss Bars
Cinnamon Roll Bliss Bars are delicious on their own, but pairing them thoughtfully can elevate your entire eating experience. A hot cup of freshly brewed coffee is the classic companion—the slight bitterness of good coffee balances the sweetness perfectly, and there's something deeply satisfying about alternating bites of warm, cinnamon-spiced bar with sips of rich coffee. If you're not a coffee person, try them with a spiced chai latte or even a simple glass of cold milk, which provides a refreshing contrast to the warm spices and cuts through the richness of the cream cheese glaze.
For a complete breakfast spread, serve your Cinnamon Roll Bliss Bars alongside scrambled eggs and fresh fruit. The protein from the eggs and the brightness of berries or citrus segments create a balanced meal rather than just a sweet treat. The combination of savory, sweet, and fresh flavors makes for a memorable morning that feels special without being overly complicated. Add some crispy turkey strips if you want even more substance.
Consider serving these bars with vanilla yogurt and a drizzle of honey for a lighter pairing that still feels indulgent. The tangy yogurt echoes the cream cheese glaze while adding protein and probiotics, and the honey reinforces the natural sweetness without making everything too sugary. Fresh berries mixed into the yogurt add color and nutrition.
For afternoon gatherings, create a dessert board featuring your Cinnamon Roll Bliss Bars alongside fresh apple slices, a small bowl of caramel sauce for dipping, and perhaps some cheese cubes. The combination of textures and flavors gives everyone options and makes the presentation feel abundant and welcoming. A pot of hot herbal tea on the side completes the cozy atmosphere.
If you're serving these bars for a special breakfast occasion, consider adding a fruit salad with mint and a squeeze of lime juice. The bright, fresh fruit provides a palate-cleansing element between bites of rich, cinnamon-sweet bars. You could also set out small bowls of additional toppings—extra cream cheese glaze, chopped nuts, or even a sprinkle of flaky sea salt for those who love that sweet-salty combination. The versatility of Cinnamon Roll Bliss Bars means they fit beautifully into almost any meal scenario.
Storing and Reheating Tips
Proper storage keeps your Cinnamon Roll Bliss Bars tasting fresh and delicious for days. Once completely cooled and glazed, store the bars in an airtight container at room temperature for up to two days, or in the refrigerator for up to five days. I prefer refrigeration because the cream cheese glaze stays fresher longer in the cold, and honestly, these bars rarely last more than a couple of days in my house anyway. Layer parchment paper between stacked bars if you need to save space, preventing them from sticking together.
For longer storage, these bars freeze exceptionally well. Cut them into individual portions, wrap each bar tightly in plastic wrap, then place all the wrapped bars in a freezer-safe container or zip-top bag. They'll keep frozen for up to three months without losing quality. I actually love having a stash of frozen Cinnamon Roll Bliss Bars because it means I'm always one quick defrost away from a homemade treat. When you're ready to enjoy them, let them thaw at room temperature for about an hour, or overnight in the refrigerator.
Reheating brings back that fresh-from-the-oven magic. For the best texture, reheat individual bars in the microwave for 15 to 20 seconds. This warms them through without drying them out and makes the glaze slightly melty again. If you're reheating multiple bars at once, arrange them on a baking sheet and warm in a 300°F oven for about 8 to 10 minutes. Cover them loosely with foil to prevent the tops from getting too brown while the centers warm through.
If you froze the bars without glaze, that's actually ideal—make a fresh batch of cream cheese glaze when you're ready to serve them and drizzle it over the just-reheated bars. The contrast of warm bar with cool, fresh glaze is absolutely divine. You can also refresh the glaze on already-frosted bars by adding just a tiny drizzle of fresh glaze after reheating. However you choose to store and reheat your Cinnamon Roll Bliss Bars, they'll continue delivering that comforting cinnamon sweetness that makes them so irresistible.
Frequently Asked Questions
Can I make Cinnamon Roll Bliss Bars ahead of time?
Absolutely! In fact, these bars are perfect for advance preparation. You can bake them the night before and store them covered at room temperature, then add the cream cheese glaze in the morning just before serving. Alternatively, prepare the entire recipe with the glaze, and they'll keep beautifully in the refrigerator for up to five days. Just reheat individual portions as needed.
Can I substitute the all-purpose flour with whole wheat flour?
You can substitute up to half of the all-purpose flour with whole wheat flour without dramatically changing the texture. Going beyond a 50-50 ratio will make your Cinnamon Roll Bliss Bars denser and less tender, though they'll still taste delicious. If you want to use all whole wheat, consider using white whole wheat flour, which has a milder flavor and lighter texture than traditional whole wheat.
How do I know when the bars are done baking?
Your Cinnamon Roll Bliss Bars are done when the top is golden brown and the center looks set rather than jiggly. A toothpick inserted in the center should come out with just a few moist crumbs—not wet batter, but not completely clean either. The edges will pull away slightly from the pan, and the surface will spring back gently when lightly touched.
Can I reduce the sugar in this recipe?
You can reduce the sugar slightly, but keep in mind that sugar doesn't just add sweetness—it also affects texture and moisture. I wouldn't recommend reducing it by more than 25 percent, or your bars might turn out dry and less tender. The brown sugar in the filling is especially important for that gooey texture, so if you're cutting sugar, reduce the granulated sugar in the dough first.
What size pan should I use for Cinnamon Roll Bliss Bars?
A 9x13-inch baking pan is ideal for this recipe, creating bars that are the perfect thickness—not too thin and crispy, not too thick and doughy. If you only have a smaller pan, you can use an 8x8 or 9x9 square pan, but you'll need to increase the baking time by about 5 to 10 minutes and your bars will be thicker. Adjust accordingly and keep an eye on them.
Can I make these without the cream cheese glaze?
Certainly! The Cinnamon Roll Bliss Bars are delicious even without the glaze, though I highly recommend it because it adds that signature cinnamon roll finish. If you want to skip it, consider dusting the warm bars with powdered sugar instead for a lighter sweetness. You could also make a simple vanilla glaze with powdered sugar and milk as an alternative to cream cheese frosting.
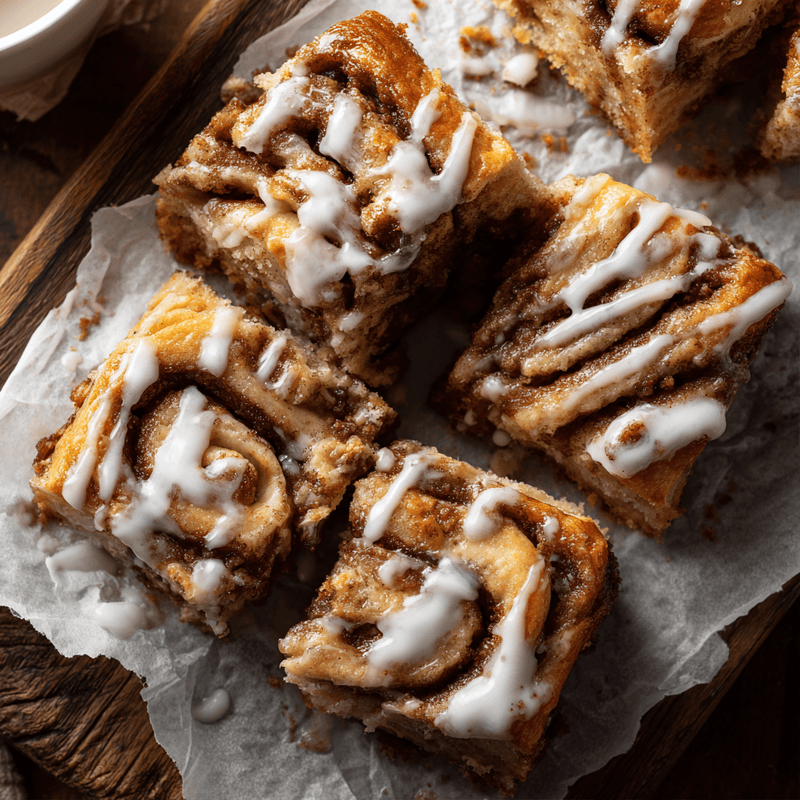
Cinnamon Roll Bliss Bars
Soft, gooey bars packed with cinnamon sugar swirls and topped with cream cheese glaze. All the flavor of cinnamon rolls with half the effort.
Prep Time
20 min
Cook Time
30 min
Total Time
50 min
Servings
12 bars
Ingredients
For 12 bars
- 2 1/2 cups all-purpose flour
- 1/2 teaspoon salt
- 1 teaspoon baking powder
- 1/2 cup unsalted butter, softened
- 3/4 cup granulated sugar
- 2 large eggs, room temperature
- 1/2 cup milk, room temperature
- 1 teaspoon vanilla extract
- 1/2 cup unsalted butter, softened (for filling)
- 1 cup packed brown sugar
- 2 tablespoons ground cinnamon
- 8 ounces cream cheese, softened
- 2 cups powdered sugar
- 3 tablespoons milk
- 1/2 teaspoon vanilla extract
Instructions
- 1
Prepare pan and oven
Preheat your oven to 350°F. Line a 9x13-inch baking pan with parchment paper, leaving some overhang on two sides for easy removal. Lightly grease the parchment paper with butter or cooking spray.
- 2
Mix dry ingredients
In a medium bowl, whisk together the flour, salt, and baking powder until well combined. Set this aside while you prepare the wet ingredients.
- 3
Cream butter and sugar
In a large mixing bowl, cream together the softened butter and granulated sugar using an electric mixer on medium speed for 2 to 3 minutes until light and fluffy. The mixture should become pale and increase in volume.
- 4
Add eggs and liquids
Beat in the eggs one at a time, mixing well after each addition. Add the milk and vanilla extract, mixing until fully incorporated. The mixture may look slightly curdled at this point, which is normal.
- 5
Combine wet and dry
Add the flour mixture to the wet ingredients in two or three additions, mixing on low speed just until no dry flour remains. Do not overmix—the dough should be soft and slightly sticky.
- 6
Create bottom layer
Divide the dough in half. Press one half evenly into the bottom of your prepared pan, using your hands or a spatula to spread it edge to edge. The layer should be relatively even but doesn't need to be perfect.
- 7
Make cinnamon filling
In a medium bowl, mix together the softened butter for filling, brown sugar, and cinnamon until smooth and spreadable. The mixture should be thick but spreadable, similar to frosting.
- 8
Add filling layer
Spread the cinnamon filling evenly over the bottom dough layer, reaching all the way to the edges. Use a spatula or the back of a spoon to spread it in an even layer.
- 9
Add top layer
Break the remaining dough into small pieces and distribute them over the cinnamon filling, covering as much surface as possible. The pieces don't need to connect completely—gaps are fine and create nice texture.
- 10
Bake the bars
Bake in the preheated oven for 25 to 30 minutes, until the top is golden brown and the center appears set. A toothpick inserted in the center should come out with just a few moist crumbs.
- 11
Cool slightly
Remove from the oven and allow the bars to cool in the pan for 15 to 20 minutes. They should be warm but not hot when you add the glaze.
- 12
Make cream cheese glaze
While the bars cool, beat together the softened cream cheese, powdered sugar, milk, and vanilla extract until smooth and creamy. The glaze should be pourable but thick enough to coat the back of a spoon.
- 13
Glaze and serve
Drizzle the cream cheese glaze generously over the warm bars. Let the glaze set for about 10 minutes, then use the parchment overhang to lift the bars from the pan. Cut into 12 squares and serve.
Nutrition Facts
Per serving (estimated)
385 calories
Calories
52g
Carbs
5g
Protein
18g
Fat
1g
Fiber
195mg
Sodium
35g
Sugar


