
Chick Cookies: Fun, Chewy Treats for Spring Celebrations
These adorable chick cookies are soft, chewy, and perfect for spring gatherings. Easy to make with simple ingredients and fun to decorate!
cookwithlucia.com/recipes/chick-cookies-fun-chewy-treats-for-spring-celebrations
There's something absolutely magical about biting into a soft, chewy cookie that not only tastes incredible but also brings a smile to everyone's face. These chick cookies are exactly that kind of treat — they're tender, buttery, and perfectly sweet, with a delightful vanilla flavor that appeals to kids and adults alike. The moment I pulled my first batch out of the oven and started decorating them with bright yellow icing and tiny candy eyes, I knew I had created something special. My nieces squealed with delight when they saw the adorable little chicks staring back at them from the cooling rack, and honestly, I felt pretty proud of myself too.
I first developed these chick cookies last spring when I was looking for a fun baking project to do with my family. We wanted something that was simple enough for little hands to help with but impressive enough to serve at our weekend gathering. After a few test batches and some creative decorating sessions, these chick cookies were born. What makes them truly special is their versatility — the base cookie recipe is forgiving and easy to work with, while the decorating process is as simple or elaborate as you want to make it. Whether you're an experienced baker or just starting out, you'll find that these cookies are approachable, fun, and absolutely delicious. In this post, I'll walk you through everything you need to know to create your own batch of these charming chick cookies, from selecting the right ingredients to mastering the perfect decorating technique. Trust me, once you see how easy and rewarding these are, you'll want to make them again and again.
What Are Chick Cookies?
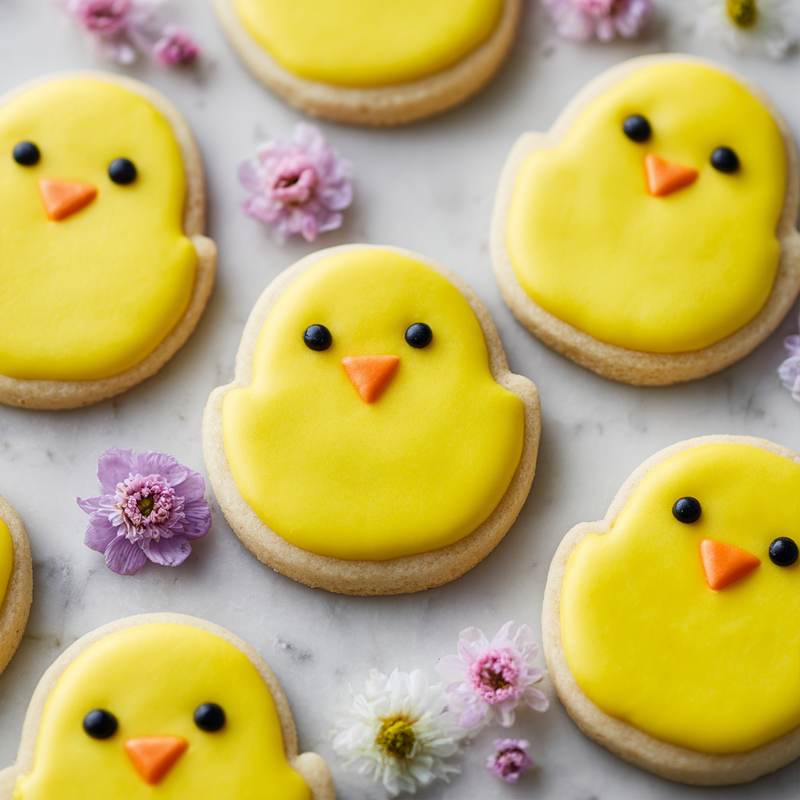
So what exactly are chick cookies, you might be wondering? These delightful treats are essentially soft sugar cookies shaped and decorated to look like adorable baby chicks, complete with bright yellow icing, little orange beaks, and sweet candy eyes that give them personality. They're part of a wonderful tradition of shaped and decorated cookies that bring whimsy and joy to springtime celebrations and family gatherings. The base is a classic butter cookie dough that's sturdy enough to hold its shape during baking but tender and chewy once cooled, creating the perfect canvas for your creative decorating efforts.
What sets chick cookies apart from regular decorated cookies is their playful nature and universal appeal. These aren't just cookies — they're edible art that brings people together. The flavor profile is straightforward and comforting: buttery, sweet, with hints of vanilla and a touch of almond extract if you choose to add it. The texture strikes that perfect balance between crisp edges and a soft, almost cake-like center. Originating from the American tradition of decorated cut-out cookies, these chick cookies have become a beloved treat for spring celebrations, garden parties, and any occasion where you want to bring smiles to the table. Ready to create your own flock of these adorable treats?
Why You'll Love This Chick Cookies Recipe
Incredibly Simple to Make: Even if you're new to cookie decorating, these chick cookies are wonderfully forgiving. The dough comes together in one bowl with basic ingredients you probably already have in your pantry, and it doesn't require chilling for hours like some finicky cookie recipes. You can go from mixing bowl to decorated cookies in under two hours, making this a perfect weekend project that doesn't demand your entire day.
Endlessly Customizable: While I'll give you my favorite decorating method, the beauty of chick cookies is that you can adapt them to match your skill level and creative vision. Use simple yellow icing and call it a day, or go all out with royal icing, different shades of yellow, and elaborate feather details. You can make them realistic or cartoonish, simple or intricate — they'll be delightful either way.
Perfect for Family Baking: These cookies are genuinely fun to make with kids. The dough is easy to work with, the shapes are simple (especially if you use a round cutter and just add the chick features), and the decorating process is engaging without being frustrating. I've made these chick cookies with children as young as four, and they absolutely loved every minute of it.
Budget-Friendly Ingredients: You won't need to hunt down expensive specialty items or exotic flavorings. Flour, butter, sugar, eggs, and some basic decorating supplies are all it takes. Compared to elaborate desserts that require premium chocolate or imported nuts, these chick cookies deliver maximum impact with minimal investment.
Crowd-Pleasing Appeal: I've yet to meet someone who doesn't smile when they see these adorable chick cookies. They're conversation starters at gatherings, perfect for gift boxes, and wonderful for sharing with neighbors. The combination of cute appearance and delicious taste makes them universally beloved.
Excellent for Make-Ahead Baking: The beauty of these cookies is their staying power. You can bake the cookies one day and decorate them the next, or even bake and freeze the undecorated cookies for up to two months. This flexibility makes chick cookies ideal for busy schedules and planned celebrations. Unlike delicate pastries that must be served immediately, these treats actually improve slightly as the flavors meld over a day or two.
Key Ingredients and What They Bring
Let me walk you through the essential ingredients that make these chick cookies so special, because understanding what each component brings to the recipe will help you achieve perfect results every time. Starting with all-purpose flour, this forms the structure of your cookies. I use a standard all-purpose variety because it provides just the right amount of gluten development for cookies that hold their shape without becoming tough or crumbly. The protein content in all-purpose flour creates that ideal chewy texture we're after in these chick cookies.
Unsalted butter is your flavor foundation here. I always recommend unsalted because it allows you to control the exact amount of salt in your recipe, but more importantly, quality butter gives these cookies their rich, tender crumb and that melt-in-your-mouth quality that makes them irresistible. When the butter creams with the sugar, it incorporates air that helps create a lighter texture. Granulated sugar sweetens the cookies while also contributing to their structure and helping achieve those slightly crisp edges that contrast beautifully with the soft centers.
Fresh eggs bind everything together and add moisture and richness to your chick cookies. They also contribute to the tender texture and help the cookies rise slightly during baking. I always use large eggs at room temperature because they incorporate more smoothly into the butter mixture. Pure vanilla extract is non-negotiable in my kitchen — it adds warmth and depth to the flavor profile, enhancing the buttery sweetness without overpowering it.
Baking powder serves as our leavening agent, giving the cookies a gentle lift and contributing to that soft, slightly puffy texture. Just a small amount makes a significant difference in the final product. A pinch of salt might seem minor, but it's crucial for balancing the sweetness and bringing out all the other flavors. For the decorating, you'll need powdered sugar for your icing, which creates a smooth, sweet coating that hardens slightly as it dries. Yellow food coloring transforms your icing into the perfect chick color, while candy eyes and small orange candies or icing create those adorable facial features that bring your chick cookies to life.
How to Make Chick Cookies — Quick Overview
Let me give you a bird's eye view of the process so you know exactly what to expect when you start making these chick cookies. First, you'll cream together your butter and sugar until the mixture is light, fluffy, and almost doubled in volume — this process incorporates air that helps create tender cookies. Then you'll beat in your eggs and vanilla, creating a smooth, creamy base that smells absolutely heavenly. In a separate bowl, you'll whisk together your dry ingredients before gradually mixing them into the wet ingredients until you have a soft, cohesive dough.
Once your dough is ready, you'll roll it out to about a quarter-inch thickness on a lightly floured surface. Using round cookie cutters (I like using sizes between two and three inches), you'll cut out circles that will become your chicks. Here's where it gets fun — you can keep them perfectly round or use a small knife to add a tiny tail bump on one side for a more authentic chick shape. After arranging them on your baking sheets, they go into a preheated oven for just ten to twelve minutes, until the edges are barely golden but the centers still look slightly soft.
The cooling process is important because the cookies continue to set as they cool, developing that perfect chewy texture. Once they're completely cool, the real magic happens with decorating. You'll tint your icing that cheerful yellow color, spread or pipe it onto each cookie, and then add the finishing touches — those candy eyes and little orange beaks that transform simple cookies into adorable chicks. The whole process from start to finish takes about ninety minutes, including baking time, and the results are absolutely worth it. These chick cookies come out beautifully every single time.
Top Tips for Perfecting Chick Cookies
After making countless batches of chick cookies, I've learned some valuable tricks that ensure perfect results every time. First and foremost, bring your butter and eggs to room temperature before you start mixing. Cold butter won't cream properly with the sugar, and cold eggs can cause the butter to seize up, leading to a less-than-ideal texture. I usually set my butter out about an hour before baking, and I place my eggs in a bowl of warm water for five minutes to take the chill off.
When rolling out your dough, resist the temptation to add too much flour to your work surface. Excess flour can make your chick cookies tough and dry. Instead, roll the dough between two sheets of parchment paper — this technique prevents sticking without adding extra flour and makes the whole process much cleaner. If your dough becomes too soft to work with during rolling and cutting, simply pop it in the refrigerator for ten to fifteen minutes to firm up.
Pay close attention to your baking time because these cookies can go from perfectly soft to overdone in just a minute or two. I always set my timer for ten minutes and then watch them carefully. You want to pull them from the oven when the edges are just barely starting to turn golden but the centers still look soft and slightly underdone. They'll continue baking on the hot pan for a few minutes after you remove them from the oven, finishing the cooking process perfectly.
For the icing, consistency is everything when decorating chick cookies. If your icing is too thick, it won't spread smoothly and you'll end up with lumpy, uneven coverage. If it's too thin, it'll run off the edges and pool around your cookies. The perfect consistency is similar to thick honey — it should slowly drip off your spoon but hold its shape once it settles. Add liquid (water or milk) just a teaspoon at a time until you reach this ideal texture.
Consider investing in gel food coloring rather than liquid varieties. Gel colors are more concentrated, so you'll use less and won't thin out your icing as much. For that perfect sunny chick yellow, I use a combination of yellow and just a tiny touch of orange gel coloring. When attaching candy decorations, do it while the icing is still wet so they'll stick properly as the icing dries. If you wait until the icing has hardened, you'll need to use a tiny dot of fresh icing as glue.
Don't skip the cooling step before decorating your chick cookies. If you try to ice warm cookies, the icing will melt and slide right off, creating a sticky mess instead of a cute chick. I usually bake my cookies in the morning and decorate them in the afternoon, or bake one day and decorate the next. This patience pays off with much better results.
Variations and Flavor Twists
While the classic vanilla chick cookies are absolutely delicious, there's plenty of room for creativity and personalization. For a lemon version, add two tablespoons of fresh lemon zest to your dough along with the vanilla extract, and substitute half the vanilla with lemon extract. This creates bright, citrusy chick cookies that taste like sunshine and pair beautifully with the sweet icing. The lemon flavor is subtle but refreshing, especially lovely for warm spring afternoons.
If you want to create almond chick cookies, replace half of the vanilla extract with pure almond extract. This gives the cookies a sophisticated, nutty undertone that adults especially appreciate. The almond flavor pairs wonderfully with the butter and creates a more complex taste profile while still maintaining that classic cookie charm. Just be cautious with the amount — almond extract is potent, and too much can be overwhelming.
For those who prefer a richer, more indulgent treat, try making chocolate chick cookies by substituting one-quarter cup of the flour with unsweetened cocoa powder. You'll end up with chocolate cookies that you can still decorate with yellow icing for a fun contrast, or you could go with white icing and create little penguin cookies instead. The chocolate version has a deeper, more intense flavor that chocolate lovers will adore.
If you're looking to add some texture, consider mixing in half a cup of finely chopped toasted almonds or very finely shredded coconut to your dough. This creates interesting texture variations in every bite and adds a subtle nutty or tropical note to your chick cookies. The key is chopping the additions very finely so they don't interfere with the smooth decorating surface.
For a fun twist on the decorating, try creating different colored chicks — baby blue for bluebirds, pink for flamingo cookies, or leave them white and add black details for little penguin treats. You can also experiment with different expressions by varying the placement of the eyes and beak, creating a whole flock of chick cookies with unique personalities. Some can look surprised, others sleepy, some happy — it's a fun way to add character and make each cookie special.
What to Serve with Chick Cookies
These chick cookies are delightful on their own, but pairing them thoughtfully with complementary items can elevate your entire spread. For beverages, I love serving them alongside cold glasses of fresh milk, which is classic for a reason — the creamy richness of milk perfectly balances the sweet cookies and cleanses your palate between bites. For a more sophisticated option, try pairing your chick cookies with hot chamomile tea or a light mint tea. The herbal notes complement the vanilla butter flavor without overwhelming it.
If you're creating a dessert table for a gathering, arrange your chick cookies alongside fresh fruit like strawberries, blueberries, and sliced melon. The bright, juicy fruit provides a refreshing contrast to the sweet cookies and adds beautiful color to your presentation. You could even serve them with a light fruit salad dressed with honey and fresh mint for a complete dessert experience that feels balanced and not overly heavy.
For a more substantial spread, consider serving these cookies as part of a spring-themed afternoon tea. Include small sandwiches with cucumber and cream cheese, savory scones with herb butter, and your adorable chick cookies as the sweet finale. This combination creates a memorable experience that works beautifully for family gatherings or casual entertaining with friends.
These chick cookies also pair wonderfully with ice cream for a fun dessert. Serve vanilla or lemon ice cream in small bowls with a chick cookie perched on top or served alongside. The temperature contrast between cold ice cream and room-temperature cookies is delightful, and the combination feels special without requiring much effort. You could even create ice cream sandwiches using two unfrosted chick cookies with a scoop of softened ice cream in between, then refreezing until firm.
For a simple but elegant presentation, serve your chick cookies on a tiered stand with other springtime treats like lemon bars, coconut macaroons, or fruit tarts. The variety gives guests options while the cohesive spring theme ties everything together beautifully. Don't forget to garnish your serving platter with fresh flowers or greenery to enhance that fresh, seasonal feeling.
Storing and Reheating Tips
Proper storage is key to maintaining the delightful texture and flavor of your chick cookies, and fortunately, they store beautifully when handled correctly. For short-term storage, place your fully decorated and dried chick cookies in an airtight container with sheets of parchment paper between layers to prevent the decorations from smudging or sticking together. Stored this way at room temperature, they'll stay fresh and delicious for up to five days. Keep the container in a cool, dry place away from direct sunlight and heat sources, which can cause the icing to soften or the cookies to become stale.
If you want to prepare your chick cookies further in advance, refrigeration is an option, though not strictly necessary. Refrigerated cookies will last up to ten days, but be sure to bring them to room temperature before serving for the best texture and flavor. The cold can make the cookies slightly firmer, and they truly shine when served at room temperature where their tender, chewy texture is most apparent.
For longer storage, freezing is excellent for these cookies. You can freeze undecorated baked cookies for up to three months in a freezer-safe container or bag with all the air pressed out. When you're ready to use them, let them thaw completely at room temperature before decorating. Alternatively, you can freeze fully decorated chick cookies, though you'll need to freeze them on a baking sheet first until the icing is solid, then transfer them to a freezer container with parchment between layers. Frozen decorated cookies will maintain their quality for about two months.
These chick cookies are best enjoyed at room temperature and don't really require reheating, but if you prefer a slightly warm cookie, you can place them in a preheated oven at 250 degrees Fahrenheit for just three to five minutes. Be very careful with this method if your cookies are already decorated, as the icing can melt. Generally, I recommend warming only undecorated cookies and enjoying decorated ones at room temperature for the best experience.
One pro tip for maintaining freshness: if your cookies start to soften or lose their texture after a few days, you can crisp them up slightly by placing them in a 300-degree oven for about five minutes. Conversely, if they've become too crisp, add a slice of bread to your storage container overnight — the cookies will absorb moisture from the bread and soften nicely. The bread method works beautifully for restoring that perfect chewy texture to chick cookies that have dried out slightly.
Frequently Asked Questions
Can I make the dough for chick cookies ahead of time?
Absolutely! The cookie dough actually benefits from resting in the refrigerator. You can make it up to three days in advance, wrap it tightly in plastic wrap, and refrigerate until you're ready to roll and bake. Cold dough is often easier to work with and results in cookies that spread less during baking. Just let it sit at room temperature for about fifteen minutes before rolling if it's too firm to work with straight from the fridge.
What can I use instead of candy eyes for decorating?
There are several creative alternatives to store-bought candy eyes for your chick cookies. You can pipe small dots of black icing or melted chocolate for simple eyes, or use mini chocolate chips pressed into the wet icing. Some bakers use small pieces of raisins or other dried fruit for a more natural look. For a fun twist, try using white icing dots with smaller black dots in the center to create custom eyes with any expression you want.
How do I prevent my cookies from spreading too much during baking?
Cookie spreading is usually caused by butter that's too warm or dough that hasn't been chilled enough. Make sure you're using room temperature butter, not melted or overly soft butter, when creaming with sugar. If your kitchen is very warm or your dough feels soft and sticky, refrigerate the cut-out shapes on the baking sheet for fifteen minutes before baking. Also ensure you're measuring your flour correctly by spooning it into the measuring cup and leveling it off rather than scooping directly from the bag, which can pack the flour and result in less flour than needed.
Can I make these chick cookies without food coloring?
Definitely! While the yellow color is part of the charm, you can absolutely make these cookies with plain white icing and they'll still be adorable and delicious. You could also use natural food colorings derived from turmeric or other plant-based sources if you prefer to avoid artificial dyes. The shape and the cute face decorations are really what make them recognizable as chicks, so the color is more of an enhancement than a necessity.
How can I make these cookies suitable for guests with dietary restrictions?
For those avoiding eggs, you can substitute each egg with a flax egg (one tablespoon ground flaxseed mixed with three tablespoons water, left to sit for five minutes) or use a commercial egg replacer following package directions. The texture will be slightly different but still delicious. For those avoiding dairy, substitute the butter with an equal amount of plant-based butter or coconut oil, though note that coconut oil will add a subtle coconut flavor to your chick cookies. These substitutions work well, though the texture may be slightly less tender than the original version.
How do I know when my chick cookies are perfectly baked?
The perfect chick cookie comes out of the oven when the edges are just barely set and showing the faintest hint of golden color, while the centers still look slightly soft and pale. They should not brown significantly on top. Touch the center gently — it should feel set but still yield slightly to pressure. Remember that cookies continue to bake on the hot pan after you remove them from the oven, so slightly underdone is better than overbaked. If you wait until they look completely done in the oven, they'll likely be too crisp once cooled. Trust the process and pull them when they still look a touch underdone for that perfect chewy texture.
Chick Cookies
Adorable, soft, and chewy sugar cookies decorated to look like baby chicks, perfect for spring celebrations and family gatherings.
Prep Time
20 min
Cook Time
12 min
Total Time
90 min
Servings
24 cookies
Ingredients
For 24 cookies
- 2 3/4 cups all-purpose flour
- 1 teaspoon baking powder
- 1/4 teaspoon salt
- 1 cup unsalted butter, softened to room temperature
- 1 cup granulated sugar
- 2 large eggs, at room temperature
- 2 teaspoons pure vanilla extract
- 3 cups powdered sugar
- 3-4 tablespoons milk
- Yellow gel food coloring
- 48 candy eyes
- Small orange candies or orange icing for beaks
Instructions
- 1
Prepare dry ingredients
In a medium bowl, whisk together the all-purpose flour, baking powder, and salt until well combined. Set this mixture aside while you prepare the wet ingredients. This ensures even distribution of the leavening agent throughout your cookies.
- 2
Cream butter and sugar
In a large mixing bowl, beat the softened butter and granulated sugar together using an electric mixer on medium-high speed for 3-4 minutes. Continue beating until the mixture is light, fluffy, and has nearly doubled in volume, scraping down the sides of the bowl as needed.
- 3
Add eggs and vanilla
Add the eggs one at a time to the butter mixture, beating well after each addition. Then add the vanilla extract and mix until everything is fully incorporated and the mixture is smooth and creamy. The mixture should look cohesive and slightly glossy at this stage.
- 4
Combine wet and dry
Gradually add the flour mixture to the wet ingredients, mixing on low speed. Add about one-third at a time, mixing just until combined after each addition. Do not overmix, as this can make the cookies tough. The dough should be soft but not sticky.
- 5
Roll and cut cookies
Preheat your oven to 350°F (175°C) and line two baking sheets with parchment paper. On a lightly floured surface or between two sheets of parchment paper, roll the dough to about 1/4-inch thickness. Use a round cookie cutter (2-3 inches) to cut out circles, re-rolling scraps as needed.
- 6
Bake the cookies
Arrange the cut cookies on the prepared baking sheets, spacing them about 2 inches apart. Bake for 10-12 minutes, until the edges are just barely starting to turn golden but the centers still look soft. Do not overbake. Remove from the oven and let cookies cool on the baking sheet for 5 minutes before transferring to a wire rack to cool completely.
- 7
Prepare yellow icing
In a medium bowl, whisk together the powdered sugar and 3 tablespoons of milk until smooth. Add more milk, one teaspoon at a time, until the icing reaches a spreadable consistency similar to thick honey. Add yellow gel food coloring, mixing until you achieve a bright, cheerful yellow color.
- 8
Ice the cookies
Once the cookies are completely cool, spread or pipe the yellow icing onto each cookie, covering the entire top surface. Use the back of a spoon or a small offset spatula to smooth the icing into an even layer. Work with one cookie at a time to ensure the icing stays wet for the next step.
- 9
Add chick features
While the icing is still wet, gently press two candy eyes onto each cookie to create the chick's face. Then add a small orange candy piece or pipe a small triangle of orange icing in the center below the eyes to create the beak. Position everything before the icing dries.
- 10
Let icing set
Allow the decorated chick cookies to sit at room temperature for at least 2 hours, or until the icing has completely hardened. Once set, the cookies can be stacked and stored. The icing should be firm to the touch and no longer sticky before you move or package the cookies.
Nutrition Facts
Per serving (estimated)
165 calories
Calories
24g
Carbs
2g
Protein
8g
Fat
0.5g
Fiber
65mg
Sodium
15g
Sugar


