Cheesy Garlic Chicken Wraps Recipe - Easy & Delicious
Try this irresistible Cheesy Garlic Chicken Wraps Recipe! Tender chicken, melted cheese, and roasted garlic in a soft tortilla. Ready in 30 minutes!
cookwithlucia.com/recipes/cheesy-garlic-chicken-wraps-recipe
There's something absolutely magical about biting into a warm, crispy-edged wrap filled with tender chicken, melted cheese that stretches with every pull, and the aromatic punch of roasted garlic that makes your taste buds dance. These cheesy garlic chicken wraps have become my go-to recipe when I need something satisfying, quick, and guaranteed to make everyone at the table happy. The golden-brown exterior gives way to a warm, gooey center that combines savory chicken with rich, melted cheese and the sweet, mellow flavor of perfectly cooked garlic. I discovered this recipe during a particularly busy week when I was juggling deadlines and had a refrigerator full of leftover chicken. I threw together what I had on hand, and my family couldn't stop raving about it. Since then, I've perfected this cheesy garlic chicken wraps recipe to the point where it's requested at least twice a week in my household. What makes this recipe truly special is its beautiful balance of simplicity and flavor. You don't need fancy ingredients or complicated techniques, yet the result tastes like something you'd order at your favorite restaurant. In this post, I'll walk you through everything you need to know to make these wraps perfectly every single time, from selecting the right ingredients to achieving that ideal crispy exterior while keeping the inside wonderfully tender and cheesy. Let me show you how easy it is to bring this restaurant-quality dish to your own kitchen.

What is a Cheesy Garlic Chicken Wrap?
Have you ever wished you could combine all your favorite comfort foods into one handheld meal that's both satisfying and surprisingly sophisticated? That's exactly what a cheesy garlic chicken wrap delivers. This delightful creation brings together seasoned chicken pieces, generous amounts of melted cheese, and aromatic garlic all wrapped up in a soft flour tortilla that gets toasted to golden perfection. The concept draws inspiration from various global wrap traditions, from Middle Eastern shawarma to Mexican burritos, but this version puts the spotlight firmly on the irresistible combination of garlic and cheese. The flavor profile is rich and savory with a beautiful depth that comes from the garlic, which can be used fresh, roasted, or as a garlic-infused butter spread. The cheese creates a creamy, indulgent texture that binds all the ingredients together, while the chicken provides hearty protein that makes this wrap a complete meal. What sets this cheesy garlic chicken wraps recipe apart from other wraps is the intentional layering of flavors and the final toasting step that transforms a simple wrap into something extraordinary. The exterior becomes slightly crispy and golden, creating a textural contrast with the soft, melty interior that makes every bite interesting. Ready to make this flavor-packed wrap your new favorite meal?
Why You'll Love This Cheesy Garlic Chicken Wraps Recipe
Incredibly Quick and Easy: This cheesy garlic chicken wraps recipe comes together in just thirty minutes from start to finish, making it perfect for those hectic weeknights when you need dinner on the table fast. The preparation is straightforward with no complicated techniques, and even kitchen beginners will find success with this recipe. You'll spend most of your time simply assembling the wraps, and the cooking happens quickly on a hot skillet or grill pan.
Bursting with Bold Flavors: The combination of garlic and cheese creates an incredibly satisfying flavor profile that feels indulgent without being overwhelming. The garlic adds aromatic depth and a subtle sweetness when cooked properly, while the cheese brings richness and that irresistible melty quality. Every bite delivers a perfect balance of savory chicken, creamy cheese, and fragrant garlic that will have everyone asking for seconds.
Budget-Friendly Without Sacrificing Quality: You don't need expensive ingredients to make these wraps taste amazing. Basic pantry staples and affordable chicken breast transform into something that tastes restaurant-quality. This recipe is perfect for feeding a family without breaking the bank, and you can easily stretch the ingredients to make extra wraps for lunch the next day.
Endlessly Customizable: This cheesy garlic chicken wraps recipe serves as a fantastic base that you can adapt to your family's preferences. Add vegetables, switch up the cheese varieties, adjust the garlic intensity, or incorporate different seasonings to make it uniquely yours. The versatility means you'll never get bored, and you can use whatever ingredients you have on hand.
Perfect for Meal Prep: These wraps hold up beautifully when made ahead, making them ideal for weekly meal preparation. You can assemble several wraps, store them in the refrigerator, and simply toast them when you're ready to eat. They also freeze exceptionally well, giving you a stash of ready-to-go meals for those days when cooking from scratch isn't an option.
Crowd-Pleasing Appeal: I've yet to meet someone who doesn't love these wraps. They have universal appeal that makes them perfect for family gatherings or casual entertaining. Unlike quesadillas which can sometimes be messy, these wraps are easier to eat and transport, making them ideal for packed lunches or picnics too. Trust me, once you make this cheesy garlic chicken wraps recipe, it will become a regular fixture in your weekly meal rotation.
Key Ingredients and What They Bring
The foundation of any great cheesy garlic chicken wraps recipe starts with selecting quality ingredients that each play a specific role in creating the final delicious result. Let's talk about boneless, skinless chicken breast first, which provides the protein base for these wraps. I prefer chicken breast because it stays tender when cooked properly and has a mild flavor that allows the garlic and cheese to shine. You'll want to cut the chicken into bite-sized pieces or thin strips, which helps it cook quickly and makes the wraps easier to eat. The size of your chicken pieces matters because uniform sizing ensures even cooking and better distribution throughout each wrap.
Fresh garlic is the star ingredient that gives these wraps their signature flavor and aroma. I recommend using at least four to six cloves of fresh garlic, minced finely so it distributes evenly and doesn't create overpowering bites. When garlic cooks, it transforms from sharp and pungent to sweet and mellow, adding incredible depth to the chicken. Some people prefer using garlic powder in a pinch, but fresh garlic truly makes a noticeable difference in this recipe. You can also create a garlic butter by mixing minced garlic with softened butter, which adds richness while distributing the garlic flavor beautifully.
The cheese selection is crucial for achieving that perfect melty, gooey texture we're after. I typically use a combination of mozzarella for its superior melting qualities and mild flavor, along with sharp cheddar for a more pronounced cheese taste. Mozzarella creates those beautiful cheese pulls, while cheddar adds depth and a slight tang. You could also incorporate cream cheese for extra creaminess or pepper jack if you want a spicy kick. Always use freshly shredded cheese rather than pre-shredded varieties, as the anti-caking agents in pre-shredded cheese can prevent proper melting.
Large flour tortillas serve as the wrapper that holds everything together. I prefer flour tortillas over other varieties because they're soft, pliable, and develop a beautiful golden color when toasted. Look for tortillas that are fresh and flexible, as older tortillas tend to crack when folded. The size matters too; you'll want tortillas that are at least ten inches in diameter to comfortably hold all your filling. Warming the tortillas slightly before filling makes them even more pliable and easier to wrap tightly without tearing.
Olive oil or butter is essential for cooking the chicken and toasting the wraps to golden perfection. I often use olive oil for cooking the chicken because it has a higher smoke point and adds a subtle fruity flavor. For toasting the assembled wraps, butter creates an irresistibly crispy exterior with a rich flavor that complements the garlic beautifully. You can also brush the tortillas with garlic butter before toasting for an extra layer of flavor.
Seasonings like salt, black pepper, paprika, and dried herbs bring everything together and enhance the natural flavors of the chicken. Don't underestimate the importance of proper seasoning, as it makes the difference between bland chicken and flavorful, restaurant-quality filling. I like adding a pinch of paprika for subtle sweetness and a beautiful color, along with dried oregano or Italian seasoning for herbal notes that complement the garlic. Season your chicken generously, tasting as you go to ensure the flavors are balanced and vibrant.
How to Make Cheesy Garlic Chicken Wraps — Quick Overview
Making this cheesy garlic chicken wraps recipe is remarkably straightforward and follows a simple three-step process that anyone can master. You'll begin by cooking your seasoned chicken pieces in a hot skillet with olive oil and plenty of minced garlic, stirring frequently until the chicken is golden brown on the outside and cooked through completely. The garlic will become fragrant and turn a light golden color, infusing the chicken with incredible flavor. This step takes about eight to ten minutes, and you'll know the chicken is done when it reaches an internal temperature of 165 degrees Fahrenheit and no pink remains in the center.
Once your chicken is cooked, you'll assemble your wraps by laying out the flour tortillas and creating a layer of shredded cheese down the center of each one. The cheese acts as a binding agent that holds everything together, and using enough cheese ensures you get that satisfying stretch with every bite. Top the cheese with your cooked garlic chicken, then add additional cheese on top if you're feeling extra indulgent. The key to a good wrap is not overfilling it, which makes folding difficult and can lead to ingredients spilling out. Fold in the sides of the tortilla first, then roll it up tightly from the bottom, creating a secure package that keeps all the delicious filling inside.
The final step is toasting the assembled wraps in a clean skillet over medium heat, which takes just two to three minutes per side. You'll want to place the seam side down first to help seal the wrap closed, pressing gently with a spatula to ensure even contact with the hot pan. The tortilla will develop golden-brown spots and become slightly crispy, while the heat melts the cheese inside to creamy perfection. This entire process from start to finish takes about thirty minutes, with most of that time being hands-on and active. The result is a warm, crispy, cheesy wrap that's bursting with garlicky goodness and sure to satisfy even the heartiest appetites.
Top Tips for Perfecting Cheesy Garlic Chicken Wraps
The quality of your chicken makes a significant difference in the final result, so I always recommend using fresh chicken breast rather than frozen when possible. If you must use frozen chicken, make sure it's completely thawed and patted dry before cooking, as excess moisture will cause steaming rather than browning. Cutting your chicken into uniform pieces ensures even cooking, and I find that bite-sized cubes work better than strips because they're easier to wrap and provide chicken in every bite.
Don't rush the garlic cooking process, as this is where much of the flavor develops in this cheesy garlic chicken wraps recipe. Cook the garlic over medium heat rather than high heat to prevent burning, which creates a bitter taste that can ruin the entire dish. The garlic should become fragrant and just slightly golden, which indicates that the sharp raw flavor has mellowed into something sweet and complex. If you're worried about burning the garlic, you can add it after the chicken has cooked for a few minutes, giving it less time over direct heat.
Layering your cheese strategically creates the best texture and helps bind the ingredients together. I recommend placing cheese directly on the tortilla first, then adding your chicken, then topping with more cheese. This double-cheese method ensures that cheese surrounds the chicken, creating a cohesive filling that doesn't fall apart when you bite into the wrap. Let your wraps rest for about thirty seconds after cooking before slicing them, which allows the melted cheese to set slightly and prevents everything from oozing out when you cut through them.
Temperature control is crucial when toasting your wraps, and medium heat is your friend here. Too high heat will burn the outside before the cheese inside has a chance to melt, while too low heat results in wraps that are pale and lack that desirable crispy texture. If you notice the tortilla browning too quickly, simply reduce your heat slightly and give the wrap a bit more time. A well-heated skillet is essential, so let your pan preheat for a few minutes before adding the first wrap.
Avoid the common mistake of overfilling your tortillas, which makes them impossible to fold properly and causes ingredients to spill out during cooking. A good rule of thumb is to use about one-third to one-half cup of chicken mixture per wrap, spread in a line down the center of the tortilla. Leave at least two inches of space on all sides to allow for proper folding. Remember that less is often more when it comes to wraps, and you can always make more wraps rather than struggling with overstuffed ones.
For extra flavor depth, consider making a garlic butter to brush on the tortillas before toasting. Simply mix softened butter with minced garlic and a pinch of salt, then spread a thin layer on the outside of your assembled wraps. This creates an incredibly flavorful, crispy exterior that takes these wraps to the next level. You can also add fresh herbs like parsley or cilantro to your garlic butter for additional complexity and a pop of color.
If you're making multiple wraps, keep the finished ones warm in a low oven set to 200 degrees Fahrenheit while you cook the remaining wraps. This ensures that everyone can eat together and enjoy their cheesy garlic chicken wraps recipe at the perfect temperature. Place the cooked wraps on a baking sheet in a single layer, and they'll stay warm and crispy for up to fifteen minutes without drying out or becoming soggy.
Variations and Flavor Twists
Transform this cheesy garlic chicken wraps recipe into a spicy version by adding diced jalapeños or a drizzle of your favorite hot sauce to the chicken mixture. The heat plays beautifully against the creamy cheese and adds an exciting kick that spice lovers will appreciate. You can also use pepper jack cheese instead of mozzarella for built-in spiciness, or sprinkle red pepper flakes into the garlic butter for a subtle warming sensation that doesn't overwhelm the other flavors.
Create a Mediterranean-inspired variation by incorporating sun-dried tomatoes, fresh spinach, and feta cheese alongside your mozzarella. The tangy feta and sweet sun-dried tomatoes add complex flavors that complement the garlic beautifully, while the spinach provides color, nutrition, and a slightly earthy taste. You might also add a dollop of plain yogurt or a squeeze of lemon juice to brighten the flavors and add a refreshing element to each bite.
For a ranch-style version that's especially popular with younger eaters, mix some ranch seasoning into your chicken while it cooks and add crispy lettuce and diced tomatoes to the wraps. You can also drizzle ranch dressing inside before rolling, which adds creaminess and a familiar flavor profile that many people love. This variation works wonderfully with cheddar cheese and creates a wrap that tastes similar to a beloved ranch chicken sandwich.
Make a lighter version of this cheesy garlic chicken wraps recipe by using whole wheat tortillas, reducing the cheese slightly, and adding plenty of fresh vegetables like bell peppers, onions, and mushrooms. The vegetables add bulk and nutrition without many calories, and they contribute their own flavors and textures that make the wraps more interesting. Sauté the vegetables along with the chicken and garlic for a cohesive filling that's packed with goodness.
For a cream cheese version that's incredibly indulgent, spread softened cream cheese on your tortillas before adding the other ingredients. The cream cheese creates an ultra-creamy texture and adds tanginess that balances the rich flavors of the garlic and melted cheese. You can also mix herbs like chives or dill into the cream cheese for additional flavor complexity. This variation is perfect for those who love extra-creamy, rich wraps that feel like a special treat.
What to Serve with Cheesy Garlic Chicken Wraps
A simple green salad with a tangy vinaigrette provides the perfect light and refreshing contrast to these rich, cheesy wraps. The crisp lettuce and acidic dressing cut through the heaviness of the cheese and cleanse your palate between bites. I like using mixed greens with cherry tomatoes, cucumbers, and a lemon-based dressing that adds brightness to the meal. The salad also adds valuable nutrition and makes the overall meal feel more balanced and complete.
Crispy oven-baked fries or potato wedges are a classic accompaniment that turns this cheesy garlic chicken wraps recipe into a satisfying, comfort-food meal. The crispy exterior and fluffy interior of the potatoes complement the texture of the wraps beautifully, and you can season them with similar garlic and herb flavors to create a cohesive meal. Sweet potato fries work wonderfully too, adding natural sweetness that contrasts nicely with the savory wraps.
Fresh vegetable sticks with hummus or a yogurt-based dip offer a healthier side option that still provides satisfying crunch and flavor. Carrot sticks, celery, bell pepper strips, and cucumber slices all work beautifully and add color to your plate. The creamy dip provides richness similar to the cheese in the wraps while introducing different flavors that keep the meal interesting. This combination is especially good for lighter meals or when you're trying to incorporate more vegetables into your diet.
A warm bowl of tomato soup creates a comforting, nostalgic pairing that reminds many people of the classic grilled cheese and tomato soup combination. The acidity of the tomatoes complements the richness of the cheese, and dipping your wrap into the soup adds an interactive, fun element to the meal. This pairing is perfect for cooler weather when you want something warm and cozy that fills you up completely.
Coleslaw with a creamy dressing adds crunch and tanginess that balances the soft texture and rich flavors of the wraps. The cabbage provides a satisfying bite, while the dressing adds moisture and flavor that complements rather than competes with the main dish. You can make a traditional creamy coleslaw or opt for a vinegar-based version if you prefer something lighter and more acidic.
For beverages, I recommend serving these cheesy garlic chicken wraps with iced tea, lemonade, or sparkling water with fresh fruit. These drinks are refreshing and help cleanse your palate without overwhelming the flavors of the wraps. The slight sweetness of lemonade or fruit-infused water provides a pleasant contrast to the savory, garlicky flavors, making each bite taste as good as the first.
Storing and Reheating Tips
Proper storage is essential for maintaining the quality of your cheesy garlic chicken wraps recipe when you're making them ahead or have leftovers. Once the wraps have cooled completely to room temperature, wrap each one individually in aluminum foil or plastic wrap to prevent them from drying out. Store the wrapped wraps in an airtight container in the refrigerator, where they'll stay fresh for up to three days. The key is preventing moisture loss while also avoiding condensation that can make the tortillas soggy, which is why individual wrapping works so well.
For longer storage, these wraps freeze beautifully for up to two months when properly packaged. Wrap each cooled wrap tightly in plastic wrap, then place them all in a freezer-safe bag or container, removing as much air as possible before sealing. Label the container with the date so you can track freshness. When you're ready to eat a frozen wrap, thaw it overnight in the refrigerator rather than at room temperature, which helps maintain food safety and prevents the tortilla from becoming overly soggy.
Reheating in the oven produces the best results for maintaining that crispy exterior while heating the filling thoroughly. Preheat your oven to 350 degrees Fahrenheit, place your unwrapped wraps on a baking sheet, and heat for about ten to twelve minutes if refrigerated, or fifteen to eighteen minutes if frozen. Cover the wraps loosely with foil for the first half of the heating time to prevent over-browning, then remove the foil to crisp up the exterior during the final few minutes.
The stovetop method works wonderfully when you want a quick reheat that restores the crispy texture. Heat a skillet over medium-low heat, add the wrap, and cover with a lid to trap heat and help the interior warm through. Heat for about three to four minutes per side for refrigerated wraps, checking frequently to prevent burning. This method creates a crispy exterior similar to freshly made wraps, and the covered pan helps melt the cheese again.
While the microwave is the fastest reheating option, it does sacrifice the crispy texture and can make the tortilla somewhat chewy. If you must use the microwave, wrap the wrap in a slightly damp paper towel to prevent it from drying out, and heat in thirty-second intervals until warmed through. For better results, finish the microwaved wrap in a hot skillet for about a minute per side to restore some crispiness to the exterior. The microwave works best for the filling alone if you want to remake fresh wraps with leftover chicken.
Frequently Asked Questions
Can I make these cheesy garlic chicken wraps ahead of time?
Absolutely! This cheesy garlic chicken wraps recipe is perfect for meal prep and actually holds up beautifully when made in advance. You can assemble the wraps completely, wrap them individually in foil or plastic wrap, and store them in the refrigerator for up to three days before the final toasting step. When you're ready to eat, simply toast them in a skillet as directed, adding an extra minute or two to ensure the filling heats through completely since it's starting cold.
Can I use leftover rotisserie chicken instead of cooking fresh chicken?
Yes, leftover rotisserie chicken is a fantastic shortcut that makes this recipe even faster and easier. Simply shred or chop the rotisserie chicken, then sauté it briefly with the garlic and seasonings to infuse it with flavor and warm it through. This method cuts your cooking time significantly and adds a depth of flavor from the pre-cooked chicken. You'll need about two to three cups of shredded rotisserie chicken to make four generous wraps.
How do I prevent my tortillas from cracking when I fold them?
The key to pliable tortillas is ensuring they're at room temperature or slightly warm before filling and folding. Cold tortillas straight from the refrigerator are more likely to crack, so let them sit at room temperature for fifteen minutes, or warm them slightly in the microwave for ten to fifteen seconds. You can also heat them briefly in a dry skillet for about ten seconds per side, which makes them incredibly pliable and easier to work with.
Can I make a vegetarian version of this recipe?
Definitely! You can create a delicious vegetarian version of this cheesy garlic chicken wraps recipe by substituting the chicken with roasted vegetables like bell peppers, zucchini, mushrooms, and onions. Sauté the vegetables with plenty of garlic and seasonings until they're tender and caramelized, then use them as your filling with the cheese. Black beans or chickpeas also work wonderfully as a protein-rich substitute that makes the wraps hearty and satisfying.
What's the best way to get even browning on my wraps?
Even browning comes down to consistent heat and gentle pressure while cooking. Make sure your skillet is properly preheated over medium heat, and use a spatula to press down gently but firmly on the wrap as it cooks. This ensures good contact between the tortilla and the hot pan, creating even golden-brown spots. Avoid moving the wrap around too much; let it sit undisturbed for two to three minutes before flipping to allow proper browning to develop.
How can I adjust this recipe for a larger crowd?
This cheesy garlic chicken wraps recipe scales up beautifully for feeding a crowd at family gatherings or casual get-togethers. Simply multiply the ingredients by the number of servings you need, cook the chicken in batches if necessary to avoid overcrowding your pan, and keep finished wraps warm in a 200-degree oven while you cook the rest. You can also set up an assembly station where guests build their own wraps with the cooked chicken, various cheeses, and additional toppings, which makes it interactive and fun while ensuring everyone gets exactly what they want.
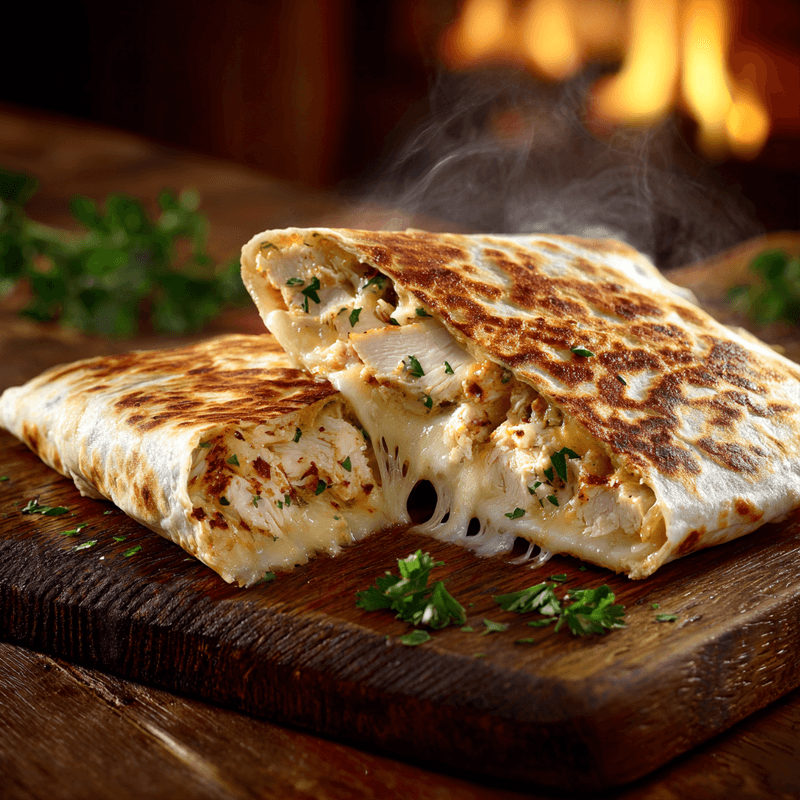
Cheesy Garlic Chicken Wraps
Tender seasoned chicken and melted cheese with aromatic garlic wrapped in a golden toasted tortilla. Quick, easy, and irresistibly delicious!
Prep Time
15 min
Cook Time
15 min
Total Time
30 min
Servings
4 servings
Ingredients
For 4 servings
- 1 pound boneless, skinless chicken breast, cut into bite-sized pieces
- 4 large flour tortillas (10-inch)
- 2 cups shredded mozzarella cheese
- 1 cup shredded sharp cheddar cheese
- 6 cloves garlic, minced
- 2 tablespoons olive oil
- 2 tablespoons butter, divided
- 1 teaspoon salt
- 1/2 teaspoon black pepper
- 1 teaspoon paprika
- 1 teaspoon dried oregano
- 1/2 teaspoon onion powder
- Fresh parsley for garnish, optional
Instructions
- 1
Prepare the chicken
Cut the chicken breast into bite-sized pieces, ensuring they are relatively uniform in size for even cooking. Pat the chicken pieces dry with paper towels, then season them generously with salt, black pepper, paprika, dried oregano, and onion powder, tossing to coat evenly.
- 2
Cook chicken with garlic
Heat olive oil in a large skillet over medium-high heat until shimmering. Add the seasoned chicken pieces and cook for 5-6 minutes, stirring occasionally, until golden brown on all sides. Add the minced garlic and continue cooking for 2-3 minutes until the garlic is fragrant and the chicken is cooked through with no pink remaining.
- 3
Rest the chicken
Remove the cooked garlic chicken from heat and let it rest for 2-3 minutes. This allows the juices to redistribute throughout the meat, keeping it moist and tender. Taste and adjust seasoning if needed.
- 4
Warm the tortillas
If your tortillas are cold, warm them briefly in the microwave for 10-15 seconds or in a dry skillet for about 10 seconds per side. This makes them more pliable and easier to fold without cracking.
- 5
Assemble the wraps
Lay out each tortilla on a clean work surface. Sprinkle about 1/4 cup of mozzarella cheese down the center of each tortilla in a line, leaving about 2 inches of space on each side. Top the cheese with about 1/2 cup of the cooked garlic chicken, then sprinkle with cheddar cheese.
- 6
Fold the wraps
Fold the left and right sides of each tortilla toward the center, over the filling. Then, starting from the bottom edge closest to you, tightly roll the tortilla upward, keeping the sides tucked in, until you have a secure wrap with the seam on the bottom.
- 7
Toast the wraps
Heat 1/2 tablespoon of butter in a clean skillet over medium heat. Place one or two wraps seam-side down in the skillet and cook for 2-3 minutes until golden brown and crispy, pressing gently with a spatula. Flip carefully and cook the other side for another 2-3 minutes until golden and the cheese inside is fully melted.
- 8
Finish and serve
Remove the toasted wraps from the skillet and let them rest for about 30 seconds before slicing. Repeat the toasting process with remaining wraps, adding more butter to the pan as needed. Slice each wrap in half diagonally, garnish with fresh parsley if desired, and serve immediately while hot and crispy.
Nutrition Facts
Per serving (estimated)
520 calories
Calories
38g
Carbs
42g
Protein
22g
Fat
2g
Fiber
890mg
Sodium
3g
Sugar


