
Cheesy Garlic Chicken Wraps | Quick Low Carb Delight
These cheesy garlic chicken wraps are the ultimate low carb dinner! Everything cooks together in one pan for minimal cleanup and maximum flavor.
cookwithlucia.com/recipes/cheesy-garlic-chicken-wraps-quick-low-carb-delight
Let me tell you something wonderful: you don't have to choose between a delicious dinner and a clean kitchen. These cheesy garlic chicken wraps deliver both, and they do it with style. Picture this: tender strips of chicken mingling with aromatic garlic, all wrapped up in a low carb blanket with melted cheese cascading over the edges. The beauty of this dish is that everything comes together in one pan, which means the flavors marry beautifully while you save yourself from a mountain of dishes.
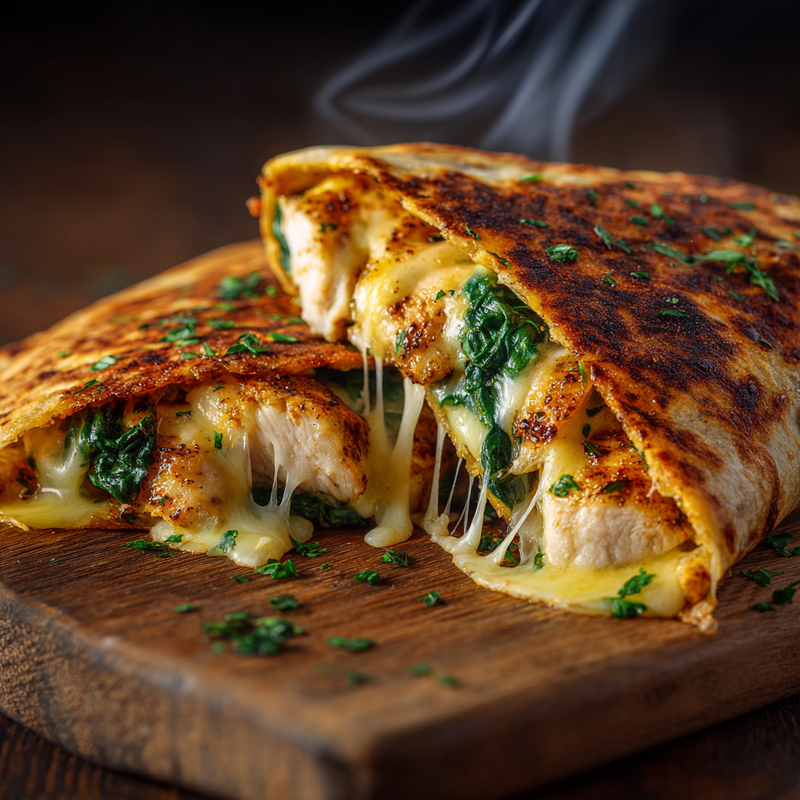
What makes these cheesy garlic chicken wraps truly special is how they manage to feel indulgent while keeping your carb count in check. The golden, slightly crispy edges of the wrap contrast perfectly with the creamy, garlicky filling inside. When you pull that first wrap from the pan, watching the cheese stretch in beautiful strings, you'll understand why this has become my go-to for busy weeknights. The aroma alone—that intoxicating blend of sizzling garlic, browning chicken, and toasted wrap—will have everyone gathering in the kitchen long before dinner is ready.
I'm promising you this: one pan, about thirty minutes of your time, and a dinner that looks like you labored for hours. Whether you're cooking for family, meal prepping for the week ahead, or just treating yourself to something special on a quiet evening, these wraps deliver comfort without the carb crash. They're substantial enough to satisfy hearty appetites yet light enough that you won't feel weighed down afterward.
The One-Pan Philosophy
Cooking everything together in a single pan isn't just about being lazy—though I'll happily embrace that benefit too. It's actually a brilliant culinary technique that creates deeper, more complex flavors than cooking components separately ever could. When that chicken releases its juices into the pan and mingles with the garlic-infused oil, you're building layers of flavor that get absorbed right back into every element of the dish.
The magic happens in those caramelized bits that form on the bottom of the pan, what French chefs call the fond. As ingredients cook, they brown and stick slightly, creating concentrated pockets of flavor that get redistributed when you add the next component or give everything a toss. This is flavor development you simply can't replicate when cooking things in isolation.
There's also an art to timing your additions so that delicate ingredients don't overcook while heartier ones reach perfection. With these cheesy garlic chicken wraps, we start with the chicken to get that beautiful golden exterior, then introduce the garlic at just the right moment so it becomes fragrant without burning. Finally, we assemble and warm the wraps right in that same flavor-packed pan. It's the laziest way to cook that also happens to be the smartest.
What Goes In
The foundation of great cheesy garlic chicken wraps starts with choosing the right cut of chicken. I always reach for boneless, skinless chicken breasts or thighs, sliced into thin strips that cook quickly and evenly. Thighs bring a bit more richness and are nearly impossible to overcook, while breasts offer that leaner profile many prefer. Either way, thin strips mean every bite gets coated in that garlicky goodness.
Garlic is obviously the star aromatic here, and fresh is absolutely non-negotiable. I use about six to eight cloves, thinly sliced rather than minced, so you get these sweet, tender pieces of garlic throughout rather than a harsh raw bite. When garlic cooks gently in oil, it transforms into something mellow and almost nutty—a far cry from the sharp punch of raw garlic.
For the cheese, I love a combination of mozzarella for that beautiful melt and stretch, plus a sharp aged cheddar for depth of flavor. The mozzarella creates that Instagram-worthy cheese pull, while the cheddar ensures each bite has real character. You could also use Monterey Jack for a milder option or even add a sprinkle of Parmesan for extra umami.
The wraps themselves need to be sturdy enough to hold everything without falling apart. I opt for low carb tortillas made from wheat protein or almond flour, which keep the carb count down while providing enough structure to wrap around all that cheesy, garlicky filling. Regular lettuce wraps work too if you want to go even lower carb, though you'll sacrifice some of that satisfying textural contrast.
Fresh spinach or arugula adds a pop of color and a slight peppery bite that cuts through the richness. Just a handful per wrap is perfect—enough to add freshness without overwhelming the other flavors. Bell peppers in various colors also make excellent additions, bringing sweetness and crunch that complement the tender chicken beautifully.
Assembly and Cooking
The cooking process for these cheesy garlic chicken wraps unfolds in distinct stages, each building on the last. Start by heating a large cast iron skillet or heavy-bottomed pan over medium-high heat with a generous drizzle of olive oil. Cast iron is ideal because it retains heat beautifully and creates those gorgeous caramelized bits, but any large skillet will work as long as it's not overcrowded.
Once the oil shimmers, add your chicken strips in a single layer, making sure they have space to breathe. This is crucial—crowded chicken steams rather than browns. Season generously with salt, black pepper, and a pinch of paprika if you like a subtle warmth. Let the chicken cook undisturbed for about three to four minutes on the first side. You'll know it's ready to flip when it releases easily from the pan and has developed a golden-brown crust.
After flipping, cook for another two to three minutes until the chicken is just cooked through. Remove it to a plate, and this is where the magic really begins. Lower the heat to medium and add your sliced garlic to that same pan, now slicked with flavorful chicken drippings. Stir constantly for about sixty seconds—just until the garlic turns golden and fragrant. You're walking a fine line here because garlic can go from perfect to burnt in mere seconds.
Now we bring everything together. Return the chicken to the pan and toss it with the garlic, letting those flavors marry for just a moment. Push everything to one side of the pan, and lay your low carb wrap flat on the empty side. Pile some of the chicken mixture onto half the wrap, top with a generous handful of cheese, add your greens, then fold it over. Let it sit for about two minutes until the bottom is golden and crispy, then carefully flip and cook the other side.
The cheese should be completely melted and starting to ooze out the sides, creating those crispy cheese edges that are honestly the best part. If you're making multiple wraps, you can keep finished ones warm in a low oven while you work through the rest, or simply serve them hot off the pan as you go—there's something special about eating a wrap the moment it's ready.
Secrets for One-Pan Success
The difference between a good one-pan meal and a great one often comes down to a handful of small techniques. First, resist the urge to constantly stir and fuss with your ingredients. When you let chicken sit undisturbed in the hot pan, you allow the Maillard reaction to occur—that chemical process that creates complex, savory flavors and appealing color. Stirring too often means you'll steam your protein instead of browning it.
Spacing is everything. Even with just one pan, don't pile everything in at once thinking it'll save time. A crowded pan lowers the temperature, trapping moisture and preventing proper caramelization. If you're doubling this recipe, either work in batches or commit to using two pans. Your patience will be rewarded with chicken that has actual texture and flavor rather than sad, grey strips.
Building layers means thinking about when each ingredient hits the pan. Heartier vegetables that need more cooking time go in early, while delicate herbs or greens wait until the very end. For these cheesy garlic chicken wraps, the chicken gets a head start, the garlic joins midway for just enough time to soften, and the greens go in right at the end so they barely wilt.
Temperature control is another secret weapon. Starting with high heat helps achieve that initial sear, but dropping to medium for the garlic prevents burning. When you're crisping up the assembled wrap, medium heat allows the cheese to melt completely while the exterior gets golden—too high and you'll burn the outside before the inside comes together.
The halfway flip technique works beautifully for proteins. Instead of constantly turning your chicken, let it cook about seventy percent of the way on the first side, then flip just once. This creates a gorgeous crust on both sides while keeping the interior juicy. Finally, don't forget to deglaze mentally—even though we're not adding liquid here, all those brown bits get redistributed as you toss the chicken with garlic, ensuring no flavor goes to waste.
Rounding Out the Meal
While these cheesy garlic chicken wraps are satisfying enough to stand alone, a few simple sides can transform them into a complete, balanced meal. A crisp green salad with a tangy vinaigrette provides textural contrast and cuts through the richness of all that melted cheese. I love mixing baby greens with thinly sliced cucumber, cherry tomatoes, and a lemon-olive oil dressing that takes literally two minutes to whisk together.
Roasted vegetables make an excellent companion, especially if you're already heating the oven. Toss cauliflower florets, zucchini rounds, and bell pepper strips with olive oil and your favorite seasonings, then roast them at high heat until they're caramelized and tender. The best part? They can roast while you're preparing the wraps on the stovetop, meaning everything finishes at the same time.
For something creamy and cooling, a simple cucumber and yogurt sauce works beautifully. Mix Greek yogurt with grated cucumber, a squeeze of lemon juice, and a pinch of salt. This refreshing sauce adds moisture and a pleasant tang that complements the garlicky chicken perfectly. You can drizzle it right over the wrap or serve it on the side for dipping.
If you want to add healthy fats and more substance, sliced avocado or a quick guacamole brings creaminess and nutrition. The mild, buttery flavor of avocado pairs wonderfully with sharp cheese and garlic without competing for attention. A small serving adds satisfying richness that helps keep you full for hours.
Leftovers and Next-Day Ideas
One of the best things about these cheesy garlic chicken wraps is how well the components hold up for next-day meals. Store any leftover chicken mixture separately from the wraps themselves—this prevents sogginess and gives you more flexibility for repurposing. The chicken will keep in an airtight container in the refrigerator for up to four days.
When you're ready to eat, you have options. You can reassemble fresh wraps using the leftover chicken, which only takes a minute or two to warm in a skillet. Alternatively, transform the chicken into a protein-packed salad bowl by serving it over mixed greens with extra vegetables, some nuts for crunch, and your favorite low carb dressing. The garlicky chicken is flavorful enough that it doesn't need much embellishment.
The chicken also makes a fantastic omelet or scrambled egg filling for breakfast. Just reheat it gently and fold it into your eggs along with a bit more cheese. This turns your dinner leftovers into an entirely different meal that still feels special and intentional rather than like you're just eating yesterday's dinner.
For reheating assembled wraps, I find the oven works better than the microwave for maintaining that crispy exterior. Wrap them loosely in foil and heat at 350°F for about ten minutes, then unwrap and give them a few minutes under the broiler to re-crisp the outside. If you're short on time, a dry skillet over medium heat also works well—just give each side a couple of minutes.
Answers to Your Questions
What's the best pan for making these cheesy garlic chicken wraps?
A large cast iron skillet is my top choice because it distributes heat evenly and creates superior browning on both the chicken and the wrap exterior. However, any heavy-bottomed skillet at least twelve inches in diameter will work well. Non-stick pans make flipping easier but won't develop quite as much fond, which means slightly less flavor depth.
Can I swap the vegetables based on what's in season?
Absolutely! The beauty of these wraps is their flexibility. In summer, try zucchini ribbons or fresh tomatoes. Fall calls for roasted butternut squash or sautéed mushrooms. Winter greens like kale work beautifully if you give them an extra minute to wilt. Just keep the proportions similar so the wrap doesn't become overstuffed and difficult to fold.
How do I make sure the wraps get crispy instead of soggy?
The key is not overloading them with wet ingredients and making sure your pan is properly heated before adding the assembled wrap. Pat any greens dry before adding them, and don't go overboard with sauce if you're using one. Cooking the wrap on medium heat rather than low gives you time to melt the cheese while achieving that golden, crispy exterior.
Can I double this recipe and cook everything on one pan?
Doubling the chicken is fine if you have a very large pan and work in batches for the browning step. However, I don't recommend trying to cook multiple assembled wraps simultaneously on one pan unless you have a griddle. They need space to achieve even contact with the heat. It's better to use two pans or cook the wraps one at a time while keeping finished ones warm in a low oven.
Should I line my pan with foil for easier cleanup?
For these cheesy garlic chicken wraps, I actually recommend against it. Direct contact between the chicken and the hot metal surface creates better browning and flavor development. Plus, you need those pan drippings to cook the garlic in. The cleanup really isn't bad—a quick soak and scrub is all it takes, and you've only dirtied one pan instead of several.
How do I keep the low carb wraps from cracking when I fold them?
Low carb wraps can be more brittle than regular tortillas, especially when cold. Let them come to room temperature before using, or warm them for just ten to fifteen seconds in the microwave between damp paper towels. This makes them pliable and much easier to fold without cracking. Don't overfill them either—less is more when it comes to achieving a neat fold that stays together during cooking.
Cheesy Garlic Chicken Wraps
Quick and delicious low carb wraps filled with tender garlic chicken and melted cheese, all cooked together in one pan for easy cleanup.
Prep Time
10 min
Cook Time
20 min
Total Time
30 min
Servings
4 servings
Ingredients
For 4 servings
- 1 pound boneless skinless chicken breasts, sliced into thin strips
- 6 to 8 cloves garlic, thinly sliced
- 2 tablespoons olive oil
- 1 teaspoon salt
- 1/2 teaspoon black pepper
- 1/2 teaspoon paprika
- 4 large low carb tortillas
- 1 cup shredded mozzarella cheese
- 1/2 cup shredded sharp cheddar cheese
- 2 cups fresh spinach or arugula
- 1 medium red bell pepper, thinly sliced (optional)
Instructions
- 1
Prepare the chicken
Slice the chicken breasts into thin strips, about 1/2 inch thick. Pat them dry with paper towels to ensure good browning. Season the chicken strips on both sides with salt, black pepper, and paprika.
- 2
Heat the pan
Heat a large cast iron skillet or heavy-bottomed pan over medium-high heat. Add 2 tablespoons of olive oil and let it heat until it shimmers, about 1 minute.
- 3
Cook the chicken
Add the seasoned chicken strips to the hot pan in a single layer, making sure not to overcrowd. Cook undisturbed for 3 to 4 minutes until golden brown on the bottom, then flip and cook for another 2 to 3 minutes until cooked through. Remove chicken to a plate.
- 4
Cook the garlic
Reduce heat to medium. Add the sliced garlic to the same pan with the remaining oil and chicken drippings. Stir constantly for about 60 seconds until the garlic becomes fragrant and golden, being careful not to let it burn.
- 5
Combine chicken and garlic
Return the cooked chicken strips to the pan and toss with the garlic, mixing well to coat everything evenly. Let cook together for 30 seconds to marry the flavors, then push everything to one side of the pan.
- 6
Warm the tortilla
Place one low carb tortilla flat on the empty side of the pan. Let it warm for about 20 seconds until it becomes pliable and slightly toasted on the bottom.
- 7
Assemble the wrap
On one half of the tortilla, layer about one-quarter of the chicken mixture, a generous handful of both cheeses, some fresh spinach or arugula, and bell pepper slices if using. Fold the tortilla in half over the filling, pressing down gently.
- 8
Crisp the wrap
Cook the folded wrap for about 2 minutes on the first side until golden and crispy, then carefully flip and cook for another 2 minutes on the other side. The cheese should be fully melted and starting to ooze out the sides.
- 9
Continue with remaining wraps
Remove the finished wrap to a cutting board and repeat the process with the remaining tortillas and filling. You can keep finished wraps warm in a 200°F oven while you cook the rest.
- 10
Serve immediately
Cut each wrap in half diagonally if desired and serve immediately while hot and crispy. The wraps are best enjoyed fresh from the pan when the cheese is still melted and the exterior is at its crispiest.
Nutrition Facts
Per serving (estimated)
385 calories
Calories
12g
Carbs
38g
Protein
21g
Fat
6g
Fiber
820mg
Sodium
2g
Sugar


