Banana Pudding Easter Truffles Recipe (Budget-Friendly!)
These Banana Pudding Easter Truffles cost pennies per serving! Creamy, dreamy, and perfect for spring gatherings. Easy no-bake recipe inside.
cookwithlucia.com/recipes/banana-pudding-easter-truffles
Let me tell you something wonderful: some of the most impressive desserts come from the simplest, most affordable ingredients sitting right in your pantry. These Banana Pudding Easter Truffles are the perfect example of how a few basic items can transform into something absolutely spectacular. I'm talking about creamy banana flavor wrapped in a sweet coating, all for less than fifty cents per truffle. When you compare that to boutique chocolate shops charging three to five dollars per truffle, you'll realize just how much magic you can create in your own kitchen. These bite-sized treats deliver restaurant-quality taste without the restaurant price tag, and they're so easy to make that you'll wonder why you ever paid premium prices for fancy desserts. The combination of vanilla wafers, ripe bananas, and a handful of pantry staples creates a dessert that tastes like you spent all day in the kitchen, when really, you've spent less time than it would take to drive to the bakery.

Why This Recipe Is a Budget Winner
Banana Pudding Easter Truffles are essentially a genius way to turn affordable pantry staples into an elegant dessert. The base relies on vanilla wafers, which cost around two to three dollars per box, and bananas, which are consistently one of the cheapest fruits available year-round at about twenty cents each. When you break down the math, each truffle costs approximately forty to fifty cents to make, while similar treats at specialty shops can run you three to five dollars apiece. That's a savings of over 80 percent, and the taste is arguably even better because you're using fresh ingredients without preservatives. One batch makes about two dozen truffles, which means you can feed a crowd at a spring gathering or family celebration without blowing your grocery budget. These also stretch beautifully across multiple occasions since they store so well in the refrigerator or freezer. There's absolutely zero food waste with this recipe because you're using whole bananas, and any leftover vanilla wafer crumbs can be sprinkled over ice cream or yogurt. The beautiful thing about Banana Pudding Easter Truffles is that they look and taste expensive, but your wallet knows the truth.
Affordable Ingredients, Maximum Impact
Let's walk through the ingredient list and see exactly why these Banana Pudding Easter Truffles deliver such incredible value. First, vanilla wafers are your foundation, and a standard box contains enough cookies to make multiple batches if you're planning ahead. Buying the store brand instead of name brand can save you another dollar without any noticeable difference in taste. Ripe bananas are crucial here, and the overripe ones with brown spots are actually perfect for this recipe, which means you can often find them marked down at the grocery store. Cream cheese is another budget hero, especially when you catch it on sale, and the block form is always cheaper than whipped varieties. For the coating, white chocolate chips or candy melts are your most economical option when purchased in bulk from warehouse stores or during seasonal sales. Vanilla extract is a pantry staple you likely already have, and a small bottle lasts through dozens of recipes. Powdered sugar is remarkably inexpensive and adds sweetness without breaking the bank. The optional toppings like crushed wafers or sprinkles can be as simple or elaborate as your budget allows, with basic colored sugar costing just a couple of dollars and lasting through many batches. The genius of Banana Pudding Easter Truffles is that every ingredient works overtime, creating layers of flavor that taste far more complex than the simple shopping list suggests.
How to Make It
Making Banana Pudding Easter Truffles is wonderfully straightforward, requiring no special equipment beyond a food processor or zip-top bag for crushing cookies. Start by crushing your vanilla wafers into fine crumbs, which takes just a minute or two in a food processor, or you can place them in a sealed bag and roll over them with a rolling pin for a budget-friendly, equipment-free method. In a large mixing bowl, mash your ripe bananas until they're completely smooth, then add softened cream cheese and mix until the combination is creamy and well-blended. Fold in the vanilla wafer crumbs along with a bit of powdered sugar and vanilla extract, creating a dough that holds together when pressed but isn't overly wet. Roll the mixture into one-inch balls and place them on a parchment-lined baking sheet, then refrigerate for at least an hour to firm up. While the truffles chill, melt your white chocolate or candy melts in the microwave using thirty-second intervals, stirring between each one to prevent burning. Dip each chilled truffle into the melted coating, using a fork to lift them out and allowing excess chocolate to drip off before returning them to the parchment paper. Before the coating sets, add your toppings like crushed wafer crumbs, pastel sprinkles, or a simple drizzle of additional melted chocolate. The entire process from start to finish takes about ninety minutes, with most of that being hands-off chilling time.
Stretching It Further
The beauty of Banana Pudding Easter Truffles extends beyond their initial presentation, offering multiple ways to maximize your investment. These truffles freeze beautifully for up to three months, which means you can make a double or triple batch when ingredients are on sale and pull them out whenever you need an impressive dessert. Store them in airtight containers with parchment paper between layers, and you'll have ready-made treats for unexpected guests or last-minute potluck contributions. If you're feeding a large family throughout the week, consider making the truffle mixture and portioning it into smaller servings to dip and decorate fresh each day, which kids absolutely love helping with. Leftover truffle mixture that hasn't been formed into balls can be crumbled over ice cream, creating an instant banana pudding sundae that feels like a completely different dessert. You can also press the mixture into a small pan, chill it, and cut it into bars for a different presentation that requires even less hands-on time. The coating ingredients can be stretched by using less coverage, creating a thin shell instead of a thick coating, which still looks beautiful and tastes delicious while making your supplies last longer. Another brilliant strategy is making half the batch fully coated and leaving the other half as simple rolled balls dusted with powdered sugar, which are equally delicious and require zero coating ingredients.
Smart Swaps and Variations
Banana Pudding Easter Truffles are incredibly adaptable to whatever you have on hand or can find at the best price. If vanilla wafers are expensive or unavailable, graham crackers work beautifully and often cost even less, giving you a slightly different but equally delicious flavor profile. When cream cheese prices spike, you can substitute half the amount with thick Greek yogurt, which adds tanginess and cuts costs while maintaining that creamy texture. For the coating, milk chocolate chips are often cheaper than white chocolate and create a classic combination with banana that everyone loves. If you want to make these even more budget-friendly, skip the fancy coating altogether and roll the truffles in crushed vanilla wafers, cocoa powder, or shredded coconut for a fraction of the cost. During different seasons, you can adapt the decorations to suit spring gatherings, summer picnics, or autumn celebrations by simply changing the sprinkle colors or using different toppings. For an even more economical version, make these as a no-coating dessert by simply forming the mixture into balls and chilling them, then serving them as banana pudding bites that are perfect for casual family gatherings. You can also customize the flavor by adding a tablespoon of peanut butter to the mixture, using up that jar in your pantry and creating a whole new taste experience without purchasing additional ingredients.
Storage and Reheating
Proper storage is key to getting the most value from your Banana Pudding Easter Truffles, and the good news is they keep remarkably well. In the refrigerator, these truffles stay fresh and delicious for up to five days when stored in an airtight container with layers separated by parchment or wax paper to prevent sticking. The flavor actually develops and deepens after a day or two as the vanilla wafer crumbs fully hydrate and the banana flavor permeates throughout. For longer storage, freeze the truffles in a single layer on a baking sheet until solid, then transfer them to freezer bags or containers where they'll keep for up to three months without any loss of quality. When you're ready to serve frozen truffles, simply transfer them to the refrigerator about two hours before serving, or let them sit at room temperature for thirty to forty minutes for the perfect texture. There's no reheating necessary with Banana Pudding Easter Truffles since they're meant to be served chilled, which actually makes them more convenient than many desserts that require last-minute oven time. The coating may develop slight condensation when moving from freezer to room temperature, so gently blot them with a paper towel if needed, though this is purely cosmetic and doesn't affect the taste at all. These truffles travel beautifully too, making them perfect for potlucks or gifts, and they hold up well at room temperature for several hours during gatherings.
Your Questions Answered
Can I make Banana Pudding Easter Truffles without a food processor?
Absolutely, and it won't cost you anything extra in equipment. Place your vanilla wafers in a heavy-duty zip-top bag, seal it with most of the air pressed out, and use a rolling pin or even a heavy can to crush them into fine crumbs. This method takes just a few extra minutes and works perfectly well, giving you complete control over the texture of your crumbs.
How can I make these even cheaper for a large crowd?
The most effective strategy is making them smaller, about half the size, which doubles your yield without changing the recipe. You can also skip the chocolate coating entirely and roll them in crushed vanilla wafers or powdered sugar, which cuts your ingredient costs nearly in half while still delivering that delicious banana pudding flavor. Buying ingredients in bulk when they're on sale and freezing batches also maximizes your savings.
What's the best way to use overripe bananas in this recipe?
Overripe bananas with plenty of brown spots are actually ideal for Banana Pudding Easter Truffles because they're sweeter and more flavorful than perfectly yellow ones. They also mash more easily and create a creamier texture in your truffle mixture. This is a fantastic way to rescue bananas that might otherwise get thrown away, turning potential food waste into a delicious dessert.
Can I make these without cream cheese to save money?
You can reduce the cream cheese by half and substitute with mashed banana or even a thick yogurt, though the texture will be slightly different. Another option is using half the cream cheese and adding a tablespoon of butter instead, which is often cheaper and still provides richness. The truffles may be slightly softer, so extra chilling time helps them hold their shape better.
How far in advance can I make Banana Pudding Easter Truffles?
These are perfect make-ahead treats that actually benefit from resting time. You can make them up to five days before your gathering and keep them refrigerated, or make them up to three months ahead and freeze them. The flavor improves after the first day as everything melds together, making them an excellent choice for busy cooks who want to spread out their preparation time and avoid last-minute stress.
What other toppings work well besides sprinkles?
Crushed vanilla wafers give you that classic banana pudding look and taste while using ingredients you already have on hand. Finely chopped nuts add texture if they're on sale, and a simple dusting of cocoa powder creates an elegant finish for free if you already have it in your pantry. Shredded coconut, colored sugar, or even crushed freeze-dried fruit pieces work beautifully depending on what you can find at the best price, and you only need a small amount to make these Banana Pudding Easter Truffles look professionally decorated.
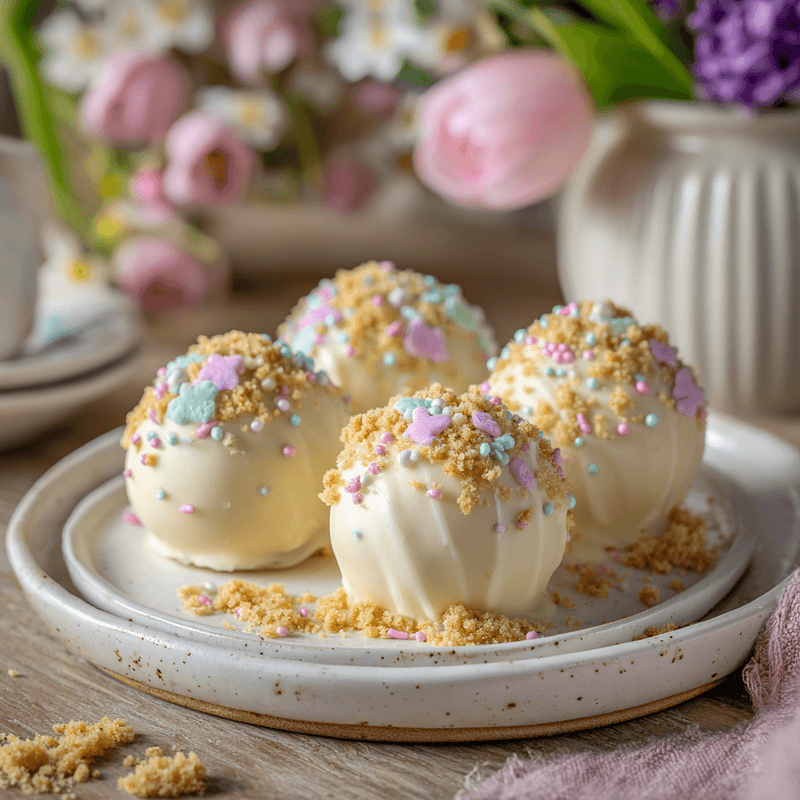
Banana Pudding Easter Truffles
Creamy, dreamy Banana Pudding Easter Truffles made with vanilla wafers, ripe bananas, and cream cheese, coated in white chocolate. An affordable, no-bake dessert perfect for spring gatherings.
Prep Time
20 min
Cook Time
5 min
Total Time
1h 30m
Servings
24 truffles
Ingredients
For 24 truffles
- 2 cups vanilla wafer cookies, finely crushed (about 50 wafers)
- 2 medium ripe bananas, mashed (about 1 cup)
- 4 ounces cream cheese, softened
- 1/4 cup powdered sugar
- 1 teaspoon vanilla extract
- 12 ounces white chocolate chips or candy melts
- 1/4 cup crushed vanilla wafers for topping
- Pastel sprinkles for decoration, optional
Instructions
- 1
Crush the cookies
Place vanilla wafer cookies in a food processor and pulse until they form fine crumbs, or place them in a sealed zip-top bag and crush them with a rolling pin until finely ground. You should have about 2 cups of crumbs. Set aside in a large mixing bowl.
- 2
Mash the bananas
In a separate bowl, mash the ripe bananas with a fork until completely smooth with no large lumps remaining. The riper the bananas, the easier they'll mash and the sweeter your truffles will be. You should have about 1 cup of mashed banana.
- 3
Mix wet ingredients
Add the softened cream cheese to the mashed bananas and beat with a hand mixer or stir vigorously with a wooden spoon until the mixture is smooth, creamy, and well combined. Add the powdered sugar and vanilla extract, mixing until fully incorporated with no lumps of cream cheese visible.
- 4
Combine mixture
Pour the banana-cream cheese mixture over the crushed vanilla wafers and fold together with a spatula until everything is evenly combined. The mixture should hold together when pressed but not be overly wet. If it seems too soft, add a few more crushed wafers.
- 5
Form the truffles
Using a small cookie scoop or tablespoon, portion out the mixture and roll between your palms to form smooth, one-inch balls. Place each formed truffle on a parchment-lined baking sheet, spacing them about an inch apart. You should get approximately 24 truffles.
- 6
Chill the truffles
Transfer the baking sheet to the refrigerator and chill the truffles for at least 1 hour, or up to 4 hours. This chilling time is crucial as it helps them firm up and makes them much easier to coat in chocolate without falling apart.
- 7
Melt the coating
About 10 minutes before the truffles are done chilling, place the white chocolate chips or candy melts in a microwave-safe bowl. Microwave in 30-second intervals, stirring thoroughly between each interval, until the chocolate is completely smooth and melted. Be careful not to overheat, as this can cause the chocolate to seize.
- 8
Coat the truffles
Remove the chilled truffles from the refrigerator. Working with one at a time, drop a truffle into the melted chocolate and use a fork to roll it around until completely coated. Lift it out with the fork, gently tap the fork on the edge of the bowl to remove excess chocolate, then slide it back onto the parchment-lined baking sheet.
- 9
Add toppings
While the chocolate coating is still wet, immediately sprinkle each truffle with crushed vanilla wafer crumbs, pastel sprinkles, or your chosen topping. Work quickly as the coating sets fast, or coat only a few truffles at a time before adding toppings.
- 10
Set and serve
Allow the coated truffles to sit at room temperature for about 15 minutes until the chocolate coating is completely set and firm to the touch. Transfer to an airtight container and refrigerate until ready to serve. These Banana Pudding Easter Truffles taste best when served chilled and can be made up to 5 days in advance.
Nutrition Facts
Per serving (estimated)
120 calories
Calories
16g
Carbs
2g
Protein
6g
Fat
0.5g
Fiber
55mg
Sodium
11g
Sugar


